Reading time ≈ 7 minutes
There are things that many of us lack in Everyday life, and not of their own free will, but due to the surrounding life, and one of them is outdoor recreation. I want to tell you how to folding table for a picnic with your own hands, which can be used not only in the forest, but also in the country. Below are drawings and supporting videos that will help you with the assembly.
Folding table
Where to begin
Of course, you need to start with the assembly of the tools and materials necessary in this case.
Carpentry tools

Carpentry tool set
To get started, make sure you have all the carpentry tools you need to assemble your camping table. This is mandatory, since all work can stall due to the inability to do this or that operation. Therefore, you should prepare:
- hand circular saw and / or electric jigsaw;
- screwdriver with different nozzles (you can use an electric drill);
- a set of drills of different diameters;
- a set of chisels and a hammer;
- belt or disc grinder. If it is not available, you can get by with sandpaper;
- building angle with a measuring ruler;
- level (can be short);
- metric tape measure;
- burner (if necessary);
- a carpenter's pencil and a varnish brush (instead of a brush, some use a piece of foam rubber).
Note. The choice of instrument may be different in one case or another. Firstly, drawings and structural diagrams can differ significantly from each other. Secondly, carpenters have their own preferences - the same operation can be done with different tools.
We select the necessary materials

Plywood moisture resistant FC
To make a folding table, you can use different material, therefore, the list contains all the blanks from which you have to make a choice:
- bar for legs with a cross section of 20x45, 30x40 or 30x45 mm. Length 300-600mm - 4 blanks for legs;
- bar 30 × 40 mm for fasteners and jumpers;
- board from 25 × 100 to 25 × 200 mm (for a plank tabletop);
- moisture resistant or laminated plywood (for plywood countertops);
- PVA glue, dowels;
- varnish for wood with stain;
- 2 screws with washers, nuts and locknuts for movable support units, 2 studs, 6 washers and 8 nuts or 2 bolts, 6 washers and 4 nuts for attaching the legs to the tabletop;
- stainless wood screws.
Assembly work
We will consider one of the assembly options with different countertops (plank and plywood), and you just choose for yourself what you see fit.
Table top and legs

Board preparation
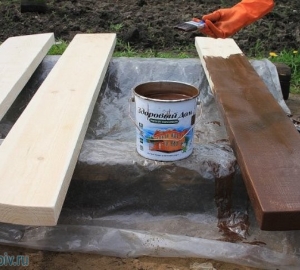
In fact, it is not even necessary to use new boards to make a folding countertop. For this purpose, old ones, blackened, but edged, are also suitable, so long as they are not affected by a fungus or shishel. If desired, the countertop can be made glued, but this is unlikely to be useful for a picnic. Boards should be sanded top and bottom, and then cut along desired length. After that, process the top edge around the perimeter at an angle of 45⁰, as in the photo above or in the video clip below.
Video: Plank worktop
But it is not at all necessary to make a tabletop from boards - it can be cut out of plywood 10-12 mm thick, but at the same time choose moisture-resistant brands. Be sure to sand the cut panel around the perimeter so that there are no sharp edges. It is also desirable to round the corners, and this already applies to the safety instructions.

Leg drawings
The easiest way to make a folding table with your own hands is to make X-shaped legs, which will not only unscrew from the tabletop, but also fold into a straight line under it. To do this, first of all, you should grind the bars, grinding off the edges, put them one on top of the other, find the middle and drill a hole through two workpieces at once. The hole diameter should match the bolt with nut and locknut you will be using. Substitute the washers under the bolt head and under the nut, and then tighten the structure so that the legs can move along this axis relative to each other. Make the second pair of legs in the same way.
Construction assembly

Elements for Assembly
Table assembly details:
- countertop made of plywood or boards;
- bar for stop legs;
- bar for attaching legs;
- second support post;
- main support post;
- straps for ligaments;
- swivel axle bolt with washers, nut and locknut;
- nuts;
- rotary axis of the main rack.
Important! First of all, I want to draw your attention to the fact that the above drawing is designed for a plywood countertop. If it is plank, then between the bars No. 2 and No. 3 you need to screw the jumpers to stop the boards.
Now you need to decide on the length of the countertop - it should match the width of the trunk of your car, unless, of course, you plan to use your table only in the kitchen. If you set its width to about 400-450 mm, then the optimal length of each leg will be 310-360 mm, respectively (later you will understand why).
First, on the sides of the tabletop, stepping back from its edge no more than 25-30 mm, attach the support No. 2 and the main No. 3 bars. In this case, there are two options for fixing: they can be attached with dowels and PVA glue, or with stainless wood screws through the body of the countertop. At the same time, do not forget to take into account that the stop bar must be at least 50 mm longer than the main one in each direction.
Now let's figure out how to do correct connection legs with the main bar. To do this, round off the ends of the main support post No. 5 with a jigsaw and grind the edges so as not to drive a splinter during operation. You round the second support post only from the bottom side, and at the top you make a cut with a slope of 45⁰ so that the leg with a sharp end enters the corner between the stop bar and the table top.
We continue to assemble the folding one and mount the rotary assembly between the bar No. 3 and the rack No. 5. As you probably guessed, you need to drill a hole through rack No. 5, equal in diameter to the pin, and in bar No. 3, make this hole 2-2.5 mm smaller. Now screw a nut with a locknut onto one end of the stud or use a bolt. Put a washer under the head, insert it into the hole in the leg, on the other hand put the washer on and screw on the nut (preferably with a lock nut) so that the bolt has a slight play in the hole.
Put on the washer and screw the bolt #9 into the end hole of the bar #3. But at the same time, it is better to do the final tightening of the bolt or stud into bar No. 3 not through the head, but with an open-end wrench, pressing the nut with the locknut to the bar. Perform an identical operation from the other end of the tabletop and on the sides (almost at the very floor) fasten the strips for bundle No. 6. This completes the build.
Video: One of the folding table options
Finishing

Prefabricated wooden table top, varnished
Now all that's left is the woodworking and here you can go in different ways, but this will also depend on the material from which the countertop was made. The easiest option is to open the lumber with a stain, and after it dries, varnish it in several layers. In addition, you can purchase varnish with stain - here, too, only two or three layers will be enough. This is suitable for both plywood and solid wood.

Boards after firing
The most advanced way to design such furniture is to age the wood, and the easiest and cheapest way to do this is to fire it, but this is not for plywood, but for solid wood. Here you can use hand burner which works from gas spray. The flame, burning the fibers, emphasizes the structure of the tree (you can see an example in the top photo). After firing, the boards and bars are opened with colorless varnish, and when it dries and you go on a picnic, you will have appropriate place where to arrange food and drinks.
Conclusion
In conclusion, I want to say that someone is interested in a folding table-cabinet, which you can do with your own hands at home. But the thing is, it's more complex structure, moreover, such a topic will take a separate article.
Folding tables are often found in everyday life. They have found application inside buildings and on land plots. Ordinary factory products perform only a direct set of functions. Modern materials and assembly techniques include decorative aspects. Mass-produced brands produce beautiful convertible models with book builds, complex motors and high quality finishes. It can be difficult to achieve the same parameters on your own. But individual attempts usually end up with the creation of exclusive furniture, unlike anything from mass production. Options for assembling and decorating a folding table with your own hands include classic as well as original design solutions in a modern manner. Calculations, accumulated experience and step-by-step instructions will help to achieve an exact match.
Features of folding tables
Tables with a folding-unfolding function save space and add options to the use of the room. The above qualities are enough to make the application justified from all points of view. An additional nice feature is that self assembly is not something complicated, and the finished product is transformed in just two or three movements. A high-quality factory mechanism will cost a large amount, and folding options with manual control practically do not differ in price from ordinary furniture. One of the options for how to proceed is to make a folding table with your own hands. Money can be set aside for something else, more difficult in terms of self-fulfillment. Folding structures are characterized by the presence of a high-strength frame with the expectation of multiple unfolding. Models with glass tops are made of durable materials.
The benefits of making your own
Some advantages independent work obvious. Products are unique in their kind. Moreover, the design can be thought out to the smallest detail in order to get the perfect product in all aspects at once. lovers self made will be able to realize their potential, learn something new, or make another piece of furniture while maintaining some common features between them. Not the last place in the list of pluses is the ability to control the manufacturing process, namely the quality and other features of the model. The master will always have access to statements about the features of the place or room for which the table is intended. As a result, and appearance, And useful features will be better than the options offered by the market. As for the monetary gain, then homemade tables have an advantage here.
Among the shortcomings, the following nuances are noted:
- Making will take much longer than buying.
- There is a good chance that the product will break.
- You will have to first learn some of the nuances of carpentry.
Material selection
More convenient option than a tree is not found. Among the minuses are the high cost and the problem of compatibility with some types of interior. Laminated chipboard often becomes a material for self-manufacturing. Finished goods take on compact dimensions. Chipboard boards withstand high humidity and it was this quality that made them good decision for kitchen areas. Table legs are often made of metal, while solid structures in most cases look better than options with metal inclusions. The reason is the low strength wooden legs. In addition, the installation of wheels on profile pipe takes less effort. In clamshell models, plywood sheets are often used. Presentable appearance of the structures will be given polypropylene pipes. These can be assembled by several methods, including gluing or welding.
Required Tools
You will need a lot of fasteners. Including self-tapping screws 20×4 and 16×3 mm, M4 screws, furniture locks, telescopic rails of approximately 500 mm and aluminum corners 50×50 mm. The legs may require 4 thick metal tubes - 710 mm in diameter. For installation work, hot melt adhesive is used, applied to PVC edges, plastic or wooden boards. During work, protect hands - with household gloves. Among the accessories you will also need a marker, a long ruler, a thick pencil, a tape measure and building level. The reliability of the connection to the glue will be ensured by a thermal gun and a building hair dryer. Chipboard sheets are cut with clamps. For cutting, you may also need a file with small teeth, a jigsaw, a circular saw and cutter. A screwdriver is used to work with hardware. The holes are made with a drill, using 4.2 mm drills.
Folding table making workshops
The most popular options are:
- bed table;
- table-bench;
- transformer;
- table-rack;
- book design;
- under the suitcase;
- rotary option.
A common feature of all step-by-step master classes is the definition of the main groups of parts. In most cases, you will need a box, legs and a tabletop, and they are assembled from sheets, boards, beams, wooden or metal fasteners. The basics of interior design are demanding on the use of hardware. It is advisable to apply decorative options with small flat hats, make special recesses for them and follow the hidden method of fastening. It is possible to assemble a high-quality folding table quickly and the first time after drawing up a detailed drawing, making trial blanks. The use of a heat gun and a building hair dryer will have a positive effect on the aesthetics of the joints. Folding tables can rise up, fold in height or in parts towards the center, adjustable with springs, intended for massage or playing ping-pong.
Deciding on design and construction
The oval shape is considered the most ergonomic: due to its smoothness, compactness and at the same time good spaciousness. This is a kind of transitional option between rectangular and round structures. The semi-circular table looks beautiful against the wall. It is used as an element original design or cozy environment with classic motifs. A small square version is ideal for the role of a transforming table with rising sections. Small folding tables come in handy in small country houses and dachas, cramped apartments. They are easy to transport. If none of the designs are to your liking, then you should opt for simple furniture with enough space for family members and 2-3 guests. Folding tables still do not make bulky and most often perform in the hi-tech style or constructivism.
Transformer
Manufacturing begins with the choice of mechanism. Smooth opening and closing is provided by gas lift and springs. They are usually used separately. The second option is preferable for those who assemble any folding structure for the first time. Hidden springs will not spoil the appearance. Useful for calculating materials computer programs. After choosing raw materials, for example, chipboard, as well as drawing, you will need cutting. It is better to order it to professionals, but it is better to do a detailed drawing personally or with them. If you wish, you can also cut it yourself. At the same time, do not deviate from the recommended thickness of the countertop. After processing the raw materials, the elements are added together - to make sure the dimensions and calculations are correct. The frame of the transforming table is assembled using special drills and confirmations. Springs are first inserted into the base, and then the mechanism. If the material is heavy, through connections will be needed.
Marking should be applied with a sticker so that the lines are large and clear.
This is the name of wall-mounted folding tables and structures with attachment to the windowsill. At the same time, the tabletop is cut out with a thickness of 20-30 mm. Going beyond these limits will lead to a weakening or significant weighting of the structure. The length is selected in a harmonious relationship with the height and width (depth). The first and last parameters are calculated based on functionality, because the bulky design will interfere with the normal operation of the premises. The legs are formed strong and stable, sufficient to hold the mass of the dishes and the entire structure. The reliability of the connections is increased by mutual ties for fastening the legs. Tables with placement above the battery are equipped with holes so that the windows of the room do not fog up. And in this case, it is undesirable to use chipboard, it is better to stay on plywood or MDF. Triangular support pieces are used for medium and short tables.
In cramped rooms, space optimization comes first. A table that turns into a bed has disadvantages - it should be remembered that it will not work to lie down during the day. For a day's rest, you will need a spare place. The final design will look like a table, but there is additional space for bedside tables, cabinets and shelving. The sofa table is made with a bed, a box and a lifting mechanism. The product is assembled with a built-in or separate box, depending on the design. The structure is usually fixed to the wall. best material for furniture will be chipboard. The boxes are assembled from bars with a section of 5 × 5 cm, external supports are taken 14-15 cm high. decorative elements they form inches from a board with a one and a half centimeter layer of wood. The reliability of the design will give a slope between the ends of the legs. Retractable bases are made using bar or piano hinges.
The function of the turn-and-fold configuration is to increase the size of the tabletop. The task is facilitated by the fact that the use of fasteners for rotation (for example, like a TV) is not necessary if the furniture will be laid out periodically. Of the materials you need laminated Chipboard thickness 2.5 cm. The optimal dimensions of the table top are 77 × 50 cm. For a false table top, you will need a fragment of 67 × 40 cm. Then legs and straps, confirmations and corners are prepared. Fastening is organized using card loops and 4-6 dowels. The false tabletop is installed from above, after which the corners are fixed with furniture corners, and ideally with confirmations. In the central part of the turn, a closed hole is made for a steel dowel, or the mechanism is simply mounted. After that, the lower part of the tabletop is attached to the system, and if a dowel is used, then its remaining half is closed with a hole made in the tabletop.
To assemble the product, you need to understand only elementary things:
- drawings;
- making templates;
- fastener features.
The design has gained popularity due to its compact size when folded, fast movement and easy transformation. Tables-books weigh relatively little and will be useful in any of living rooms. The assembly of the entire product will take no more than 2-3 hours, since the structure of the structure is simple and includes legs and a tabletop of 3 elements. The base is assembled from two moving and one static planes, that is, according to the tabletop itself. The design has a small variety of forms. It remains for a person to choose between legs and wheels for the sidewalls, and the configuration of the latter - between frame and solid. The edges of the countertop are best cut rounded. However, the central part of the countertop is sometimes made large, with space for chairs or shelves for bottles. Some variants of "books" function without a central element. But at the same time, all varieties will cope with the role of a dining table.
First of all, a box is assembled, in which the mechanism is then hidden. The length of the base is adjusted to the corresponding indicator of the transforming element, but the width is selected based on other criteria. These most often turn out to be the width of the countertop and the need for legroom. The manufacturer of the transforming mechanism should be asked about the level of maximum permissible load. Frame slats are usually attached with confirmations or self-tapping screws. Lifting mechanisms heavier than 4-5 kg it is better to mount through, with the placement of holes under the legs. The next steps include doing through holes under the bolts. With a Forstner drill, recesses are made for the caps. The walls of the base will eventually turn out to be self-supporting. The legs are fastened with ties to achieve a safety margin of 50 kg. The tabletop is attached to the mechanism from the inside.
Shelving table for office or nursery
Children's rooms and offices are sometimes too small to accommodate a table. But if you attach a countertop to a floor or wall rack, then it will be possible to solve two problems at once. In this case, saving space is obvious, and the countertop will bring additional benefits - in a fixed position, it closes the shelves. The solution is equally successful for nurseries and classrooms, because it allows you to organize the creative process, for example, modeling, drawing, designing. If necessary, the table-rack is turned into a hiding place in order to easily hide things from strangers. Among the materials, it is better to use a 12 mm thick fibreboard and a 15 mm thick multiplex. Fasteners are selected with flat heads and preferably without sharp corners. Flat dowels will do, and an eccentric sander will be needed for the job. Separate parts are fixed with clamps.
Camping picnic table
To assemble a portable table you will need:
- self-tapping screws;
- wing nuts;
- furniture bolts;
- latches;
- suitcase or door handle;
- loops;
- timber for the box of the tabletop and legs;
- chipboard or plywood sheet.
First of all, two halves of the countertop are obtained from chipboard sheets. Next, a long beam is cut: into segments according to the calculated length. The bars are connected to the halves of the table from all sides. Both parts of the tabletop are then attached to each other with hinges. For the legs you will need 4 more bars. Holes are drilled in the obtained supports, as well as in the frame, with an indent for the free connection of the frame and supports. The latter are assembled together with furniture bolts and wing nuts. Next comes the turn of the pen. Two latches are made on the suitcase so that it does not open when moving. There are additional recommendations about build quality. Even before completing the main part of the work, you need to draw a diagram from several angles, calculate the size and number of elements. The design is easy to assemble, but has a complex structure. It should be studied first.
massage
Assembly begins with the manufacture of countertops. Fragments of 600 × 900 mm are marked on two sheets of plywood. For cutting, a jigsaw is usually used. The ends are sanded with sandpaper wrapped around the bar or processed grinder. On one of the previously noted segments, an 18 × 12 cm hole is made for the face. Next cut out the frame. From a bar with a section of 50 × 20 mm, 8 segments are obtained: 4 by 560 mm and the same length of 900 mm. The blanks are fastened with 45 mm self-tapping screws. Two frames are made with dimensions of 900 × 600 mm along the outer perimeter. The first recesses for fasteners are drilled before installing the latter - only 3 mm each. Then legs are made from the same bars with a cut of 50 × 20 mm. The supports are then assembled on piano hinges. The same type of parts fasten the two halves of the countertop, not far from the ends.
tennis
Folding table for table tennis - useful thing for active people and just an unusual interior decoration. The bases are usually formed from a bar. Frames are assembled using self-tapping screws, according to the size of the covers. Like the halves of the table, there should be two frames. For folding options, two crossbars are mounted near the central part to increase stability. The legs are made of metal. Moreover, it is desirable to install them on wheels. The joint is decorated with card loops for quick and easy folding in the upward direction. The rigidity of the structure will give articulated struts. Sometimes they do without brackets, for example, by using a pattern of a construction goat for legs. To prevent the lid from moving during the game, holes the size of a bottle cap are drilled in the frame. Then the fastening is organized with wooden or metal pins.
Creating a round table
First of all, they are determined with the size of the countertop - perhaps round version the desired diameter is on sale. The folding tabletop configuration will consist of two or more sectors, but there is also an additional variety - on folding legs. The supports themselves are usually obtained from a bar. The upper part of the table can be lowered or raised due to them. In the course of work, a diagonal measurement is made when the countertop is positioned at the specified height. The legs of the sides end where the supports of the other begin. Paired supports are connected by a bar or board. As a result, cruciform pairs are formed. Fastening is organized at the level of half the height.
The legs are fastened to the table top with screws and glue. If the surface of the table consists of 2 parts, then they are connected to the supports by 2/3 of the length of the latter. For this, 4 more pieces of timber are also used.
The round version is the most spacious and comfortable in terms of freedom of movement.
In the hot summer, many residents of the city try to spend all their free time outdoors, preferably away from home. But in order to fully communicate with nature, enjoy a country trip or a picnic, everything should take place in comfortable conditions. That is why tourists take with them not only tents, but also furniture, which today is sold in any specialized salon or market. In the presented variety of forms, materials and designs, you can get confused without having special knowledge of the choice. similar products. Why not try making your own camping table to suit all your needs? Plus, you can still save a lot. In this article, we will show you how to make a picnic table.
Making a table-suitcase with your own hands
Consider the most simple design camping furniture. Its manufacture does not require large financial costs and the availability of a specialized tool. When assembled, this table will look like a small suitcase.
Prepare the following blanks for work:
- 10mm plywood.
- Birch planed timber measuring 30 by 30 mm.
- 4 self-tapping screws 50 mm for fastening frame bars.
- 4 self-tapping screws 25 mm for attaching plywood and fittings to the frame.
- 2 hinges with a plate width not exceeding 30 mm.
- 4 furniture screws 70 mm long, with nuts and 8 washers.
Important! How to make a camping table yourself? It is not necessary to equip a suitcase with locks and a carrying handle. But if you think they are necessary, then use the parts from an old suitcase or case. Small hooks can be used as a lock. For carrying it is more convenient to use a belt.
Follow these steps to make your own camping table:
- Cut two pieces of plywood 500 x 580 mm for the countertop.
- To make a frame, saw off 8 bars: 4 - 520 mm each, 4 - 500 mm each.
- Saw off 4 pieces of 500 mm long timber for the legs so that they fit when folded into the box.
- Drill holes in the wood to prevent splitting of the bars when screwing in the screws. Then pull the frame, attach the tabletop plywood to it.
- Attach the table legs to the 500mm bars on the frame. Step back from everyone inner corner frame 15 mm, then from the tabletop 15 mm, mark the centers of future holes for screwing in the screws. Also measure on the bars 15 mm from each end and one of the four sides. Make holes with a drill.
- Screw the hinges to the frame. They need to be deepened a little so that when closed, there are no gaps between the halves of the table.
- Additionally, you can make plastic or rubber legs for the suitcase. In length, they must match the diameters of the hinge hinges so that when closed, the table does not fall and opens freely.
- clean up wooden details using sandpaper.
- Treat the product with an antiseptic.
- Cover the top of the table with varnish or paint.
Using this scheme, you will make a wonderful and comfortable table-suitcase with your own hands. Due to its special design, it will fit even in the smallest trunk, or it can be easily carried on the shoulder.
Self-made roll table
There is an even simpler option to make a tourist table with your own hands. You can use old cuttings from garden tools or wooden rods with a round cross section. You will also need fasteners and several meters of wooden planks.
Here is the exact list of required materials:
- 10 pieces of wooden 600 mm planks 45 by 15 mm.
- 4 wooden rods 400 mm long, 30 mm in diameter.
- 2 x 540mm wood planks 15mm x 45mm.
- 2 canvas, leather or nylon belts, 54 cm long.
- 4 bolts 70 mm long.
- 4 inserts with internal thread.
Important! If you decide to buy the material in a store, then pay attention to birch rods or cuttings, because the appearance of the product largely depends on this. In addition, birch wood is considered the best option for the manufacture of countertop rails.

You will need to perform a series of actions in the following sequence:
- Cut 10 600mm battens, two 540mm battens, and 4 400mm rods.
- Sand the surface of the workpieces.
- Take construction stapler and fasten 10 planks of the future countertop with a belt to each other. Leave a gap between the planks, but it is important that it be the same along the entire length. Insert a 15 mm thick bar into each gap between the planks. To make the table top rectangular, use a square.
- Fold the finished tabletop with an accordion or in a roll.
- Clamp the table leg in a vise, use as a lining sandpaper, wood or rubber, so that sponges do not damage its surface. At the end of each leg, drill a hole 40 mm deep, insert a threaded insert into it. Do this operation with all rods. The drill must enter the leg strictly perpendicular to its end.
- The base of the tabletop, which will give it rigidity, will be 540 mm slats. Drill two holes for the bolts near the edges. Attach the slats at the same distance from the edges of the tabletop across the slats, mark the centers of the holes on the extreme slats. Make 4 holes in the table top with a drill.
As a result, you will get a universal folding table with your own hands, all that remains is to treat it with an antiseptic composition, paint and varnish it.
Features of finishing camping tables
Well, if everything worked out for you, all the details matched, the table folds and unfolds freely. But you can enjoy this process so far only at home, where it is always dry and warm, the room is constantly ventilated. The product in this form will withstand no more than three country picnics. After all, water is everywhere, and it is friends with wood until the tree clings to the ground with its roots. Blackening and swelling are dangerous for such structures. Therefore, you need to be able to properly process wooden tables.
Professional tips for processing and strengthening outdoor furniture:
- Details can not be sanded to achieve perfect smoothness, because it is paramount to remove potential splinters.
- It is recommended to paint over and coat all the constituent elements carefully so that they serve properly and for a long time.
- Be sure to carry out antiseptic treatment to protect plywood and wood, or to give the product the selected color.
- Before varnishing, plywood countertops and bars must be impregnated with drying oil. It is enough to heat it in a water bath to achieve maximum fluidity, rub it into the edges with a hard brush.
- It is not necessary to pour varnish over the entire surface - it is better to rub it. Apply two or three layers.
Who among us does not like to go fishing with family or friends for a picnic, barbecue or just relax in nature.
However, in addition to fishing rods, food, barbecue and tents, you need at least some kind of camping furniture - cooking and sitting on bare ground is inconvenient.
And the main item needed for a picnic outside the city is a folding table.
Now it can be purchased at any travel or fishing store, but why spend money when you can make a folding table yourself. Let's find out how to do it and what is needed for this.
Design features
If you do not go into details, then you can distinguish two types of camping tables - a table with folding legs and a table-suitcase.
In the first version, when transporting or carrying, the legs are removed under the countertop. Upon arrival, simply move the legs of the table apart to put it on.
In the second version, the tabletop is like a suitcase or a chessboard - in the stowed position, the legs lie inside it, but in place they must be taken out of the “suitcase”, connected to it and put the table in the right place.
Both types have their advantages. A folding table is easier to make and only takes a few seconds to set up. At the same time, the suitcase table is more convenient to carry, takes less space, and, in addition, you can put dishes, skewers and other necessary things in it during transportation.
Wood, plastic or metal?
What is the best material for making your own folding camping table?
If ease of creation is most important to you and you do not have a large set of tools or skills in working with plastic and metals, choose wood.
Timber, boards, chipboard, plywood - all this can be used to create a fairly simple folding table.
But a table made of wood, if you do not protect its surface with varnishes and special coatings, under the influence of dampness, sunlight and temperature changes, it will warp and lose its attractive appearance.
Both plastic and even metal can be used as a material for legs and countertops. But here you may need those tools that can not be found in every home. In addition, working with such materials is more difficult than with the same tree. But tables made of plastic are not subject to corrosion, and those made of metal are very strong and durable.
 In order to make collapsible or folding table, you need a set of enough simple tools, which can be found in any house or garage:
- Electric jigsaw (can be replaced with a circular saw or a hacksaw for wood);
- Electric drill for preparing holes for screws;
- Hammer and Phillips screwdriver;
- Roulette, square, ruler, pencil and level.
Attention! remember, that cutting tools, such as a circular saw or a jigsaw, are sources of increased danger! Follow all necessary safety precautions when working.
Folding picnic table
 To make a simple and strong enough, you need the very minimum of materials and fasteners:
- wooden boards, 20–40 mm thick. For countertops, instead of boards, you can use a sheet of chipboard or plywood, about 10 millimeters thick;
- self-tapping screws, furniture bolts, and for each pair of legs the bolts must be of different lengths, wing nuts for bolts;
- door handles for carrying the table and hooks.
To start, cut out from the boards or sheet chipboard countertop the right sizes. If the countertop is made up of several boards, assemble them together, lay them down and measure the length and width.


Stages of work
Step 1. Making the frame
Lay the boards for the frame on the countertop, on each side the frame should recede from the edge of the countertop by 2-3 centimeters. Using an electric jigsaw, cut the boards to the desired size, then lay them again on the countertop, check the length and width of the frame according to the drawing. Outline the contours of the frame - use them to make holes in the countertop for the screws.

Important! In order to accurately maintain the dimensions of the paired parts, connect the boards together with clamps and cut them with an electric jigsaw or hacksaw together.
Step 2. Intermediate bars
Cut out the stop bars on which the unfolded table legs will rest, make four holes for the screws in them. To prevent the table legs from colliding with each other when folding, make wooden substrates for the second pair of legs, which will be located between the frame and the stop bars.

Step 3: Assembling the Frame and Tabletop
Assemble the frame elements together, fasten the stop bars and wooden substrates, make four holes for the bolts with an electric drill. Fasten the tabletop and frame with screws. 
Step 4. Table legs
Draw and cut out the legs of the table with an electric jigsaw. In the upper part, where they are fixed with the frame, the legs should be rounded, while in the lower part there should be a cut at a slight angle (15–20 degrees). Make holes for the bolts.

Step 5 Assemble the table
Connect the first pair of legs with a crossbar and secure to the frame with a bolt and wing nut. Repeat the same with the second pair. Check that the legs do not catch on each other when unfolding and folding the table. If they get stuck, treat the legs at the point of friction with sandpaper.
Folding table is ready. Additionally, you can attach a handle to it for easy carrying and hooks to hang towels or barbecue and barbecue equipment.
Table-suitcase
 To make a camping table-suitcase, you will need more materials and fasteners:
- sheet of plywood or chipboard for the lid. In case of their absence, boards can be used;
- wooden beam for legs and countertop box;
- hinges, door or suitcase handle, two latches;
- furniture bolts and wing nuts;
- self-tapping screws.
Stages of work
Step 1. Take chipboard sheets, cut out the halves of the countertop. Then saw off the frame bars you need along the length, connect them to the halves of the countertop with screws from all sides. Fasten the halves of the tabletop together with the help of loops.

Step 2 Cut off four beams, which will be the legs of our table, make holes for the bolts in them and in the frame, while indenting so that the table legs freely connect to the frame.


Step 3 Connect the legs and frame with furniture bolts and wing nuts.

Step 4 Attach the carrying handle to the frame. Don't forget to make two latches ,
so that the suitcase does not open during transportation.

Note! Before starting work, draw up a drawing of your table in several projections, calculate the dimensions of all parts and how much material you will need. So you will save yourself from mistakes, and you will not have to redo all the work again.
Protecting the camping table
 An unprotected tree ages rather quickly: dampness, temperature fluctuations, which are inevitable in nature, sunlight and many other factors have a bad effect on the material and reduce the durability of the folding table.
Therefore, do not forget to treat all its surfaces, especially the countertop, which is most susceptible to harmful effects.
For use special antiseptic compounds, stain.
Finishing with varnish or paint will enhance the look of the plywood or chipboard and make the camp table more beautiful.
How to make another version of a lightweight folding table, see the video:
Any family loves to go outdoors, and for this you need a table and chairs that are lightweight and foldable, which are easy to put in the trunk of a car.
Folding design has its advantages and disadvantages.
But, if you know how to hold a tool in your hands, then making a folding table for the street with your own hands is not difficult.
 You should start by choosing the material from which you can make this design.
If you do not have experience with metal and plastic, which require a special large set of tools, then build a structure wooden- It is easy to make.
A simple picnic table can be made from boards, bars, plywood or chipboard.
Wood has many advantages:
- naturalness;
- environmental friendliness;
- durability with proper processing;
- does not cause allergic reactions.
But there are also disadvantages:
- wood is afraid of dampness;
- it can warp from sunlight;
- it is affected by temperature changes;
- it can be damaged by insects.
For this reason, it will be necessary to carry out additional processing from decay, exposure to moisture and insects so that it does not change its appearance over time.
 Metal- an excellent, durable material that has both advantages and disadvantages.
Among the advantages can be called: environmental friendliness, long term services, aesthetic appearance.
Flaws:
- you need a special set of tools;
- if you choose a thick metal, then the design will turn out to be quite heavy;
- moisture can corrode the metal;
- requires some skill and additional processing.
WITH plastic it is much more difficult to work, but it does not have such disadvantages as metal and wood, and it does not require additional processing.

Advice. In addition, the table can be combined, for example, a wooden table top and metal legs.
It is up to you to decide which material to choose, but we will consider the manufacture of a folding picnic table made of wood. For him you need to prepare:
- wooden glued board or plywood;
- bars for legs;
- reinforced washers;
- corners for furniture;
- furniture hinges;
- nuts;
- rivets;
- black screws.
Dimensions and drawings
The table can be made in any configuration, it can be:
- square;
- rectangular;
- round;
- oval.
table can be made on a frame that folds easily, and, if necessary, is brought to the desired position.
Important. The main role in this design is played by the legs. Competent calculation of thickness and length, correct setting fasteners will ensure ease of folding into a compact position and good stability of the table.
Create drawing You can independently, based on your needs, given the number of people who will simultaneously sit at the table.
But you can go on a simpler path - find a suitable drawing on the Internet.

Important. The folding part (legs) must be made shorter than the height of the structure, otherwise it will be impossible to fold the table.
Tools
To quickly assemble the table, prepare the following tools:
- hacksaw or jigsaw;
- screwdriver or screwdriver;
- emery skin;
- tape measure and marker.
Advice. If you use a power tool, it will be much easier and faster to work.
How to make a folding tourist table?
To assemble a wooden, folding picnic table, we present the following instructions:

Finishing
To wooden surface served long time, it needs to be handled well. Algorithm action is the following:

Advice. If there is no varnish and stain, you can soak it with drying oil and paint it with paint on wood of any shade.
Photo
Picnic tables can be very different. For example, as in these photos


Useful video
Another option for a folding picnic table can be seen in the following video:
Conclusion
As you can see, making a homemade folding picnic table is not difficult if you follow the instructions. It is only important to observe safety precautions when working with power tools and carefully adjust the parts.
In contact with


