If you ask which type garage doors is considered the simplest and most affordable, then we can say with confidence that these are swing garage doors. They are the ones that can most often be found in our area. Demand and popularity are determined by a lot of different factors, which we will consider further. If there is an urgent need to properly protect your garage, then this is an excellent solution.
In this article we will look at the features swing gates, types, design, advantages, and also learn how to make a garage door with your own hands.
Features of garage swing doors
We can say that swing garage doors are a classic. They have a simple, but at the same time reliable design. The name itself speaks about the principle of their work. The gate consists of 2 leaves that open in one direction. One of the gate sections may have a wicket. The structure swings open at an angle of 110°. It all depends on the hinges used and the type of construction.
Many people consider swing garage doors to be the best option. There are several reasons for this:
- The design is traditional and familiar. Such garage doors are time-tested, and many experienced car enthusiasts use them.
- Metal garage doors are considered the standard of strength and durability.
- Although the design is simple, it protects the garage from penetration by ill-wishers. In addition, if you use metal with increased thickness and additional stiffening ribs during manufacturing, you can achieve excellent results.
- The installation process for swing gates is quite simple. Even an inexperienced person can handle it.
- Garage doors are secured using supporting posts. They open thanks to hinged hinges. The blades themselves move accurately, easily and make virtually no noise.
- Many people are attracted by the simple operation of garage doors. The design is easy to wash and clean from dirt.
- You can make swinging insulated garage doors to make the room warm. This will be necessary for those for whom the garage serves as a workshop.
- Thanks to swing design, the owner has a lot of opportunities to modernize the design and make it attractive and beautiful. You can create 3D images, metal patterns, or simply paint them on the canvases. In general, in this case, imagination can run wild as it pleases.

But there is a main advantage that sets swinging garage doors apart from all others - their affordable cost. You can find the following types of garage doors on sale:
- recoil;
- roller shutters;
- sectional;
- lifting

They all have special design and you will have to pay handsomely for them. The sectional type performs all the same tasks, but will cost two or even less times less.
Swing gate design
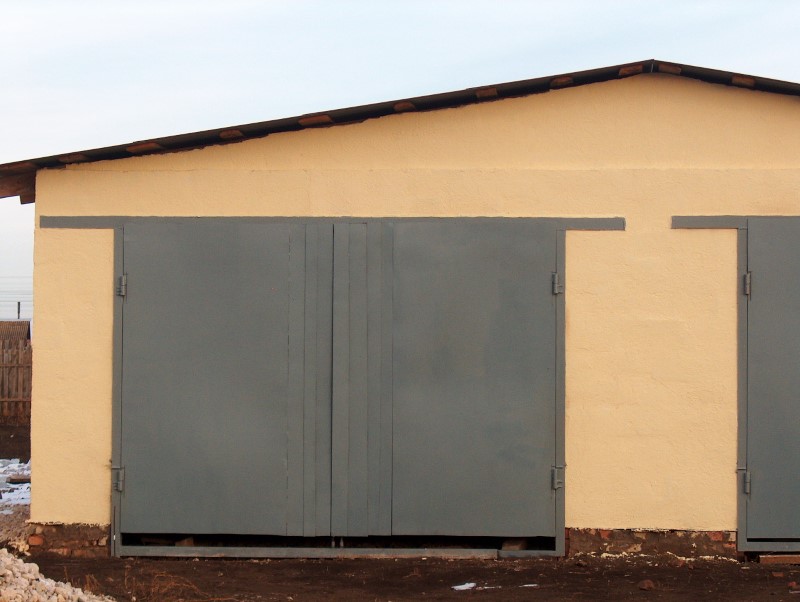
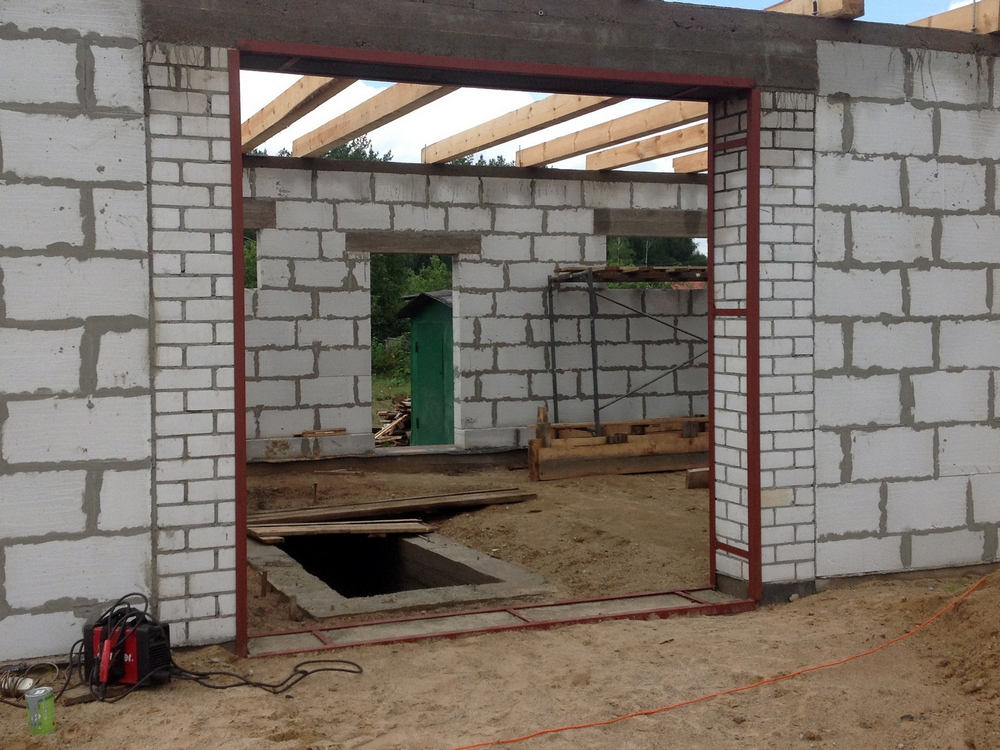
Before you start making garage doors yourself, it is important to familiarize yourself with components product designs. Below in the photo you can see a diagram of exactly what this type of gate looks like.
All the elements of a garage door are described here. The main one is support pillars. Only if we are talking about a structure for a garage, then the gate is not fixed to support pillars, and in the opening to the walls. They are enclosed in a frame, which is securely installed in the garage opening. This can be seen in the next photo

The second most important element is the structure frame. It consists of two parts that can open independently of each other. The frame is made from a metal profile by welding. To make the structure stronger and more reliable, stiffeners are welded.
The doors themselves are attached to support posts or frames using hinges. They play a major role in the performance of the structure. Hinges allow the gate to open and close. And so that the product can be fixed in the same place, latches are made into the ground. The design is simple, but it will allow the sash to firmly take the same position. Well, in order to close them you will need a bolt or lock.
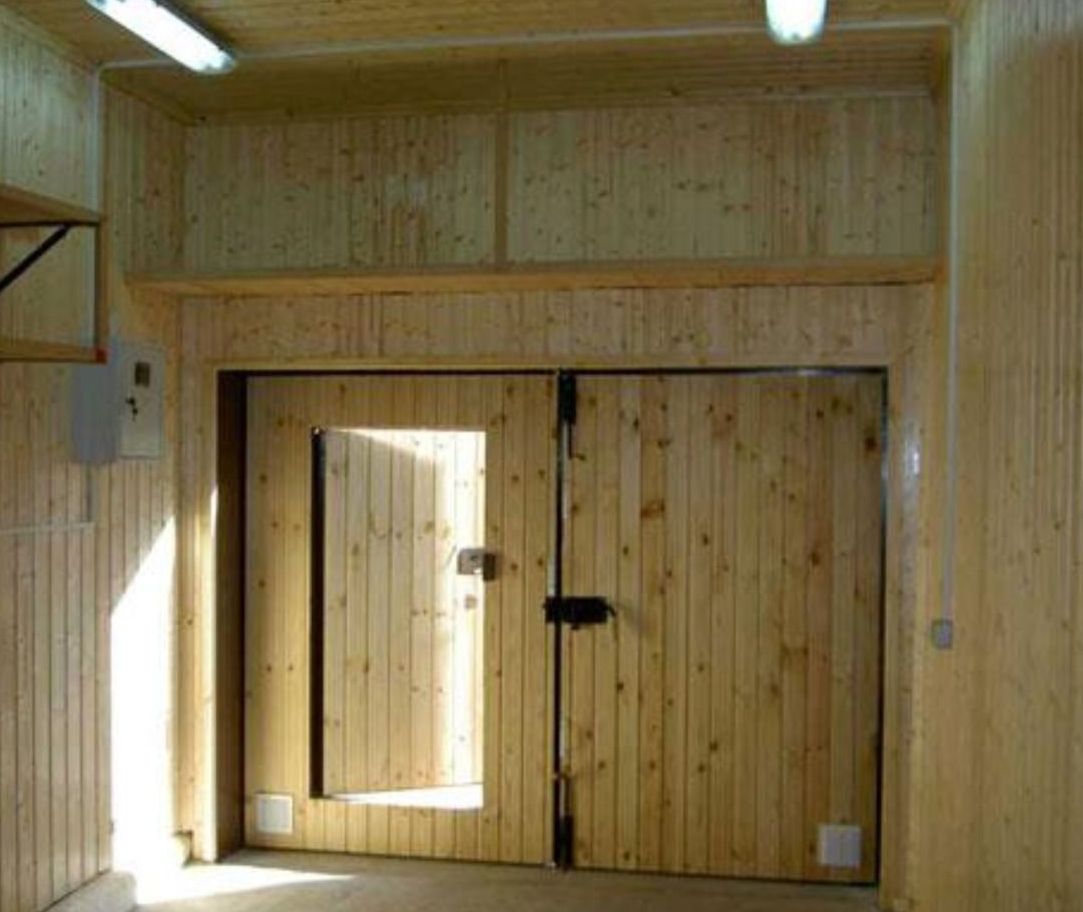
The sample showed a simple type of construction. It is usually used for fences. But swing garage doors are made with a wicket. This is convenient, as it allows you to enter the garage without fully opening the door. After all, we don’t always go there to take out our car. Therefore, a gate can be very useful for people. A drawing of a garage door with a wicket is shown in the photo below.
And finally, the last element of the design is the canvas. Unlike others structural elements, the type of canvas can be very different. It is the type of cladding that may determine what the gate will look like. They can be sheathed:
- Tree.
- Metal.

These are broad concepts. The most popular is sheet material made of metal, as well as sandwich panels. Rarely seen aluminum profile. The strength, reliability and protection of the garage door will depend on the choice of casing. Even wooden garage doors can be made durable. You need to choose the right material thickness and adhere to the creation technology.
Pros and cons of swing gates
Why is this type of design still so popular? It's all about the positive aspects of the products. Here is their list:
- Strength and durability.
- If you use anti-removal pins, cutting off the hinges will be impossible.
- The design is very simple and easy to open.
- Installation can be carried out in openings of any features and dimensions.
- The gate can open both inside and outside the room.
- Made from modern materials that do not rust.
- They have an attractive appearance and can be modernized as desired.
- They do not have welded joints, which allows for improved appearance.
- It is possible to make them not only manual, but also automatic, which will greatly simplify their operation.

As for the disadvantages, the design has them:
- since the type of opening is swing, this process will require free space in front of the garage;
- in winter, in order to ensure access to the garage and proper opening of the structure, it is necessary to clear the snow. Although, on the other hand, this must be done in any case, since the car also needs to leave the garage;
- Although the opening system can be made automatic, the devices will need to be installed on both doors. And this will make installation even more expensive.
If you look at the ratio of pros and cons, it becomes clear why many prefer swing garage doors.
Types of swing gates
Depending on the material, type of construction and type of opening, there are several main types of swing garage doors. This allows you to choose for yourself best option in accordance with the allocated budget and requirements.
So, all designs can be divided according to the material used for manufacturing into:
- metal gates;
- wooden gates.
We mentioned that the structure itself is made of metal. This guarantees the durability and other strength characteristics of garage doors. But as for the cladding, it can be different. Metal gates For garages, hinged ones are the most popular. They are reliable and durable. But wooden garage doors, although not as durable, have an excellent appearance. In addition, wood is an environmentally friendly material and is easy to process. To cut it or connect its component parts, you do not need to have a lot of experience and skills in using welding machine.
Swinging garage doors can also be divided according to the type of opening into:
- manual;
- automatic.

Manual is the usual design option. They are set in motion by the forces of the owner himself. To open them, you have to get out of the car. This is not entirely convenient, however, such gates are the simplest and anyone can afford them.
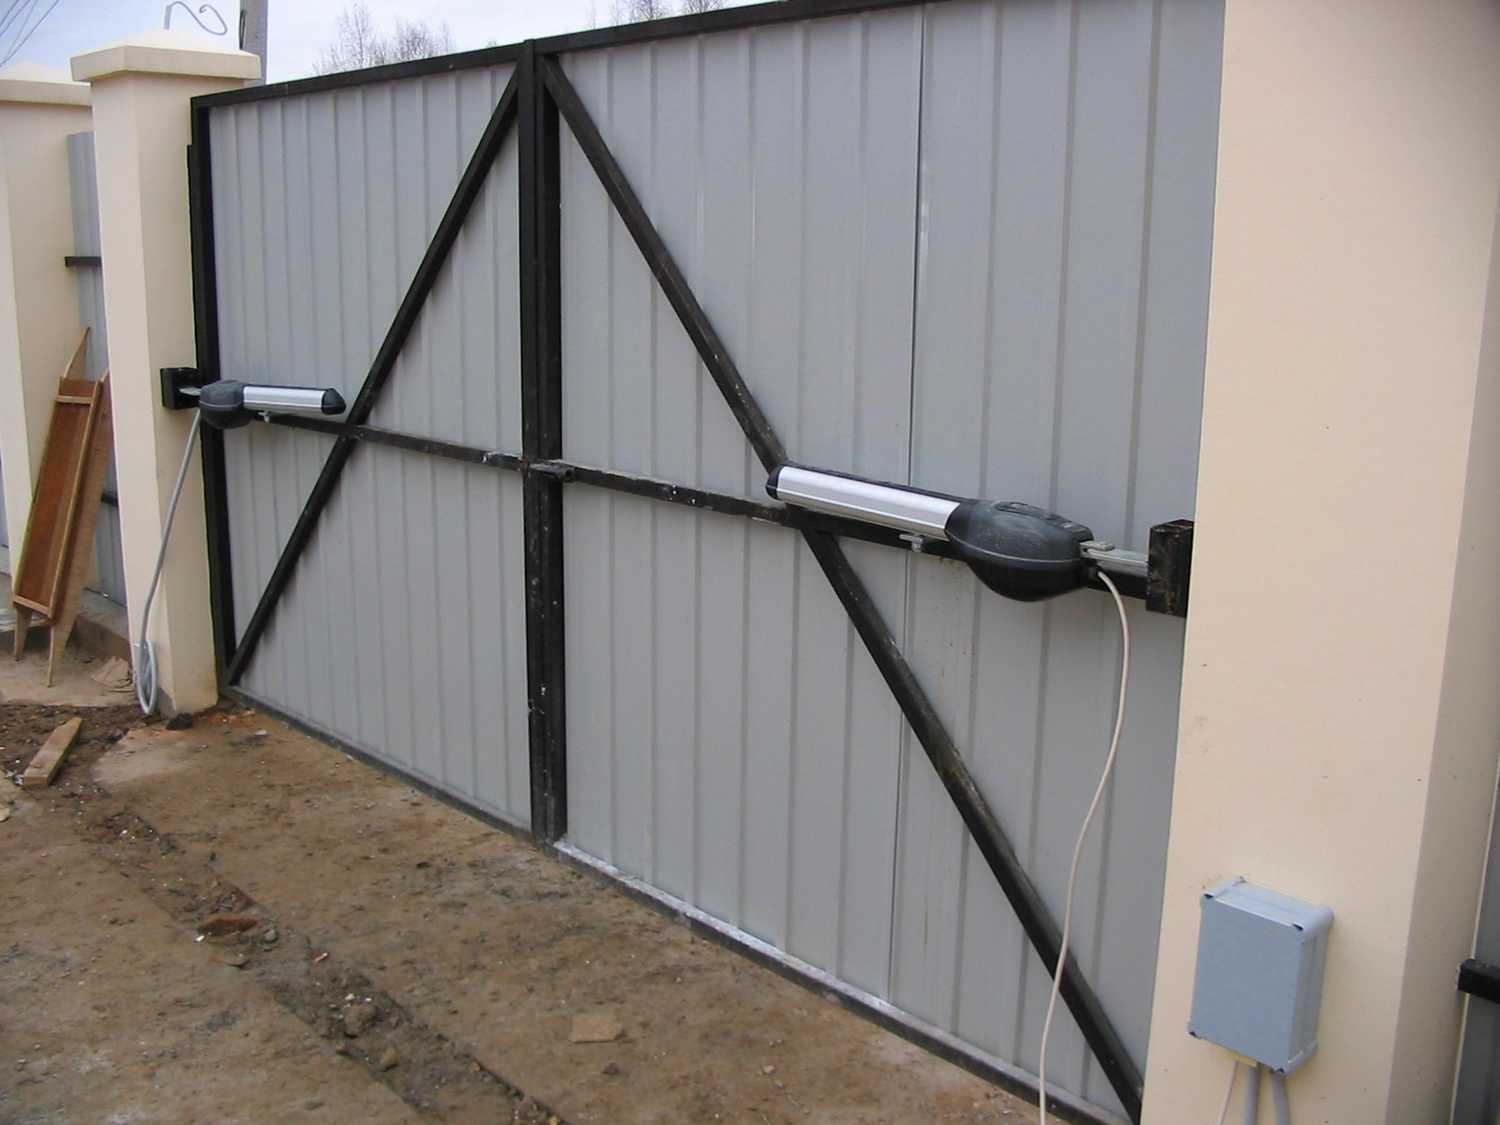
Another thing is automatic swing gates. Their peculiarity is that they automatically open or close when necessary. It is enough to drive up to the gate and, without leaving the car, open it using the remote control. This is possible thanks to the automation that is installed on each sash.
What is included in this set of electrical appliances? The system consists of an electromechanical drive, an access system and a control unit. Automation of this design is carried out by different types drive (linear or lever). To select a suitable design, many factors must be taken into account. Here are the parameters you should pay attention to:
- The area of the structure's fabric that does not include gaps.
- Frequency of use of garage doors.
- Dimensions and weight of the metal structure.
- How do gates open - outwards or inwards?
- Installation location.
If we talk about universal version, then it is linear worm gear. It is installed on a structure that opens and closes quite often. The automation is also suitable for gates that open outwards.
The linear hydraulic drive also has its advantages. It is inexpensive, high-power and versatile. In addition, it is easy to use and easy to install. However, if we talk about areas with temperature changes, this is not the best option.

As for the lever electric drive, its scope of application is narrower. It is highly durable and allows swing gates to be opened in any direction.
What if your automatic swinging garage door malfunctions? What if the mechanism is jammed, how can they be opened? Manufacturers took this fact into account and equipped the system with a function for manually unlocking the blades if the automation failed or the power was cut off.
The only thing that can stop many is the price. You can buy them in any store, but not everyone can afford the design. The minimum price starts from 300 euros. There is a system for 400, 500 euros and more. After purchasing, all that remains is to install them on each shutter and connect the system.
Note! You can ask the company to install the products. Often this service is an addition to the purchase, so there is no need to waste your time and effort.
The last thing I would like to note regarding the types is the type of cladding of the structures. Cloths for the garage can be:
- one-sided;
- double sided;
- sandwich panel.
From this follows the next subtype - insulated and non-insulated structures. The first option interests us more. Insulation consists of using a layer thermal insulation material, which saves heat. Your garage will stay cool in the summer and warm in the winter. This is achieved through the layer insulation material, which is laid between the layers of sheathing. It can be polystyrene foam (the cheapest and very effective) or mineral wool. The cost of such a design will be higher, but the comfort inside the garage will be even higher.
On a note! It is worth mentioning that gates can also be divided according to their design. They are made without a gate or with it. The second option is more preferable.
Now that we have looked at all the features, characteristics and types of swing garage doors, you can find out how to make a garage door.
Requirements for homemade structures
First you need to familiarize yourself with several requirements that are observed in production, and which are important to comply with when working:
- The ability for the car to enter and exit freely. It turns out that the size of the structure is chosen taking into account the dimensions of the car. A van needs a large gate, and a passenger cars less.
- In order not to be afraid of damaging the car when entering, you should leave 30 cm on each side. This will simplify the driving process.
- If we talk about the standard dimensions of a garage opening, they are as follows: 4x2.1 or 5x2.4 m.
- It is important to make strong gates that will be burglary-resistant. This will require high-quality cladding and a lock. Some people buy or make their own security locks. It is better to sheathe the structure with galvanized steel, the thickness of which is 2 or better than 5 mm.
- To strengthen the gate, you can use overhead locks.

Taking into account all these requirements, you can create the right gate with your own hands.
Materials and tools for work
To make swing garage doors with your own hands, you need to stock up on the following materials:
- steel corners, from which the supporting frame (mounting frame) will be made;
- material for covering the frame, selected in advance (wood or metal);
- hinges, latch;
- primer and paint for the fence;
- metallic profile to form the structure as a whole (60x30 or 60x20).

As for the tools for creating garage doors, their list is as follows:
- building level;
- tape measure, pencil or marker;
- grinder for carving;
- square;
- perforator;
- welding machine;
- paint brush or spray gun.
Now you can begin the first stage of creating a metal garage door.
Formation of the gate mounting frame
The design is based on the supporting frame. Since we are talking about a product for a garage, the frame will consist of two parts: an internal and an external frame. The external one is needed to fix the structure in the opening, and the internal one allows the gate to move. The frame will be made of a metal corner.

Do-it-yourself swing gates for a garage - step by step process:

This completes the work on creating the external frame.
Creating a swing gate frame
The gate frame consists of two swinging doors of our product. It is to them that we will further attach the selected canvas. To create the frame of our sashes, a metal profile measuring 6x2 cm is ideal. Step-by-step creation instructions:

On at this stage you should end up with a product that is shown in the photo below.

In fact, the main and most difficult part of the work has already been done. It will be easier later.
Gate cladding process
Although this stage may seem simple at first glance, it is very important. Both the appearance of the structure and its other features depend on how well it is implemented. functional features. Further work depends on the choice of material for the canvas. We'll consider classic version for the garage - galvanized steel. And below in the photo you can see the wood paneling option.

Instructions for creating a gate trim:
- Galvanized sheet metal need to be marked according to the size of the sashes. You need a tape measure and a marker. In addition, it is worth considering that the left sash must be 10 or 20 mm larger in order to overlap the right sash.
- When two identical canvases are cut out using a grinder, you can begin installing them. The sheet is welded at the bottom at several points. This is done in order to secure it to the frame.
- The sheet on the right, which should be 10-20 mm narrower than the left, should be cut off. It turns out that the metal sheet will not reach this distance to the end of the profile.
- When the blades are aligned evenly and correctly, they can be completely fixed by welding. To prevent the skin from moving during the work, which can lead to distortions, it can be secured by welding in the middle and in the corners on each side. When the blade is completely welded, the points can be cut off. If this is not done, then there is a small chance of one of the corners bending outward. Only a sledgehammer can solve the problem, so don’t forget to cut off the dots.

The structure is almost ready. But there is a small detail without which its work is impossible. After all, the doors themselves, as you remember, are not yet connected to the main frame.
Fixing hinges for swing gates
Hinges for garage doors need to be purchased and prepared in advance. They consist of two parts. One of which is mounted on a cylinder and allows the structure to rotate. The gate will require 4 hinges, 2 on each side. Sometimes, if the structure is very large and heavy, 3 loops are needed on each side.

So, the hinges are welded into place. In this case, the lower part of the hinge is welded to the outer frame, but the upper part is attached to the sash from the outside. To strengthen the fixation, a strip of metal can be welded to the loop on each side. On sale you can find hinges already with such plates, with a thickness of 5 to 7 mm.
We install locks and latches on gates
Safety comes first. For such structures, a mortise or padlock is used. They are simple and more effective. Great option is deadbolt lock for garage doors. However, it is best to supplement the design with a powerful deadbolt and pin stoppers. They will allow you to close the gate with inside. However, in this case it is necessary to make a gate in the sash or a door in the wall of the garage.

Important! Making a wicket in a gate leaf is not that difficult. You still need to create a frame from the profile according to the dimensions, place it in the sash, and then weld the hinges. The doors are sheathed according to the same principle; a handle and a lock are embedded in them.
The stoppers are made as follows: a piece of pipe is driven into the ground, inner part and the moving part of the stopper - the rod - will sink. The pipe diameter should not be too large. The rod is threaded through the loop in the gate leaf. During operation, you will need to constantly monitor the pipe so that it does not become clogged with snow, dust and dirt.

Care is needed and garage locks. It is very important to protect them from moisture, especially in winter. If water gets inside and freezes there, the key will not be able to penetrate the well and open the doors. Yes, and the lock can rust and fail. The castles that suffer the most from frost are those with cylinder mechanism. It is much better for cold regions to use a lock with a tubular key. Gate locks also require regular lubrication.
Painting the frame
Since the entire structure is made of metal, it needs protection from corrosion. For this purpose, a special primer or paint is used. This solution will not only protect your swing garage doors, but will also make them more attractive.
So, the product should be primed. The primer is applied with a roller or paint brush. It is important to do this job carefully so as not to miss any areas. A primer is needed for better adhesion of paint to the surface.

Now, after the soil has dried, the gate can be painted. The composition is applied using any of the methods available to you. It is important to do this in two layers so that the color is saturated and the structure is more protected.
Installation of swing gates
Installing swing garage doors requires an assistant. The structure itself is heavy, so strong man's hands, preferably several. The sequence is as follows:
- The first step is to install the inner and outer parts of the frame. They are securely fixed to the opening slopes using metal pins ranging in size from 15 to 18 cm.
- After which the ends of these pins that will protrude need to be cut off, scalded and thoroughly sanded with a grinder and painted over. This way the pins will not prevent the structure from moving.
- The outer and inner frames are connected to each other using 40 mm metal plates. The plates must be welded in increments of 60 cm.
- All that remains is to hang the sashes in their place.
It is at this stage that our DIY metal or wooden garage doors can be equipped automatic system opening and closing. This can be done later.
Insulation of garage doors
Few people know, but if metal swinging garage doors are not insulated, they will become the main source of heat loss. They account for as much as 60%. That's why everyone recommends insulating garage doors. Using the same foam, the work will not be expensive. But the result pleases all year round.
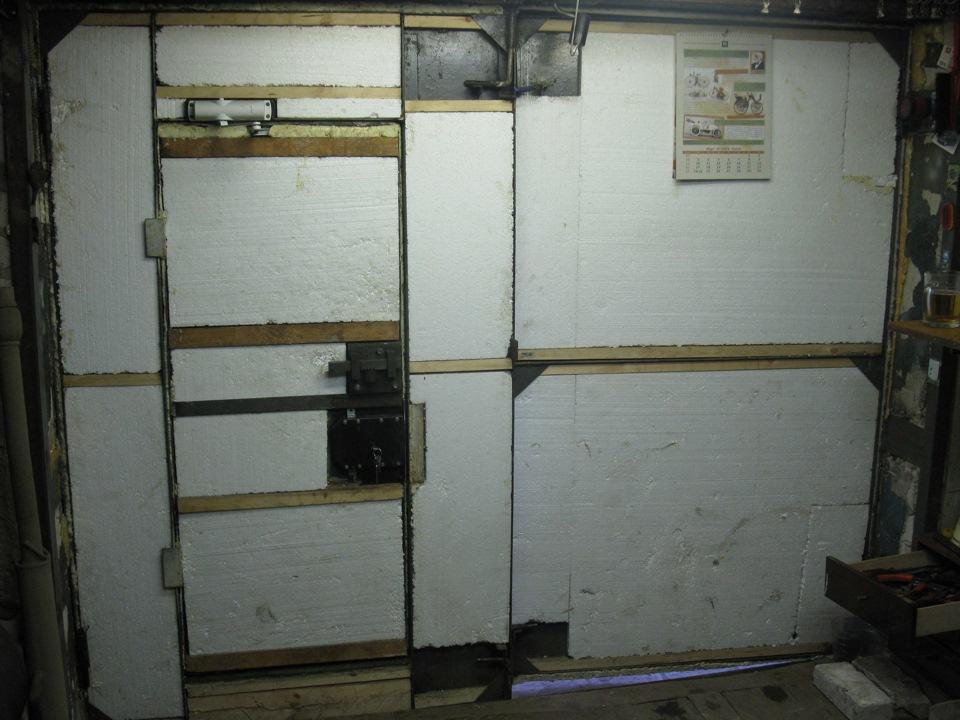
To insulate swing gates, insulation (mineral wool, polystyrene foam, polyurethane foam, glass wool, expanded polystyrene) is placed inside the doors. To subsequently protect the insulation layer from negative influence, it is recommended to sheathe the canvas with wood. When working, you need to make sure that there are no air pockets left. All gaps are filled well.
Attention! For high-quality insulation, you need to use a layer of insulation 15-20 cm thick.
That's all, now you know the whole process of creating a product with your own hands from scratch.
Let's sum it up
Swinging garage doors are the simplest, yet time-tested design that reliably protects your garage from strangers. We looked at not only the features and advantages of the products, but also learned how to weld a garage door. Step-by-step instructions will help you save on the purchase of garage doors by making them yourself. All that remains is to prepare everything you need for work and begin the process. And thanks to the visual video, making a garage structure will be twice as easy.
Garage doors are very important detail the entire garage. They protect it from burglary, cold and precipitation. Today, many different companies and manufacturing enterprises offer their services for the manufacture and installation of indoor shutters garage type. Such companies do everything professionally, but quite expensively. Is it possible to build this kind of structure yourself? If yes, then how to make a garage door with your own hands, and what is needed for this? This article will try to answer all of the above questions.

First of all, it’s worth clarifying what types of garage doors exist today:
- Swing – old, good and proven garage doors. Our grandfathers made them, and they never let them down. Making such a garage door with your own hands is quite simple.
- Recoil – enough the new kind gate Sliding garage doors imply the presence of one or more leaves that slide to the side when opened. Such shutters are usually used only in large rooms that have a fairly large lateral space for the shutters to move in, or as a gate to the yard.
- Up-and-over garage doors are a single piece that, when opened, rises up and is fixed under the ceiling. This system is a very big plus for garage owners, as it saves space inside and in front of them. Disadvantage folding gates the probability of freezing of their mechanisms and systems in severe frosts is considered. That is why such shutters are suitable only for heated rooms. Making them with your own hands is difficult, but possible.
- Sectional overhead doors consist of several panels that slide under the ceiling when opened. The advantage of such a system is considered to be the same space saving. Its disadvantage is the impossibility of creating such gates at home.
- Roller shutters are a lattice made of aluminum plates, which when opened go up and hide in a special compartment. The disadvantage of such a system is the inability home production, fragility and unreliability, as well as poor thermal insulation.
As can be seen from this list, the easiest way to make one at home is just swing gates. It is their production that we will consider in the article.

Handmade production
Before you make a garage door with your own hands, you need to create a diagram of it. A drawing of a garage door should show all the components of the structure and their design.
Swinging garage doors consist of three main parts:
- Frames for the opening (internal and external);
- Shutter frame;
- Canvas for shutters.
Dimensions

When drawing up drawings of garage doors with your own hands, it is advisable to adhere to the following requirements and tips:
- The width of the shutters should be such that the distance from the sides of the car to the garage box is at least 30cm;
- The standard width for garage doors is 2.5-3m, and the maximum is 5m;
- The height of the gate directly depends on the height of the car that will be parked in the garage - the standard for cars is 2-2.2 m, for minibuses - 2.5 m.
What do you need to stock up on for work?

In order to make swing garage doors, you may need the following materials:
- Metal corners 65x65mm;
- Steel reinforcing rod;
- Steel strips 3-4mm thick and 2-3cm wide;
- Reinforced hinges;
- Steel sheets 3-4mm thick or corrugated sheets.
Tools that will be useful:
- Measuring tape;
- Square;
- Level;
- Bulgarian;
- Welding machine.
Frames
Before building the entire garage, it is advisable to stop at the fifty percent stage of constructing its walls in order to embed the gate frame into them.

Algorithm for making a gate frame:
- We cut out eight segments from the metal corner, four of which will be equal to the height of the garage door opening, and four to its width.
- We lay out the four parts of the first frame at an angle of 90° on bricks or other materials of the same height - be sure to make sure that all its parts are in the same plane.
- We fix the angle pieces together by welding, and regularly check that the angle is 90°. It is advisable to weld the corners overlapping - this technique will provide better adhesion.
- We carefully clean the outer part of the outer frame from traces of welding, since it is very important that there are no gaps between the sashes and the frame.
- We do the same procedure with the second frame.
Shutter frame

When making the frame for the sashes, the following instructions should be followed:
- We cut four pieces from a metal corner or rectangular profile, each of which should be 10-15mm shorter than the height of the gate frame.
- We cut out four more segments, each of which will be equal to half the width of the frame minus 30-35mm.
- We lay out the resulting pieces of the profile on a flat plane and set angles of 90° between them - for convenience, you can apply the profile to an already welded frame.
- We weld both frames one by one.
- We weld another piece of profile in the center of the frames in a horizontal position to strengthen the structure.
- We carefully polish the weld marks on the side of the frame to which the leaf panels will be attached.
Doors

The algorithm of actions for the production of gate leaves is as follows:
- We cut out two rectangles of appropriate sizes from sheets of metal.
- The height of the rectangles should be 3-4 cm higher than the height of the garage opening.
- The width of one of the rectangles should be 1-2 cm greater than the width of the frame, and the second, correspondingly, the same amount less.
- We weld the cut sheets of metal to the frame of the doors so that their upper and lower edges protrude above the frame by 1.-2 cm.
- We weld the smaller sash so that the frame peeks out from under it 1cm wide.
- We weld the large sash so that it overlaps the edge of the frame by 2-4 cm.
- The resulting indentation is necessary for a tighter joint between the doors.
- In the process of welding sheets, it is advisable to first grab them a little along the edges and center of the frame, and only then carefully weld the entire sheet in increments of 10-15 cm.
- It is advisable to grind off the welds at the corners of the gate.
Connection of sashes and frame
In order to connect the sashes and frame, it is necessary to use reinforced hinges. Their upper part must be welded to the gate, and the lower part to the gate frame. For greater welding adhesion, you can use welded pieces of metal and a reinforcement insert.

A metal strip 5-7mm thick can be welded to the junction of the upper part of the hinges and the sash. The reinforcement tab must be welded from the inside.
When welding work will be completed, it is necessary to test the entire structure for strength and effectiveness. During testing, it is advisable to pay attention to the following points:
- All structural parts must be in the same plane.
- The shutters should be adjacent to the frame and flush against each other.
- When opening/closing, the doors should move easily and not cling to anything.
Installation
As mentioned above, it is advisable to install the gate frame at the stage of construction of the garage, when only half the height of the walls has been erected. It is necessary to install the frame into the unfinished opening, making sure that it is installed correctly vertically and horizontally.
For greater strength and accuracy, it is best to weld both frames together with metal plates 4 cm wide. The plates must be attached to the frames every 60cm.

When the frame is ready, you can continue laying out the walls of the garage, but it is advisable that the entire space between the frames be bricked. During the laying process, it is necessary to wall up the frames themselves. To do this, you need to weld 3 reinforcement rods to them on each side. It is advisable to take rods 20-30 cm long. As the masonry progresses, they must be embedded in the seams between the bricks.
At the final stage, the upper part of the frame must be fixed with a ceiling - a concrete or metal beam.
When the masonry has dried and set, it is advisable to test the new gate - you need to open and close it, listen to see if there is any resistance to these actions.
If the tests are successful, then you can start inserting locks, installing latches and welding special ears for a padlock.
It is also worth saying that, if desired, swing gates can be made with a wicket. This convenient device allows you to not open all the shutters completely and not let them into the garage in winter without the need to drive the car out cold air. We hope that you?
We hope that this article will help you build your garage and make high-quality and inexpensive swing gates for it.
Stands out among its peers in some ways advantages. Firstly, they are made from whole cloth, which can be made very resistant to hacking attempts. Secondly, up and over gates V open form do not take up as much space in the space in front of the garage as swing doors do.
Thirdly, with sufficient experience and skill in working with sensors and electric drives, they can be made automatic that open when you press the remote control.
An additional, but nevertheless important advantage of self-made overhead garage doors is the large number of options to choose from. decor– the gate can be sheathed with clapboard, plastic panels, steel and much more.
Lift gates for garage - dimensions:
But in addition to the advantages, you need to remember shortcomings. The main disadvantage of up and over gates is that in the open position they are installed horizontally under the ceiling, taking away about 20 cm on the height of the opening, which in some situations can cause inconvenience (for example, when you are trying to drive into a garage in a tall SUV).
A significant disadvantage of solid fabric is that if it is damaged, it will not be necessary to replace it. separate element, A the entire structure at once. In addition, it can be quite heavy, which puts heavy loads on the frame and lifting system.
Rising garage doors have one more disadvantage: they can only be used in rectangular openings. But here it should be remembered that garages with arched or other shaped openings are extremely rare.
Do-it-yourself up-and-over garage doors - blueprints:
We buy everything you need
Now it's time to take a pen, a few sheets of paper and make a list of everything you need to make overhead gates to the garage with your own hands. All this can be purchased at the nearest construction department store, so with the search for materials and tools big problems should not arise.
So for homemade overhead gates for the garage we need:
- Wooden beam section 100x100 And 120x80 mm. They can be replaced steel profile comparative strength.
- Corners 40x40 and thickness 4 mm.
- Channel 40x80 mm.
- Material for canvas: thick boards 25 mm, corrugated sheets or plastic panels.
- Steel rod diameter 8 mm.
- Two springs with inner diameter 30 mm.
- Anchor bolts and screws.
As for tools, first of all, we need a tape measure, an angle and a level to carefully check that the dimensions of the overhead garage door are correct.
To work with metal we will need an angle grinder (also better known as an angle grinder) and a welding machine. In addition, we need to saw wooden beam and carry out other work with it, which means we need electric jigsaw, drill and screwdriver. Well, what would a repair be without a hammer, screwdrivers and wrenches?
Pre-planning
How to do overhead gates to the garage yourself? Together with a tape measure and a level, you should go to the opening to find out the dimensions of your homemade garage door. This is a very important stage, which further determines whether your work will be successful.
After this, you can take a sheet of paper and start making your own blueprints overhead garage doors. So, they will consist of a solid canvas, an opening, a frame under the ceiling and moving mechanisms.
First of all, you need to carefully measure the drawing lifting garage doors in all sizes, so that in the future there will be no inconsistencies and problems during manufacturing. It will be useful to make a plan from several views, including isometry.
If at this stage you have difficulties, try to find a friend with experience in compiling drawings and, even better, gate making. Made with your own hands blueprints overhead garage doors? Now it's time to take action!
Do-it-yourself garage doors - blueprints:
Do-it-yourself lifting garage doors: step-by-step instructions
How to do up and over gates to the garage with your own hands?
- First of all, we need to equip opening. Vertical supports made of 120x80 mm timber should be dug into the garage (if it is already filled) or the ground (if not yet) by 20-30 millimeters; for greater reliability, the depth can be increased. Both vertical and horizontal beams will be attached to the walls of the garage using anchor bolts.
- Assembling the frame for ceiling. To do this, a horizontal beam for the guides should be installed from the opening at a distance of approximately the length of the gate. It is important that it is parallel to the horizontal beam of the opening and is the same in height throughout its entire length; distortions are unacceptable.
- It is assembled from two metal corners by welding guide rail, along which the roller mounted on the canvas will move. The distances between the corner vertices should be carefully monitored during assembly. Two such rails must be attached to the upper beams; for this you can use metal fittings and self-tapping screws.
- We manufacture canvas frame. For it, you can take a wooden beam, or metal corners welded into a square profile. For better durability of the canvas, transverse or diagonal beams can be welded (or attached) to the main frame. Don't forget about the rollers at the top of the structure.
- Using fastening material, need to sheathe the canvas the material you have chosen.
- This point in the manufacture of overhead gates is very important and great attention should be paid to it. Using corners and fasteners, you need to make movable brackets on both support beams. The levers of their channels should be attached to them, which will push the blade upward.
- To keep the gate open, you need springs. They are attached to the bottom of the supports, to the bracket and to the end of the channel. When the door is raised, the spring is compressed and does not allow spontaneous lowering: closing the gate will require considerable effort. It would not be superfluous to equip the fastening of the spring to the bracket and channel with a tension regulator.
- Final stage gate manufacturing– installation of all elements, insulation of the canvas and fastening of the decorative covering to the sheathing.
Do-it-yourself lifting garage doors (from profile): 
Further up and over gates for a garage can be improved by adding the ability automatic opening and closing. To do this, you will need an electric drive, a signal receiver and a control panel. As the latter, you can use a key fob for a car alarm, and as a drive - either a reverse winch or a power window mechanism.
Don't forget to install a reliable locking system, which will protect your garage from illegal entry. If you often come here and you don’t need to lift the canvas every time, then you can make a cutout in it for the door.
In addition, you can make inserts in the canvas from glass or any other light-transmitting material, so you will save on the garage during daylight hours.
As you can see, do it yourself up and over gates getting into the garage is not so difficult, the main thing is not even good skills in working with metal and wood, but careful planning and compliance with the dimensions of the garage overhead gates. If everything was done correctly, such gates will serve you for a very long time.
Useful video
Watch the video on how to do it up and over gates for the garage with your own hands:
We continue the series of articles on the topic “with your own hands” or “how you can save money” and today we will figure out how to make a gate yourself, without the help of expensive specialists. You can say that this is a trivial matter and anyone can do it, but this is not true. This requires careful measurements, preferably drawings of the gate and the attention of a welder, because every centimeter of difference in diagonals will mean that the work has failed. But it's not all that scary. If you follow our instructions carefully and step by step, you will get very durable metal doors. Besides, they don't look bad.
Before making a gate, you need to make sure that normal mortgages are made under it, which are exactly level. Ours were thick-walled metal profile pipes 200x200 mm. It could be thinner. Here a lot depends on the length of the gates; these mortgages were designed for gate leaves 220 centimeters long. The total width of the gate is 440 cm.
Dimensions of garage doors and getting started with your own hands
You can start with anything, but to get the original dimensions of the doors, you need to place a tension beam on top of the supports and make metal frames on the door based on the measurements obtained. Garage doors can be of any size, but it is better to start from the parameters of a standard sheet: 250x150. We took a height of 250 centimeters, this will result in 1 less cut and less weld. We just “grab” the beam so that it doesn’t fall, we don’t weld it.
Metal garage doors had to be strong, so they used 0.3 sheets with reinforcements. But first we had to make a frame. Here the drawing is quite simple: we retreat 3 cm from the top beam, 3 cm from the side beam and 3-4 cm from the desired level below. You can leave about 1-2 cm between the two sashes and overlap one side. We obtained measurements of a rectangle, which we laid out on the ground and welded a frame with right angles based on them. When making a gate frame with your own hands, you can use a protractor or tape measure (measuring the diagonals) - this is more reliable.
The frames and reinforcements are made from a 40x20 mm profile pipe; after fastening, additional hinges are welded on using a semi-automatic machine. The garage doors will be swinging, so it is important to set the hinges very accurately so that the doors do not fall down. Here you will need the help of an assistant.
STEP 1: frame alignment . We place the frames on bricks or other auxiliary objects, the main thing is to fix the entire structure.


STEP 2: setting gaps
. We insert objects of the required thickness around the frame and supports (we used 20x10 mm wooden planks and metal squares of the same size). Garage door gaps should be the same everywhere. 
STEP 3: setting up the loops . We weld the hinges at the same height to the supports, and measure the slopes with a plumb line and level. We are testing this design.
IMPORTANT: when making metal gates with your own hands, never weld them “tightly” right away. Do not rely on your eye, even if it is level, which almost never happens, there is still a risk that the materials will turn out to be crooked. First, “grab”, then perform commissioning work (open/close the door).
STEP 4: make adjustments. In our experience, all do-it-yourself swing garage doors required adjustments. After catching the hinges and frame, try to close/open them synchronously and one by one. If there are distortions, you need to hit or pull hand winch in the right direction.


IMPORTANT: after tightening with a winch and adjusting the supports, nothing should be changed or released, everything should be tight. Please note that under the future weight of the sashes, the structure may “go” a little to the sides. If you have standard sizes For garage doors that are much smaller than ours, the reinforcements and posts can be made smaller. The permissible dimensions of the reinforcements are: 15x30, 20x20, and the racks can be made 100x100 mm.
After adjustments to the levels, you can safely weld the frame. It is most convenient to use a manual mechanical winch with a force of 300-700 kg - this will be enough. When making garage doors with your own hands, this is simply an irreplaceable thing. With its help, you can align not only light frames and corners, but also embedded racks. Setting the diagonal is also much more convenient: we pull the stand in the desired direction and work with a welding machine - voila!
DIY garage door leaves: step by step and simple
We have ready-made rectangular frames onto which we need to attach metal sheets. This will not be so easy to do, since they are: a) heavy b) not always even. If you are lucky and you have made a perfectly even frame, then the sheet will only need to be cut in 1 place. If you need a gate less than the height of the sheet, then it’s worse to cut at least on both sides.


There are 2 ways to make a garage door with your own hands: hard and fast, easy and long. The easy way: apply a metal sheet to the frame, take measurements according to the gate drawings, and weld it to the frame. Then we cut out the marked places with a grinder and brew further.


The hard way: we take measurements on the frame and cut the sheets around the perimeter, sand them and then install them. In the first case, you will have to briefly hold a sheet weighing approximately 80 kg with your hands. It will be attached by welding. The second option involves building a finished structure on the ground, sanding it down, and hoping it fits perfectly. But it will be physically easier to install, it will just take longer and take more measurements. But you install something that is already ready and easily made.


We didn’t have that many hands at first, so we decided to go the fast route and first welded sheets around the perimeter. Measurements were taken several times so that the DIY garage door would fit perfectly into the opening. Everything was as it was, they just trimmed both edges with a grinder. The second sheet was a little more difficult to align, since it was necessary to make a perfect 1 cm overlap in relation to the other sheet. Here again a winch, a level and several welding points for preliminary measurements helped.


After attaching the sashes and hanging everything on the hinges, make sure that the levels are maintained everywhere and everything works as it should. Carefully close the gate and proceed to total fixation to the walls, reinforced belt and mortgages.
Installing gates with your own hands and attaching them to walls
According to all building codes, gates can be fastened with anchors to foam concrete and welding with a reinforced belt - few people do anything else. But when making a garage door with your own hands, you don’t want to save money - it’s better to cook more often. It will be stronger and there is no risk that the gate will sag under the weight of heavy metal and long leaves. The sheets are welded, although not reinforced yet, it’s time to firmly fasten the mortgages to the walls and armored belt.
We have already partially examined how to do iron gate with your own hands, but this is still an autonomous structure that needs to be secured properly. You still can’t remove the guy wires that we installed earlier. Now we need to follow carefully sequential instructions for fastening and it is important not to confuse anything.
STAGE 1: we fasten the top of the supports between ourselves and the wall . Most often, a reinforced belt is made of foam concrete on top of the walls and the gate is attached to it. We need to cut out metal plates and rods (not so important), weld them to the top of the racks. We simply place the other edge approximately in the center of the future belt. Such “flagella” must be made on all sides of the supports to ensure its solidity.


STAGE 2: weld the beam tightly . The upper beam (for us it is a 200x200 pipe) now no longer needs to be adjusted to the diagonal and must be completely welded.


STAGE 3: pour concrete into the posts from above . This will prevent them from “playing” and will firmly establish them. The solution should preferably be very liquid, so that everything is as monolithic as possible and in a “proprietary” manner, even though it was made with your own hands.
STEP 4: remove guy ropes, winches . Just in case, we check the functionality of the structure (carefully) and lock it. We pour the reinforced belt on top of the walls, look through everything, weld the hinges tightly to the canvas and frame, and leave the concrete to harden.


Now we have looked at how to make a garage door and we have a ready-made design. All you have to do is wait about 1-2 weeks until the concrete hardens and “finish it with a file.” We will also need to weld the door leaf reinforcements and make niches for insulation (optional).
Strengthening and installing a lock on the garage door
A little time has passed and now we can continue our work in the future garage, install a lock and reinforcements. Previously, we looked at how to make a gate with our own hands, but we have not yet installed a lock and decorated it beautifully. The design is fixed and you can safely use it, we will finalize it as it should be and do it. Let's take a step-by-step look at our improvements to the gates:
STEP 1: add oblique reinforcements at the top and bottom of the sheets . It will be enough to make reinforcements at ¼ of the length of the side: they will give rigidity to the product. Spot welding every 5-10 centimeters.


STEP 2: We weld the locking box with our own hands . We used a regular flat lock (cheaper and more reliable). Therefore, it is enough to simply weld a box around the lock approximately equal to its volume.


STEP 3: fixation castle From the end of the door we drill 2 (3 or 4, depending on the type of lock) holes for attaching the base of the lock. We insert the lock into the box, screw it to the frame, and weld the box from the back.  STEP 5: installation of “shut-off valves”.
We finish welding the lock to secure the doors. Too bulky was not chosen on purpose, since it has a purely decorative look and for convenience.
STEP 5: installation of “shut-off valves”.
We finish welding the lock to secure the doors. Too bulky was not chosen on purpose, since it has a purely decorative look and for convenience. 
The only drawback of installing the lock this way is that to replace it you will need a grinder, which will be used to saw off several welding points. Although, perhaps this is even an advantage, since the lock does not need to be changed often. But the attackers clearly cannot cope without a heavy weapon.
Now the instructions on how to make a garage door with your own hands can be considered fully disclosed. All that remains is to cover it with primer and paint. If the welder did not work very carefully, then it makes sense to also grind the weld areas at the ends.
Happy construction everyone and have an extremely strong garage door!
To date, many garage door designs have been developed and put into practice. In terms of ease of use, hinged ones are in many ways inferior to sliding ones, but still remain the most reliable. There is simply nothing to break in them. The design is simple, so any car owner can make a swing gate for a garage with his own hands.
Swing gates can be either double or single leaf
Before you begin to implement your idea, you need to clearly understand what swing gates are, what elements they consist of and how they work. There are two types of this design:
- with one leaf;
- with two.
The first option is not suitable for a garage, since the dimensions of one door will be too large and it will be inconvenient to open it.
Double doors consist of several elements:
- frame made of metal corner, round or profiled pipe;
- valves;
- gates in one of the doors, if provided for by the project;
- loops;
- jib/beam/lintel;
- bolt and/or lock.
Assembly and installation of swing gates is simple. But those who do not have experience in manufacturing and installing such structures will need detailed instructions, taking into account all the nuances of each stage of work.
Advantages and disadvantages
The main advantage of swing gates is reliability. But this is far from their only advantage. The simplicity of the design provides other advantages:
- there is no need to configure and maintain the automation;
- among budget alternative options sectional, lifting and sliding gates there are no comparable in cost to swing ones - the latter are always more affordable;
- you can install automation: drives that open and close the doors;
- there is no need to strengthen the opening and the top floor, which is often required when installing sectional or overhead doors;
- the possibility of insulating the doors and frame;
- many door design options.
The main disadvantage is the need to get out of the car and close/open the gate under any, even the most unfavorable weather conditions. In addition, in winter it is necessary to clear the space in front of them from snow.
What materials can it be made from?

Swing gates made of profile pipes with correct production and long life is guaranteed
Despite wide choose building materials, reliable swing gates can be made in several ways.
Option #1:
- Metal corner 50x5033 mm - for making the frame of the doors and the jibs or crossbars reinforcing it.
- Sheets of cold-rolled metal 2.5-3 mm thick. They are attached to the frame with a 3 cm outlet. Welding is used.
- 4 loops with a cross section of 25 mm, dimensions 30x160 mm. Welded onto metal sheets through additional metal plates.
Option #2:
- Rectangular pipe 40x40x2.5 mm or 50-50-2.5 mm for the frame of the doors and reinforcing elements.
- Sheets of metal 1.5-2 mm thick are fixed to the frame with rivets.
- 4-6 loops.
- 4 metal plates for hinges.
For the installation of gate posts, pipes of 80x80x3 mm are used. The upper beam, which reinforces the opening, is made of channel No. 16 (shelf height 160 mm) or No. 18, depending on the width of the gate. The threshold can be made from the same materials: a profile pipe or a metal corner.
The most reliable way to install swing gates in a garage is to mount a frame from channel No. 24 under them and install it during the construction of walls and ceilings. If this is not possible, elements reinforcing the opening are installed: an upper beam, a threshold and racks for the sashes.
Reference! The proposed material options for installing swing gates in the garage are universal and suitable for any buildings: brick, concrete, wood, foam and gas blocks. The only exception is a garage made of metal profiles. Such buildings require lightweight structures.
For garages, “flexible” gates are made from metal profiles, so that each leaf can be pressed against the opening with minimal effort. The frame of such structures consists of a bent profile with an open section (l- or u-shaped). The sashes are installed on 4-6 hinges.
Gates with a rigid frame are designed and manufactured in such a way that the leaves fit the opening with a minimum gap and immediately close with the provided locks, without applying additional effort. Accurate data on the required materials in a particular case can be obtained through calculations.
Calculation

You can make the calculation manually, using formulas, or using a special calculator
Professional calculation of the strength characteristics and geometric parameters of materials for the manufacture of garage doors is carried out using a set of complex mathematical formulas. The following factors are taken into account:
- opening rigidity;
- deplaning deformations for given dimensions of the valves and the use of a certain material;
- bending strength;
- twisting forces (from wind pressure, weight load, mechanical influences).
Specialized calculators have been developed to perform accurate calculations. If necessary, you can use them.
Required materials and tools
To manufacture swing gates (with a wicket) with dimensions of 2200x3000 mm, you will need not only materials and tools. Adaptations will also be needed, since swing garage doors are manufactured/welded only in a horizontal position.
Materials

The profile pipe is ready for use
- Metal corner 50x50x2 mm, length 2.2 m - 2 pieces (a total of 4.4 m of corner will be required).
- Profile pipe 50x25x2 mm, length 3 m – 2 pcs.
- Sheets of cold-rolled metal (can be replaced with hot-rolled) 1250x2500 mm, 2 or 3 mm thick - 3 pcs.
- Profile pipe 40x25 mm (or 40x20 mm) 2.2 m long - 9 pcs (necessary for the manufacture of horizontal strips of sashes and gates).
- Profile pipe 40x20 mm, 3 m long – 3 pcs (for the manufacture of vertical slats for the frame of the sashes).
- Profile pipe 40x40 mm, 3 m long – 1 piece (for mounting a vertical strip at the junction of the working doors, holes for the lock and bolts are also formed in it)
- Additional elements: steel plates for hinges and to strengthen the joints of the frame, steel rods.
- Level lock.
- Garage bolts: vertical and horizontal.
- Primer for metal.
- Solvent No. 646.
- Dye.
- Insulating tape.
- Coarse to medium grit sandpaper.
Reference! Using a profile pipe to construct a threshold is a reasonable solution. With this design, the gate frames are raised above the level of the parking area by 20-25 mm. Due to this rainwater will not leak inside the room.
Tools
- Welding machine.
- Electrodes.
- Sledgehammer, hammers.
- Grinder, metal wheels.
- Drill, drill bits.
- Hammer.
- Screwdriver Set.
- Bolts with nuts, self-tapping screws.
- Clamps.
- Level (preferably laser).
- Tape measure or rangefinder.
Important! Before you start working with the welding machine, you need to make sure that the garage wiring can withstand this load.
When calculating and purchasing materials, take into account the need for framing (a double frame with horizontal crosspieces) of the garage opening. For its manufacture and installation you will need the same materials and tools. You can use a metal corner, channel, profile pipes. The strapping is an optional element of the gate design; it is necessary to strengthen the opening and the structure as a whole.
Adaptations
To perform cutting and assembly work, you will need two tables: the main and auxiliary. The dimensions of the main one should be such that both doors and frames fit on it. The table surface must be level. Otherwise, there is a high risk of distortion. The table must be durable, able to withstand the weight of metal, tools and blows with a sledgehammer.
Preparatory work

Preparing the opening
Preparing the opening involves performing several steps:
- Make sure that the walls on both sides of the opening do not have cracks or deformations.
- Dismantle the old structure, if any.
- Align the opening (if necessary).
- Clean surfaces from dirt, cement and plaster deposits.
Step-by-step instructions for making metal swing gates
Installation of metal swing gates for a garage can be done in two ways.
Option #1:

The Bulgarian went into action
Step 1. Cutting materials: cut corners and pipes with a grinder required sizes corresponding to the drawing or project.
Step 2. Assembling the double frame.
- Two vertical strips, the length of which corresponds to the height of the gate, are connected by welding to each other with horizontal jumpers (steel strips).
- Holes are drilled in the wall of the opening for fasteners, for which pins from reinforcement can be used. The minimum depth of holes is 200 mm.
- Dust the holes.
- They are filled with cement-sand mortar.
- Use a sledgehammer to hammer in the pins.
- On the protruding part of the pins, measure 50 mm and cut off the excess with a grinder. There is another option for performing this task: cut the pins flush with the frame and scald them after installing it.
- Install the frame.
- The protruding parts of the reinforcement are bent with a sledgehammer.
Installation work is performed using a plumb line and level. Install the second one in the same way vertical stand frames
Step 3. Marking the horizontal line for installing the top beam and threshold. When performing work, use a laser level.
Step 4. According to the instructions given in step No. 2, install the horizontal frame beams.
Step 5. The frame of both doors is assembled on the table. Do not forget about the need for reinforcing crossbars, which can be arranged in an x-shape, t-shape or according to the principle of horizontal jumpers. If a gate is provided, its frame is welded from the appropriate elements.
Step 6. Weld the hinges.
Step 7. Hang the sashes.
Step 8. Weld the metal sheets (sew up the sashes).
- Sheets for sash cladding must have an outlet at the top and bottom of at least 20 mm.
- The center should be covered by the overlap of one of the sashes.
Step 9. Clean the metal from the effects of welding.
Step 10. Cover with anti-corrosion primer.
Step 11. Install locks and latches.
Step 12. Paint the gate.
If necessary, insulate the doors and openings.
Option #2:

The second option for manufacturing swing gates is suitable if there are no conditions for construction perfectionism
This method of manufacturing a sash frame is optimal in situations where it is not possible to build a perfectly flat horizontal surface for assembling the frame.
Step 1. Making scarves. 4 identical strips 50 cm long are cut from a metal corner. They are grabbed at several points to the frame of the opening. Kerchief – auxiliary element, which will subsequently be cut with a grinder. Therefore, continuous welding is not required.
Step 2. Cut 4 strips to make the sash frame.
Step 3. The corners prepared at the previous stage are welded to the gussets so that a “frame within a frame” design is obtained. Continuous welding is needed only in the inner corners (for sashes).
Step 4. Installation of stiffeners. If one of the doors has a gate, its frame is welded.
Step 5. Installation of canopies/hinges. Use products with a male-female connection. The “father” is fixed to the frame of the opening, the “mother” is fixed to the gate wings.
Step 6. Using a grinder, cut the frame of the doors in the middle vertically.
Step 7. Cut off the scarves.
Step 8. The doors are sheathed with sheets of metal or other material chosen at the design stage.
Video: DIY swing garage doors
Features of care and operation
Properly manufactured and installed swing gates have a large margin of safety. To ensure that their service life is not exhausted prematurely, it is necessary to follow several simple maintenance rules.
- Keep metal structures clean.
- Renew the protective paint coating in a timely manner.
- To not allow mechanical damage trim: dents and paint chips.
- Do not clean painted structural elements using scrapers, stiff bristle brushes, washes or solvents.
- Before opening/closing the doors, make sure that there are no obstacles in the way of their movement.
- Do not allow weight loads on the gate leaves.
- The hinges are periodically lubricated with Litol or something similar.
The process of making swing gates in a garage is not as complicated as it might seem at first glance. All stages of this task, from design to painting the finished structure, can be done with your own hands. This will significantly reduce the cost of the garage improvement estimate.