For summer residents and owners of private houses, the question of how to insulate a house from the outside and with what remains one of the most pressing. How to properly insulate a house? Proper insulation of external walls not only creates a positive microclimate inside the home, but is also very economically beneficial. After all, the need to constantly use heating systems in cold weather is eliminated - therefore, you pay less for electricity. The second aspect is the constant “correct” temperature indoors, the absence of humidity and, as a result, the elimination of the appearance of fungus, mold, and putrefactive processes.
You can insulate the outside of your house with your own hands using various modern materials. Initially, you need to look at what the walls of the house are made of, and then decide on the choice of insulation. Each insulation has its own fastening technology. External thermal insulation It is also good because it does not reduce the volume of the room, does not provoke the accumulation of moisture, and prevents “sweating” of the walls. Let's consider the most commonly used insulation materials and the specifics of their installation, methods of insulating a house from the outside.
Foam insulation
Insulate the house from the outside with polystyrene foam - rational decision. This home insulation is good for everyone: it is lightweight, inexpensive, and does not require the use of any special technologies or tools.
Installation steps:
- First you need to prepare the surface, level it well. Polystyrene foam is produced in the form of slabs, therefore, the smoother the outer part of the wall is, the better the fit (no voids), the less labor costs it will be possible to insulate the house.
- The surface should be thoroughly cleaned and primed to eliminate any remaining glue or whitewash.
- Next comes the installation of external window sills (sills).
- Installing a starting bar - a base that will prevent the foam slabs from sliding down. This element also helps to lay the slabs evenly (keep the line).
- To insulate a house, laying foam insulation begins from the bottom of the wall; the accuracy of the installation of the bottom plate is responsible for the evenness of all subsequent rows. Universal adhesive for facade work is suitable for attaching the slabs, silicone sealant, glue for tiles, other varieties. Some craftsmen recommend securing the slabs with nails for greater reliability (3 days after installation). However, in this case, one should take into account the characteristics of the material from which the walls of the building were erected, whether it will be possible to use nails in this case.
As for houses made of timber, before insulating a wooden house from the outside, carefully examine the surface for holes and cracks, and then seal them with mineral wool, polyurethane foam or ecowool. There should be no drafts or air pockets.
Before we begin describing the characteristics of another insulation material, it is worth clarifying some nuances regarding foam plastic. To the frequently asked question: is it possible to use it to insulate a house from the outside, the answer will be positive - yes, it is possible.
It is characterized by fairly good thermal insulation parameters, but there is an opinion that it is short-lived, has high flammability, and is unsafe from an environmental point of view.

Let's look at these factors in more detail:
- Polystyrene foam contains polymer additives that are truly flammable. However, danger can only arise when the installation of the slabs was carried out incorrectly, safety requirements and operating rules for this particular material were not observed. It is quite successfully used on different stages construction of houses, if all stages of the insulation “pie” are carried out correctly, then everything will be fine. Its combustion temperature is 491 degrees, which is almost twice as high as that of wood or paper-containing materials. Thus, in terms of flammability, it is no more dangerous wooden furniture or gender.
- It is difficult to voice an objective opinion regarding the durability of polystyrene foam, for the reason that it is relatively young. When choosing, pay attention to its manufacturer, as well as its quality. Most manufacturers guarantee its service life as insulation up to 70 years, taking into account temperature fluctuations from -40 to +40°C.
- Polyfoam is not poisonous, non-toxic, biologically neutral. There has never been a single case where a builder or a person constantly working with him became poisoned or fell ill. When contacting it, you do not need to wear respirators or protective gloves. It is distinguished by its “breathing” effect - this allows you to maintain an acceptable level of humidity indoors.
- On forums dedicated to construction topics, you sometimes find information that foam insulation does not provide heat gain. This opinion is correct, but we should not forget that it perfectly retains heat in the house. If you decide to insulate the walls with it, then approximately 30% of the heat that previously “went” outside will remain indoors. It is very important, before insulating the outside walls of a private house with penoplex or polystyrene foam, to determine its thickness required specifically for your home.
Comparative characteristics of materials for insulation
Very often you can hear the question, what is the difference between polystyrene foam and penoplex? These thermal insulation materials are indeed practically the same: both are light in weight, moisture resistant, do not rot, and are resistant to solvents and acetone. Both have a “related” origin - the method of foaming polystyrene. In appearance, their difference lies in their different colors - penoplex has a yellow-orange color. But when the question arises, what is the best way to insulate the outside walls of a house with foam plastic or penoplex, the latter demonstrates higher density, moisture resistance, and air tightness.

If you live in the zone high humidity, then when choosing insulation for external walls it is better to opt for penoplex. Is the same mineral wool in such conditions it is completely unsuitable for insulating walls and foundations.
A short list of penoplex characteristics:
- higher density, respectively, slightly reduced thermal insulation performance;
- higher moisture resistance;
- higher degree of flammability;
- It is treated with fire retardants, which is why its environmental friendliness suffers.
In turn, foam plastic:
- lower density (fragile);
- higher thermal stability (due to the loose structure);
- the degree of moisture resistance is lower (again, due to looseness);
- low sound insulation performance;
- performs better in combination with other more durable building materials.
Otherwise, they are almost the same, the choice is yours with what to insulate.
Now let's look at what is better to insulate the house from the outside, foam plastic or mineral wool? Again, the choice is always determined by many factors: price, climatic conditions, the material from which the house was built. For example, for wooden house mineral wool is optimally suited ( stone wool, glass wool), it is a non-flammable building material. When working with mineral wool, you should wear protective clothing, gloves, and a respirator.
If we consider the characteristics of both insulation from manufacturers, approximately the same thermal conductivity parameters will be indicated. In fact, this is not entirely true - foam plastic when insulated shows top scores. It can only be compared with dense balsalt wool in slabs - one of the varieties of mineral wool. In terms of ease of installation, foam insulation also wins: no protection when working with the material, low weight, no dust during processing. Plus, insulating with polystyrene foam is cheaper than using mineral wool.
Mineral wool performs better at joints, cold bridges are practically eliminated, while polystyrene foam suffers from this. The problem is solved if for certain stages of work you choose sheets with an L-shaped edge. How to insulate the walls of a house from the outside, if they have uneven surface? Mineral wool is good because it can be cut into fragments of any shape and size - this is very convenient for insulation uneven walls. For foam insulation, the surface must be flat.
Sometimes they are used together, this technique is called multi-layer thermal insulation. In such cases, the foam should be located under the mineral wool. Mineral wool should act as the top layer.

How to insulate a block house from the outside?
Some modern building materials used to build houses initially have high thermal insulation properties. Often the manufacturer assures that a house built from this material will not need additional insulation. This is not always the case; let’s take, for example, aerated concrete - an excellent environmentally friendly building material with a cellular structure. It really has high thermal insulation performance, but it also needs insulation.
How to insulate a house made of aerated concrete from the outside? Due to their high vapor permeability, polystyrene foam or penoplex should be immediately excluded. If air exchange between interior space and the external environment, condensation collects at the boundary of the wall and the thermal insulation material (which is why it is constantly wet). If aerated concrete gets wet, it will develop mold, fungi, and putrefactive processes. In this situation, polyurethane or mineral wool in the form of mats would be appropriate as insulation.

Initially, the surface of the wall is cleared of debris and then primed. Any unevenness is plastered with a special mixture.
Installation steps:
- Mineral wool in mats is attached to the treated surface with suitable adhesive mixtures, but in no case with dowels.
- Fiberglass is laid on top (silicate glue helps), it acts as a reinforcing layer.
- To insulate those places where window or doorways, the insulating material is mounted with reinforcing mesh or corners.
- Then comes the turn of plaster and finishing, for example, coloring.
The presence of high-quality waterproofing is extremely important for walls made of aerated concrete, since the porous structure actively absorbs moisture. When insulating such a house, you should exclude dowels and screws, since any minor chips or cracks can lead to disastrous results for the entire structure. Suitable adhesive mixtures or chemical anchors may be used.
How to insulate a house made of timber from the outside?
Now let's look at how to insulate a house made of 150x150 timber beams from the outside. In theory, it would also be possible to use polystyrene foam or penoplex here, but there is one “but” - for wooden houses they are not suitable due to ventilation requirements. Mineral wool allows air to pass through well and at the same time provides thermal insulation. In turn, polystyrene foam provides a reliable barrier to cold, but does not allow free air exchange, which is important for houses made of timber. If wooden walls are insulated with it, then after some time fungus and rot will appear on them, especially since in winter there will be nowhere to escape the condensation.

In addition to mineral wool, waterproofing will be required, construction stapler, self-tapping screws with anchors, a protective antifungal agent, which will need to be pre-treated with the surface of the walls.
The installation steps are as follows:
- wall preparation;
- laying the first waterproofing layer;
- installation of sheathing;
- laying mineral wool;
- installation of the second waterproofing layer;
- how to cover the insulation on the wall outside the house? The last stage coming decorative plaster or sheathing with siding (or other suitable material).
Mineral wool should be placed tightly, without through gaps. Vents should be left below, near the foundation and above, under the roof overhang, to ensure air circulation and steam removal (so that condensation does not settle on the vapor barrier layer).
Base insulation
What is the best way to insulate the basement of a house from the outside? The base also absorbs precipitation, which means that the insulation for it must have reliable waterproof qualities. This part of the house can be insulated using foaming agents, mineral wool, and polystyrene foam. Each of them requires individual approach, installation features. However, the best and easiest to work with is polystyrene - durable, strong, and moisture-resistant. By all parameters this material most beneficial among other insulation materials.

Before installing polystyrene boards, the surface must be treated with a primer. Fastening is done on top of the waterproofing layer, polyurethane glue or using bitumen-polymer mastic. It is important that the adhesive mixture does not contain solvents - this destroys the material. The thicker the slab you choose, the better the insulation will be.

Any house, no matter what it is built from, needs proper insulation. The answer to the question of how to insulate a house from the outside and with what will depend on many factors: the original material of the building, the atmospheric characteristics of the region, the cost of the insulation. In any case, it is better to spend money once on high-quality insulation outside than to give heat to the street for years and heat the house around the clock.
The problem of heat loss in private residential buildings has always existed. In some places, heat is lost uselessly through the roof, in other houses it is wasted through the foundation. However, the main part is spent through wall structures.
To this day topical issue What remains for homeowners is how to avoid unnecessary waste of thermal energy? Therefore, let’s try to figure out how to insulate a house, which material will best cope with the tasks.
Choosing thermal insulation
After constructing the frame of the building and laying the walls, the important stage- insulation of housing. By selecting the most effective thermal insulation material, you can create the maximum barrier to useless heat transfer.
Currently common insulation materials are Russian market are: mineral wool, polystyrene foam, extruded polystyrene foam, glass wool, expanded clay, ecowool. Let's take a closer look at the features of each heat insulator.
An extremely popular material that has been successfully used as insulation for many decades.
The advantages of mineral wool are:
- low thermal conductivity coefficient ranging from 0.041 to 0.044 W/m3;
- good compressive density - up to 200 kg/m3;
- high fire safety - withstands exposure to elevated temperatures up to 1000 oC;
- excellent sound insulation.

Despite the obvious advantages, the material has a significant drawback - the ability to absorb moisture. Therefore, it is impossible to do without laying an external waterproofing layer during its installation.
In addition, for insulating walls from the inside, mineral wool is unlikely to be the best option, since it takes up too much useful volume.
The material is in wide demand for domestic market on a par with the previous insulation, mainly due to increased resistance to moisture. The thermal conductivity coefficient of polystyrene foam is an order of magnitude lower compared to mineral wool. However, the density suffers somewhat when compressed. The material does not resist mechanical stress very effectively. Therefore, polystyrene foam boards are easy to damage.
The density of foam plastic ranges from 11 to 35 kg/m3, depending on the brand. The compressive strength of the slabs is 0.05-0.16 MPa. The same bending quality of the material is 0.07-0.25 MPa. Thermal conductivity coefficient is 0.033-0.037 W/m3.

Advantages:
- does not need protection with moisture-repellent coatings;
- has little weight;
- acts as an effective heat and sound insulator;
- is one of the most accessible, relatively inexpensive solutions.
Among the disadvantages, it is worth noting the presence of a danger of fire of the material with the release of caustic, toxic smoke, causing harm to health when used at elevated temperatures.
In the past, the material was the most common basis for home insulation. However, the reason for the popularization of insulation was not so much its characteristics as the lack of more effective insulation materials.

Made from molten glass fibers. Hence the name of the material. It has decent thermal insulation qualities, which are only slightly inferior to mineral wool. Thermal conductivity ranges from 0.03 to 0.052 W/m3. Resistance to elevated temperatures reaches 450 °C.
The advantage of this solution is the absence of toxic fumes during fires. The disadvantages include inconvenient installation, significant shrinkage and increased hygroscopicity.
Belongs to the category of innovative cellulose-based insulation. Suitable for and outside. However, laying the material requires a special unit that combines the substance with water, forming an insulating mass of the required consistency. The dry insulation method does not allow the coatings to be insulated hermetically.
Material qualities:
- specific gravity – 25-75 kg/m3;
- thermal conductivity – 0.037-0.042 W/m3;
- the ability to accumulate moisture and its rapid evaporation without loss of insulating properties;
- effective absorption of sound waves;
- fire and environmental safety.

It consists of the smallest wood fibers, so it does not hide potential harm to health. As practice shows, the heat insulator does not emit toxic substances, prevents the development of mold and does not emit unpleasant odors.
The only drawback of insulation is the need to use specialized equipment.
Essentially, the material is insulating boards, the structure of which is formed by small plastic granules. To obtain a sheet of extruded insulation, a blowing agent is mixed with granular particles under the influence of high pressure and temperatures. The result of production is colored or transparent slabs.

Properties:
- practically complete absence of moisture absorption;
- the lowest thermal conductivity coefficient in comparison with any other common thermal insulators;
- ability to transmit light;
- frost resistance;
- lack of tendency to rot, mold development;
- highest compressive strength;
- It is considered an ideal option for thermal insulation of buildings both from the inside and for external work.
If we talk about the disadvantages of a heat insulator, then, just like ordinary foam plastic, the material suffers somewhat from fragility. Therefore, its installation and operation requires careful handling.
Represents bulk insulation. It has decent thermal conductivity and vapor barrier properties. Most often used for insulating floor coverings. Although it is ideal for insulating walls using the ring masonry method.

Expanded clay is characterized by moisture absorption at a level of about 8-20%. Due to the presence of a significant proportion of clay in the composition, it has increased sound insulation. Has high frost resistance. The thermal conductivity coefficient is 0.10-0.18 W/m3, which indicates decent thermal insulation qualities of the material.
The disadvantages of expanded clay include its tendency to form dust, which makes it difficult installation work, and significant weight of the thermal insulation layer.
How slowly the insulation absorbs moisture, the longer it takes for it to be freed from it. Therefore, when laying expanded clay, it is necessary to provide in advance options for its vapor and moisture protection.
The choice of insulation directly depends on the method of work. There are several ways to externally insulate a home:
- ventilated facade systems;
- laying insulation under plaster.

The technology for creating ventilated facades involves installing insulation directly on the outer surface of the walls and insulating it with an airtight membrane. At a distance of 2-4 cm from the outer membrane, cladding in the form of siding, drywall, etc. is attached.
Material
The use of polystyrene foam in this case becomes unacceptable, since the presence of a ventilated space increases the likelihood of the material catching fire. The advantage of the insulation method is the possibility of laying inexpensive insulators in the form of mineral wool or glass wool, since here the heat insulator does not bear the load of the outer layer.

As for insulation under plaster, for this purpose insulation is laid on the surface of the wall. The insulator is secured with dowels or glued to a special mixture. Decorative plaster or primer is applied on top.
The insulation method involves creating a three-layer structure, when between the wall from the inside and external cladding the selected thermal insulator is installed. Interior wall connected to external embedded anchors. The most common insulation materials here are polystyrene foam and mineral wool.

This method of insulating a house is one of the most effective. However, its main disadvantage is the ability to perform work only during the construction of housing.
Thermal insulation from the inside of the building is a less preferable option. Since in this case the “dew point” shifts towards the insulation, which leads to its getting wet. In addition, with this method of insulation, the area of the rooms is noticeably reduced.

However, there are cases when the creation of an external thermal insulation coating walls turns out to be impossible. For example, when the wall of a neighboring house is adjacent or the facade of a building is of cultural value. Therefore, insulation from the inside also has a right to exist.
What to choose?
If the inner plane of the walls will be plastered, the insulation can be mineral wool, ecowool or low-flammability foam. Before insulation it is worth once again calculate the likelihood of exposure of the insulator to an abundance of moisture. With this method of insulation, condensation quickly destroys the insulation, its effectiveness decreases and there is a high probability of fungus appearing.
Eventually
What is the best way to insulate a house? Widest choice heat-insulating materials for home insulation often leads to complete bewilderment of homeowners who dream of living in the most comfortable conditions. Some prefer glass wool, proven by practice and time. Others rely exclusively on advanced technologies.
Relying on beneficial features common materials, rationally use them in competent combinations. So, the most economical and at the same time sufficient effective solution To insulate the walls of a house, there will be a combination of the qualities of mineral wool, expanded clay, glass wool and polystyrene foam. Isolate hard to reach places better than ecowool, tightly filling any unevenness with the composition.
Expanded polystyrene boards are recommended for use in the most humid climates. The material retains its properties for decades under conditions of intense exposure to factors environment. The components of the heat insulator do not react with atmospheric chemicals, which becomes an indispensable quality when insulating houses located in industrial regions.
Currently, when constructing new buildings, developers pay attention to Special attention thermal protection of external walls. This is required not only by building codes, but also by the desire to increase their competitiveness. However, the situation with walls in old houses is somewhat different. Owners of private houses have to insulate their premises with their own hands in order to keep the heat inside and leave the cold outside.
There may be several reasons for the decrease in temperature inside the house: poor heating system, presence of cracks, drafts. However, the most common reason is poor wall insulation. Walls occupy the largest area in a room and are the main source of heat loss. There are several ways to insulate the walls of a private house from the outside.
Why insulation should be carried out outside
- When insulating a house from the outside, the material protects the walls not only from heat loss, but also from the negative effects of moisture. Home warmth warms up the wall and, in case of moisture penetration and condensation, helps it dry out quickly.
- moves closer to the outer edge of the wall. This prevents condensation.
- Insulating the outside of the house with your own hands not only protects the room from the cold, but also preserves the usable area of the rooms.
Options for insulating walls outside
There are several options for how best to insulate a private house outside:
- Installation of heat-insulating material on the wall using an adhesive solution and further covering with plaster.
- Formation of a three-layer non-ventilated wall. The insulation is fixed with a solution. Next, the outer wall is laid in one layer of brick, taking into account the air space.
- Installation of a ventilated facade. Insulation is attached on top of the waterproofing, on which the wind protection is installed. The final stage is covered with decorative clapboard or other siding.

Each method has its own nuances in execution. Exist combined materials, as well as modern modified ones, when installing which you should adhere to special technology. can be carried out even in the cold season, since its technology does not involve the use of an adhesive composition.
What is the best way to insulate a house from the outside?
There are several types insulation material. Each of them has its own characteristics and price range. The following insulation materials are considered the most popular:
- polystyrene foam (expanded polystyrene, extruded polystyrene foam);
- mineral wool;
- polyurethane foam;
- basalt slabs;
- cellulose-based insulation materials.
Proper insulation of the walls of a house from the outside with your own hands depends on the choice optimal option wall insulation. The main differences between the above materials are vapor permeability, moisture resistance and thermal conductivity. The first two parameters are selected based on the climatic conditions, as well as the method of fastening to ensure maximum protection of the room from dampness. Thermal conductivity is taken into account in the calculation required thickness to achieve optimal effect.
Calculation of insulation thickness
Insulation work should begin by calculating the thickness of the heat insulator. Calculations are carried out based on data from SNiP, GOST and SP. If you cannot carry out the calculations yourself, it is better to use the services of private design organizations. The thickness of the insulation depends on the heat loss of the house through the external walls, window frames, foundation, ceilings and roofing. Taking into account the data obtained, and also taking into account the power heating system, calculate the thickness of the thermal insulation layer.

Next, they decide on the choice of material and insulate the house from the outside with their own hands. It is important to consider not only the type and size of the heat insulator, but also the number of layers required. For example, it is better to abandon polystyrene foam if laying in several layers is required. Mineral wool or polyurethane foam, the thickness of which is much thinner, is suitable for this.
Preparing walls for insulation
After choosing the best way to insulate the house from the outside, the main work begins. The main goal is to prepare the walls for further installation of the material. To achieve perfectly smooth brick, wood or concrete surface completely removable old layer plaster or other insulator.
Particular attention should be paid to priming the walls. If there are differences in levels on the wall (protrusions and depressions over 2 cm), it is better to seal them with a special solution or comb them to the required level. A primer with deep penetration should be used. Before applying the primer, the wall is cleaned of dust and dirt.
In order for the insulation for the walls to lay down in an even layer on the outside and not interfere with the construction external wall made of decorative brick or plastering, you should think in advance about a system of plumb lines and beacons. They are used to determine the plane of the outer edge of the insulation, which facilitates its installation.
Anchors or screws are installed to the upper edge of the wall. A strong thread is tied to them and lowered plumb to the very bottom. Horizontal threads are attached between them, which form a control grid. It serves as a guide when installing the frame or installing insulation.
Installation of polystyrene foam and extruded polystyrene foam (EPS)

The foam is attached to the wall using a special glue for polystyrene foam boards. Sometimes construction “fungi” are used for these purposes.
When insulating EPS walls, the surface on which the adhesive solution will be applied is made rough. This promotes more reliable bonding. There are no such problems with polystyrene foam, since the glue fixes it without additional processing.
Often, both glue and “fungi” are used simultaneously to strengthen the fastening. This is a more correct solution that extends the service life of the insulation.
The final stage of insulating the walls from the outside is the application of plaster or cladding with decorative materials.
How to insulate walls in a private house from the outside with foam plastic using wooden slats
In practice, another method of fastening foam sheets is used - by forming a frame from wooden slats.
To construct the frame, slats are used, the thickness of which is no less than the thickness of the insulation. If the thickness is a little greater, this will create a ventilated space between the insulation and the facing material. The distance between the slats is calculated in such a way that the slabs are tightly inserted into the niches and do not fall out.
This type of installation is acceptable if siding or lining will be used to finish the walls. The slats will serve as the basis for fastening facing material.
fastening features
Using mineral wool, you can also insulate a private house from the outside. The materials and tips for performing the work are similar to the instructions for fastening basalt slabs and cellulose-based insulation.

For more reliable installation of mineral wool sheets, a frame system from wooden slats. The width of the lathing should be 2-3 cm less than the width of the heat-insulating material. This ensures that the mineral wool fits tightly between the beams and there are no gaps. Additionally, anchors are installed, onto which insulation sheets are subsequently placed. If the wall surface is uneven, two-layer mineral wool is used, the layers of which have different densities. The soft layer provides reliable adhesion to the wall.
In respect of exterior finishing mineral wool is more versatile, unlike other types of heat insulators. On top of the insulation, you can install an external horizontal cladding, under which a windproof layer is attached in the form of a dense polyethylene film. Used for wall cladding decorative brick, clapboard or other siding. This technology allows you to create three-layer ventilated insulation, which is suitable for most climate zones.
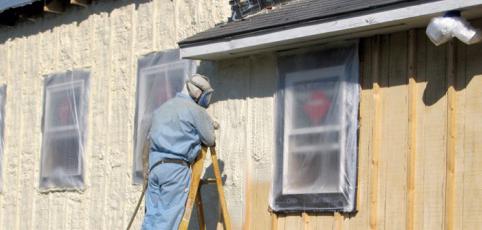
How to insulate walls in a private house from the outside with polyurethane foam
The principle of installing polyurethane foam is similar to the technology of attaching mineral wool. However, it is almost impossible to insulate walls using this material yourself. The method involves the use of special expensive equipment that distributes liquid mixture over the treated surface. In addition, without professional skills, working with the installation causes many difficulties.

The main feature of this method of insulation is the very fast completion of the work. Using the above installation, polyurethane foam is sprayed onto the surface. As a result of a chemical reaction, the liquid substance is transformed into a solid state and foams. The insulation does not form an air space between the wall and the heat insulator, which provides a stronger and more durable coating.
Features of polyurethane foam
Polyurethane foam has many advantages, including:
- after hardening, fills all cracks and depressions;
- vapor permeability is significantly lower than that of other materials;
- quickly and securely fixed to the wall;
- excellent mechanical strength;
- good heat and sound insulation.
However, the cost of the material and its installation are quite expensive. Durability and high quality indicators justify the high costs of its installation.
If sooner or later the question arises about how to insulate a house from the outside with your own hands, instructions for using polyurethane foam will help solve the problem of heat loss and save comfortable temperature in room.
Regardless of what material is used as a heat insulator, any of the above options copes with its main task - insulating the room. In addition, external insulation allows you to retain heat and protect the surface from dampness. He will tell you how to insulate the walls of a private house from the outside. step-by-step instruction And practical recommendations specialists.
Building materials are becoming more and more expensive every day. In this regard, the question is increasingly being asked: is it possible to make insulation with your own hands? Fortunately for many ordinary people, this is a completely solvable task, and the final result will be very productive. Next we will consider the two most interesting methods.
The entire post-Soviet space is rich in luxurious forests. Therefore, since ancient times, sawdust has been actively used in various fields of construction, in particular as insulation. Another reason for the popularity of this natural raw material is the ability to give it any condition with your own hands.
To use sawdust as insulation, it must be prepared in a certain way. Otherwise, they will rot after the first winter, and you will have to redo all the rather labor-intensive work. You will need to create the so-called “sawdust blocks” with your own hands. This procedure is performed in the following sequence:
- The quality of sawdust is assessed. In particular, they must be without impurities and have approximately the same fraction. If any foreign debris or impurities are observed, the mass will have to be cleaned.
Advice: you should not use “fresh” sawdust, that is, which has recently been used up. Perfect option, when they are about a year old, in this case they turn out to be more pliable.
- The starting material must be well dried. Ideally, scatter it in a sunny attic. If you do not have a large room, you can use convectors.
- When the raw materials are completely dry (this can be determined by touch), large containers of at least 100 liters are prepared. Next, the mixture is mixed in the following proportion: 10 buckets of sawdust x 1 sand (necessarily cleared of foreign impurities) x 0.5 cement (the stronger the brand, the better).
- The resulting powder mass is filled with a solution boric acid. Boron itself can be bought at any pharmacy or chemical store, and it is quite inexpensive. If you do not use this solution, then after the first freezing the insulation will turn black and lose its quality. In addition, it will provide moisture resistance.
- This mixture is then thoroughly mixed. Doing this with your own hands will be extremely problematic, so it is better to use a drill with an appropriate attachment. The resulting composition is poured onto the floor (or ceiling) between the joists.
The resulting thick mass will become a solid and monolithic material, but this will take a lot of time - from 2 to 4 months. Therefore, it is best to carry out such work in the spring or early summer, so that the insulation has time to acquire the qualities it needs before the onset of cold weather.
Another eco-friendly material is waste paper.
The above technology is relevant only for insulating the floor or ceiling, but what to do with the walls? There is another cheap (or practically free) raw material from which you can make a good heat insulator - waste paper.  This insulation is also made as simply as possible:
- Absolutely any waste paper is taken (in other words waste paper). The required quantity is almost impossible to predict, as it will depend on many factors.
Advice: it is best to use low-grade waste paper, as it has better properties necessary for protection from the cold.
- A container of at least 100 liters in volume is prepared. Then carefully shred the paper to a fraction no larger than 1×1 cm. Manually this work will take quite a lot of time, so it is ideal to use a shredder or extruder.
- The crushed mass is placed in a container and filled with water at the rate of 20 liters of water per 1 kg of raw material. The solution is thoroughly mixed. You can do this manually, using, for example, a shovel, but it will take a very long time. Therefore, it is recommended to use a drill with an appropriate attachment.
- Then you need to add hydrophobic agents (any of your choice) to the resulting composition. They will protect the material from moisture. It is also necessary to use an antiseptic (it will protect against fungi and mildew) and soda ash(it will increase fire resistance). Soda consumption: 100 g per 200 kg of finished mixture. The resulting mass is left for 3-4 days to “set.”
- After waiting for the composition to be “cooked,” you need to mix it (with the same drill) and pour it into the mold for pouring. It can also be made from any available materials, the main thing is that a fine mesh serves as the bottom. The thick mixture is placed in a mold and left for 3-7 days (depending on the weather). At the end of this period, it will turn into a monolithic insulation in the form of a slab. You can use it to decorate walls by placing it on any glue, because the weight of the material will be quite small.

The nuances of using such technologies
Anyone who decides to make insulation with their own hands should know a few important features similar techniques:
- The resulting heat insulators are not relevant for cold regions. Unfortunately, this technology is not very effective. Therefore, it can only be used in temperate climates. To organize an effective thermal insulation layer in the northern regions, it will have to be very thick (50-100 cm), which is not entirely rational.
- Materials obtained from environmental materials(especially sawdust and waste paper) are not durable. Despite the use of various additives, they begin to rot over time. Therefore, you need to be prepared for the fact that you will have to regularly (on average once every 4-5 years) “reboot” the thermal insulation layer.
- This technology also has one important advantage - the insulation materials made by yourself are absolutely environmentally friendly. In this aspect, they clearly outperform penoplex and mineral wool, which are popular today.
- Natural origin attracts various insects and rodents. Therefore, the use of such materials obliges to create additional protection from similar factors (repellents, traps, etc.).
September 7, 2016
Specialization: facade finishing, interior decoration, construction of cottages, garages. Experience of an amateur gardener and gardener. We also have experience in repairing cars and motorcycles. Hobbies: playing the guitar and many other things that I don’t have time for :)
Insulating a house from the outside is, on the one hand, a fairly simple procedure that you can handle on your own, even without any experience. But, on the other hand, this operation raises a lot of questions, and also requires strict adherence to technology, otherwise the result will not meet your expectations. Therefore, below I will describe to you several ways to perform external insulation as efficiently as possible and without damage to the structure.
Methods of external insulation
Many people who are faced with insulation for the first time do not know how best to place thermal insulation from the inside or outside. According to SNiP 3.03.01-87, in private houses, for a number of reasons, external thermal insulation should be performed:
- if you place the heat insulator from the inside, the walls will freeze even more than before insulation. Moreover, a heat insulator will form in the space between the wall and the insulation;
- It is impossible to provide thermal insulation of the ceiling from the inside, resulting in insulation that is inadequate;
- Internal insulation reduces living space.
Thus, the answer to the question posed above is unambiguous - internal insulation is carried out only in cases of extreme necessity.

So, if you decide to insulate the outside of the house with your own hands, you will need dry thermal insulation material in the form of slabs or mats. As a rule, mineral wool or polystyrene foam is used as insulation. With their help, you can insulate the facade in several ways:
- wet facade – the technology consists of gluing insulation and applying plaster on top of it. This method is widely used due to its relative cheapness. Its disadvantage is the low strength of the facade and fragility, compared to other finishing methods;

- curtain façade– is a frame to which facade materials are attached (siding, lining, facade, etc.). The insulation is located in the space between finishing material and a wall. This finish is more durable, but at the same time costs more;
- cladding with thermal insulation blocks, which can be made of wood concrete, foam concrete, gas silicate, etc. I must say that thermal insulation properties These materials are worse than polystyrene foam or, for example, mineral wool. But they have higher strength.
If, for example, you need to insulate an old wooden or country house frame house, then this method of insulation is the best solution. Moreover, block insulation can be combined with other heat insulators.
Everyone must decide how and with what to insulate the house from the outside, depending on the situation, financial capabilities and wishes regarding the design of the facade. As you can see, each of these methods has its own advantages and disadvantages.
Below we will consider in more detail all the insulation options described above.

Wet facade
First of all, I will tell you how to properly create a wet facade. To do this you will need the following materials:
- insulation in the form of mats or slabs (mineral wool, expanded polystyrene or extruded polystyrene foam);
- special dowels for insulation (“fungi”);
- glue for insulation;
- aluminum perforated corners
- fiberglass mesh;
- primer;
- decorative plaster;
- dye.
Before buying a heat insulator, people are always interested in what is the best way to insulate a house from the outside? If the house is brick or made of other non-combustible materials, you can save money and use polystyrene foam. If the structure is wooden, it is necessary to use mineral wool, which will serve as fire protection.

The process of installing insulation with your own hands looks like this:
- first of all, you need to prepare the facade for work - dismantle all elements that will interfere with the installation of insulation;
- then you need to dilute the glue with water according to the instructions on the package;
- Next, the glue is applied to the surface of the insulation using a notched trowel. If the walls are uneven, you can apply glue in “blobs” in the corners and in the center, which will give more opportunity to align the slabs relative to each other.

It should be noted that on at this stage it is necessary to ensure a smooth vertical surface of the walls, therefore, in the process of gluing the insulation, you need to use a level and beacons (a horizontally stretched thread along the wall along which each row of heat insulation is aligned);
- then the insulation is additionally fixed with dowels. To do this, holes are drilled in the wall directly through the slabs or mats. The dowels must be driven in so that they are recessed and do not protrude above the surface of the wall;

- The slopes are glued over in the same way, the only thing is that they are not fixed with dowels;
- after this, the evenness of the walls should be checked as a rule; if necessary, individual areas can be floated;
- after that for everything external corners perforated aluminum corners are glued;
- then the screw caps are covered with glue;
- The next step is gluing the mesh. To do this, you need to use the same glue that is applied with a spatula to the surface of the insulation. A mesh is immediately applied to the treated surface and a spatula is passed over it, as a result of which it is embedded in the adhesive composition.

I note that the mesh must first be cut into sheets of the required length, taking into account the fact that it should be overlapped and turned over at the corners;
- After drying, the glue is reapplied to the surface of the walls in a thin layer. In order for the composition to lay down evenly, the solution must be made more liquid than for gluing;
- when the glue has dried, the surface is treated with a primer using a paint roller. The composition is applied in two passes;

- After the soil has dried, decorative plaster is applied to the surface and leveled with a fine trowel. When the composition begins to set, the plaster is rubbed with a small brush in a circular or reciprocating motion;
- the final stage is painting. There is nothing complicated in this procedure - the roller must be dipped into a bath of paint and then treated with it on the wall. The paint is applied in two layers.
This completes the work. It should be noted that this technology can be used to insulate not only a private house, but also an apartment.

Curtain facade
Making a curtain façade on your own is no more difficult than a wet one. To do this, you need to prepare the following materials:
- insulation in the form of mats or slabs;
- metal profile or wooden beam for mounting the frame;
- adjustable brackets;
- vapor barrier film;
- dowels for insulation;
- finishing material for the facade.
Many people are sure that the cheaper the heat insulator, the better. However, the same mineral wool or polystyrene foam comes in different qualities. For example, cheap mineral wool can be exposed to moisture, and polystyrene foam can easily ignite and sustain combustion, so it is better to use materials from well-known brands, even if they are not the cheapest.

Insulation instructions look like this:
- After preparing the facade, you must first carry out installation. There are quite a lot of options for its design and placement of insulation in it. Most often, racks are mounted on brackets, between which mats or slabs are placed.
It must be said that installation of the frame is the most critical stage, since the evenness of the walls depends on it. Therefore, all racks must be placed in the same vertical plane;

- then insulation is laid between the racks and fixed with dowels;
- then a vapor barrier film is attached over the insulation. As a rule, it is fixed on a frame. To do this, you can use slats that are mounted horizontally, with the film located between them and the racks;
- At the end of the work, the frame is sheathed facade material, after which additional elements are installed - ebbs, corners, etc.
That's it for the montage. curtain façade completed with your own hands.

Cladding with thermal insulation blocks
If you need to insulate an old, for example, log house, then it is better to build additional walls for it, which will also serve as insulation. Of course, this will require more time and effort, but the result is well worth the expense.
There are quite a lot of options for covering walls. The most common materials are:
- blocks from Sibit (it would be more correct to say aerated concrete, since Sibit is the name of the enterprise, which people began to call the material it produces);
- wood concrete blocks - made from wood chips mixed with cement;
- gas silicate blocks - resemble aerated concrete, however, their composition is based on lime. In addition, this material is obtained by autoclave;
- made of polystyrene concrete – contain foam granules in their structure;
- from expanded clay concrete – contain expanded clay granules in their structure.

So that you can decide on the materials yourself and understand, for example, why a gas silicate block is better in comparison, for example, with aerated concrete, below I will provide a table with the main characteristics of these materials:
As we see, some materials benefit in strength, others – in thermal conductivity. Eg, gas silicate block more durable than wood concrete, but at the same time it is more heat-conducting.
Certainly, important factor The choice is also the price of the material. Arbolite blocks cost about 4,000 rubles per cubic meter, and polystyrene concrete material costs about the same. The price of gas silicate is slightly cheaper - about 3,000 rubles per cubic meter.

The house cladding technology is as follows:
- A shallow foundation is laid around the perimeter of the house. On our portal you can find detailed information about the arrangement of such a foundation;
- then the foundation is waterproofed with several layers of roofing felt;
- then a wall is erected around the perimeter of the house. Since blocks have big sizes, masonry is much easier to do than with brick. However, in any case, it is necessary to ensure that they lie flat and in the same plane, so during the work you need to use a level, plumb lines and beacons;

- if wood is veneered Vacation home, after several rows, pins are placed into the facing wall, which are first driven into wooden wall. The pitch of the pins should be about a meter to one and a half meters.
Walls built from heat-insulating blocks require further finishing, for example, plastering. That's why this technology insulation is rarely used. Most often it is used in cases where it is necessary to strengthen and insulate a garden house.
If the same procedure is required for a residential building, you can line it with bricks and place it between the walls mineral mats. Of course, the costs in this case will be much higher, but additional finishing will not be needed, and the building will acquire a solid and presentable appearance.
Here, in fact, are all the options for external insulation of houses that I wanted to introduce you to.
Conclusion
As we found out, there are several methods for effective external insulation of houses, which have their own advantages and disadvantages. Regardless of the technology that is optimal for you, you can cope with this task yourself. The main thing is not to violate the sequence of actions described above and do the work carefully.
See the video in this article for more information. If during the insulation process you encounter any difficulties or some points are not fully clear to you, ask questions in the comments, and I will be happy to answer you.
September 7, 2016If you want to express gratitude, add a clarification or objection, or ask the author something - add a comment or say thank you!