Perhaps, it is possible to appreciate all the advantages of automatic watering only after its installation. Personally, it seemed to me that watching the water flowing out of the hose was easy and pleasant. This is probably heredity: my great-grandfather carried water to the garden in buckets from the Aksai River and did not dream of anything else.
Lawn, vegetable garden (behind the trellis) and trees behind the fence, which we will waterTypes of irrigation and practical solutions
It just so happens that we all have different needs, preferences and opportunities for organizing irrigation on our own plot. Therefore, it is necessary to consider various options so that everyone can choose their own. At the same time, it will not be possible to create automatic watering on the site with our own hands if we do not familiarize ourselves with the subject of automation, that is, with the design of ordinary irrigation. Then we will look at organizing an automatic watering system for a vegetable garden, flower garden and lawn using a specific example.
Of course, you can depict dozens of scheme options, but we will simplify the task and divide the irrigation system into three functional components, combining which you can create your own unique one. Everything is very simple, any system for providing moisture to plants consists of three parts, namely:
- water source;
- water supply;
- elements for supplying water to plants.

 The flower garden in the yard is also subject to automatic watering
 “Without water and neither here nor there”
This is how they sang in the Soviet film and it is impossible to refute it. Sources of water can be:
- central water supply, in which there is always water (almost);
- water supply system of a dacha society, in which water is supplied on a timely basis;
- well or well;
- pond, lake, river, that is, a natural body of water;
- a container containing accumulations of rainfall, drainage water, or filled from a water supply.
Everyone likes clean and warm water
Water is water: it would seem, what's the difference? Differences in its purity, volume, temperature and pressure.
In the case where we are dealing with not quite clean water, that is, from a reservoir or container, and we use drip irrigation, you will have to install a special filter. Otherwise, the droppers will quickly become clogged.

 The garden wants personal irrigation with warm water
 Temperature is also important: many plants do not like cool water. Source cold water- well or well. The problem is solved by natural heating of water in the storage tank. Note that when irrigating at night, the temperature difference between the liquid and the plants is noticeably smaller, so this positive factor can be used. Also, when spraying water in small drops, it has time to warm up when it comes into contact with air. We definitely take this fact into account.
It is advisable to have more water and stronger pressure
Water pressure has ambiguous properties. For example, when using drip irrigation, it should not exceed two atmospheres. Too high pressure is compensated by installing a reducer. On the contrary, when using sprinklers (sprayers) with a retractable part, water pressure in the system will be of the order of two atmospheres. You can increase the pressure using an additional pump.
The volume of water reserves is also ambiguous. Yes, when using drip irrigation from the container, the size of the latter determines the duration of irrigation. If prepared correct amount liquid, the process will end at the right moment, and we will get the simplest automatic system. On the contrary, when installing sprayers, for their normal operation, you will have to balance the water consumption and quantity with the capabilities of the water supply. In the worst case scenario, the sprinklers simply won't work or won't cover the intended area.

 This container will last a long time, but you will need a pump to supply water.
 Technical solutions for water supply
All options without running water involve the use of a pumping station or simply a pump. Pumping station will provide constant water pressure in the system, but costs money and requires maintenance. It is cheaper to install an ordinary one, for example, drainage or submersible pump and pump water into the container. By the way, the water in the container will warm up.
You can automate the process of turning the pump on and off yourself. To do this, a valve float from an ordinary toilet is installed on the container. The float can control the limit switch. The pump is connected to the switch via a timer. Otherwise, the bounce of the switch contacts will damage the pump.
When filling the container from the country water supply, you can install the mentioned valve from the toilet to the supply line. Thus, the container will be filled with water automatically until the required level during your absence.

 TO home plumbing Irrigation is connected through a separate tap using HDPE pipe 25
 The water supply is no longer the same
When organizing a water supply in a country house plastic pipes gradually replaced metal ones. This event is probably comparable to the replacement of wired phones with mobile phones. Such pipes can be delivered to the site in the trunk of a car and installed without welding or threading, that is, using plastic fittings. Now the water supply does not rust and can withstand freezing water.
The most popular are HDPE pipes. For a plot of 6-15 acres, pipes with a diameter of 25-40mm are sufficient. It is important to hide the pipes in the ground so as not to trip over them and spoil the appearance of the site. The minimum laying depth is 0.3 m, so as not to damage it with a shovel. At a depth of 1 m they will be protected from freezing.
Variety of elements for delivering water to plants
Water reaches the plants using a hose, spraying, drip irrigation or root irrigation. All options have the right to life and are applied depending on specific conditions.

 Hose with quick release couplings – handy tool for watering
 Good old watering hoses
Popular economical drip irrigation
Option No. 2 – drip irrigation. If the source of water is a container, such a system will be automatic: the water runs out - watering ends. When powered from a water supply, you will need a pressure reducer. For automation, a timer with a valve is required. Of course, there is no escape from the wiring of the water supply, taps and drip tape (or drippers). If water is supplied by a pump, then a pump is also needed. Drip irrigation is very popular and provides minimal water consumption. Well suited for irrigating vegetables and plants in greenhouses. With your own hands, you can make calibrated holes in the hose and get the simplest drip irrigation. Details about drip irrigation:
Super economical root irrigation
Option No. 3 – subsoil irrigation. This type of irrigation is used in conditions of strict water conservation. Sections of thick pipes with drainage are installed next to the root system, where water is supplied. In this case, not a single drop of water will be wasted, and the soil will remain loose. This method is used to supply water to grapes and trees.
 This sprayer covers different area depending on the position of the tap handle
 Artificial rain
Master class on organizing automatic watering with your own hands
Now we know enough about irrigation as such to automate it. Personally, I did not have a clear understanding of the need for such a system at the stage of building a house. However, laying the pipeline system before the construction of the paths was enough. Since we can’t do without it, we’ll start with this.

 Sketch of the area that we will provide with an irrigation system
 Water supply diagram for hose irrigation
The irrigation system consists of a large number of components, so it will be difficult to correctly place all the elements and calculate the necessary materials without a diagram. It is better to do this on a computer using a publicly available program. I worked in Microsoft Power Point. The sketch can also be done on paper. You will need a compass, pencil, eraser and ruler. Of course, it is necessary to take the dimensions of the area and transfer them to a scale sketch.
 Water supply diagram for watering with a hose
 Before the construction of the paving stones, a water supply system was laid from HDPE pipes with a diameter of 25 mm, which is indicated in red on the diagram. The numbers in the drawing indicate the dimensions of the sides of the areas for irrigation. Circles with a radius of 10 m with centers at the locations of the cranes demonstrate the possibility of irrigating all vegetation on the site and trees outside the fence.
All connections are made with plastic fittings. Working with them is a pleasure: docking is quick, simple, and reliable. The pipe is laid to a depth of more than 0.5 m to ensure that it is not damaged by a shovel. I tried to carry out the laying outside the tracks to ensure the possibility of repairs and connecting additional lines, if necessary.

 Plastic fittings provide quick and reliable connection of HDPE pipes
 Three taps with fittings are installed at the end points of the water supply; this was done for quick-connection of the hose. The site has a noticeable slope, which means the pipe also lies on a slope. This makes it easy to remove water from the system in the fall. On a flat area, it is quite possible to lay water pipes with a gradual increase in depth from one side of the area to the other.
 Hose connection point with tap and quick connect fitting
 Needs and possibilities of automatic irrigation
Subsequently, along with the desire to go on vacation and forget about watering, the understanding arose that the flower garden, lawn, vegetable garden and trees - they all should be provided with water in different modes.
It was decided that water would continue to be delivered to the trees using a hose, since this happens rarely, it is necessary to control the filling of the holes, and it is expensive to supply water to them. 
 The tree watering hose is connected to a tap on the lawn that does not interfere with the lawnmower.
The design of the automatic watering system itself begins with an assessment of water consumption. That is, the capabilities of the water supply must satisfy the needs of the sprayers. For this purpose, you need to place a 10 liter bucket in the bathtub, open the tap completely and record the time it is filled. I got 25 seconds, which corresponds to a consumption of 1.4 m3 of water per hour. When installing the water supply system in the house, it turned out that the pressure in the system was about 2.5 atmospheres.
Selecting sprayers for different irrigation zones
Now we select sprayers. Informed people suggested that one should pay attention to the products of the Rain Bird company, as they are widely represented in Russia and have a good price-quality ratio. Complex sprayers are not cheap, so there is a desire to get by minimum quantity. In this case, the following sprinkler parameters must meet the needs of the system: operating pressure, water flow, irrigation radius.

 These sprinklers are selected for automatic watering
 As a result, SXB-360-TS-SPYK micro-sprayers were chosen to irrigate the beds. They have a spray sector in the form of a circle with a maximum diameter of 5m. Size working area It is easily adjusted by rotating the head of the device, which means I can adjust it to a 1.2 m wide bed and a 0.6 m wide flower bed area. The manufacturer does not specify the water consumption, but the fact that it is connected to a distribution tube for drip irrigation outlets means that I can install dozens of these sprinklers in one irrigation zone.

 Sprayers in the garden at work
 To irrigate a 3m wide flower bed (near the fence), a US-412 sprinkler was chosen. Its operating pressure of 1.0-2.1 bar corresponds to the parameters of the existing water supply. (Note that 1 bar corresponds to 1 atm with a small difference.) The device has a spray radius of 2.7-3.7 m, which is consistent with the size of the flower garden. The US-412 water flow parameters are 0.1-1.21 m3/hour, which means I can simultaneously include several of these sprayers in a system with a flow rate of 1.4 m3/hour. The device has an adjustable irrigation sector, that is, I can configure it to irrigate in corners with a 90-degree setting and on the side of a flower bed with an angle of 180 degrees. The sprayer has a retractable rod, which is hidden down to the ground level from the feet of others.

 The sprinkler is set to water the corner of the flower bed
 Using the example of a flower garden, it became clear that the water consumption of sprayers is comparable to the capabilities of the water supply system. That is, automatic lawn watering can only be achieved with more complex and expensive rotary sprinklers. Devices of this kind do not pour out water in a sector, but in a stream, which sequentially irrigates a given sector as the spray head rotates. As a result, the range of water spray increases, and water consumption decreases. Of course, irrigation time increases. The Rain Bird 3504 rotor has an irrigation radius of 4.6 - 10.7 m, which matches the size of the green carpet. Water consumption of 0.12-1.04 m3/hour allows you to install up to 10 such devices. The working pressure of 1.7-3.8 bar also suits me. The retractable part of the device will hide in the grass after closing solenoid valve. When creating a do-it-yourself lawn watering system, I decided on Rain Bird 3504 rotary sprinklers.

 Rain Bird 3504 rotor tries its best and hits the tracks
 Automatic watering without a sketch is difficult to design
Now almost everything is clear, but again we need a drawing. This means we will repeat it, excluding previously depicted elements for better readability.
The green circles in the diagram mark the locations of the valves to control the inclusion of water. To implement an automatic watering system on the lawn, two valves are placed in a common box: for supplying water to the grass cover and for supplying water to the flower beds near the trellises. To connect the valves to the controller, which is planned to be located in the garage, a cable is provided, indicated in the diagram with a black dashed line. The blue color shows a pipeline made of HDPE pipe with a diameter of 25 mm, connecting the valves with the previously laid pipeline and sprinklers. Turquoise color shows a 17mm diameter pipe connecting 14 SXB-360-TS-SPYK sprayers to the corresponding valve.

 Automatic watering scheme for lawns, flower beds and vegetable gardens
 As a result, 6 US-412 sprinklers were placed in the flower bed area near the fence to cover the entire area. The automatic lawn watering system is provided by six Rain Bird 3504 rotors. They have a minimum irrigation radius of 5 m, guaranteeing coverage of the entire area of the site with minimal water pressure. The drawing shows that the entire irrigation area lawn grass overlaps at least twice. This approach guarantees watering of the entire area when using rotary sprinklers.
The SXB-360-TS-SPYK sprayers have different irrigation diameters in the diagram, which allows for their adjustment. Two micro-irrigation taps allow additional control of the irrigation zones of 14 sprinklers.

 The irrigation control controller is conveniently located on the wall of the garage
 Installation of an automatic watering system
Now that we have an irrigation scheme, we can completely determine the list and number of components required for practical installation. The result is the following list:
| Name | Quantity | Purpose |
|---|---|---|
| Controller STP6PL | 1 PC. | For controlling solenoid valves |
| Sprayer UniS-400 (With nozzle - UniS - 412) | 6 pcs. | For watering flower beds, complete with 12 VAN nozzle |
| Injector 12 VAN | 6 pcs. | For watering the flower garden, complete with UniS-400 sprayer |
| Rotary sprayer 3504 | 6 pcs. | For watering the lawn |
| Sprayer SXB-360-TS-SPYK with self-piercing fitting included | 14pcs. | For watering beds and a narrow flower bed near a pergola |
| Branch pipe SPX-FLEX | For connecting lawn and flower garden sprayers using flexible bends (optional) | |
| Threaded angle fitting SBE-050 1/2" | For connecting 25mm UniS-412 nozzles and 3504 rotors to a HDPE pipe | |
| Solenoid valve 100-JTV 1" | 2 pcs. | For supplying water to lawn and flower bed sprayers |
| Starter kit XCZ-075 PRF, 1" | 1 PC. | Valve with filter for supplying water to the bed sprayers |
| Drip irrigation hose 17mm | 30m | For supplying water to bed sprayers |
| Stand holder 12-16 mm C12 | 15pcs. | For attaching 17mm pipes to the ground |
| Dispensing tube 4-6mm XQ1000 | 7m | For connecting SXB-360-TS-SPYK sprayers to a 17mm pipe |
| XFD TEE Barbed Tee | 1 PC. | For routing a 17mm pipe |
| Adapter for drip hose 3/4VR | 1 PC. | To connect a 17mm pipe to a 25mm HDPE pipe |
| End cap 700-CF-22 | 3 pcs. | For 17mm pipe plug |
| Micro-irrigation tap BF92 | 2 pcs. | To shut off irrigation zones with a 17mm hose |
| Boxing double | 1 PC. | For valve and starter kit for lawn and beds |
| Single box | 1 PC. | For flower garden valve |
| Fitting for sprinkler area - Saddle 25Х1/2ВР | 7pcs. | For connecting sprinklers to a 25mm passing pipe |
| Angle bend 25Х1/2"НР | 5 pieces. | For connecting sprinklers to the end of a 25mm pipe |
| Fitting for magnetic valve coupling 25Х1"НР | 3 pcs. | For connecting valves to a 25mm pipe |
| 2-position manifold | 1 PC. | For connecting 2 valves in one box |
| Tee 25*25*25 | 4 things.. | For routing HDPE pipe 25mm |
| PVS cable 2x0.75 sq. mm | 60m | To connect valves to the controller |
| HDPE pipe diameter 25mm | 110m | For water supply |
By and large, guided by the above table, you can already assemble the entire system. Of course, in your specific case there will be a different list. In any case, if you organize automatic watering of the area with your own hands, you can discuss the list of necessary items with the seller at the gardening store and make adjustments. Of course, for this you need to have a sketch of the project.

 Lawn and garden irrigation control valve
 Now let's look at the installation in more detail. First you need to dig trenches for laying pipes. Taking advantage of the fact that no one would dig next to the paths, I did not go deeper than 30 cm. Then we had to cut 25x25x25 tees into the existing water supply to connect the valves. In the double box I used a 2-position manifold and 25X1HP couplings to connect the valve and starter kit. For watering the beds, a starting kit was selected, that is, a valve with a filter, since the nozzles on the beds are afraid of contamination. The valves and sprayers of the lawn and flower bed are connected by HDPE 25 pipe.

 Flower garden watering control valve in a single box
 When connecting the sprayer to a pipe passing by, I used a 25X1/2 BP saddle, and to connect to the end of the pipe - a 25X1/2″ HP corner outlet. When the pipe is located deeper than the bottom of the sprinkler, an optional flexible elbow and SPX-FLEX pipes can be used. In this case, you will need a threaded angle fitting SBE-050 1/2″.

 Connecting the sprayer to the end of the pipe
 To connect a 17mm garden watering pipe to the valve, I used an adapter for a 3/4BP drip hose. To route the 17mm pipe, an XFD TEE fitting tee was required. To ensure the possibility of turning off the beds and half of the flower bed near the trellis, two BF92 micro-irrigation taps were installed on a 17mm pipe.
 Micro-irrigation taps allow you to turn off part of the irrigation
 Next, I installed self-piercing micro-fittings into the 17mm pipe, which I connected using an XQ1000 distribution cabin with sprayers on the beds. I did the same thing in the flower bed near the trellis. The 17mm tube was secured to the ground with holder posts 12-16-C12.

 The sprinkler is connected with a self-piercing fitting and tube
 I laid a double multi-core cable in double insulation along the pipes and connected the valves to the controller. I had to cut a seam of paving stones to lay the cable without disassembling the path, and then seal the gap again with a mixture of sand and cement. Several tiles of the path still had to be temporarily removed when laying the cable into the garage.

 A seam is cut along the red paving stones with a grinder, into which the cable is laid
 I connected the power and control wires to the controller according to the instructions. Nothing complicated about electrical installation No. Setting up the controller turned out to be easier than learning a new one mobile phone, although the instructions were only in English. During the test switching on of the equipment, I set the required angle of the irrigation sector for each sprinkler. After checking the entire system, the pipe grooves were filled in and the ground was compacted.
Some rules for operating and maintaining an automatic irrigation system.
First, let's set up the system for correct use. The start time for watering was set at 4 am. At this time, the water pressure is at its maximum, and the earth has completely cooled down. To begin with, the time for automatic watering of the lawn is set within 30 minutes, then the flower garden is irrigated for 20 minutes, then the vegetable garden is irrigated for 20 minutes. In the spring I water three times a week. In summer, the lawn has to be watered every day.
In the fall, I purge the system with air, since valves and sprinklers do not like ice. To do this, I made an adapter from a quick-release hose fitting and a car wheel fitting. It turned out that small compressor for painting work pays for itself in three seasons instead of inviting professional “blowers”. First, I simply drain the water using a tap, then use a compressor to pump up the water supply system to 4 atmospheres and turn on the “irrigation”. After several such cycles, all the water flies out through the sprayers. Rate the article:
(5 rated at 4,80 from 5 )In the dacha community, there are a variety of opinions about what the irrigation system at the dacha should be like, how much water and at what time should be supplied to the beds and root zones garden trees, greenhouse crops, flowers and ornamental plants. In all of these cases, there are rules and recommendations about watering time, average daily consumption and method of water supply. The first two factors, as a rule, are selected based on agricultural practices, average daily temperatures, the number of sunny days and the severity of climatic realities. Another thing is the design of an irrigation system; it is built to suit one’s own capabilities and characteristics of growing certain crops and plants.
How to choose the method of watering plants
The only thing that the vast majority of summer residents and lovers of organically pure products, vegetables and fruits agree on is that the garden watering system must correspond to the specifics of the plants being grown. For example, it is impossible to use a field and lawn irrigation system for capricious and whimsical eggplants. In addition, it is necessary to take into account the availability of water reserves, the size of irrigation areas and even the geometric shape of the site.
To provide plants with a sufficient amount of water, several basic watering schemes are used:
- Sprinkler systems, both manual and mechanized or even automatic. In this case, the flow of water, cut into separate streams, is directed along an overhead path so that drops of water fall on the plants like rain;
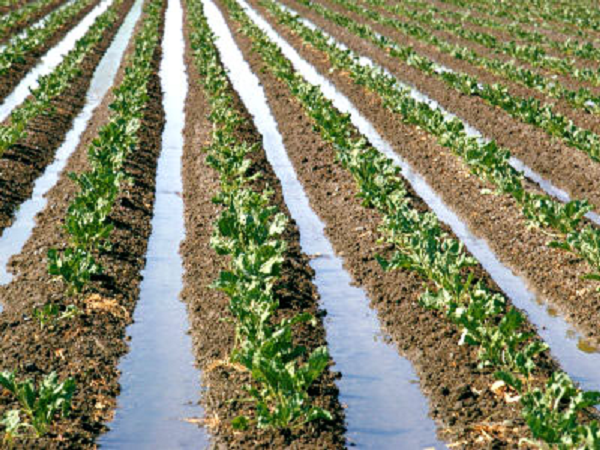
- Distribution of water over the beds using a system of pipelines, canals and ditches, a system of collectors and containers. This is the most ancient and proven method. The flow of water, as a rule, does not come into direct contact with the root system of plants, but saturates the soil layers adjacent to the roots with moisture;
- The most modern of those currently existing is the drip irrigation method. Spot irrigation involves precise dosing of liquid entering the near-root zone of plants.
Today, drip irrigation systems are used in hot, arid climates where water resources are limited.

Important! The average capital intensity of drip irrigation is approximately 3-4 times higher than other methods, so point water supply is resorted to on thin and rocky soils. In this case, in addition to water, it is possible to supply a precisely dosed amount of nutrients, salts and fertilizers to the root system.
Drip irrigation works ideally in conditions where there is either not enough water or it cannot be used in large quantities, for example, when the air is excessively humid and warm in greenhouse and greenhouse conditions.
How to water in greenhouses
A closed and often isolated greenhouse space imposes its own characteristics on the way water is supplied to the plants. The greenhouse watering system is selected depending on the purpose and method of growing plants:
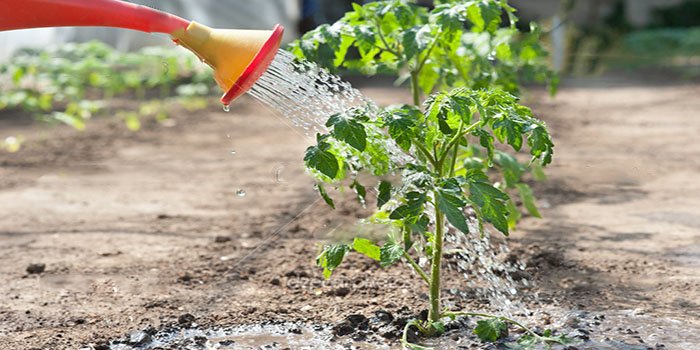
- Dosed drip feed water is used for plants and crops grown and bearing fruit in greenhouse conditions. In this case, all irrigation equipment is controlled automatically or by a self-watering mechanism. To a large extent, spot watering makes it possible to protect plants, for example, tomatoes, cucumbers, eggplants from possible damage by infectious diseases, acid rain, pests, including those present in the soil and water;
- With the flow-sprinkler method of water supply, a significant amount of moisture is released in a relatively short period of time. Typically, large greenhouses are equipped with such irrigation systems in which seedlings are grown and intended for planting in the ground;
- It is clear that sprinkler irrigation systems are used for growing seedlings popular cultures, for which point water supply is not applicable due to the large areas of the beds and the structural features of the crops. In this case, plant seedlings are deliberately accustomed to periodic moistening with vertical streams of water. This is how plants will be watered after planting in open ground.

In addition, seedlings are always grown in portable soil boxes, disposable pots, bags in very dense plantings, on which it is difficult and expensive to install a drip irrigation system, and this is of no use if after three or four weeks the plant goes to the beds. It’s another matter if vegetable crops are grown in a greenhouse full cycle growth, vegetation and fruiting. In this case, there is practically no alternative to drip irrigation systems.
Do-it-yourself greenhouse watering
You can assemble the simplest version of an irrigation system for a greenhouse with your own hands from a dozen polypropylene water pipes, soldered into several longitudinal threads of the water supply system. Each line is equipped with 3-5 centrifugal water sprayers, similar to those used in backpack or balloon sprayers. Irrigation lines are installed under the ceiling of the greenhouse and connected to an underwater main with little powerful pump.

Here, in the greenhouse, a container for several hundred liters of water is installed. The electric timer is taken outside the greenhouse and installed at the point where the pump's power cord is connected to the power supply line.
Important! It is clear that it is necessary to correctly calculate the operating time of the irrigation system and the point at which the electric pump is turned off by the timer before the water container is completely empty.
The use of centrifugal sprayers will produce fog from fine droplets of water, which will settle on the plants and perfectly moisturize the surface without any negative consequences. Such an irrigation system for a greenhouse will ensure the most efficient irrigation with microdroplets of water, regardless of what exactly will be grown - seedlings or fruit-bearing plants.

Of course, if you plan to grow vegetables, for example, tomatoes or early cucumbers, in addition to the irrigation system, you will need to make larger vents to ensure normal air flow and remove excess water. In early spring drip irrigation warm water will protect the greenhouse from severe frosts, and in the period of July-August from acid rain and pest invasion.
What to choose for your dacha
Oddly enough, but organizing the watering of beds, shrubs, plants and trees at a summer cottage has always been and remains one of the most difficult and time-consuming tasks. It takes a lot of effort to ensure the supply of water to the plants in right time days and in the required quantity. At the same time, for shrubs, mature trees and beds, water must be supplied in completely different modes. Therefore, you have to combine and assemble an individual irrigation system with your own hands:
- For trees, drip or channel irrigation is used, the system is designed to supply water for 2-4 hours in the evening;
- For shrubs, seedlings and young trees, the use of channel irrigation systems is recommended;
- Seedlings, strawberries, lingonberries, cucumbers, eggplants, onions, and carrots are watered using the channel method. For tomatoes and young bushes, it is recommended to use drip irrigation systems;
- Perennial grasses, potatoes, pumpkins, zucchini, any plantings with dense plant mass can be filled with water using sprinkler systems, provided correct selection dissecting nozzles.
Drip irrigation often has to be resorted to involuntarily, due to the high sensitivity of plants to various bacterial and viral forms of diseases. In this case, the irrigation system avoids water getting on the leaves and, accordingly, reduces the risk of disease. No matter how carefully the water is prepared and filtered, excessive moisture of the leaves always causes the appearance of powdery mildew or late blight.

Open plant watering systems
The choice of a specific irrigation system for your own plot in 90% of cases depends on the growing conditions of the plants. For proper organization supplying water and fertilizing plants, three main factors must be taken into account:

Farmers, experienced summer residents and experienced gardeners, whose acreage amounts to tens or hundreds of acres, often use towed systems to water their fields. It is possible to provide water to seedlings, vegetable crops, onions, peas, beans on an area of 800-1000 m2 only with the help of a special mobile sprinkler installation.

Structurally, such a system is a trailer to a mini-tractor, on which a frame with installed sprinklers is attached. The water flow is supplied using a flexible hose laid along the track. During the movement, irrigation is carried out in a strip of at least 10 m wide. The water pump is driven by the tractor engine.
For your information! The inconvenience and difficulty of using such structures lies in the fact that a person has to directly participate in the watering process. On average, one watering of 100 m2 requires at least one hour of time.
Despite its primitiveness and extreme simplicity, in fact, this is the most effective method watering in such conditions, especially if, in addition to irrigation, it is necessary to perform fertilizing, protection from weeds and pests, fluffing up the beds and annual plowing of the land. It is clear that such irrigation systems are used only in conditions of unlimited water supplies, for example, from a nearby river or pond.
Sprinkler systems for summer residents
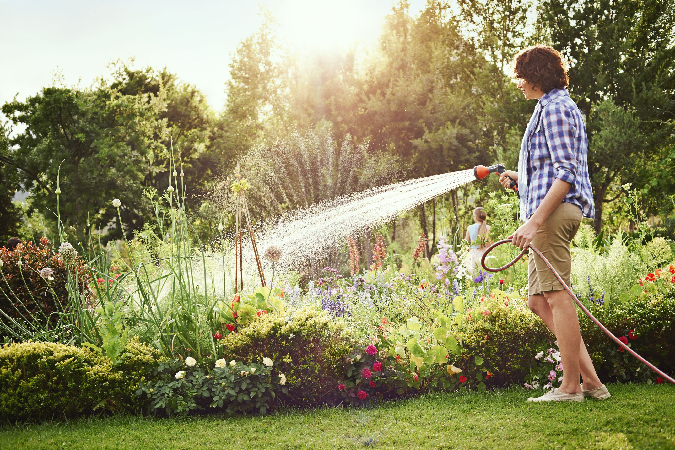
Majority summer cottages due to their location, size and layout, they are not suitable for irrigation with towed installations; on 6-10 hundredths of the land it is easier and more reliable to install several portable water spraying and spraying installations. The efficiency of such irrigation systems is lower than that of drip structures, but the simplicity and reliability of irrigation equipment have made raincoats and sprinklers, or, as they are also called, sprinklers, the most popular among the average summer resident or gardener.
Irrigation system options:

More powerful pivot sprinkler systems are designed like a fire nozzle mounted on a steel support with a circular hinge. An aluminum cheek or blade with a counterweight is installed on the side surface of the metal barrel. Under the action of the counterweight, the blade rotates, falls under the pressure of a stream of water and is thrown to the side. As a result, the irrigation trunk rotates at a small angle of 1-2 degrees. In 12 hours of continuous irrigation, the irrigation system rotates 180-270° and covers an area of 150-200 m2.

The irrigation system does not require constant human intervention to operate. It is enough to configure the automatic shutdown of the electric pump and ensure the proper functioning of the water intake in the well or the nearest water source.
An example of an effective scheme for country watering
An example of the most sophisticated and fully functional sprinkler installation is the Gardena irrigation system. Today, the installation includes more than a dozen special devices and mechanisms that ensure efficient water supply, both by sprinkler and drip methods.

What is her secret? In versatility and high adaptability of water supply to any conditions. The irrigation system kit includes:
- A powerful and at the same time lightweight vortex pump, capable of drawing water from a depth of up to 5 m without immersion in a well;
- A set of hoses of various diameters and lengths with connectors, splitters and adapters. In 15-20 minutes you can assemble a system up to 100 m long from hoses;
- System of tips and water sprays;
- Electronic devices for dosing water and recording watering time;
- Plumbing tapes and drippers - tips for organizing spot watering.
In essence, this is a kind of construction kit for adults, which allows you to assemble an irrigation installation of any complexity and power.
Channel irrigation systems
The rather forgotten channel irrigation systems are now getting a chance to regain popularity. This scheme takes advantage of the features of the terrain, the flow of rainwater flowing from territories and areas located higher up the slope is collected in a long and wide mini-pool. From there, through channels dug in the ground and lined with concrete, the flow of water is directed to the beds, shrubs, and trees.

A simple device consisting of a pair of plastic bottles attached to a swinging gutter is used as an irrigation timer for gravity systems. As water is consumed, the float lowers, and the gutter through which excess water from the pool is poured stops the supply of moisture to the channel system.
To reduce water loss, in hot weather, the channels are covered with gratings made from slabs or wooden planks. A simple system of aqueducts in the style of Roman water pipes is now wildly popular in suburban and dacha areas. Although, in addition to the fashion for a new element of the landscape, the aqueduct also has very real advantages:
- Absolute independence of the irrigation system from the availability of electricity on the site and proper operation of the automation;
- Very simple circuit regulating the water supply using blade valves. In the same way, excess water in the pool during rain is switched to rain drainage channels;
- Efficient use of water, not inferior to drip irrigation, without the risk of increasing the number of weeds in the beds due to thoughtless spilling of water, as is the case with sprinklers;
- Job resource channel system An irrigation system built according to all the rules will easily exceed 40-50 years, and when lining aqueducts with sandstone, the service life can be doubled or tripled. Some villages still have a vegetable garden irrigation system built over 150 years ago from fired tiles.
The channel irrigation system has one drawback - to effectively use water, the gardener has to directly participate in the distribution of water flowing from the channel along the beds. As a rule, due to skillful blocking and redirection of the flow, it is possible to water the beds and trees without interference, even in the most hellish heat.
Most of the water enters the underground layers of soil along the periphery of the plant root system; the upper loosened layer remains almost dry. When mulching, the material remains in working condition almost the entire season. In the same way, you can water gooseberries, currants, seedlings and even mature trees, without creating swamps and thickets of weeds on the site.
There is a more modern channel irrigation system, in which instead of channels, perforated polyethylene pipes, with a diameter of 50 mm. Such a gravity irrigation system no longer requires human presence, but turns out to be sensitive to clogging of holes in the walls. Sometimes the pipes are wrapped with plaster plastic mesh and geotextiles, but still regularly, once a season, the irrigation system has to be flushed with a stream of water high pressure.
The most nice option is the use of a gravity channel irrigation system with water intake from a well using a windmill. To fill a pool with a daily supply of water, a 4 m high tower with a blade wheel span of up to 2 m is sufficient. A gentle wind of 4-5 m/s allows you to lift water from a depth of up to 4 m with a flow rate of 150-200 l/h. This is enough to water the beds on 2-3 acres of garden.
Drip or spot irrigation systems
Organizing drip irrigation at a summer cottage allows you to get by with “little expense,” as they say. For example, if the spring-summer was not too dry, then it is quite possible to use stored rainwater, but this will require building an entire plantation of film to collect rainfall.

Typical device for spot irrigation of a summer cottage
A point or drip supply of water allows you to get by with an order of magnitude less moisture, only due to its correct supply to the roots of plants. It is clear that top scores can be obtained subject to the use of branded components and components.
In the simplest case, a domestic Zhuk irrigation system is purchased for $120-160, which is customized to the size and characteristics of your site. The “dripper” includes a set of tape hoses, a main water conduit, a mass of tees and 20 pieces of drippers. This is enough to water and feed one tomato plantation of 20 bushes.
From several sets of the Beetle you can power the entire summer cottage, but you will need to additionally acquire an automation system, a pump and a water tank, since they are not included in the kit.
For country houses with a large lawn, a huge vineyard, a garden and a vegetable garden, you can buy the American Hunter irrigation system. This design has an abundance of automation, there are humidity sensors, there is a timer and automatic irrigation control, and even systems that monitor air humidity, solar radiation and evaporation.
All Hunter parts, from containers to dividers and solenoid valves, are made of impact-resistant polypropylene. It is not afraid of temperature changes, frost, or clogging. Hunter's service life is almost two decades. The cost of an irrigation system depends on the irrigated area. For an irrigated area of 1 hundredth you will have to pay almost 700 dollars, for 11 hundredths - only 1500 dollars. The larger the dacha, the lower the cost of irrigation with a system of one hundredth.
The advantages of the system include its high autonomy. For example, you can leave a vegetable garden at your dacha for a week and not worry that the vegetation will die due to a lack of water in the irrigation system.
Hunter is ideal for very large plantations that require automated control of watering and fertilizing of plants; in small gardens it is easiest to water manually or using the Zhuk system.
Which is better from droppers
Despite the obvious technological gap between the Beetle and the Hunter, the demand for simple drip irrigation systems is much higher than for the automated version. There is a completely reasonable explanation for this. During the gardening season, what is required is not so much an automated, but rather a reliable water supply. Any drip point irrigation system is extremely sensitive to water quality.
The more suspended matter and clay particles, the stronger and more often they become clogged. thin holes shooter in the system. The water has to be settled and passed through sand filters, but still salts and clay microparticles clog the irrigation equipment.
Despite a certain mistrust on the part of gardeners, drip irrigation systems are ideal for watering shrubs and garden trees. In summer, the roots need water in small quantities, but constantly. This allows, in addition to the flow of nutrients to the root zones, to provide high humidity in the crown of a tree or bush. As a result, the plantings easily survive even the hottest weather and drought. Sprinkler irrigation systems are much less effective in this regard.
For spot watering, a small amount is enough. overpressure at 1.5-2At at the input and 0.5At in the working line. In some cases, a point irrigation system works successfully without any pump; it is enough to raise the water supply container to a height of 4-5 m above ground level.
Individual option for watering plants
Drippers have several small but significant disadvantages, namely, moisture is supplied to the plant roots at almost one point. For the system itself, this does not matter, since capillary forces “stretch” the irrigation moisture over an area of 4-6 cm. Plants suffer first of all - a wet spot on the roots becomes the main source of disease.

For example, after the operation of a sprinkler irrigation system, the top leaves of tomatoes, eggplants, strawberries, cucumbers, and shrubs remain wet for a maximum of 30-50 minutes. Even if some microflora is present in the water droplets, the sun and wind remove and destroy most of the pathogens. In spot irrigation, everything is different - wet soil and shading create conditions for rotting of the upper part of the root mass.
Therefore, spot irrigation is often supplemented with individual irrigation systems. What it is? Structurally, these are individual containers installed on racks or wooden planks next to the plant. This is usually a plastic bottle with the bottom cut off and a hole in the cork. A solution containing top dressing or fertilizers that the crop needs is poured into a liter container of the irrigation system.
The most advanced and sophisticated irrigation systems provide for the supply of water to the root system using an underground container with perforated walls. Usually, when planting seedlings, an empty plastic bottle with holes in the side wall is buried in a vertical position next to the plant. It is enough to make 2-3 rows of holes on the side of the plant with a nail. To prevent the irrigation system from becoming contaminated with liquid soil, sometimes the bottle is wrapped in an old nylon stocking or sock. This is not difficult to do, especially since there is always plenty of material for a homemade irrigation system.

In the first stages, while the seedlings take root in the garden bed, do not top up the bottle once every two days. a large number of water, but no fertilizers. After the seedlings begin to grow, they add fertilizer and after a couple of weeks they switch to a drip irrigation system. Remove the cap from the bottle and leave it open. Such an irrigation system begins to work as ventilation pipe, providing a constant flow of air and removal of excess moisture.
At the stage of fruiting of tomatoes and eggplants, the buried bottles are simply connected through a cork to an additional tape water conduit from drip irrigation. This is easiest to do with a needle from a blood transfusion system. As a result of the modified irrigation system, plants receive sufficient moisture even during the driest periods of summer.
In approximately the same way, you can organize watering of shrubs and garden trees. To do this, 3-5 bottles are buried in the root system, through which most of the water gets under the rhizomes. But it is worth remembering that in the summer, shrubs and trees receive most of the moisture through the crown, so such a design is not able to completely replace a sprinkler or drip-spot irrigation system.
Conclusion
Watering garden crops has always been and remains a difficult task, requiring accuracy and patience, so it makes sense to shift most of the work to sprinkler and drip systems. A complete transition to automatic irrigation systems today is only possible in greenhouses and greenhouses, where this is critically important. Full use for the entire summer cottage automated systems Watering is still quite expensive. And most importantly, water supply systems do not provide adequate operational reliability. One accident in summer heat can cause the death of the entire crop.
The success of growing vegetables and fruits on a personal plot will directly depend on the provision of plantings proper care. The gardener needs to manually irrigate the beds or set up automatic watering, which will make it somewhat easier to care for the garden by growing moisture-loving vegetables and fruits in the beds. You can use either purchased automatic watering systems or make them yourself.
Description of technology
 Initially, automatic irrigation systems were used only on large farms, but today, with the improvement of technology, household installations have appeared, which are simple in design and are offered to customers at affordable prices. Irrigation systems are usually understood as a technological complex that ensures regular and uniform irrigation of beds with water. It can be either relatively simple designs, which are equipped with only one powerful pump and an electric timer, and fully automated installations, the operation of which is controlled by modern computers.
A standard automatic watering design will include the following elements:
- Water pump.
- A controller that controls the operation of equipment.
- Hose system.
- Taps and drippers.
Even the simplest system, which consists of a supply pump and control automation, can be configured in such a way that watering is turned on at a strictly defined time, and knowing the performance of the pumps, it will be possible to calculate the volume of water that irrigates the beds up to a liter. Such a system will not require any subsequent maintenance, and if necessary, the gardener can make appropriate adjustments, depending on the weather in the yard and the condition of the plants in the beds.
Advantages and disadvantages of automatic watering
The popularity of automatic irrigation systems is largely due to the versatility of such designs, their ease of operation, reliability and durability.
Gardeners make it much easier to care for their garden beds; they do not need to come to their dacha every two or three days and water the garden.
The advantages of the technology include the following:
- Easy to use.
- Full autonomy of work.
- Possibility of adjusting the intensity and frequency of watering.
- “Advanced” systems have built-in rain sensors, which allows them to adapt to the weather.
- Durability of use.
- Affordable price.
On sale in gardening stores you can find relatively simple options, in which there are not even water pumps, and water flows to the beds by gravity through a pipe system and installed at a low height plastic tank. You can also purchase and install branched systems that can simultaneously be used to irrigate beds and water the lawn.

Types of automatic irrigation
Due to its affordable cost and functionality, automatic watering of the garden has gained popularity in the domestic market today and is used with equal success by both summer residents and owners of private houses who arrange a natural lawn in their backyard.
The following automatic watering systems have become widespread:
- Sprinklers.
- Drip.
- Combined.
The use of sprinkler irrigation systems allows you to imitate raindrops, which has a positive effect on the condition of plants, improving their growth and subsequent productivity. The basis of such a system are special sprayers that spray water in small drops. It is only necessary to correctly plan the design, configure the automation and subsequently make certain adjustments to the operation of the equipment.
Drip systems will become excellent option for beds where vegetables and fruits with powerful mother plants and an extensive root system near the plantings. The gardener has the opportunity to apply drip irrigation directly to the roots and trunk of plants, which, in turn, saves water consumption, ensuring proper irrigation of the plantings.
Irrigation arrangement
One of the conditions for installing a completely autonomous irrigation system will be the presence of a water supply system. If there is none at the dacha or in a private house, then any container that is located at a height of at least one and a half meters above the ground can be used as a source of water. It is recommended to use opaque plastic containers, the volume of which is selected depending on the required quantity water for weekly irrigation of beds.
To set up drip irrigation at your dacha you will need:
- Automatic controller.
- Pressure regulator.
- Drip tape.
- Fittings and distribution pipe.
The drip tape used can be made of thin-walled polyvinyl chloride pipe. You can also purchase ready-made drip tapes in gardening stores, which are made of soft plastic, cross-linked polypropylene or other similar materials.
WITH inside drip tape, small droppers are installed at equal distances, which are directly responsible for supplying water to the plants being grown. The size of the gaps between the drippers is calculated based on the planting pattern of vegetables and fruits in the beds.
A pressure regulator will be required in cases where a central water supply is used as a source of water supply. Voltage surges can often occur in the water supply, which can adversely affect the condition of the drip tape and the integrity of the supply pipe.

Selecting a controller, which is an electronic unit automatic control the operation of the entire system will depend directly on the ramifications of automatic watering and the financial capabilities of the gardener. You can choose a fully automated design, which is equipped with various additional sensors, is distinguished by its versatility and functionality in use, and in the case of an economical option, you can buy a regular electric timer, which, according to an established program, will supply voltage to the pump being used.
Distribution pipes are used in cases where several beds are being irrigated at once and it is necessary to provide an irrigation regime for those grown on garden plot vegetable crops. To make such a distribution pipe, ordinary plastic plumbing is used, the diameter of which must be at least 32 millimeters.
All connections between pipes and drip tape must be sealed. You will need to use appropriate plastic or metal-plastic fittings that are easy to use. Preferably do dismountable connection, which, if necessary, will allow you to make adjustments and improve the irrigation system used.
Component Assembly
Despite the apparent complexity of such an automatic drip irrigation system, every gardener can handle its assembly.
The sequence of actions when assembling a drip irrigation system will be as follows:

When assembling drip irrigation and installing pipes, it is necessary to ensure that they are horizontally located underground. Any slope can adversely affect the movement of liquid, the efficiency of the irrigation performed will decrease, and as a result, the installation will have to be done again.
Use of industrial installations
If until the recent past industrial installations automatic irrigation had a high cost, today you can find the simplest options on sale, which are distinguished by their versatility and functionality in use, offered to customers at affordable prices. All you need to do is purchase and install the system at your dacha, ensuring proper watering beds.
The advantage of using purchased automatic watering systems is the quality of their manufacture, as well as the possibility of subsequent modernization and improvement of the entire structure, which allows you to additionally mount various controllers and sensors or increase the total area of the pipeline by connecting more and more beds on the site to the system.

Watering rates and times
When using a drip irrigation system for beds, the required volume of water is significantly reduced. The gardener will need to correctly calculate watering rates, based on the moisture-loving nature of certain plants, the condition of the soil and a number of other factors. If with manual watering each plant will require about a bucket of water, then with drip irrigation the consumption rate is reduced to 2-3 liters.
The gardener will need to monitor the condition of the plants and the general soil moisture and, based on the data obtained, make adjustments by increasing or decreasing the volume of water supplied to the garden crops.
The use of an automatic watering system will allow summer residents and gardeners to significantly simplify the care of vegetables and fruits cultivated on the site. You can purchase ready-made irrigation systems or make them yourself, which will reduce costs. You will need to correctly select the components used and subsequently carry out competent installation of the system, which will operate in a fully automatic mode, providing high-quality irrigation of the beds and lawns near the house.
Drip irrigation is a method where water is dispensed in small portions, evenly, constantly and in the right place. Typically, this method involves moistening the plant's root system and nearby soil. Not a single drop of water is wasted, and the plants do not dry out or rot from overwatering.
To install the system you will need pipes or plastic bottles. Choose for yourself what is more convenient and simpler. But usually the bottle method is chosen for small gardens with crops for which root watering is recommended. For a large area with a variety of plants, it is better to use pipes.
The general requirements for all vegetable gardens are to be parallel and the plants close to each other.
The choice of a mechanical or automatic system is a matter of personal taste and financial capabilities.
How to make a drip irrigation system at your dacha from pipes
To install a pipe automatic watering system, you will need a water tank, a large PVC main pipe, several thin polyethylene pipes with a diameter of 10-15 mm (depending on the number of beds), nozzles ( plastic elements droppers), as well as plugs for thin pipes. PVC and plastic perfectly withstand high and low temperatures, so they are ideal for watering and irrigation systems for the garden.
Lay a large pipe perpendicular to the beds and connect it to the water tank by drilling a hole just above the bottom. Make holes in the “main” itself according to the number of thin pipes. Place thin pipes between the beds parallel to each other, cut them and bring them one side to the “main” using fittings, and close the other end with a plug.
Now you need to drill holes in thin pipes - according to the number of plants. Water from the dacha “pipeline” will flow to the roots of the plants through the plastic elements of the droppers. Thin plastic pipes can be replaced with a special drip tape or a rigid hose, and it is better to make holes with a hot awl.
If you do not want to clean the pipes too often, install a filter in the tank that pre-cleanses the water from dirt and sand. Before operating the irrigation system, remove the plugs and run water through the pipes. This way you can see all the shortcomings of the system and correct them in time.
Do-it-yourself watering system in the country from plastic bottles


Photo from the site: https://samodelino.ru
Evgeniy Ukhtomsky
Experienced gardener
“This is also a drip design, however, it is constructed much more simply - from ordinary plastic bottles, which can be suspended over the beds with the neck down or dug into the ground. The bottles are secured to a frame made of timber and wire using twine pulled through the holes. Several punctures should be made in the lid with a hot needle. Adjust the system so that drops do not fall on the leaves, otherwise there will be a burn. In my experience, liter bottle It lasts about five days, so if you’re going away for 10-15 days, use 3-6 liter bottles.”
To organize a root watering system for your garden, you will need a 1.5 liter bottle. Simply pierce the bottle in several places and bury it in the ground to the depth of the plant roots. Pour water into the bottle and it will ooze drop by drop, watering the ground. One bottle usually lasts for 3-4 days. You can bury the bottle with the neck down. In this case, you will have to cut off the bottom of the container and put special dispensers for root watering on the neck.
How to organize a rain irrigation system at your dacha

The rain garden irrigation method refers to the automatic watering method. It imitates natural precipitation, and such a system has its advantages. With rain irrigation, not only the root soil is irrigated, but also its upper layer, which reduces the evaporation of moisture from the surface of the earth. Plants are naturally cleared of dust and dirt, which improves their growth and increases productivity. In addition, when correct installation these structures are visually invisible.
For a rain irrigation system, you need to purchase special sprinklers, which are available in different types. Rotary designs have a rotating head that sprays water over a radius of 30 meters. Fan sprinklers do not rotate and are capable of watering the ground at a distance of 18 meters. They are less convenient and use more water.
To install a rainwater irrigation system, you need to dig trenches, lay pipes, install sprinklers, and connect the entire system through a programmable controller to a water tank that is connected to a well or water supply. Only people can do this with their own hands experienced gardeners who know how to work with technology. In all other cases, it is better to call specialists. It would also be nice to connect a soil moisture sensor, which will block the operation of the system during rain.
Underground irrigation system for garden

This method of irrigation resembles drip irrigation, only the pipes do not lie on the surface of the earth, but directly in the soil. Previously, such a system was very complex and was used only on a large scale, for example on state farm fields. Now, thanks to the advent of polyethylene pipes, subsurface irrigation has become.
Igor Popovtsev
Garden engineer
“The essence of this system is that water is supplied directly to the roots of plants through tubes with holes. Since the pipes are laid at a sufficient depth, the top part of the soil is not moistened, so a crust does not form on it. This means that there is no need to additionally loosen the soil and remove weeds, because the moisture on the surface will clearly not be enough for their seeds to germinate. To install such a system, you will need polyethylene tubes with a diameter of up to 4 cm, in which round holes with a diameter of 2-3 mm must be made at a distance of 20-40 cm. The pipes are laid in the soil to a depth of 20-30 cm at a distance of 40-90 cm from each other. The distance between the humidifiers is determined by how often you need to water the garden - pipes can be placed more often in strawberry beds, but in apple orchard there is no such need."
Place humidifiers on strips polyethylene film to prevent moisture loss. The underground irrigation system is designed as follows: a hose is laid from a barrel of water into an irrigation tank, which is installed directly into the ground. The reservoir must be equipped with a water dispenser to regulate its supply to the roots of the plants. Polyethylene pipes are connected to this container, supplying moisture to the soil.
The area near the house is a vegetable garden, greenhouse, garden, flower bed or greenhouse; caring for it constantly takes a lot of effort and time. Most modern inventions are designed to make life easier for people. In hot weather, watering takes a lot of energy; this procedure requires daily repetition. Automatic watering at the dacha with your own hands will significantly simplify the process of caring for your site, and the result will be much better: water consumption will be significantly reduced, while appearance plants and productivity will be much better.
Before you start creating your own automatic watering system, you should pay attention to the fact that there are three different types the design of this miracle of engineering. Despite the similarities in operation and minor differences in design, they are still quite different and are intended for different purposes. Let's look at the question of what is intended for what, and how to make automatic watering with your own hands.
An automatic watering system can be of three types:
- Rain or surface watering. This system is the most common type of irrigation. Special nozzles connected to pipelines spray water in the form of raindrops. This is enough effective method watering, but it is not suitable for every species cultivated plants– most vegetable crops require exclusively root watering. Therefore, this type of watering is used only for lawns, berry gardens, flower beds and other areas with vegetation that is not picky about the type of watering.
- Drip irrigation system. The main advantage of such a system is its efficiency - the liquid is supplied to each plant drop by drop through special capillary pipelines. The supply is carried out continuously, day and night, thanks to this, water resources are saved and efficient irrigation is carried out. This system is used directly for fruit and berry plants; it is not practical to use this system for watering flower beds and lawns.
- Subsoil irrigation of the site. This method is one of the varieties of drip irrigation; just like the one described above, it uses a dosed but constant supply of water into the soil. It is advisable to use this system for watering long-term use areas, such as tennis courts, football fields, rolled lawns, which are used by people to constantly move around them. One of the main advantages of this system is that its parts are hidden inside the soil. At dachas, such a system is practically not used.
Most often, dachas use a combined irrigation system, which combines rain and drip scheme– this applies to professional engineering structures of this type. A do-it-yourself automatic watering system is almost always a simplified version of a drip or rain irrigation system.

Do-it-yourself irrigation system development
Automatic watering Organizing a vegetable garden with your own hands is not difficult. First you need to take a site plan to scale. If it is missing, it needs to be drawn on graph paper or on a large checkered piece of paper. Place all large plants, beds and buildings on paper.
- Configuration development. Mark the location of the water source and irrigation zones on the plan. Along the way, you need to draw a passage main pipeline. If you plan to spray with sprinklers, you need to draw their zones of action. They should intersect with each other and there should be no unwatered areas.
In the case when plants are planted in rows, it would be more advisable to use drip irrigation: the cost of equipment and water consumption are much less. When developing a drip irrigation scheme, the number of irrigation lines depends on the distance between the rows. In the case where the inter-row distance is more than 40 cm, one line is required for each. If the distance between the rows is less than 40 cm, watering is one less line.

After drawing all the sections, you need to decide on the length of the required pipelines, you need to calculate how many and what water distribution points you have, decide on the equipment - the number of hoses, tees, sprinklers, droppers and pipes. Is a gearbox and pump required, is a container required, and what kind of automation will be installed in what place. After the counting stage necessary materials and the system design on paper is completed, you can begin installation. The irrigation system that was designed on paper begins to be implemented on your site.
- Construction. Firstly, what you need to decide on is the laying of pipes. There are two ways to lay a pipeline: bury it in a trench or lay it on top. At the dacha they usually lay it on top, since watering here is seasonal and the entire system is dismantled in the fall. With rare exceptions, the system at the dacha is left non-removable; if the system can withstand low temperatures, it can simply be broken or stolen by ill-wishers.
Automatic irrigation system for the house area permanent residence They try to make it as unnoticeable as possible, so the pipes are buried. In this case, trenches are dug at least 30 cm deep. This depth is optimal in order not to damage the pipes during earthworks. You just need to remember that all equipment remaining for the winter must withstand low temperatures.
From main water pipelines Branches go off for irrigation. It is best to make all connections and assemblies in hatches with covers: since leaks most often occur in connections and tees. To find a leak, digging a trench is not the most pleasant task, but when access to problem areas is easier, system maintenance is greatly facilitated.
The last step, depending on the chosen irrigation method, is to install water distribution devices into the hoses, everything is connected and checked.
- Accessories. All piping throughout the site is made from polymer pipes. Pipes from of this material do not react to most fertilizers, are corrosion resistant, reliable and easy to install (they do not require any installation equipment). The most popular pipes are HDPE (polyethylene) low pressure). To all the advantages described above, it is worth adding UV resistance: they can be laid on the surface. You can also use LDPE (high-density polyethylene), PVC (polyvinyl chloride, but this material is afraid of ultraviolet radiation) and PPR (polypropylene, the disadvantage of this material is that its connection must be carried out by welding and eliminates the possibility of dismantling).
For an automatic irrigation system in a country house, garden, or greenhouse, a pipe with a diameter of 32 mm is usually used. If a large number of beds must be watered, it is recommended to take a pipe with a diameter of up to 40 mm.
HDPE pipes are assembled using compression fittings (with threaded gaskets). Pipes made of this material can withstand pressure in the water supply multi-storey building, so that the pressure for watering the site will be withstood without problems. The advantage is that at the end of the season they can be dismantled and assembled and used again the following year.
If the choice fell on drip irrigation, drip hoses or tapes should be connected to the main line; you can attach ordinary droppers to the hoses (a hole is made and a device is inserted into it small size). For rain irrigation, sprinklers are installed. They come in different structures and are able to cover areas different sizes and shapes - rectangular, round, sectors. A DIY lawn watering system is also easy to install.
Work on the installation of an irrigation system
When the plan for automatic watering at the dacha is ready, you need to transfer it to the site.
- DIY drip irrigation system
Automatic drip irrigation at the dacha can be arranged as follows:
- You need to take a large number of bottles with a volume of 1.5-2 liters. If the system will irrigate moisture-loving plants, a larger container will be required.
- At a distance of 3 cm from the bottom, several holes are made on the walls using a nail.
- Bury the bottles upside down between the plants at a depth of 10-15 cm.
- If necessary, add water through the neck.
Such lawn and garden waterers save resources and provide the soil with sufficient moisture.
How to make watering more high level on one's own? At a minimum, you will need engineering skills and experience with tools. If you know how to calculate the working pressure, you can dig trenches under the right angle install the pipes, connect them, set the timer, filters, etc., then you should get to work. Otherwise, it is better to trust the professionals.
- Automatic rain watering system for gardens and cottages
Installation of this watering irrigation system will not cause much trouble in implementation. Installation steps:
- The irrigation hose must be replaced with a network of pipelines covering the entire personal plot, vegetable garden or greenhouse.
- Mount sprayers at the ends of the dead-end pipeline. Various models can be found at a hardware store.
- Replace the standard water supply tap with an automatic valve. Equip the device with a power-on timer.

- Subsoil irrigation system for a summer residence
It is quite difficult to implement this irrigation system at your dachas on your own. For simple description you will need something like this:
- It is necessary to make trenches 20-30 cm deep with a distance between them of 40-90 cm.
- Lay polyethylene porous pipes in the trenches through which water will leak.
- To prevent water from going deeper, tapes are placed under the pipes.
- For automatic operation system, you need to install a solenoid valve/precipitation sensors/drain valve.

Creating an automatic irrigation system at your dacha yourself is quite a difficult task. Careful attention is required, creating a diagram, organizing the water supply and, if possible, connecting automatic control. You can turn to specialists for help, but it is quite possible to assemble an automatic irrigation system yourself. You just need to think carefully about the functionality. A wide choose materials on the modern market will allow you to design an automatic watering system suitable for your site.


