Wooden floors can be sheathed with fiberboard sheets of MDF-T or HDF, which eliminate the problem of defective subfloor layers. Let's try to understand the types of this material. Depending on the density, MDF is divided into three subgroups:
- HDF - high density boards, which reaches 1050 kg/cub.m.
- MDF - medium density boards, reaching 800 kg/cub.m.
- LDF - low density boards, approximately 650 kg/cub.m.
These imported boards are similar to the domestic subgroups: DVP-T (hard fiberboard), fiberboard and DVP-M (soft fiberboard), respectively. The first subgroup is used in the manufacture flooring, the second is used in any capacity, and the third is used when it is necessary to create a soundproofing gasket.
Typically, three-millimeter fiberboard-T is used. Since the floors of the first floors are subject to damp evaporation from basements, it is advisable to use slabs impregnated with oil, which ensures moisture resistance. Thicker, six-millimeter slabs are recommended for laying if there are uneven floors. The sizes of the slabs depend on the brand and are 2500/1200 and 1200/600 mm. When laying fiberboard-T, make sure that there are no gaps between the boards and no distortions occur.
Fiberboard slabs are laid with the back rough side up. This promotes better adhesion of materials when laying the finishing coating. When testing the layout, make sure that the joint lines of the slabs do not form a continuous line, and that the edge slabs do not turn out to be too narrow. The layout begins with sheets located along adjacent walls. Fastening is done using 19 mm staple nails, special nails for fiberboard, staples or adhesive mastic. Nailing begins from the middle of the edge of the slab in the directions towards its ends and towards the opposite edge.
Stages of work:
1. Preparation of fiberboard sheet material.
When using slabs without oil impregnation, it is necessary that they reach the humidity level of the room where they will be laid. To do this, it is recommended to lightly moisten them with water on the back side using a brush at the rate of 600-800 ml per 1 sq.m. After laying the slabs with the wetted surfaces facing each other, leave them indoors for 2 days.
2. Laying fiberboard sheets.
After 48 hours, the slabs are laid on the plank floor, leaving a ventilation gap. The first sheet of fiberboard, laid in the corner of the room, is nailed in increments of 100 mm along the edge line and in parallel rows every 150 mm along the entire surface of the slab. Having docked the second slab to the first slab of the row, nail it to the base. All slabs in the row are laid in the same way. Before fixing the penultimate sheet, you need to trim the last one.

Having laid the last slab, draw a cutting line with a cutting board, taking into account the curvature and other features of the wall. Saw off the excess with a jigsaw or cut off the excess and lay it (with a gap) against the wall. Place the penultimate slab on top of the last and draw a line along which to cut the bottom one. If the slab is not thick, then press the cutter along the cutting line, turn the slab over, stand on the end of the larger piece and sharply pull the other end toward you. The slab will break along the intended line. Secure both plates. The remaining piece is laid as the first in the next row (if it is not too narrow).
Subsequent rows are laid and secured in the same way, but with the joints offset relative to the joints of the previous row (similar to brickwork). You can make several cuts to get around the pipe. If you need to cut out large pieces for large objects (bathtub, bay window corner), make an obstacle template out of paper, outline it on the slab and cut it out with a jigsaw. When laying fiberboard approx. doorway remove and shorten the trim to the thickness of the slab. As a result, the floor covering will go under the installed platband.
Fiberboard is one of the most popular sheet materials these days. Widely used in various areas of the national economy, fiberboard is often used in construction and repair work. In particular, laying fiberboard on a wooden floor as a base or finished floor has become very popular.
In order to save on expensive specialist services, most home craftsmen carry out such work with their own hands. This is a fairly simple procedure, and with the right approach it allows you to achieve truly excellent results. About how to attach fiberboard to wooden floor we'll talk about it in this article.
Advantages of laying fiberboard on the base
Fiberboards are made by hot pressing woodworking and sawmill waste with the addition of antiseptics, synthetic resins, and various stabilizing substances.
This composition and manufacturing technology determine whole line serious advantages compared to natural wood, namely:
- Acceptable price.
- A dense structure that perfectly “holds” nails, self-tapping screws, and screws.
- Lacquered surface that does not require any additional processing.
- High strength.
Flaws:
- Fiberboard is inferior to wood in terms of appearance.
- Such coatings wear out quite quickly, so it is not advisable to install them as finished floors.

Advice! Despite the presence of water repellents in the material, in order to avoid deformation, such sheets should be protected from moisture. Therefore, they cannot be used as a finished floor in rooms with high levels of humidity.
Installation technology
As mentioned above, making fiberboard floors is generally not difficult, but in order to achieve good results, you need to take into account all the features of working with this material. The work is carried out in several stages, and an important aspect in their implementation is proper preparation surfaces.
Preparing the base for fiberboard
The following instructions will help you with your preparation:
- Having purchased the material, you need to bring its humidity as close as possible to the humidity of the room. Otherwise, the sheets will warp during installation, and the base will need to be dismantled. To prevent this from happening, you need to moisten warm water reverse side each sheet, after which the sheets should be turned with their backs facing each other and left in this form for a day.
Advice! If the room is regularly heated, then there is no need to wet the sheets. It is enough just to put them on the edge, leaving them in this position for two days.
- The fiberboard slab for the floor is laid on wooden base or at sand-cement screed. The screed must be pre-treated with a primer mixture.

Advice! As a primer, it is advisable to use bitumen dissolved in gasoline in a ratio of 6:1.
- Before applying the primer to the base, it is necessary to clean it from dust and dirt.
- A construction vacuum cleaner can be used to remove dust.
- If installation is carried out along logs, then there is no need to level the base. In places of unevenness you should only place it under the joists. wooden blocks or pieces of plywood.
Laying on joists
If you decide to install a fiberboard floor with your own hands using joists, then you need to first purchase wooden beams. They will be used as lags. The advantage of this method is that between the lags you can lay thermal insulation mats.
Installation instructions:
- According to the length of the base, we cut off the beams the right sizes.
- We lay a waterproofing film on the base. This can be either a specialized waterproofing material or an ordinary one. polyethylene film, thickness 150-200 microns. We close the joints between the sheets with construction tape.
- Laying the logs begins 30 cm from the wall, then the step between them is 60-80 cm.

- The logs are strengthened on the base using anchors.
- We lay thermal insulation mats between the joists. Best suited for this mineral wool. The insulation should fit tightly between the joists. If joints occur, seal them with polyurethane foam.
- Now let's move on to how to nail fiberboard to the floor. In the case of lags, fixation is carried out using ordinary self-tapping screws. It is not advisable to use nails, since over time this coating will become loose.
Advice! The slabs should be laid so that the distance from the walls is 5-10 mm.
Place it on the screed
Process
It is simpler than installation on joists, but only if it is carried out on a perfectly leveled base.
Therefore, let's start with alignment:
- If significant irregularities are found on the base, then The best way to level the floor screed - use beacons. Profiles for plasterboard are taken as beacons, which are cut according to the width of the room.
- The beacons are laid parallel to each other using a small amount of solution.
- When the solution hardens a little and the beacons “grab”, you can start pouring the screed.
 laying on concrete screed flooring is simpler than installation on joists, but only if it is done on a perfectly level base.
Therefore, let's start with alignment:
- If significant unevenness is found on the base, then the best way to level the floor screed is to use beacons. Profiles for plasterboard are taken as beacons, which are cut according to the width of the room.
- The beacons are laid parallel to each other using a small amount of solution.
- When the solution hardens a little and the beacons “grab”, you can start pouring the screed.
Concrete floor screed: step by step guide on creation, and the nuances of the process" href="https://shkolapola.club/ustroystvo/styazhka/577-betonnaya-styazhka-pola">laying the floor on a concrete screed is simpler than installing on joists, but only in that case , if it is produced on a perfectly leveled base.
Therefore, let's start with alignment:
- If significant unevenness is found on the base, then the best way to level the floor screed is to use beacons. Profiles for plasterboard are taken as beacons, which are cut according to the width of the room.
- The beacons are laid parallel to each other using a small amount of solution.
- When the solution hardens a little and the beacons “grab”, you can start pouring the screed.
There are two application options, depending on the type of composition:
- Cold mastic is applied to the entire surface of the screed (previously primed), with the thickness of the mastic being no more than 0.6 mm, and the adhesive layer being no more than 0.3 mm. 30 minutes before starting work, it is necessary to lubricate the lower surface of the slabs with glue.
- Hot mastic should only be applied to the area where the slab will be laid. This is necessary to ensure that the temperature of the mastic does not fall below 140 degrees. The layer should not exceed 1 mm in thickness, so the mastic must be leveled using rubber combs.
- Press the slabs tightly to the base.

In this article we will talk about the popular building material— Fiberboard, let’s look at the features of its use as a floor covering. You will learn about the differences between brands and installation features. The article contains information about mechanical, consumer and operational properties Fiberboard for the floor.
Fiberboard is a wood-fiber board, which in modern Russian-language terminology is also called MDF (from the English MDF - Medium Density Fiberboard).
It is produced by pressing ground wood material (ground sawdust, wood chips, shavings - natural fiber) and cellulose. Before molding (pressing) solid slabs, additives are added to the mixture:
- Synthetic resins for welding particles together.
- Hydrophobizers (rosin, paraffin) to resist getting wet.
- Fire retardants and antiseptics.
- Impregnation with pectol for strengthening.
Soft slabs of grades M-1, M-2 and M-3 are pressed " wet method"- the raw materials moistened with water are sent under a hot press - without adding additives.
The material has been known for a long time and is widely used in construction, household products, furniture production and packaging all over the world. Accordingly, under different needs use “their” type of this slab. In total, twelve varieties of fiberboard are known, which in the context of this article can be divided into two categories.
Solid slabs (grades T, T-S, T-P, T-SP, T-V, T-SV, NT, ST, ST-S)
Laminated fibreboards are pressed boards coated with finely dispersed polymer-wood pulp. Has relatively high strength and fire safety. This is a well-known laminate or parquet board low classes (6-12 mm). Thinner panels (3-5 mm) are used for finishing walls and ceilings. This material is also used to make furniture elements (facades), packaging, decorative items (it can be processed well).
Soft slabs (grades M-1, M-2, M-3)
It is this material that is the object of interest of our article. People often call it “hardboard” or “pressed cardboard” and there is a lot of truth in this. Up to 60% of recycled material is used for the production of soft boards (sheets) - waste paper, wood chips, bark, used corrugation. It is widely used in construction, furniture industry and packaging.

Characteristics of fiberboard M-1
As a sample, we will take the optimal common version of fiberboard brand M-1 (GOST 4598-86). Distinctive feature— no glue or resins are used in its manufacture (biologically friendly material). His indicators:
- Density - 400 kg/cubic. m.
- Bending strength - 1.8 MPa.
- Compressive strength (10% deformation) - 35 MPa.
- Tensile strength is not standardized.
- Thermal conductivity coefficient is 0.09 W/m°C.
- Release form: sheets up to 3 m long and 1.2 or 1.8 m wide.
- Sanding, decorative (paint and varnish) or protective water-repellent coatings - on one or both sides.
As can be seen from the initial data, fiberboard is more of a heater than a structural materials. For comparison, the thermal conductivity of expanded polystyrene, suitable for a similar application, is 0.032 W/m °C. At the same time, the bending strength of the slab is significantly inferior even to relatively weak wood - pine (79.3 MPa). However, it is not without reason that the fibers are formed in the form of a slab - this provides the necessary advantages for using this material on the floor.
Using fiberboard for floor finishing
The shape of the sheet or slab allows you to easily and quickly level surfaces, bridge gaps and create an intermediate preparatory layer. The pliability and fragility of the material when tested for bending, fracture and rupture do not play a role in this case - on fiberboard floor works on compression. In this sense, MDF is already closer to wood - the compressive strength of pine is 44 MPa (versus 35 MPa for fiberboard).

With all the advantages mentioned above, one significant drawback does not allow it to be fully used as facing material for the floor - low density. It causes low abrasion resistance, which is unacceptable for flooring. In addition, soft slabs are “afraid” of water and quickly swell when wet. Therefore, M-1 fiberboard used on the floor must be well protected from abrasion and moisture, which leaves them the role of exclusively an intermediate layer. In this capacity, MDF performs the following functions:
- Covering gaps up to 5 mm. This is often used by unscrupulous builders, performing repairs "quickly". The draft is blocked, but the floor remains cold. For high-quality thermal insulation, be sure to check the sealing of cracks before laying.
- Plane alignment. Fiberboard smoothes out millimeter steps well old board floor. This must be done before laying a new coating, especially linoleum. Otherwise, the step will appear on it and the linoleum will break through over time.
- Noise insulation. It is due to its softness and relative looseness that fiberboard absorbs noise and vibration. According to this indicator, it is also appropriate to compare it with basalt wool.

It is also worth mentioning that fiberboard is a rather demanding material. It does not tolerate changes in humidity and is not just intended for interior decoration, but for residential and constantly heated premises. 10 cycles of significant moisture change will result in irreversible warping, even if the sheet is fixed.
Features of installing fiberboard on a wooden base
Due to the low tensile and shear strength, the plate cannot reliably hold the force at one point - the heads of nails and self-tapping screws push through the material. The small thickness of the sheet does not allow making a secret hole to hide the cap. Hence the conclusion - there are only two ways to attach the sheet - with many small dots or with glue.
Multiple point mounting - effective method, but rather labor intensive. In this case, the sheet is fixed with small thin nails (12x1.5 mm) in increments of 100 to 250 mm. The nails create uniform pressure on the entire sheet, and the force is distributed not over 20-30, but over 200-250 points. In addition, their small caps do not stand out on the surface of the fiberboard.

This method has one critical contraindication - a shaky foundation. If there is even a barely noticeable backlash, it will definitely result in a gradual release of nails from seats and tearing linoleum. It is not possible to use self-tapping screws due to the size of the cap. The multiple point method is only relevant on a wooden base.
Glue mounting. Fiberboard in the basic version (sanded on one side) is well suited for working with PVA glue on the rough side. The glue perfectly connects the material to the wood surface. If you need to level the old wooden floor, it is better to use the combined method - grease with PVA glue and fix it on small nails. The cost of PVA glue is 1.2-1.5 USD. e. for 1 kg.
Installation of fiberboard on concrete (screed)
When installing on concrete or screed, there are nuances that need to be taken into account in advance:
- The base must be level, without drops.
- Humidity of the cement base is unacceptable (blocked by special compounds - primers).
- Uniform pressure must be ensured.
- Concrete from factory floor slabs has extremely low adhesion.
A subspecies of this method is installation on double-sided industrial tape, designed specifically for gluing wood, PVC, PPR to concrete. A roll of such tape, 460 m long and 12.5 cm wide, costs about 10 USD. e. (DK Film, DURACO, USA).
When laying on concrete with adhesive, it is recommended to install more than one layer - cold concrete is better to be reliably blocked. The clamp can be organized as follows: lay the boards on the surface and secure them with dowels to the screed (the sheet is already laid with glue). After the glue has dried, remove the boards mounting holes fill with liquid nails.
Operation of fiberboard on the floor
There is an opinion that if you paint fiberboard with enamel, it will make a good floor covering. This is not true because a sanded surface has poor adhesion. In addition, the surface is sometimes covered with a thin layer of water repellent.
Even a sheet impregnated with a water repellent should be protected from moisture by all means. The simplest and most affordable is the impregnation of the finishing surface with drying oil (on which the finishing layer will be laid). The cost of drying oil is 1-1.2 c.u. e./liter
Also, the material is well suited for rough filing of insulation (from the inside!), Especially mineral wool - fiberboard is vapor-permeable and allows the insulation to “breathe”. The slab is very easy to process - literally cut with a knife. The cost of fiberboard in the basic version:
- with a thickness of 2.5 mm - 1.5 y. e./m2
- with a thickness of 3.2 mm - 2 at. e./m2
Oddly enough, but among the most modern materials no alternative to fiberboard M-1 has yet been found. Manufacturers can only experiment with its composition, adding hardeners and flame retardants, and vary consumer properties. This cheap, light and comfortable material indispensable as an intermediate leveling layer when finishing the floor.
Finishing work in renovation is perhaps the most important. Your apartment may have perfectly prepared walls, but crooked finishing can bring all the efforts of the masters to naught. And vice versa - even the most clumsy walls can be masked by finishing with laminated fiberboard.
What to choose from?
Laminated fiberboard appeared on the construction markets relatively recently. A huge variety of fiberboard wall panels is divided into three types:
- Set rack("under the lining"), 10-30 cm wide, 2.5-6 m long and 8 to 25 mm thick, are equipped with a tongue and groove system, which allows you to mount the panels on the wall easily and quickly. Such panels are fastened using special clamps or brackets;
- Tiled are distinguished by a wide variety of fiberboard sheet sizes (30×30 cm, 30×60 cm, 15×60 cm, 49×98 cm, 98×98 cm), which makes it possible to create incredible patterns on the walls by combining panels different sizes and colors. Tiled fiberboard panels for walls are mounted in the same way as typesetting panels;
- Leafy outwardly resemble the usual sheets of hardboard. Sheet panels have a wide range of sizes (49×130 cm, 98×128 cm, 98×260 cm, 100×130 cm, 100×200 cm, 100×260 cm, 122×244 cm, 260×490 cm) and a variety of colors , from plain to 3D. Fasteners sheet panels produced different ways, depending on the condition of the walls.
In addition, laminated panels are divided into moisture-resistant and non-moisture-resistant; this aspect should be taken into account when choosing a finishing material. say, kitchen or bathroom.
Features of the material
Fiberboard manufacturers claim that their products are very different from the good old Soviet chipboard. despite similar manufacturing principles. In fact, these differences are noticeable to the naked eye, you should pay attention to the edge: the fiberboard panel is uniformly dense and consists of very small chips, more precisely, compressed wood fibers.
The fibers are pre-moistened, mixed with special resins and pressed at high temperature. After that, the plates are cut to the desired size, a laminated coating of any color and texture is applied to the surface.
The front side of the fiberboard can be designed both in traditional versions (wood, marble, tile, granite and even metal) and fantasy, with bright patterns, mirror inserts, stucco, thematic drawings and reproductions of paintings.
Fiberboard panels for walls are durable, self-tapping screws hold well in them, which makes it possible to mount shelves, frames and lamps on walls made of fiberboard. Of course, it is necessary to take into account the thickness of the material and use special dowels such as "umbrella" or "butterfly".
For all types of fiberboard wall panels, the so-called moldings are produced: fittings and accessories that are used to finish joints and mask wall defects. These include fillets, moldings, skirting boards, corners, platbands, finishing elements, plinth strips and other little things that play a big role in shaping uniform style interior
How to attach fiberboard to the wall?

Depending on the condition of the walls, finishing with laminated panels can be done in several ways:
- On adhesive compositions, if the wall is perfectly flat, there are no large changes in temperature and humidity in the room, and the panels themselves are not too thick;
- Using self-tapping screws directly to the wall;
- Using self-tapping screws, screwing them to the sheathing, wooden or plastic;
- Clamps (plastic or metal) to the sheathing.
How to attach Wall panels from fiberboard, everyone decides for himself. If you decide to mount fiberboard directly on the wall, you will have to first level and prime the walls. Starting from the corner, aligned with a plumb line, glue the first sheet, then lubricate the next one with glue, snap it into the lock first and also glue it to the wall.
Don't want to mess around with glue? Use nails or screws, but remember that the heads will be visible. You can beat this drawback and attach the panels using nails with decorative heads.
Fiberboard is directly attached to walls made of wood and sip panels. On brick and concrete walls You will first have to apply markings, drill holes and drive plugs into which screws are then screwed in or nails are driven in to secure the panels.
But most often you have to build a sheathing and only then attach the panels. In this way, you can level even the most hopeless wall, losing a few centimeters of space and gaining the opportunity to lay communications, sound and heat insulation materials.
The sheathing is mounted from wood or special plastic profile. Fastening to the sheathing is carried out using glue, self-tapping screws or clamps (special fasteners that are purchased complete with the panels). The sheathing is installed strictly according to the level and plumb, in increments of no more than 30 cm. After installing the sheathing, attach the sheets in any way and install the moldings.
Among different options Leveling and finishing the floor is as cheap and simple as possible. One of them is laying fiberboard on the floor. It's practical and affordable option, which will eliminate minor unevenness from the surface. Fiberboard has its own characteristics and contraindications for use - all this, as well as how to properly lay the material, will be discussed in this article.
Fiberboard as a material is known to everyone. The sheets are used for upholstering the back wall of cabinet furniture and for various other purposes. Fiberboard is sheet product, made from waste from wood processing plants. These wastes are steamed, ground, mixed with resins, water repellents and antiseptics, and pressed under high pressure. The result is flat and even, but at the same time quite soft sheets.

On a note! The abbreviation “Fibreboard” is simply deciphered - it is wood-fiber board.
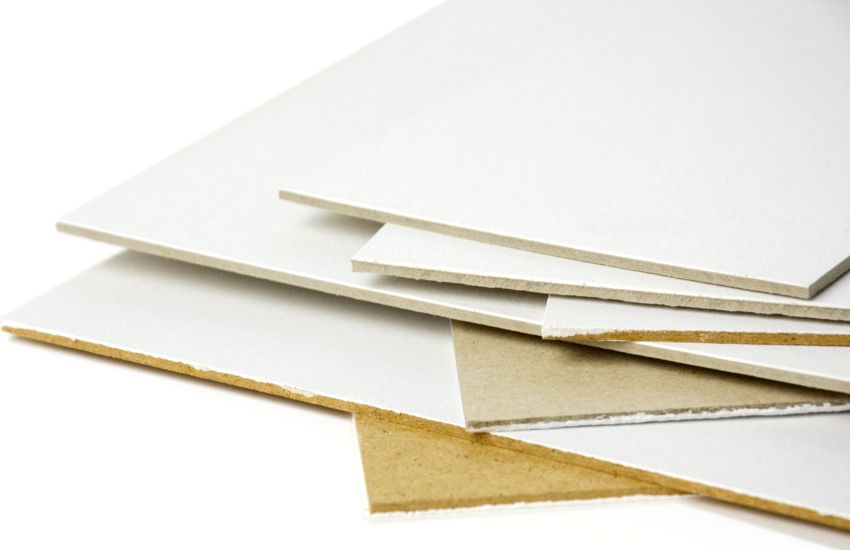
The dimensions of the fiberboard sheet are standard - 3.2x1700x2745 mm, although the thickness can vary from 2.5 to 4 mm. On the front side the material is smooth, and on the back it is rough to the touch, having a mesh pattern, which appears due to the fact that during production the material is laid and dried on a special mesh with small cells. There is always a demand for fiberboard; you can purchase sheets at any construction or hardware store.

Fiberboard is also used for finishing and leveling floors. It can be found especially often in older apartments and houses, where the subfloor is usually made of wood rather than concrete. Here it acts as a leveling material before laying finishing floor coverings - carpet, linoleum, etc. Fibreboard can also act directly as finishing material, however, it requires the application of a final decorative layer - for example, paint.

Description and types of fiberboard for floors
There are several types of fiberboard. They mainly differ from each other in terms of density.
Table. Main types of fiberboard.
| Types | Characteristics and description |
|---|---|
| These types of fiberboard have a low density - it is no more than 350 kg/m3. They do not have good soundproofing properties. Typically, such sheets are used as rear walls cabinet furniture, used for making the bottom of furniture boxes, etc. Types of soft fiberboard: M1, M2, M3. |
| The density of these types of wood sheets is already higher - at least 850 kg/m3. Similar to soft types, these fiberboards are used in the manufacture of furniture, but are more durable and less flexible. Marked with the abbreviation NT. |
| The density of these sheets ranges from 850-1000 kg/m3. They are low-porous and can be used in the production of certain types of doors, as well as for the manufacture of furniture. Types: T, T-S, T-P, T-SP; T has a normal coating, y T-S external the side is covered with wood fibers, T-P sheets painted, T-SP also have a slight tint. There is also T-B sheets, which are highly resistant to moisture, and do not have tinting on the front side. |
| Sheets with a maximum density of over 1000 kg/m3. Raw materials are necessarily treated with pectol, a substance that increases their strength by 20%. It is these sheets that are used in construction: partitions are created from them, floors are covered with them or walls are sheathed, they are used for various finishing works. Also suitable for making furniture and door leaf. The front side can be coated with paint, primer, or varnish. They are marked as ST, which has a standard front side, and ST-S, which has a finely dispersed front layer. |


Fiberboard brands T, T-S, T-P, T-SP may be marked with a quality group (A or B), front side they may have 1st or 2nd grade. By the way, T is hardboard, which is produced using the wet method. Hardboard can be used for wall cladding, as a backing for laminate and other floor coverings, for sound insulation and thermal insulation of floors, and room finishing.

Advantages and disadvantages of fiberboard flooring
Fiberboard is often used to level a subfloor or base and is suitable for almost all surfaces. This material has a lot of advantages, which is why it is in great demand.

Advantages of laying fiberboard on a subfloor.


Disadvantages of fiberboard as a floor covering.
- The material is afraid of water. When moisture gets in, the fiberboard begins to deform - it bulges and swells. Thus, the leaf completely loses its appearance, paint on it and others finishing coatings are also deformed. Fiberboard cannot be used in the kitchen or bathroom.
- Fragility. If there are cavities under the fiberboard sheets, then under strong mechanical stress the material is easily destroyed. It also breaks easily when the sheet is strongly bent.
- High fire hazard. In the event of a fire, the fiberboard will quickly be engulfed in flames and burn.
- The front side wears out quickly. If the fiberboard is not covered with finishing material, it quickly peels off and loses its appearance.
- If fiberboard sheets laid in an unheated and damp room, then they become deformed and begin to peel off.

How to choose the right fiberboard for the floor
In order for the final work to please the owner for a long time and serve without complaints, it is important to approach the choice of material responsibly and buy quality option. There are several criteria that will allow you to choose fiberboard that is ideal in each specific case.