A potbelly stove made from a gas cylinder with your own hands is intended for heating a house, garage, bathhouse or any other room. This a budget option will help you spend the cold winter in warmth and comfort if you do not have a portable or stationary stove.
What can a stove be made from?
Such a potbelly stove from a gas cylinder using wood or mining can be made in a short time. After all, for construction you can use almost any of the gas cylinders you or your neighbors have. A potbelly stove for a garage or apartment can be made from almost any cylindrical metal object. For example, from a can, pan, barrel, bucket, pipe or wartime shell.But the best thing for making it is an ordinary gas cylinder. This is the most common and easily accessible container today, made of thick, high-quality metal. Thickness is important, because a thin wall will quickly burn out and the oven will have to be thrown out.
In order not to encounter surprises during the manufacturing process, do not immediately undertake to implement an option you see on the Internet. Calculate it first and see how easy it is to complete.
Principle of operation
In order for your horizontal stove made from a wood-burning gas cylinder to work properly, you need to build it according to the principle of a conventional one. wood stove. Here is a drawing of such a standard version built using this method:This version has two compartments, between which there is a grille made of fire-resistant material (metal). Firewood is placed on it and set on fire. As they burn, soot is formed, which is poured through the grate into the lower section.
For complete combustion of fuel in confined space needed constant influx oxygen from the air provided by the blower. It has special holes for this. But you can also provide oxygen by simply opening the door from time to time.
The smoke exits through the chimney - an equally important part of the stove. If it is done incorrectly and poorly, then all the smoke may remain in the room, and the heat will escape through the pipe. You will have to spend a lot of fuel to light the stove, and the efficiency of such a unit will be very low.
The basic principle of operation of a potbelly stove made from gas cylinders is as follows:
- The blower provides gas (air) for combustion into the firebox.
- In the firebox, complete or partial (depending on the quality of workmanship) combustion of fuel (peat, firewood, coal) occurs.
- The chimney removes various particles of unburned fuel, and with them carbon monoxide, out.
- To provide continuous burning The process is regulated using a special damper (throttle) and a view mounted in the chimney.
How to make a heater from gas cylinders
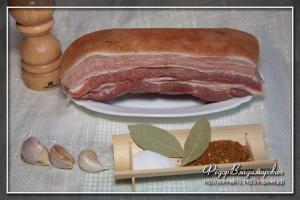
Never use oxygen, acetylene or fire extinguisher cylinders. Processing (cutting) such containers is dangerous. A minimal part of the gas may remain in them, which, when cutting holes with a welding device, can ignite and explode when connected to air.The stove is made from a durable gas cylinder with a capacity of 50 liters (“red”), intended for propane or its mixture with butane (propane-butane). These gas cylinders are used both in industry and in everyday life.
How to make a potbelly stove from a gas cylinder? Let's consider sequentially the manufacturing processes of our device.
Preparing a gas cylinder for installing a potbelly stove in it.
The process of making a potbelly stove from the container described above begins with preliminary preparation corresponding cylinder:- First you need to get rid of the remaining gas. Just open the valve completely.
- After the hissing has finished (to be completely sure), the gas cylinder can be slightly heated on a fire or stove.
- To eliminate a specific “fragrant” additive to propane - mercaptan fragrance (odorant), it is necessary to completely (up to the shoulders) fill the container with bleach, which contains acids. It could even be "Persol".
- Then wait a little and pour it out.
- After this, soak the insides with a solution of table soda (10%).
What is needed for construction
To build our heating unit, you need to prepare the following materials:- 3 mm sheet of metal to make an ash pan and (if you plan to cook on a stove) a hob;
- pipe (you can buy ready-made);
- fittings or corner for the grate and legs;
- doors (if any).
The tools needed are:
- welding machine 200A;
- grinder (angle grinder);
- welding electrodes;
- hammer;
- meter, pencil;
- chisel;
- roulette;
- pliers;
- drill, required drill bits;
- metal brush;
Which design to choose
A homemade version of a potbelly stove from a container, as already written above, can be horizontal or vertical. It is easy to attach a hob to it.The second option (vertical) is installed in a natural position on a stand in the form of a ring with the valve facing up. It is more difficult to do, but it has much more traction. Since it takes up little space, it is often used by motorists for garages made of metal or concrete.

The first one stands on legs, its valve looks to the side. It is much faster to make, and it is advisable to use it only in medium and large rooms. Therefore, it all depends on the room where the potbelly stove with chimney should be placed and on your preferences.
Construction of a horizontal heater
This potbelly stove is done like this:The top with the valve hole is cut off from the gas cylinder.

The grate is made directly into the wall of our heater by drilling it.

Sometimes this knot is made differently. Corners for laying the grating are welded inside the container (on the walls). If it burns out, it will be easier to pull it out.
The legs are attached (boiled or screwed) to the remaining container. Housing made of sheet material and corners for collecting soot are welded from below.

A round hole is cut in the wall of the container near the bottom to insert a chimney pipe.

Weld a hole onto the “collar” from a 5 cm strip. Its internal diameter must be equal to the external caliber of the pipe.
The door shown in the figure involves fastening on hinges a cut top with a hole made, an annular belt and a round flap.
Another door option is shown at the beginning of this section. Instead of the cut off top, a sheet with a welded fitting (for the blower) and a hole for the door is welded onto the gas cylinder. It is fixed, as usual, on hinges. The valve on the fitting must be of a ball design.
At the end, insert the pipe (necessarily with an elbow) into the hole for the chimney:

Making a vertical potbelly stove
Such a design will take less space, it is convenient to move it from place to place.
They begin to make such a furnace like this:
- Cut out the valve and expand the hole (under the pipe) to 10 cm.
- They weld on it, as in horizontal version- “collar”.
- Measure 5 cm from the bottom upward and cut a hole for the blower.
- At a distance of 5 cm upward, cut out a door hole.
- A grill or corners for its installation are welded between the cut holes (inside the container).
- The vent and firebox doors are hung on hinges and latches are screwed to them.
Chimney installation
Before cutting a hole for a pipe, find out what kind of pipes you have. After all, the sizes of standard smoke outlets start from 7 centimeters. Industrial enterprises produce pipes for various chimneys. You can buy any elbows and straight sections necessary for the construction of a chimney. You can even purchase such products from artisans.The picture above shows correct location chimney parts. Don't make a straight pipe. This will affect the quality of heating and your pocket.
"Underwater rocks"
The chimney is one of the main components of any stove. It must be located in such a way that it has fairly easy access.Due to incorrect arrangement of elements, it is possible:
- smoke in the room;
- poor traction;
- frequent chimney blockages;
- too much traction.
- incorrect angle of the pipe when exiting;
- the absence of an anti-wind nozzle at its end or low draft, which occurs due to a clogged chimney;
- its short length.
To eliminate the reasons described above, you should disassemble and inspect all elements for contamination. If everything is normal, you should try to extend the pipe to increase the draft. If the draft is strong, try not opening the vent. If the traction returns to normal, it means you have cut too much. big hole. This can be corrected by simply welding part of the hole shut with a strip of metal.
If you need to provide affordable and easy-to-implement high-quality heating for a garage or small country house, it is worth choosing heating for ordinary firewood. A potbelly stove is usually used for this purpose. long burning, which, in essence, is a simple, but, in the process of doing it yourself, a slightly modified metal stove in design.
It is, thanks to some improvements, that the potbelly stove allows you to burn common materials as efficiently as possible. solid fuel. In this article you can learn how to make a stove with your own hands using drawings, how to install it correctly and connect the chimney. We offer photo and video instructions.
Using a metal stove or potbelly stove, it is quite possible to heat any warehouse and production premises. This stove can be completely assembled with your own hands. During the manufacturing process, various metal containers are usually used, including gas cylinder is the most popular.
A long-burning potbelly stove made from a cylinder can last a huge amount of time, while the overall process of its implementation does not take much time. If you follow the instructions presented to your attention, you can quickly and relatively easily solve heating problems country house, garage, small warehouse and barn, as well as other premises of the industrial and utility category.
 Let's look at the pros and cons of a self-made long-burning wood-burning stove.
You can get acquainted with the simple design of a smokehouse for cold smoking at home
Learn about the manufacturing technology of a smoke generator for cold smoking:
The basic principle of the work performed
A do-it-yourself long-burning potbelly stove, like all wood-burning devices, consists of elements such as
 1.Blower- this is a special channel, which is usually located at the very bottom of the furnace body. It is through this channel that air is usually supplied, which is the main catalyst for fuel combustion. This element is usually equipped with a door, which is used to effectively regulate the intensity of the combustion process. It simply closes or completely opens the channel from time to time. At the same time, the internal space of such a blower can be used as a special container designed to collect ash.
2.Firebox, that is, the combustion chamber of the fuel used, located strictly above the ash pit. This element is part of the channel through which air is supplied. It is separated by special rods, which are known as grates. The firebox must have its own separate door, which is required for loading fuel.
The ignition process, as a rule, is carried out strictly with the door of the combustion part open and with the door of the existing blower completely closed. All unburned parts of the fuel usually fall through the grate into the mounted ash pit. They can also fly out through a special exhaust channel.3.Chimney- This exhaust duct, used to remove combustion products from the furnace. A view, that is, a special wedge-shaped shutter, is mounted in the body of the chimney. It was originally intended to completely close the entire exhaust duct. Using it, you can seriously slow down the overall process of efficient fuel combustion, while simultaneously increasing efficiency parameters.
Do-it-yourself stoves made from a gas cylinder usually involve placing such two in a metal container body structural elements, like a firebox and a high-quality blower.
The chimney of this stove can be mounted separately.
- Such a potbelly stove works based on the following principles:
- The blower supplies air to the combustion part;
- The firebox usually burns coal or wood;
- A part of the stove, such as the chimney, removes gas and all unburned elements, that is, soot;
- The combustion control process is carried out by means of a throttle valve. It, in turn, is inserted into a short fitting and a special wedge-shaped view, pre-installed into the body of the chimney;
- Fuel is loaded into a special door cut into the body of the cylinder.
In fact, everything is relatively simple and clear. All that remains is to figure out how to correctly place the combustion part and the blower in the cylinder. It is important to understand how to connect a special chimney duct to it. All this can be found out by studying the information below.
Technology for making a stove from a conventional gas cylinder
First of all, it is necessary to clarify that a do-it-yourself long-burning potbelly stove is constructed from a special 50-liter container. It was originally designed to store propane mixtures. These containers are usually used in everyday life to power autonomous gas stoves, as well as in industry, in particular for efficient storage fuel used for a conventional cutting torch.
The process of careful preparation of the container
- The oven assembly process begins with preparing the base. It is done like this:
- The gas is completely removed from the cylinder, for which you just need to open the valve and wait for a sound such as a perfectly audible hiss. This process is carried out strictly on the street;
- After this, it is recommended to completely get rid of the smell of odorant or mercaptan fragrance. It is this that is usually added to the container to determine if there is a gas leak. To completely get rid of it, simply rinse the bottle with a special bleach solution that contains acid. Any sediment present can be effectively washed away with a 10% mixture. soda ash. After washing is completed, you can use the container to perform a long-burning oven.
The choice of furnace design is carried out
It is worth knowing what can be vertical and horizontal. In other words, the cylinder can stand in its usual position, that is, with the valve up and at the same time resting on a special stand in the form of a ring. Also, the base can simply lie with the valve to the side, while it rests on the legs welded to the base.
A horizontal potbelly stove is usually constructed much faster, but the disadvantage is that the device takes up quite a lot of free space. A vertical stove can be placed in any corner without any problems and the draft will be much better.
Features of making a horizontal potbelly stove

- A horizontal potbelly stove can be done with your own hands using the following steps:
- From the body of the gas cylinder, approximately at the level of the hangers, it is necessary to cut off the top at the same time as the hole that is intended for the valve.
- Four supports are welded to the cylinder, that is, legs that transfer the workpiece to a horizontal state.
- In the very top part of such a container, next to the closed end, a round hole. This will be the base for the chimney. Then a special ring collar made of a 5-centimeter strip of steel, pre-bent, is welded just above the hole.
- In inner part gas cylinder, as the drawings show, special transversely located grates are mounted. To make it convenient to install them, it is worth burning special small holes in the cylinder.
- You can go by execution alternative option. In this situation, a home-made oven is equipped with two special shelves from the inside, directed from the corners. It is on them that the grate will then be laid. From the point of view of completely replacing all burnt-out grates, this particular option looks much more preferable to the insert described above.
- After this, steel elements should be welded in the front part of the cylinder where there is a cut hole. It is intended for the door; a special fitting with special ball valves is welded there. It is this that is used as a blower. On installed hinges The door is attached and must be closed with a latch. When making an alternative version of the furnace, a ring-shaped belt is welded onto the body. Many people use a valve hole as an effective blower.
On the picture detailed drawing how to make a potbelly stove for a summer residence:

Vertical oven assembly process

- A vertically positioned potbelly stove can be made with your own hands according to the following instructions:
- The existing hole for the valve, located in the end part, should be slightly enlarged, to about 10 cm. At the same time, a metal plate, that is, a collar, the thickness of which is 5 cm, should be welded along the ring. Such an element will play the role of a pipe intended for chimney;
- A small hole is cut approximately 5-10 cm from the very bottom; it will act as a door for the installed blower.
- A little higher there is a hole for a small firebox door. The parameters of these holes can be completely arbitrary, but the parameters of the door, which plays the role of a vent, are in no way less than the total area of the chimney system;
- Between elements such as the firebox and the ash pan, shelves are welded in order to then place grates of rods and grates;
- Doors can be secured to special loops, they can also be equipped with special latches.
How to properly make a chimney?
To ensure maximum stability in the operation of a stove structure made from a cylinder, it is imperative to arrange high-quality draft.
To achieve this goal, the cut of the stove chimney pipe must be installed at a certain height. This is slightly higher than the edge of the mounted grate. When connecting a gas chimney to the side, it is necessary to ensure that the length of the strictly horizontal section is approximately 400 mm. At the very bottom of the vertically located part, it is worth organizing high-quality removal of accumulated moisture, as the drawings show.

- A horizontal section is being installed at a slight inclination of 35 degrees. Immediately after this, the channel turns upward and leads out. A completed or purchased heat exchanger of a special samovar category is installed on the chimney element;
A pipe that leaves the furnace at a special angle and then passes through the premises will be able to transport warm air. Thanks to this, overall efficiency indicators become higher, while at the same time fuel consumption is seriously reduced.
- At the same time, it is recommended to use certain measures regarding the removal of incoming heat from the chimney part. There are two methods for carrying out this process:

- , will provide the opportunity to install about 2 or 3 radiators in the country house or garage and at the same time provide them with heat. Similar device It is distinguished by its simplicity in the manufacturing process, that is, a special water jacket is made in the chimney section, which has two high-quality pipes.

Summing up
For efficient heating buildings such as garages, country dachas and greenhouses, it is difficult to choose more the best option than homemade wood-burning stoves. When compared with electricity, the process of complete combustion of wood is the cheapest, even taking into account low efficiency parameters heating systems. At the same time, the overall efficiency of the furnace can be seriously increased by competent organization removal of combustion products and high-quality heat extraction.
This video discusses the manufacturing technology of a mobile potbelly stove.
The sequence of actions when disassembling a gas cylinder is shown in the following video
Various options for potbelly stoves are presented in this short video:
Gone are the days when the potbelly stove was used for heating residential premises and cottages. Today, only garages and utility rooms are heated with such devices.
The best option for making it yourself
The main disadvantage of a classic potbelly stove is its low efficiency, which is expressed in significant fuel consumption and rapid cooling after it burns out. Therefore, modified versions of it are currently used. One of the most popular ways to make a stove from a gas cylinder is to use an old gas cylinder for this. Its sizes vary: miniature 5-liter models are unlikely to be suitable in this case, since the stove will have limited heating capabilities.
As for 12 and 27 liter cylinders, the power of the heater made from them is enough to service small areas. Such devices are able to produce no more than 2-7 kW of heat: they are sometimes used as camping stoves. To make a stationary potbelly stove from a gas cylinder for a garage or cottage, it is recommended to use 50-liter containers, 85 cm high and 30 cm in diameter. The wall thickness here is quite enough to load any fuel. At the same time, the weight of the cylinder allows you to work with it alone.
There is also an option with industrial gas tanks of 40 liters: with approximately the same volume, they have a smaller diameter (25 cm), greater height and thicker walls. Operating a freon cylinder is much more difficult - it is both longer and heavier than a household 50-liter container. If you have the appropriate equipment, it can be shortened to 70 cm: a potbelly stove made in this way will have thicker walls. As a result, it will take more time and fuel to warm it up, but the stove will also take much longer to cool down.
Making doors for a potbelly stove from a gas cylinder
There are several options for arranging doors for a gas cylinder stove:
- Finished cast products. Ready-made ones are available for sale modular designs, consisting of a blower and flow door. To integrate such a module into a homemade stove, you need to cut out a niche of appropriate size in the cylinder body, equipping it with a frame made of welded corners. The cast structure is bolted to the frame. The cutout for the door is sealed using a small side (a metal strip 10-20 mm wide) welded along the entire length of the body.
- Homemade design. To save money, instead of a purchased door, they sometimes use a homemade structure made from a cut-out piece of wall. In this case, loops will also be required. The simplest option– buy ready-made canopies and weld them onto the surface of the stove from a gas cylinder with your own hands. Craftsmen make homemade loops using thick chain links.

When starting to make a stove from a gas cylinder with your own hands, it is important to take care of safety precautions. A flammable substance in a liquid or gaseous state may remain inside the old product: therefore, before cutting or cooking a metal container, remove the reducer and completely bleed off the remaining gas. To be sure, it is recommended to fill the inside of the balloon with water and let it sit for a month.
Do you need a grate for a stove?
Most simple drawings Do-it-yourself gas cylinder stoves do not contain a grate. This is primarily typical for small vertical potbelly stoves, inside of which there is too little space for additional compartments. This version of the stove consists of a body on legs, one door and an upper pipe for connecting the chimney. To increase the level of heat transfer of the device, its external walls are additionally equipped with welded steel strips. The upper part, in addition to the chimney, has another cutout: if you install a lid on it, you will get a convenient tile for cooking food and heating water.

In cases where the presence of a grate is necessary, a horizontally located cylinder at the bottom is supplemented with a tray for accumulating ash. Vertical stove models made from a long-burning gas cylinder are more convenient for installing a grate, since there is much more space in them. To do this, a mesh of thick reinforcing bars is placed in the container itself: finished cast iron products required sizes practically never occur. The disadvantages of such structures are their rapid burnout and the difficulty of repair: for this it is necessary old fittings Cut it out and weld a new one. More convenient option- weld fragments of a thick corner or fittings inside the stove from a propane cylinder as a stand: a separately welded grate is subsequently mounted on it.
Ways to improve heat transfer from a propane cylinder stove
As mentioned above, the main disadvantage of a garage stove made from a gas cylinder is its poor thermal efficiency, because... a significant part of the heat obtained during combustion simply goes out through the chimney along with the gases.

There are several ways to improve the heat transfer of a homemade stove:
- Apply combustion of flue gases. In this case, the design of the potbelly stove will resemble a “bubafonya” or “slobozhanka” stove. This will make it possible to increase the efficiency of the device by an order of magnitude.
- Extend the chimney pipe. In this case, part of the heat that goes outside remains inside the room. To do this, the pipe is given a broken configuration, without horizontal sections and negative angles.
- Use smoke pipe. Another cylinder in a vertical position is welded onto the horizontally located stove body from a wood-burning gas cylinder: it will act as a smoke pipe. Improved heat transfer of the stove is achieved here by increasing the area of the heating surface. The condition for preventing smoke from entering the room is the presence of good draft.
- Arrangement of the heater. This technique is widely used in baths, where rubble is used for additional heat accumulation. The metal chimney is equipped with a mesh into which stones are poured to take heat from the pipe and transfer it to the room. In this case, it will take some time to warm up the stones: before this, the air will heat up with some slowdown. But in the future, the surface of the pipe will not burn, and the heated stones will evenly heat the surrounding space. Even after the wood burns out, the accumulated heat will continue to maintain a comfortable temperature in the room for some time.

When selecting stones for backfilling, it is recommended to give preference to round river samples: it is desirable that they have a uniform color without any inclusions. Other types of stones can even be dangerous, bursting when heated, or releasing substances harmful to health.
Options for increasing the room heating rate
In order to quickly raise the temperature in the room where a propane cylinder stove is installed, you can use the following devices:
- Regular fan. It is mounted in such a way that the forced air blows through the housing and chimney. Craftsmen often go further, equipping the upper part of the cylinder body with through pipes, welding them into pre-designed holes. A heat-resistant fan is installed on one side of the improvised channels, capable of maintaining several speed modes: this makes it possible to regulate the temperature of the air leaving the pipes.
- Ventilation holes in the case. In this case, additional activation of air flows is carried out without the use of a fan. To achieve this, a wood-burning gas cylinder stove is additionally “dressed” in a special casing, the surface of which has a series of holes in the upper and lower areas. Through the lower gaps, cold air is sucked in, which usually accumulates in the floor area. Blowing through the hot body, the air flows gradually heat up and exit through the upper slots into the surrounding space. Approximately the same operating principle is used in Buleryan stoves and sauna heaters.

A simple water heating boiler can be made from a gas cylinder. To do this, a water jacket is installed around the finished pyrolysis furnace from a gas cylinder: from it, the heated coolant is supplied through pipes into the batteries. Such a system must have expansion tank, installed above the stove and radiators. Thanks to it, surges in internal pressure in heating circuit due to the expansion of heating water. Since we are talking about a primitive boiler without any adjustment, cases of water boiling inside the system will occur quite often. The volume of the expansion tank is at least 10% of the total displacement.
Making a potbelly stove from a gas cylinder with your own hands is not a very complicated procedure. During operation of the finished device, one should take into account the fact that the temperature of its body can reach significant levels: this imposes additional requirements on fire safety heated room.
If you pay attention to how much a cast-iron or steel wood-burning stove costs, you will quickly understand that buying it to heat a garage or cottage with a greenhouse is not always justified. More affordable option– a potbelly stove made from a long-burning gas cylinder, made by hand or welded by a craftsman to order according to your drawings. Our goal is to help with the choice of design, describe the manufacturing technology of the potbelly stove and its installation, right down to the installation of the chimney.
Selecting the design of a wood stove
Outdated and inefficient heating equipment is gradually becoming a thing of the past, which also affects homemade stoves. Nowadays no one needs primitive iron boxes with a pipe and doors, devouring firewood without good heat transfer. A modern potbelly stove should be economical and heat the room well. Therefore, advanced craftsmen are constantly working to improve steel furnaces.
To achieve the maximum efficient work wood heater, it is necessary to solve 2 questions: how to increase the efficiency of the stove-stove and the burning time from one load, without increasing the quantity and price of the materials used. We present 3 homemade options where these tasks were successfully solved and implemented:
- three-pass stove made of two propane cylinders;
- pyrolysis stove with an air-fire-tube heat exchanger and a secondary chamber;
- A very popular design is “Bubafonya” with top burning of wood from a gas cylinder.
For reference. The first 2 units were designed, made and tested by our expert, who kindly provided his photos and video materials.
If you are comfortable with a welding machine and have the necessary tools, then there will be no technical problems with production. Below we will present drawings and explain the technology of how to make a potbelly stove from a gas cylinder using all three options. But first, make your choice by reading the review of these stoves.
 To make a stove you need welding machine, grinder, plumbing and measuring tools. You will need several clamps, at least 2 pieces
 Three-way potbelly stove - operating principle and pros and cons
This homemade stove the master assigned the humorous name “Collider” due to its unusual appearance and good heat dissipation. This wood-burning stove is made from two standard 50-liter propane cylinders welded to each other at an angle of 90°, as shown in the drawing. The operating principle is as follows:
- The first tank, laid horizontally, plays the role of a firebox and is accordingly equipped with doors and grates. An impressive portion of firewood is placed in it and set on fire.
- The second vessel is an air heat exchanger with internal partitions, slowing down the flow of flue gases and forcing them to change the direction of movement three times and give off more heat. At the end, combustion products leave the heater through the chimney pipe.
- To increase the heating surface, both parts of the housing are equipped with additional ribs.
- An ash pan made of sheet metal, whose door regulates the supply of combustion air.
 Sectional drawing of a homemade three-way wood-burning heater
 Note. With the same success, instead of cylinders, you can use a steel pipe for a potbelly stove with a diameter of 300 mm and thin walls (4-5 mm).
The estimated power of the “Collider” is 10 kW with an efficiency of about 55%, which allows you to heat a room of up to 100 m² - a cottage, a greenhouse or large garage(boxing). Practical tests have shown that in the mode of maintaining heat in a heated room, 1 load of firewood lasts for 1.5-2 hours. If you use a heating unit in a smaller house (25-50 m²), the combustion duration will increase to 3-4 hours. Anyone who understands the topic will understand that for homemade potbelly stove This is good economics.
 Photo of the finished Collider stove with heat exchange fins
 There is only one downside to this long-burning stove - it’s a bit strange appearance. But it is compensated by numerous advantages:
- ease of manufacture;
- quick warm-up and decent operating time from 1 load of solid fuel;
- the design is cheap, you only have to buy comfortable handles and also a pipe for the potbelly stove if you don’t have propane cylinders;
- due to the size of the firebox, long (80 cm) and massive logs are placed in the stove, which contributes to the duration of combustion;
- the unit can be made with hob, as shown in the photo.

The "Collider", like any potbelly stove made from a gas cylinder, welded by yourself, can be supplemented by installing a water circuit, regulating the air damper in the ash pan door and an external fan. The dimensions of the stove can be changed in any direction by selecting smaller tanks or pipes of a different diameter.
The operation of a potbelly stove used to heat a 100 m² cafe is described in the video:
Review of a pyrolysis oven for 2 chambers
This small wood-burning stove, made from a 24-liter gas cylinder, was named “Pyaterochka” after the number of air heat exchanger pipes. It operates according to this principle:
- As in the previous case, the cylinder laid on its side serves as a combustion chamber, and an ash pan is attached to the bottom. The role of the grate is played by slits cut in the wall of the vessel.
- There is an opening at the top of the tank where 5 vertical heat exchanger pipes are adjacent. Hot flue gases move along them and thus release some of the heat into the room.
- From the heat exchanger, combustion products enter the secondary chamber, where heated air is supplied separately through a separate tube. Thanks to this, the combustible gases formed in the firebox are burned and release additional heat, after which they are directed into the chimney.
 Drawing of a long-burning pyrolysis stove with a gas afterburning chamber
 The results of practical tests of the heater are as follows: a room with an area of 30 m² warms up to 20 °C within 1 hour, after which one laying of wood lasts for 1.5-2 hours, depending on the operating mode. Approximate power – 5 kW. As you can see, in this design the burning time is reduced due to the reduction of the firebox, but the stove is very compact and will fit in any room. Yes, and it heats up quite well.
Advice. Do you want to increase the burning time to an average of 4 hours? Then study the drawing of another option, which shows the same pyrolysis potbelly stove, made with your own hands from a 50-liter gas cylinder. The design of the heating units is identical, the only difference is in the volume of the tanks used as a firebox.
 This is what a two-chamber homemade stove looks like. 2 rods are welded on top - you can put a saucepan or kettle with water
 Thanks to the efficient combustion of wood, the Pyaterochka stove is more economical than the Collider, although it is more difficult to assemble. In terms of the cost of materials, the difference between them is small - the first has 2 cylinders, the second has 5 pipes with a diameter of 57 mm and a length of 40 cm. A separate advantage of the stove is the ability, after heating, to burn wet wood and any debris without losing heating intensity. The remaining advantages are the same - low cost, ease of use and the possibility of modernization.
More useful advice. It is quite natural if, after replacing a small cylinder with a standard one (50 l), you want to increase the heater’s power and add 2-3 more pipes to the heat exchanger. Remember that the flow area and chimney draft should increase accordingly. Otherwise, you will waste materials and time, because due to insufficient draft, the outer sections will remain cold and the furnace power will not increase.
 An enlarged version of Pyaterochka from a large 50 l cylinder
 Top burning stove "Bubafonya"
By and large, “Bubafonya” cannot be classified as a potbelly stove, since it has a radically different operating principle. But it is impossible to ignore this stove due to its wide popularity due to the burning time from 1 load of wood from 6 to 10 hours. At the same time, the heater is famous for its numerous shortcomings, which we will discuss later.
The operation algorithm of the Bubafonya long-burning stove shown in the drawing is as follows:
- The firebox is standing vertically propane tank for 50 l. Through the hole in top cover An air supply pipe goes inside, ending with a thick metal disk. Steel strips are attached to the bottom, distributing air in all directions.
- When the firebox is filled to the top with firewood, the heavy disk presses it down and causes it to sag as it burns. Ignition is also done from above, and only then the pipe with the load is lowered.
- The combustion air supply is regulated by a damper installed at the upper end of the pipe. The chimney pipe is embedded in side wall bottle under the lid itself.
 Drawing of a top combustion furnace and arrangement of air distributors
 Note. The place where the pipe passes through the lid is not sealed and secondary air is sucked in there, which helps to burn out the flammable gases above the disk when the oven is properly heated.
The strengths of "Bubafoni" are a decent operating time, simplicity and the possibility of conversion into an upper combustion boiler (a stove is made with a water jacket, as described in). And here weak sides forced many garage owners to abandon such potbelly stoves:
- the stove cannot be loaded until all the fuel has burned;
- if the damper is closed, the firebox will not go out and will smolder for a long time, because secondary air enters it;
- without good draft, the heater smokes into the room;
- in the slow burning mode, the stove heats weakly, and the chimney pipe becomes intensively clogged with soot;
- To enter normal mode, the unit must warm up well, which consumes ¼ of the fuel.
 On the left in the photo is a close-up of the air damper, on the right are homemade heat exchange fins from profiles for installing gypsum boards
 For reference. To burn off soot in the chimney, you need to run the Bubafonya at maximum speed every time you light it.
Finally, let's sweeten the pill a little. Despite all the shortcomings, a long-burning stove made from a gas cylinder does not lose popularity; in addition, it successfully operates on sawdust and various flammable debris.
Instructions for making a potbelly stove with your own hands
Before you cook a long-burning wood stove, you should prepare all the necessary power tools:
- welding inverter;
- grinder, also known as an angle grinder;
- drill with a set of drills.
Note. We will not list hammers with pliers here, since a good owner will always have a full set of tools in his house.

Of course, you will need an old propane tank, from which you need to twist the valve and be sure to fill it with water before cutting. The fact is that propane is heavier than air and its residues will not leave the tank on their own. To push them out of there, water is used. The order of further work depends on the chosen design.
Assembling a three-pass furnace
In addition to the cylinders, to make this potbelly stove you need to prepare the following materials:
- sheet metal 2 mm thick will go to the ash chamber and ribs, 3 mm - to the doors;
- a piece of round pipe with a diameter of 100 mm - for the chimney pipe;
- corners or profile pipes for legs;
- asbestos, or better yet, graphite-asbestos cord for sealing the doors;
- steel profile 20 x 20 mm or reinforcement of the same cross-section - to strengthen the grate.
 Joining two cylinders (left) and welding door frames (right)
 Advice. It is easier to buy handles - locks with beautiful ebonite linings than to waste time on homemade ones. To give the stove a modern look, purchase heat-resistant paint (sold in aerosol cans).
 To prevent the rods from bending high temperature, they need to be reinforced with welded profiles
 First of all, cut the metal into blanks according to the dimensions indicated in the drawing of a long-burning potbelly stove presented in the previous section. The furnace manufacturing technology is as follows:
- At the end of the first cylinder, cut an opening for the door and a hole in the wall for the gases to escape. Cut off the bottom of the second vessel, and make a 100 mm hole at the end for a pipe. Make semicircular cutouts on the walls so that one cylinder sits tightly on the other.
- Cut the slits in the grate. From the outside, weld amplifiers from a 20 mm profile to it.
- Make an ash pan and door frames, weld them to the body. Install the legs at the same time.
- Weld the doors and seal the junctions with the frame. Install the sashes and handles.
- Use the cut out walls of the cylinder as partitions, welding them inside the vertical tank.
- Connect the two vessels together by welding. Install the chimney pipe and boil it.
- Attach heat transfer fins to both housings. At this point the oven is ready.

A few words about how to make tight doors for a long-burning potbelly stove. The technology is simple: from narrow steel strips welded to inner surface sash, a channel is formed into which a graphite-asbestos cord is subsequently stuffed. The main thing is to clearly determine the location of the groove. Upon completion, all metal must be degreased and painted in 3 layers with breaks for drying.

Advice. Before painting, it is advisable to heat the welded stove in order to burn off all the old paint.
Manufacturing of a two-chamber pyrolysis stove
The assembly diagram of this high-efficiency potbelly stove is in many ways similar to the Collider, only 1 gas cylinder is used, and pipes with a diameter of 57 and 20 mm are added from materials (for the heat exchanger and secondary air supply, respectively). The work order is as follows:
- Cut holes in the tank for the loading door and for installing the heat exchanger. The dimensions of the platform for it are 260 x 200 mm.
- Make an ash pan and install doors as described above. Weld the supports.
- Make a heat exchanger by cutting pipes in a staggered pattern between two sheets of metal. Observe the center distances indicated in the drawing.
- Bend the 20 mm pipe at an angle of 90° and weld it to the heat exchanger. Attach the latter to the opening cut in the cylinder.
- Weld the secondary chamber with the chimney pipe. As a lid, use a semicircular blank that used to be the wall of the cylinder. The heater is ready.
 Stages of assembling the firebox door - non-combustible insulation is laid in the center, graphite cord is laid along the edges
 Note. If you use a standard cylinder, then the work algorithm does not change, only the ash pan needs to be made larger (the size is shown in the drawing).
A little about how to properly supply air to the secondary chamber of a long-burning potbelly stove. Before installation, the end of the tube must be plugged, and 5-6 cuts in the form of a Latin V must be made on the sides. Then the pipe is inserted into the hole in the upper platform of the heat exchanger and scalded. If you are making a potbelly stove with your own hands from a pipe taken instead of a cylinder, you will need to weld back wall and a front panel made of metal with a thickness of at least 4 mm.
 Such slits need to be made on the sides of the tube - air passes through them into the secondary chamber
 Photo of the potbelly stove assembly process

We install a frame for the oven doors

We weld an ash pan from sheet metal

We cut the grates and reinforce them with a welding profile

We weld the ash chamber to the cylinder

We put handles and locks on the doors
 Cutting holes for pipes in the flanges of the heat exchanger
Making a potbelly stove on video
Assembling the Bubafonya heater
The manufacturing technology of this stove is one of the simplest. Take a 50 liter gas cylinder, cut off the top part along the factory seam, and then perform the following steps:
- Weld a grate from periodic profile reinforcement with a diameter of 20-24 mm and install it according to the drawing. Below, cut an opening and install the ash chamber door.
- Make a hole in the cut-off lid for the air pipe, and weld a steel strip to the outside of the cylinder for sealing.
- Attach a disk weight with welded air diffusers to one end of the 57 mm pipe by welding, and place an air damper on the other.
- Install the chimney pipe.
- Insert the air pipe into the firebox and put on the lid.
 In fact, 3 parts are the entire Bubafonya stove
 For reference. Many home craftsmen do not install grates and an ash pan door in a Bubafonya-type stove. This simplifies the work, but complicates the operation: after the firewood burns out, the body has to be turned over to shake out the ash.
 Installation of a grate made of reinforcing bars
 How to properly install a potbelly stove and chimney
When placing wood heaters, it is important to follow fire safety regulations. This is especially true for our expert’s stoves, whose upper part can become red-hot under maximum operating conditions. Here the requirements are:
- In a garage or country house built of brick or other fireproof materials, the minimum distance to the walls of the room is not standardized. But any flammable objects or structures must be no closer than 50 cm from the body of the stove.
- In a greenhouse, a potbelly stove should not be placed close to plants or external glass walls.
- IN wooden house the floors under the stove are covered metal sheet, protruding from the firebox side by 700 mm. Nearby walls are also lined with metal to prevent fire.
A separate question is what to make a chimney for a potbelly stove from. Aluminum corrugation is definitely not suitable, since the temperature of the gases at the outlet reaches 200-400 °C, depending on the operating mode. What options are acceptable:
- regular steel pipe with thin walls;
- flue made of roofing or stainless steel;
- insulated sandwich chimney.
 It is better to lay the chimney duct at an angle (left) than simply vertically (right)
 Advice. It is preferable to take the last option for a chimney - a double-walled pipe with basalt fiber insulation in the middle.
To create good traction, the top of the pipe is placed at a height of 4 m or more, measured from the grate. The Bubafonya potbelly stove is especially demanding in terms of draft; for it, the gas outlet should be made higher, so that later there will be no questions about why the stove smokes into the room. Ideally, the vertical section of the chimney should end with a condensate collector, although many home craftsmen do not adhere to this rule.
By the way, correct chimney allows you to increase the efficiency of the potbelly stove. This is achieved in two ways:
- In a garage or greenhouse, the chimney pipe is extended and laid at an angle, and at the other end of the room it goes out onto the roof, as shown in the photo above. This way, the hot combustion products will give off more heat to the internal air.
- A heat exchanger is installed on the vertical section of the chimney, connected to the water heating system of the house or cottage. Disadvantage: you will have to remove soot from the chimney duct of a long-burning potbelly stove more often.
 Connection diagram for a water heat exchanger located on a chimney pipe
 A samovar-type heat exchanger placed on the chimney of a potbelly stove should not be directly connected to the water heating network. There is a danger that the coolant may boil and rupture the pipelines. It is better to use a connection diagram through a container of water - a heat accumulator, which you can also make with your own hands from a gas cylinder. For a description and drawings of its design you can.
The onset of cold weather makes it very topical issue heating. It is especially important for those premises in which people are occasionally present: utility rooms, garages, etc. It is very impractical to equip a stationary system here, and often impossible, but it is also impossible to do without heating. There are two options: systems running on electricity or solid fuel. The second category includes an economical potbelly stove made from a gas cylinder - even an inexperienced home craftsman can assemble it with his own hands. Let's take a closer look at how this is done.
The principle of operation of such a stove
A stove of this type is a practical solution for all kinds of unheated rooms that occasionally need to be heated. Due to their design features The potbelly stove heats up very quickly, which allows you to minimal costs time to achieve comfortable temperature. However, it cools down just as quickly and this is its big drawback. You can deal with it by covering the stove with bricks, but be sure to leave a small gap between the masonry and the metal. Only in this case will the device maintain a high heating rate, but it will take longer to cool down.
There must be two rectangular holes on the body of the heater. One is for supplying fuel, the second is for blowing
The main structural element is the housing, on which there are doors through which fuel is introduced into the system. The system also includes a chimney and a vent. This is the name of a special hole for air that ensures the combustion process. Quite often it is combined with a compartment where ash is collected. It is best to install another door here, this will make it easier to clean the oven. The principle of operation of the system is simple. Fuel is added to the firebox. When it burns, heat is released, which heats the metal of the case. That, in turn, gives off heat to the air and very quickly warms up the room. The chimney pipe removes combustion products harmful to humans from the room.
A small nuance. If the chimney is laid along the shortest path, then most of the heat will escape out along with the smoke. This is very irrational, so you should arrange a broken-shaped pipe. This will significantly increase the efficiency of the furnace. Almost anything that can burn can be used as fuel for the system. This could be firewood, coal, carpentry waste, old clothes, household waste, etc. The attractiveness of a potbelly stove lies in the simplicity of its design and versatility, since the device can be used not only for heating, but also for cooking.
Instructions for self-production
For the experienced home handyman It won’t be difficult to make a potbelly stove. You should start by preparing the gas cylinder for use. This is a mandatory procedure, otherwise the gas, which most often remains in the container, may explode upon contact with a spark during cutting. First, unscrew the cylinder valve and let the remaining gas escape. Then we turn the container over and drain the condensate. It should be noted that it smells very unpleasant. Therefore, it is worth carefully collecting it in some kind of container. The smell from condensation accidentally falling on the floor or other surface takes a very long time to disappear.

Before you start working with the cylinder, it should be prepared. It is imperative to get rid of any remaining gas in the container, otherwise it may explode during work.
Place the container vertically and fill it to the top with water. This is necessary so that the remaining gas that remains inside is completely displaced by the liquid. Then turn the container on its side and completely drain the water. Now the cylinder can be subjected to any manipulation without fear. This is how, for example, disassembling and cutting takes place:
Having prepared everything you need, you should determine the type of stove. It can be of horizontal or vertical design.
Option #1 - horizontal system
In this embodiment, the cylinder is placed in a horizontal plane. First you need to cut off its top part. Then install a grate inside the container. It is made from reinforcement. The rod is neatly bent like a snake. Installation of grates is quite simple. They are installed in the container and welded to it. Now let's work on the front part. We take a sheet of steel and mark on it the outline of a circle with a diameter equal to the outer contour of the cylinder. Cut out the part. Then we mark two rectangular holes inside the circle. The first is intended for supplying fuel to the combustion chamber, the second - under the ashboard.
Using a chisel or grinder, cut out the intended holes. We weld the curtains to the finished lid and attach the doors to them. The latter should be covered along the contour with asbestos-cement cord. We weld the prepared structure to the cylinder. The front part of the stove is ready. Let's move on to the back of the device. Here you need to install a chimney. To do this, we cut out a hole equal in size to the diameter of the pipe used to remove smoke. We weld the chimney to it the desired shape and sizes, made of thick-walled pipe. The oven is ready.

A type of potbelly stove, which involves a horizontal arrangement of the body of the gas cylinder. Quite simple to manufacture design
Option #2 - vertical design
When arranging this design, the cylinder is located vertically. There are two ways to set up the system. The first involves more work associated with cutting, but there are fewer difficulties during installation. When choosing this method, use a grinder to remove the upper part of the cylinder. The second method saves time, effort and electrodes, but is extremely inconvenient. In this case, the upper part of the cylinder remains in place. In any case, we cut out a fairly large combustion hole on the front of the future device. Below you need to place a smaller hole for the blower and cleaning the stove from ash.
You can place holes arbitrarily, as well as select sizes for them. The main thing is that there are two rectangular holes in the lower part of the case. Without them, the stove will not be able to function. Now you should prepare the grates for installation. They are made from reinforcing rods, which are bent in the form of a snake and welded inside the body between rectangular holes. In the case of the first installation option, this operation is carried out very easily, since the grille is lowered through the open top part. In the second case, it is quite difficult, since the grate bars are inserted through the top hole and held through the bottom hole, and this is extremely inconvenient.

A potbelly stove can be made from a gas cylinder placed vertically. This system involves two manufacturing methods. The top of the container can either be cut off for ease of installation or not
After installing the grates, the curtains are welded to the holes for the doors. They need to be covered with asbestos-cement cord to ensure the necessary tightness and installed in place. Now you need to make a hole for the chimney. This can be done in two ways. The central exhaust gas outlet and oxygen supply is supposed to be through a hole in the top cover of the device. The size of the hole must correspond to the diameter of the pipe that will be used as a chimney. Side smoke exhaust and oxygen supply are also possible. In this case, the hole is made in the side of the body. An elbow is most often welded to it, but a direct outlet can also be arranged. Final stage– fastening the chimney of the required configuration and length. If the top of the cylinder is cut off, weld it in place.
Homemade potbelly stove - very economical and sufficient effective solution for heating rarely used rooms. When deciding to use it, you need to remember that such a heating device is potentially dangerous. It burns oxygen, so from time to time it is necessary to provide fresh air access to the room. In addition, all precautions necessary when handling devices that operate with open flames should be observed. In this case, there will be no security problems.