Venetian plaster, also known in the old days as ancient or roman stucco, has been used for hundreds of years and has never gone out of style. This may be due to the effect of the deep glossy marble, which helps create a unique and stunning look to the room.
Earlier finishes included slaked lime, with the addition of fine sand and marble dust to form a compound called Marmorino, to which natural pigments were sometimes also added to achieve the preferred color.
The above ingredients were used by the great Italian artists who decorated the magnificent old buildings of the cities. In Venice, where high humidity needed to be found effective method treatment of the walls of palaces, churches, noble houses, castles, as well as dwellings of rich people, to avoid damage by stains and mold. This method of wall covering has proven its relevance today.
The need to keep walls from damp and capillary water from foundations is less important than in the past, as technologies are now available to help dry out the environment, such as central heating and air conditioning. However, the art of Veneziano stucco is still appreciated by people who love complex solutions and want their homes to look chic without forgetting about useful properties in providing wall protection.
Since this finish is expensive and difficult, but at the same time popular, it would be useful to know that the technique of applying Venetian plaster consists of treating the walls with a thick plaster finish applied in at least six layers.
The thick finishing layer was motivated in the past by the need for artists to create bas-reliefs or sculptures, and now it allows modern craftsmen to achieve aesthetically beautiful effects.
Applying Venetian plaster is also a great way to add character to dull and bland wall surfaces. This article will help outline the process of turning walls into a classic European look.
Venetian plaster - advantages and properties
The choice of material for wall decoration should be approached carefully, carefully weighing the pros and cons. A prudent owner wants to get a beautiful, practical, durable and, as far as possible, inexpensive option. Venetian plaster meets the requirements of the customer as much as possible:
- Beautiful - the similarity of the finish with natural marble gives a unique effect of elegance and chic;
- Practical - applied wax on the surface adds shine, in addition, the walls can be subjected to wet cleaning;
- Durable - will last for several decades without losing quality and color saturation, if not destroyed by mechanical action;
- Unfortunately affordable price Venetian plaster cannot boast, however, it is worth taking a closer look at it in the store.
- Difficult to apply, with their own hands, the owner of the home will not be able to apply plaster in a quality manner on the first attempt. Particular difficulty arises in difficult areas with bends.
Enough perfect option finishing material. Perhaps only two minuses overshadow the purchase. Firstly, the high price, and secondly, it is difficult to apply plaster with your own hands. Of course, it will be possible to apply, but to get excellent quality without a certain experience unlikely to succeed . A specially trained master will help solve the problem. It is best to check his skills based on the reviews of previous customers.
Advantages of Venetian plaster
A beautiful surface can be obtained with any color and tint, on the surface (it is figuratively divided into: smoothed, embossed and with painting). Second, Venetian stucco finishes have consistently been characterized as luxurious and elegant. Thirdly, this material has amazing durability, pliability and adhesion. The average service life is 15-20 years, during this time it will not lose its luster and protective properties.

Material advantages:
Environmental Safety. The main substances, despite modern technical means, are natural ingredients;
The ability to create unique effects. The cross section from the inside of the plaster creates an unusual and each time unique pattern;
Durability and reliability. Venetian plaster composition, even after many years, may not have cracks;
General waxing leads to moisture resistance, has the property of absorbing carbon from the environment, the so-called carbonization. A carbon film is formed on its plane, which in addition forms a protective lining. In addition, the negative impact of temperature fluctuations is compensated (amplitude from -40 to +70);
The Venetian covering of the walls perfectly hides the flaws. Not unimportant is its easy pliability of reconstruction and renewal. This makes it possible to quickly and cost-effectively restore the damaged area.
Technological process
The application of Venetian plaster is one of the most tempting projects for decorating the walls of a house or apartment. However, Venetian plaster is considered not the easiest in terms of the implementation of the application task. Most high-quality Italian plaster surfaces are made by professionals with extensive experience in this field.
Let's not hide, applying Venetian plaster with your own hands is a long, painstaking and extremely complex process. The problem is exacerbated by the fact that this is a creative work with various performance techniques inherent in the masters.
From the variety and direction of movements, a product comes out from under the hand of the master, which is difficult to repeat. Lack of experience is guaranteed to lead to a fiasco and it is impossible to predict what will happen in the end.
Experience and skill required
Skill and practice will help to predict which directions of movements will be needed for the desired result. Experiment and try until you find your style, then proceed to implement the entire project with your own hands.
It should be taken into account that the price of experience is high, since Venetian plaster is not a cheap product. In addition, to make high-quality Venetian plaster will require a lot of time and labor costs, as a rule, more energy will be spent than the implementation of other finishing projects.

After deciding to cover your walls with Venetian plaster, it will be more rational to buy yourself a few sheets of drywall or plywood for practice, gain skills and achieve optimal quality of work. To begin with, the training surface must be sanded, primed and then try to apply a plaster solution.
You should not start finishing right away, there is a high probability that everything will be redone later. In view of the high cost of plaster, it should be carefully and economically spent, otherwise the experience will turn out to be very expensive.
Due to the wide variety of application techniques, the final result will also be varied.
The materials and tools that will be needed in the process are as follows:
- plaster (either pre-painted, or you can add the desired shade yourself);
- polished spatulas with rounded edges of different widths. Spatulas must be new and free from scratches;
- trowel to apply plaster directly and draw veins on it;
- metal grater. It is needed for leveling and grouting the solution;
- brushes with coarse bristles;
- grinding grater;
- large ruler;
- roulette;
- sandpaper;
- containers of different sizes.
Before starting work, you should dress properly (glasses, mask, gloves, etc.).
It is better to remove furniture from the working room, the floor is preferably closed. Using masking tape will protect surfaces that do not need to be covered with paint or plaster.
The walls must be leveled and smooth, pre-filled with latex putty.
On uneven wall Venetian plaster will further emphasize the unevenness and possibly increase material consumption. When the wall is leveled, it should be primed abundantly in several layers. This is necessary to get rid of dust, prevent the formation of fungus and better subsequent adhesion.
Preparation for application and painting
Venetian plaster is sold in buckets and looks like a paste. Initially, the plaster White color, to give the desired shade and Venetian look, additives of various colors help, and for a variety of visual effects - decorative additives. You can make the desired color both on your own and by asking a consultant in the store. It is easier to prepare a color scheme with your own hands if you use a drill with a special nozzle.
Sometimes you can find, by opening a bucket, that the plaster is filled with a certain amount of water - this is done to prevent drying. Before use, the water must be drained and knead the composition to a uniform state. After that, dyes can be added to the plaster and mixed thoroughly.
When mixing the composition, you need to pay attention to the solution near the walls of the container, where it may not be painted. Then, you should take a wooden stick and run it along the container a couple of times, collecting the unpainted composition and mix the plaster again. Of the specific nuances, it should be noted that a number of manufacturers advise, after mixing with paint, to wait about 12 hours before use.

When tinting, it must be taken into account that certain compositions, when dried, have a slightly different color from the original version, they are usually lighter. To specifically determine what the final color will be, you must first make samples - apply a few strokes to any surface, and wait for it to dry, after which you can find out what tone the Venetian plaster will acquire.
After viewing the final version, you can either dilute the resulting composition with a clean composition or tint more. It must be remembered that manually tinting the composition of the same color will be impossible to achieve. Each batch will have a different tone from the previous one. Consequently, Venetian plaster is painted in an amount that exceeds the planned consumption by 10% - let it be better to have a surplus than not enough.
The procedure for applying plaster
Before you start applying plaster, you must first make sure that the wall is properly primed. If there is an intention to use shaded plaster, it is recommended to paint the primer in the same color. This will help prevent some of the formation of white spots.
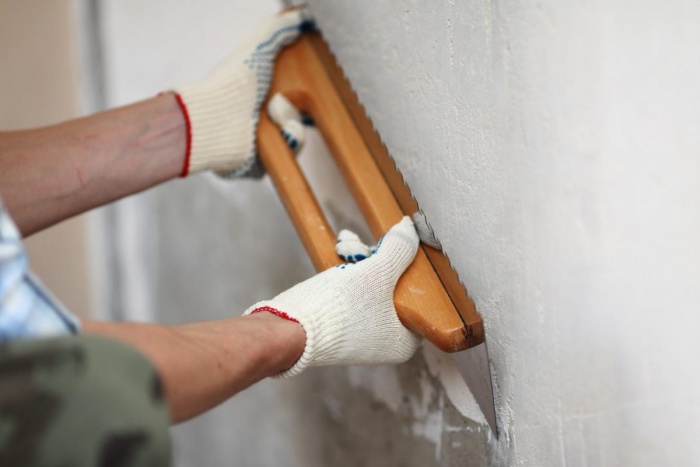
Step 1: First layer
After successfully completed preparatory work, you can start applying Venetian plaster directly. Using a steel trowel, thin layers of Venetian plaster are applied to the wall. These layers serve as the main base for subsequent layers. When performing this step, care should be taken to hold the spatula at a ninety degree angle.
Also, don't try to cover too much wall space at once. It is best if the Venetian plaster is applied to a small part of the wall surface at a time and make sure that the layers are as thin as possible. When working with a spatula, care must be taken to periodically clean it using a bucket with warm water, thereby ensuring that after the plaster has dried, no unsightly marks will remain.
Once you have finished applying the first coat, allow it to dry for at least four hours before proceeding to the next step. After the base layer has dried, you can walk on the surface sandpaper to make it easier to apply the next layer and get rid of any air bubbles that may have formed during the process.
Step 2: Second coat of Venetian plaster
Now that the wall is level and smooth, you can start applying the second thin layer of Venetian plaster. The process is much the same as applying the initial coat, one small section of the wall surface is slowly covered with Venetian in random strokes in various directions.
You need to try so that the first touch with a spatula is subsequently not visible. At this stage, it is not necessary to achieve uniformity, the whole point lies in the disorder of directions, different shapes, curved lines, meanders, so that there is a similarity as in natural marble. This layer can be the last, but if you think the wall needs more layers, feel free to add more.
You just need to make sure that enough time has passed for drying. Venetian plaster can be ventilated and dried for up to ten hours, it will depend on the internal temperature, the presence of humidity and on the composition itself. After the layer has dried, it should be rubbed with a grater, which will smooth out the bumps.
Step 3: Apply the finishing touches
The final layer should be applied with a thin spatula, which will give a transparent effect. A small amount of the composition on the spatula is applied to the surface, with a strong pressure on the spatula, part of the composition from the wall is collected back. It is important to monitor the evenness of the application. Minor irregularities will be removed with grout.
Step 4: Grout
The last applied layer, the thinnest, does not need to dry completely. About an hour after the end of the work on applying the layer, ironing should begin. This happens with the help of a trowel. It must be clean and free of any defects. With circular movements, the surface of the wall is rubbed and smoothed. At this stage, a pattern and shine begins to form.
Little by little, “depth” is acquired, like real marble, and layering appears. In the process of ironing, care must be taken so that scratches do not appear. To avoid this kind of trouble, the trowel must be constantly cleaned and try not to touch the surface with its edges.
A small area is cultivated at a time until the pattern appears, then you can move to the next area, watching the blurring of the border between these parts. This work can be considered the last stage. If Venetian plaster was applied in the bathroom or kitchen, the walls should also be waxed.
Step 5: Wax
After complete drying (about 12-15 hours), wax can be applied. After lightly wetting the surface of a wide spatula, a thin layer of wax is applied over the finished plaster. Ideally, a layer of wax is applied thinly, but without touching the wall with the blade. You need to leave a very thin film. After an hour, you can start polishing the wax to your desired gloss level. The wax will dry in the region of one and a half weeks, after which the wall can be washed.
Other application methods
Using a spatula or trowel to plaster work is one of the most common methods. However, this requires caution. By holding the trowel at a 5 degree angle, you can simply apply Venetian plaster to the wall. This needs to be done as evenly as possible, which can be difficult. You need to have a steady hand and a lot of patience.

When the plaster is almost completely dry, you can smooth it a little with a spatula. You can also use a little sandpaper to get a smoother effect. It is very important to only use sandpaper when the plaster is already dry, otherwise it will simply damage the work. Finally, after cleaning the surface, a fine finish is added.
Applying Venetian plaster with a roller
Using a roller can easily make the job messy, but it can also get the job done quickly once the technique has been mastered. First you need to mix water with plaster. One part of water is used for 2.5 parts of plaster. Stir the mixture until it becomes a homogeneous mass.
The roller is dipped into the mix and simply applied to the wall. Start better with the middle layer. Before it dries completely, you can smooth the surface with a spatula as mentioned earlier. Again, the spatula should be used at a 5 degree angle.
Sealing plaster
Sealing plaster is an important part of the job. This work is easier than applying the plaster itself. It is designed to preserve Venetian plaster and extend its durability. Sealant must be used water based and applied to the entire wall with a roller. It can also be sprayed onto the wall with appropriate equipment.
When the first coat of sealant is completely dry, a second coat should be applied to additional protection. The second coat should dry for a few minutes and then any excess sealant should be removed with a cloth. This is important, because otherwise it can leave white streaks and Venetian plaster will lose its glamor.
Summing up:
Venetian plaster has been known since the Middle Ages. Its use allows you to create surfaces that resemble stones of natural origin in their texture. With the help of this finishing material, an imitation of a marble coating is created. When the work is done by professionals, a fake is almost impossible to distinguish from the original.
Over the past century, the composition of the plaster has changed little. True, synthetic dyes are used instead of mineral dyes, and lime, which performed a binding function, replaced acrylic and other substances based on it. As for the main components, they remained the same - this is marble dust with the addition of other minerals, crushed to a similar state.
In addition to the composition, the quality of grinding is also important for plaster, which should be as fine as possible. Venetian plaster can be bought completely ready for use. It resembles a paste and has the density of sour cream. If desired, this finishing material can be purchased in dry form and act in accordance with the instructions. It is worth noting that it will be possible to stir the plaster to a homogeneous state if you use a construction mixer.
This type belongs to the category of expensive finishing materials. When it is applied to the wall, all the requirements of the technology must be observed. Ignorance or non-observance of them will not allow you to get that amazing effect that is guaranteed if you use the services of professional craftsmen.
How to work with Venetian plaster?
The first and very important stage of work is the preparation of the surface for processing. During this process, the walls are leveled, and their condition is brought to perfection. When using Venetian plaster, even the smallest cracks are unacceptable, which will become more noticeable after applying a decorative layer. The surface is primed, and after it dries, the plaster is applied.
Work is carried out on a small section of the wall, not exceeding 1 sq.m. Masks are applied randomly with varying degrees of pressure. This technology will provide an illusory perception of the depth of the material.
Venetian plaster is applied in several thin layers. Process of creation decorative coating based on this material makes it possible to choose its color, pattern, as well as glossy or matte texture.
Complete curing of the plaster occurs within 7-8 days. During this time, the material absorbs carbon dioxide from environment, on the basis of which the protective layer of the coating is formed.
Let's consolidate our knowledge of Venetian plaster
Venetian plaster comes to us from the era of Roman antiquity and the Renaissance. It gives personality to any room, and its artistic charm is due not only to its ancient origins, but also to the fact that many of the great Italian artists such as Raphael used this decorative plaster as the basis of their frescoes.
1. Real Venetian stucco is a lime base mixed with marble powder. The final shine is made with wax. Other marbles can be used instead decorative stones- for example, granite, quartz, onyx or malachite, but these options are rare due to the high price. Natural ingredients allow the wall to "breathe" and protect it from bacteria and fungi. Wax plaster makes gypsum more stable and is suitable for cleaning with water. It is very simple, just like cleaning carpets with a vacuum cleaner.
2. The texture of Venetian plaster is a play of light. Properly inserted, it creates the illusion of transparency and inner flame. The effect is due to the glare of the sun and light fixtures falling on three layers of plaster and reinforced with a wax coating.
4. However, if you just take a mixture of Venetian plaster and then apply it to the wall, you are unlikely to get the same impression. Coating requires experienced hand. Each layer is applied to previous spots and then smoothed out. To achieve a unique visual effect, the coating must be applied by a master, a true specialist in Venetian plaster. Unfortunately, this greatly increases the cost of its final price.
3. Venetian plaster is for interior use only. Otherwise, cold, rain and wind will quickly damage, thus preventing outdoor use. Interior decoration in your house will have long life and ease of maintenance. Therefore, Venetian plaster is suitable not only for decorating the walls of a house, but also for the interior of fine restaurants, cafes and hotels.
4. The advantages of Venetian plaster: a unique visual effect. In addition, gypsum does not release harmful substances because it has a natural composition.
5. Disadvantages of Venetian plaster: high cost and difficult application. The need for careful surface preparation - it must be perfectly smooth.
Architecture is often referred to as poetry set in stone. If you follow a similar allegory, then, for sure, Venetian plaster can be a romantic ballad of design, the technology of its application has remained unchanged for more than 2000 years, and unusual beauty still excites the imagination. How to apply Venetian plaster?
The technology of applying Venetian plaster has remained unchanged for 2000 years.
Due to the fact that this type finishing works very in demand, the application of Venetian plaster in the construction services market is often offered by craftsmen who are very superficially familiar with the technology of such work. In addition, the market offers many coatings that only imitate the famous Venetian.
How to choose real Venetian plaster

Application of plaster coatings: 1 - prepared base; 2, 3 - reinforcement of corners; 4 - reinforcement in the places of openings; 5 - application of the base layer; 6 - laying reinforcing glass mesh; 7 - application of primer soy; 8 - application decorative plaster.Applying plaster coatings: 1 - prepared base; 2, 3 - reinforcement of corners; 4 - reinforcement in the places of openings; 5 - application of the base layer; 6 - laying reinforcing glass mesh; 7 - application of primer soy; 8 - applying decorative plaster.
Classical Venetian plaster is carried out with a putty mass, marble dust is necessarily included in its composition, which is replaced in some cases by quartz, onyx or granite. The second invariable component of the coating is slaked lime Thanks to this, the Venetian plaster finish is very strong and durable. In addition to these components, various colorants and pigments are usually used to impart color, which help the finished surface withstand the negative effects of ultraviolet and oxygen. Often, modern mixtures for Venetian plaster have a certain percentage of acrylic binder. According to experts, Venetian putty masses based on acrylic dispersion are much more plastic and do not undergo microcracks on the surface. But no one will argue that such a material is less environmentally friendly than water-based Venetian plaster.
Finishing specialists in our time do not need to make their own layout of the mixture, it is sold ready-made in plastic buckets. At the same time, each manufacturer has original recipes that allow you to get different visual effects (matte, velvety, gloss). Often, color does not need to be added to the mixture, although certain manufacturers supply dyes separately so that the master can individually select the desired shade.
Back to index
Required Tools
If you have some artistic gift and feel like trying own forces in this type of creativity, be sure to prepare plastering special tools:

Applying Venetian plaster requires perfect surface walls.
- steel graters (required for mashing and leveling the mortar) 25 and 20 cm wide;
- spatulas of a specialized form. Their feature is rounded edges and a very smooth, literally polished, surface without scratches and notches. A spatula also needs two, wide and narrow;
- brushes of two forms: a paint brush-maklovitsa and a flat classic flute brush. The first has an oval, rectangular or round shape, somewhat similar to a brush. It is necessary to choose a maklovitsa with thick bristles.
A level, tape measure and a long metal ruler will also come in handy. Stock up on a grinding grater with a fine-grained skin.
Back to index
The foundation of the basics: preparatory work

The method of applying Venetian plaster involves very scrupulous and meticulous work on the preparation of the surface. Only in this case, Venetian plaster will be able to delight not only with its beauty, but also with its main operational advantages - practicality and durability.
If certain types of decorative plaster are not very demanding on the base and even allow you to hide small construction flaws - chips, wall irregularities and cracks. Alas, Venetian plaster, like a real aristocrat among finishing plasters, will not tolerate such a dismissive attitude towards preparatory work. Although the basis for it can be concrete, and brickwork, and drywall and even walls once covered oil paint, but all this must be thoroughly cleaned of dirt and dust, peeling plaster and paint residues. Close up chips, cracks and cracks carefully. For drywall sheets, all joints must be flush. After that, the areas to be sealed are sanded.

With the help of Venetian plaster, you can achieve the effect of a marble wall or decorative stone.
After the walls can already boast of the absence of noticeable defects, a continuous first putty is performed. When the putty layer dries, the surface is polished with pumice or sandpaper. Now you can blow the walls with compressed air or walk over them with a dry rag to remove particles. After that better surface primed, in this form it is easier to give in to a continuous second putty. Yes, again, continuous puttying and sanding will be required to correct all scratches and roughness. And again the primer. And if the walls are in poor condition, this tedious procedure sometimes has to be done three times before applying Venetian plaster. The finishing putty must be of high quality, and the last sanding is done with a “zero” sandpaper, followed by careful removal of dust with a dry cloth.
Back to index
Preparatory work will take a lot of time
In addition to painstaking and laboriousness, the preparatory work is quite long in time, since after applying each layer, you need to give it time to dry. Each layer in general case dries in about one day. If the temperature in the building is low or the air humidity is significant enough, more time may be required. In the end, the walls should be even and smooth. Now it remains to cover them for the last time several times with a deep penetration primer. Its type must correspond to the putty material, they are usually sold as a set. After priming the wall, you need to wait for it to dry completely. Finally, now is the time for real creativity.
Back to index
What color to choose?
Before starting work, glue the upper parts of the walls with masking tape. To preserve the Venetian plaster, this adhesive tape will have to be removed immediately after completion of the work, without waiting for the final drying of the material. Otherwise, when it is removed, very unaesthetic chips and cracks may form. If the putty mass for Venetian plaster is not tinted, it is necessary to add with thorough mixing required amount dye. When choosing a shade, it is necessary to take into account that the finished Venetian most often turns out to be somewhat darker and brighter in a confined space than in the catalog of a building salon or on a small test piece of material. It is better to abandon the use of strongly flashy tones for living quarters, and limit yourself to pastel shades. Plaster mass and colorators must be purchased from the same brand, otherwise they may be incompatible in their own properties.
Many people are surprised by the Venetian plaster glowing from the inside, which has the effect of translucency: only professionals know how to apply a coating of amazing beauty. But even beginners in the painting business can master simple techniques for working with Venetian mixtures. The main thing is to follow the correct procedure. Before starting work, it is worth making test samples on pieces of plywood or drywall to get a feel for how the delicate Venetian behaves.
All methods of applying Venetian plaster require the obligatory alignment of the walls. Alignment is carried out in 2 stages: the wall is prepared for puttying with the starting compositions, the finishing putty mixture is brought to perfect smoothness. If leveling is carried out by hired workers, you should order putty for painting or clarify that the decoration will be done with Venetian plaster.
After leveling, the wall is dried for 24-48 hours. The final grinding of the surface is carried out with a fine-grained sandpaper. Dust must be carefully removed.
Impregnate the wall with a primer for lime and gypsum plasters(with quartz filler). The choice of primers is quite large, and their characteristics practically do not differ from each other. It is advisable to apply 2 coats of primer to ensure good adhesion of the decorative coating to the wall.
Applying Venetian plaster will require little:
- trowel;
- metal spatula;
- dry rag;
- emery cloth with very fine grain;
- finished or dry Venetian plaster;
- color;
- polishing wax.
The material for Venetian plaster consists of a lime binder and a filler (marble dust) and is laid in a very thin layer.
Instrument preparation
If the spatulas and trowel are new, then you need to carefully examine all their edges, corners and work surface. There should not be the slightest defect on the instrument. Professional craftsmen use old, well-served trowels to apply the Venetian: they have sharpened rounded corners and a very smooth surface.
New tools can be prepared specially:
- carefully cut off the corners of the spatula and trowel with metal scissors;
- process the sections first with a file, and then with a fine sandpaper;
- sand the edges and planes of the tool with sandpaper.
Since it is necessary to apply Venetian plaster in a very thin layer (1-2 mm), it is necessary to avoid the possibility of the appearance of the most small scratches. For this, such a thorough preparation of the working tool is needed.
Classic is the easiest way

Before applying Venetian plaster, you need to mix the finished composition (in the form of a paste) until smooth or combine the dry mixture with water. The proportions of the components are indicated on the packaging of the Venetian, and the ratio of water and mixture must be very strictly observed. It is very important to pour the dry ingredients into the liquid, and not vice versa. During the filling of the dry mixture, the mass must be mixed, bringing it to uniformity. Leave the mass to infuse for 5-7 minutes and mix again.
The classic scheme for decorating walls with Venetian plaster consists of 3 stages:
- applying the base layer;
- laying 2-3 decorative layers that form a pattern;
- sanding and waxing.
To get a color coating, you need to add color to the plaster. This can be done directly in the store where the mixture is purchased. You can also tint it yourself, given that the plaster will be lighter when it dries. In order not to make a mistake in choosing a shade, you can apply a smear of the colored mixture on a white surface and dry it.
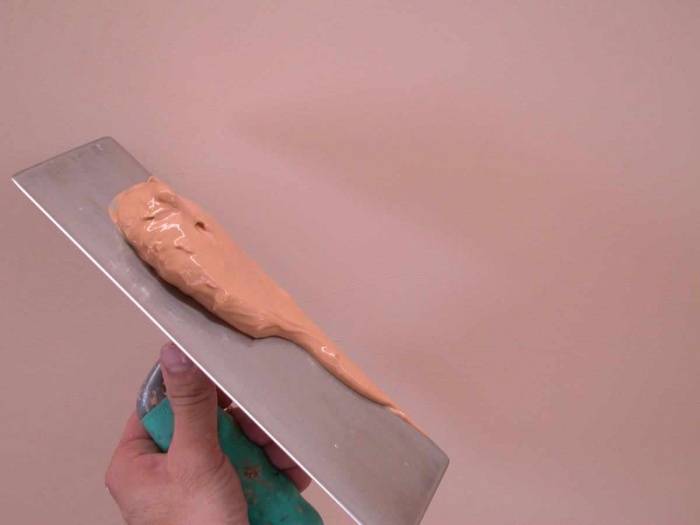
The rules for applying the base layer are not particularly complicated. It is very convenient to take the mixture with a spatula, laying it on the edge of the trowel. After that, the tool must be pressed against the wall surface at a slight angle: the front edge must be raised by about the thickness of a finger. Rub the mass into the surface with a free arcuate motion. Cover the entire wall gradually, in small squares.
It is very important to apply strokes so that they overlap the neighboring ones by 0.5-1 cm. The plastered wall must be dried for 6-8 hours (you can leave it overnight). Apply the following layer on the prepared surface:
- Dial plaster paste on the trowel. Spread it over the base layer with short and long strokes. At this stage, uniform application should not be achieved: chaotic strokes create an unusual texture of the finished plaster. Smooth out irregularities with a trowel.
- Dry the wall for 2-3 hours.
- Treat the surface with sandpaper, removing all small irregularities.
In conclusion, the coating is glazed. Apply a strip of mortar on a wide spatula, press the tool against the wall, holding it at a very large angle to the wall surface (75-80º). Make an extensive stroke in one continuous movement, pressing the spatula firmly against the wall.
On the applied stroke, you need to draw the spatula again, smoothing it and making the paste layer very thin. Glazing is desirable to produce separate squares (about 1 m²). Having processed 1 square, you need to move on to the next. Having finished applying the solution, return to the previous one and polish it with a clean spatula to a light gloss. Apply the solution on the 3rd square, polish the 2nd area and cover the new part of the wall with paste.
It is convenient to arrange the squares when glazing with a ladder, starting from the upper corner of the wall and gradually moving to the side and down. The boundaries of individual sections need to be joined with a slight overlap, combining them together. Having finished finishing, polish the wall again with a spatula and dry it.
A high-quality plastered surface will not need sanding. In the presence of the smallest irregularities, it is worth wiping it a little with very fine sandpaper, smoothing it to perfect condition. Dust must be removed very carefully so that the wax lays evenly. That is why the craftsmen prefer to polish the wall well, avoiding the use of an abrasive: the smallest dust particles constantly settle on the wall and complicate the work.
Wax application
For wall waxing, special compositions based on natural wax. You can buy them in the same construction departments where the mixture for Venetian plaster was purchased. The composition is applied in a thin layer:
- gain mass on a wide spatula, perform a smear, stretching the wax over the surface with a long straight movement with a slight pressure;
- run over the same place again, removing the excess.
When applying wax, try to leave a very thin layer without streaks at the edges of the stroke. All flaws reduce the quality of the coating, as they become very noticeable after polishing. Processing is most conveniently done in small sections, which the master will have time to finish in 20-30 minutes. When applying wax, you need to use a glazing scheme: starting from the top corner, with a ladder, processing a section of the wall and returning to the previous one.
The wax has time to dry while the wall is being finished. When you are done, you should immediately go to final stage- polishing. To add shine, use a soft dry cloth. With a rag, you need to perform circular movements, achieving the appearance of gloss.
Venetian with craquelure effect

Another very easy-to-perform method is to imitate an old, cracked wall from time to time. Thanks to various additives in the polishing layer (wax or varnish), the decorative effect of such a coating is very high. This technology of applying Venetian plaster requires less time than the classic version.
In addition to the standard set of tools for Venetian plaster, in this case it is advisable to purchase a building hair dryer. This will significantly speed up the drying process of the coating. For finishing you can use glitters, metallic powder (for gold or silver), phosphor (TAT33 noxton, for example) or leave wax or varnish colorless.
The effect of cracking lies in the method of applying a layer of plaster:
- Apply a white or tinted Venetian mixture to the prepared wall in a rather thick layer (about 2 mm), without trying to even out the surface. Strokes should be done with arcuate or straight movements in different directions, chaotic. You need to trim small sections of the wall (about 1 m² each).
- Randomly draw a trowel over wet plaster, forming lines along which the coating will crack. To do this, you need to press the tool against the wall with the entire plane and with light pressure move it in the desired direction. Make a few more of these movements. Stripes appear on the coating, slightly rising above the surface.
- Turn on the hair dryer to the maximum. From a very close distance (1-1.5 cm), heat the plaster, drying it. As it dries, a pattern of cracks appears on the surface.
- With fine sandpaper, slightly clean the surface, showing the pattern and leveling the surface. Remove dust carefully.
- Add color, glitters or luminous phosphor powder to varnish or wax. Apply wax in the usual way, as in classic version. It is easier to varnish the wall with a roller, rolling each section well so that the composition penetrates into the cracks.
After drying, the wall is completely ready for use. Lacquering gives the plaster greater resistance to wet cleaning. But such a coating is devoid of the mysterious volumetric effect inherent in wax.
Marble plaster

The technique of applying Venetian plaster imitating the surface of marble is not particularly complicated, but rather time consuming. With this method, the master actually draws a pattern inherent in the stone. The creative process implies the presence of artistic skill and a sense of color.
The pattern of marble slabs consists of smooth transitions shades of the same color with occasional splashes of black. Almost parallel layers are visible on the polished plane, formed during the sedimentation of calcareous crystals. You can create a similar pattern using colors and conventional working tools: a spatula and a trowel.
The technology for applying marbled Venetian plaster includes laying the base layer. It can be left white or tinted in one of the shades. Strokes should be long and located along the future layering of the pattern. After slightly drying the surface (5-7 minutes), you can additionally draw uneven long lines with a trowel.
Color the Venetian in 2-3 shades of color. Separately, make some black paste. Apply different plasters to the trowel without mixing it. Add a few drops of black. Observing the previously chosen direction of layering, stretch the paste over the surface with long uneven strokes. At the borders of strokes and areas, you should try to overlap, continuing the drawing. Finishing the next square, dry it for 15-20 minutes and polish with a spatula to a gloss.
Decorative Venetian plaster, the application technology of which is quite simple, is becoming increasingly popular. You can make it with your own hands, it is important to follow the rules that are the same for all methods: apply with separate strokes. Overlapping each other, they create color transitions that can be emphasized by applying wax or varnish.
Modern Construction Materials help create the most different interiors, with the help of them it is easy to implement specific tasks. So, for example, the application of Venetian plaster allows you to turn an ordinary typical apartment into a luxurious palace. The technology for creating the original coating is extremely simple. You can master it yourself if you wish. There are several ways to apply a decorative coating. It makes sense to get to know each of them. Then it will be easier to choose the most suitable option and make repairs in the apartment with your own hands
How to apply Venetian plaster
Before you start working, it is important to take into account one circumstance: different methods of applying Venetian plaster to the walls help to form different decorative effect. The basis of the technology is the same stages of work, and only the finishing layer can be carried out taking into account existing expectations.
What is Venetian Plaster? This is a multi-layer coating that helps to simulate the surfaces created by different natural materials. You can create on the wall the effect of natural marble, the wall of a farm hut, cork wood, complex textured volume. The color of the new coating is created using a tint. The finishing layer is often additionally processed with wax or mother-of-pearl. These components help to enhance the decorative component and make the interiors exclusive.
To new finish served for a long time, it is important to comply with all technological stages. Doing this will help step-by-step instruction, telling about how Venetian plaster is applied.
Surface preparation.
In order for the multilayer coating not to crack or crumble in the future, the walls must be carefully prepared before decorating. The order of work is as follows:
- First, carefully dismantle the old finish.
- The walls are cleaned with a spatula.
- Then plastered.
- Putty.
- Treated with sandpaper.
- They are primed.
Note! Alignment of the walls helps to save on the consumption of the finishing decorative coating.
Today, Venetian plaster is quite expensive, ignoring the need for preliminary work with the surface leads to the fact that the consumption of multi-layer plaster increases three times.
Carrying out tinting of Venetian plaster
The Venetian plaster itself is white. If it is necessary to give it color shades, color is used - special coloring additives. They are simply added to the already prepared diluted solution, after which the mixture is thoroughly mixed with construction mixer. Stir the color evenly without it manually fail: it will be difficult to achieve a uniform color mass.
Applying Venetian plaster to walls

Any Venetian plaster helps to create or simulate a cut natural stones or any other natural materials. To create this or that effect, a certain technique for performing the finishing layer helps.
marble effect

The marble effect is created as follows:
- Using a wide spatula and sweeping movements, the first layer is applied.
- Ten minutes later, a special trowel is taken into the hands and with the help of it the necessary relief is formed.
- Two hours later, a second layer is applied to the wall. It is made with a wide spatula. A multi-colored composition is laid out on it, stirred to a homogeneous mass. What colors to use to create a marble pattern will tell the video tutorials published in the article. A multi-colored mass is applied to the dried first layer with pulling movements. In this case, the Venetian should lie down in different directions. Five minutes after the end of the work, the applied plaster is leveled with a trowel.
- The applied layers should dry during the day, then the new coating is polished with a special grinder and then polished with a spatula of stainless steel. Applying wax on marble Venetian plaster helps to enhance the decorative effect.
The following video helps to see in more detail all the stages of creating a marble effect.
Classic Venetian effect

The effect of a classic Venetian is created a little differently. To form it, it will be necessary to apply several layers to the wall. textured putty(from three to five). In addition, each layer has its own color or shade.
Note! Since even professional decorators cannot repeat the chosen combination of colors twice, it is important to prepare all the necessary volume of Venetian plaster in advance, and dilute different colors in different containers.
The order of work is as follows:
- The first layer is applied with arbitrary strokes using a wide spatula.
- Ten minutes later, the necessary relief is formed with a trowel.
- Two hours later, the convex scallops are cut off with the same tool and the first layer is leveled.
- The second layer, like all subsequent ones, is applied using the same technology after the first layer has completely dried.
- At the very end, the surface is polished with a fur cloth. To give shine, Venetian plaster is treated with wax.
Demonstration lessons of application help to visually see how classic Venetian plaster is realized.
cork tree effect

The way to create a cork tree effect is quite difficult. But you can also master it if you wish. If it is necessary to apply Venetian plaster to the walls without a do-it-yourself master, it is important to realistically assess the howling potential. Otherwise, any alteration will be very expensive.
- The effect of creating an imitation cork tree begins with a selection of the right colors. As a rule, there are several of them: brown, coffee with milk, gold, bright burgundy. The first layer is applied with a mixture of these colors (note that they do not need to be pre-mixed for a homogeneous mass).
- The first layer of Venetian plaster is applied quite thickly.
- The secret to creating the balsa wood effect is to force-dry the Venetian. Therefore, immediately after application, we pick up a building hair dryer and dry the first thick layer of the coating with it. At the same time, the nozzle of the hair dryer is periodically brought close, then removed to a distance.
- When exposed to heat, Venetian plaster cracks. It is the cracks that help to imitate the surface of the cork pattern.
- After treatment with a hairdryer, the wall surface is left to dry. Finally, Venetian plaster will dry in two days.
- After the specified time, a second layer is applied. As it is used water-dispersion materials. They are tinted in a different color (it is better to choose bronze or gold). Apply in a thin layer.
The surface dries for a day, then it is processed by a grinder. Only after that, the finished Venetian plaster with the effect of cork wood is treated with wax (you need to apply it with a soft cloth). The following videos clearly demonstrate the above description.
Textured coating

Today, Venetian plaster allows you to apply a special textured layer to the wall surface, which also looks very decorative. But it is performed in a slightly different way than the technologies described above.
- After leveling, the walls are impregnated first with a deep penetration primer, and then, after it dries, they are treated with a covering primer. Re-treatment of the surface helps to increase the adhesive properties of the substrate. Such impregnation dries within one and a half hours, after which you can start laying the Venetian plaster solution.
- The material is applied not with a spatula, but with a roller. It allows you to form a thin layer. It dries within two hours, after which the surface is treated with a spatula. the main task- remove the sharp protrusions of the frozen layer.
- After the first layer dries, you can arm yourself with a trowel. She and the ready-made solution form a relief that looks like a collection of small islands. The thickness of the second layer should not exceed one millimeter. The bumpy surface dries for five hours.
- We again take a spatula in our hands and clean the protruding parts.
- As a finishing layer, Venetian plaster is applied into which a special finishing varnish is mixed.
- The final stage is the implementation of ironing - processing with a special trowel. This operation helps to give the finish a metallic sheen.

And this video will allow you to see how you can create the effect of wet silk with the help of Venetian plaster
.
Conclusion
As you can see, Venetian plaster is a rather malleable material, the application technology of which is easy to master on your own. Different application methods help to solve different design problems.
If you are determined to master the technique of decorating walls with Venetian plaster, this article will be very useful. In it, we will talk about the basic methods of working with a Venetian and help you choose the right colors for the finishing material to create an original artistic composition.
What is the peculiarity of working with a Venetian
Venetian plaster imitates a polished cut of a marble massif. Thanks to the effect of translucency, it is possible to achieve almost complete identity with natural marble: a glossy surface, translucent layers and veins of different shades.

There are two main directions in working with such a finish: artistic and imitation. For each, there is a special working technique that allows, in the first case, to create a highly detailed drawing with a wide variety of shades and uneven gradients. The second type of application creates a picture that is much less colorful, but it perfectly imitates a glossy surface and the translucence of veins and layers of different colors, just like in natural marble.

Selection of the color scheme of the composition
For artistic technique, it is recommended to have one pure composition without dye and one with a medium saturation tinting. Please note that some areas of the coating will not blend at all, correlate the contrast of the selected color relative to white in accordance with the interior style.
The imitation technique uses more muted patterns; to create the main pattern, you will need two compositions with approximately the same color, one 3-4 tones darker than the other. If you want to add dark veins and inclusions to the marble cut, get a third composition with a much brighter and darker color.

You can tint the Venetian yourself by adjusting the level of mixing and the presence of strips of different tones in the composition. Mixing plaster with color in a vibrating apparatus will give an absolute dissolution of the paint, in this case the range of shades will be less rich, and the pattern itself will be more washed out and uniform. Please note that when drying, the plaster loses 3-4 tones in brightness.
Surface preparation
Venetian plaster is applied only on a specially prepared surface. Plastered walls are reinforced with mesh under a layer of starting plaster. If we are talking about surfaces made of plasterboard, the joints are cut at 30 ° and two layers of sickle are applied.

The surface must be treated with a deeply penetrating primer until completely saturated. Next comes the coating with a special primer for the Venetian or painting the wall with water-dispersion paint, white or painted to match the future coating.
Foundation application
Venetian plaster is one of those materials that you need to feel. Before you start finishing the walls, practice a few times on pieces of drywall, get used to how the material behaves with different movements of the tool.
The Venetian is applied with a trapezoidal trowel and spatulas, the tool must have rounded corners. The first layer is applied with a thickness of 0.2-0.5 mm to create solid foundation. Take a small amount of the composition on the trowel and distribute it evenly. Place the tool flat against the wall and make a few rubbing movements.

The color of the base should be uniform, but you will immediately notice that you are creating the contours of the future drawing. Large strokes can be in the form of spots, even or rounded strokes, or chaotic strokes. In the future, adhere to the formed contours and repeat them on a reduced or enlarged scale for the most harmonious combination of form. After applying the base coat, you need to wait 36-40 hours for complete drying.
Choose the color for the base that will prevail in the finished drawing. The consumption of plaster for the first layer is approximately 30-50% more than for subsequent ones. Keep this in mind when purchasing material.
Techniques for applying a texture-forming layer
It is important to understand the ability of plaster to mix colors. In the liquid state, this happens relatively easily, but if the coating is already applied in a thin layer, the polymerization process immediately begins. You can completely cover the color only after applying 3-4 new layers. It turns out that mixing occurs only when the spatula moves, any applied pattern is likely to remain unchanged.
If you take two contrasting compositions on a spatula or trowel and smear them on the wall, at first you will get a large and contrasting pattern. The longer you move the tool, the more the border is washed away and the colors are mixed.

If the compositions on the trowel are pre-mixed wooden stick, the picture will turn out smaller and more detailed. You can also add a single color in dots, stripes or zigzags, in any case, the final look will be noticeably different.
The texture is applied in the thinnest possible layers, so the effect of translucence appears. IN artistic technique thin, short strokes are used. Take two compositions of different colors on the trowel, mix them in different proportions and apply the plaster with a spatula 30 or 40 mm wide.
The imitation technique involves the use of wide and long strokes, in each layer only one color or shade is used. It is necessary to apply plaster with a wide part of the trowel, stretching the composition as wide as possible. With the application of each subsequent layer, areas of increased saturation and overlapping colors will appear on each other.

The best result can be achieved by applying two layers for artistic and 4-5 for imitation technique. It is recommended to let each layer dry overnight, but if you work carefully, the drying period can be reduced to 6-8 hours.
Matting coating
If the pattern is too contrasting or you need to give some haze to the coating, use white plaster for this, applied as thinly as possible. The angle of the spatula relative to the surface must be at least 45°. Each movement is firm and with effort, rub a small amount of the composition as thinly as possible.

Often, white plaster is used for matting with added dark color, but not completely mixed. This technique enlivens the composition a little, and it does not look frankly dull.
Gloss and metallization
In addition to color texturing, there is another way of texturing. It consists in highlighting the relief of the coating with small elevation differences. After drying, the surface is rubbed with a metal spatula applied to the surface at an angle of 25-30°. Direct each movement towards you, do not press hard on the instrument. This technique will create areas with different glossiness. It is useful to do this both at the end of the application and after each applied layer.

If you apply a spatula under more acute angle, almost close, the surface can be rubbed. This is done to give the thin edges of the strokes a darker outline. This method is great for additional texturing of each layer.
When the wall covering is ready, it can be protected from moisture with a special wax, which is rubbed with lint-free wipes. Finally, it is advisable to polish the wax layer with a fur wheel for a drill or angle grinder.


