Summer shower You can make it from polycarbonate yourself. This material is quite lightweight, and correct operation It has long term services. Polycarbonate can be transparent or matte, and it also has bright colors.
Tall building from metal frame With arched roof, will protect from the wind and keep warm.

The bright color of this shower will attract attention. The shape is determined by the frame.

The brown color of polycarbonate creates a mirror-like appearance.

To build a simple rectangular shower, you will still need a frame to provide rigidity to the finished product.

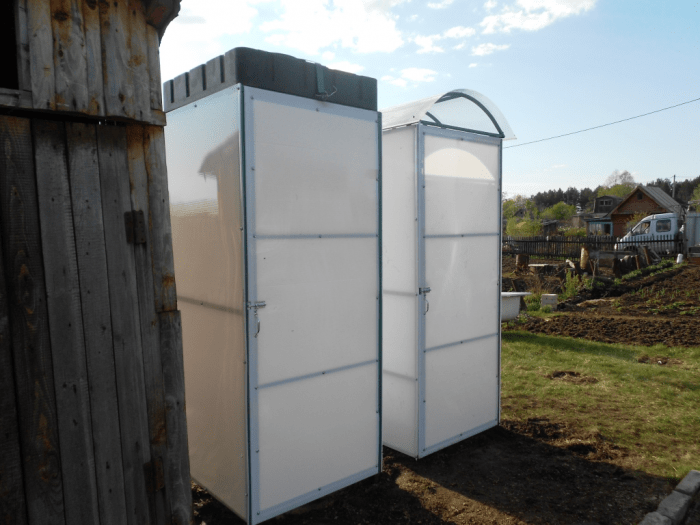
The white matte material will protect you from prying eyes.

The metal profile frame helps hold the water container and allows you to attach shower walls and doors.

A double shower cabin with a dressing room will save the day in a large family.

A round shower cabin is possible from polymer, as it bends well.

If transparent material is confusing, then you can install additional screens inside.

You can use opaque polycarbonate for the walls of the shower, and make the roof transparent for lighting and heating by the sun.

10 ideas - what to use to make a summer shower at the dacha
The shower is one of the important buildings in the country house. First of all, a shower will save you from hot weather and can refresh you at any time if the water is not hot. Secondly: sanitation, because at the dacha they mostly work in the ground and it’s almost impossible not to get dirty. Everyone makes a shower in the country as best they can and from what they can; in this article you can get acquainted with the best ideas from Internet users.
The simplest option is to make it from boards, preferably painting them for durability and natural beauty.

Showers are also very often made from polycarbonate - quite cheap material and easy to process.

The cheapest and fastest option is made of polyethylene, but it will not last long.

You can also make a shower from leftover plastic after renovation.

A brick shower will serve you for a long time.

It will come out very beautifully from transparent polycarbonate.

You can quickly make a shower from corrugated sheeting, but this material is not cheap.

A couple of beams and boards, and the ventilated shower is ready.

How do you like this option? They took the empty ones glass bottles and simply filled it with the solution, and the result was a masterpiece!

Well, another very durable shower - made of wild stone.

Summer shower made of metal profiles: 10 best ideas + photos
Any dacha or a private house are equipped with cabins for summer showers, this is convenient, practical, and economical. Today's market offers a lot of materials for making showers outdoor booths. Consider a summer shower made of metal profiles in 10 best photos ideas.
Excellent spacious shower made of metal profiles.

The shower is made of corrugated sheets; the owner even managed to tie a bush to the wall of the cabin, which provided the plant with impromptu watering.

Spacious cabin made of green corrugated sheets.

Reliable, excellent construction made of profiles and corrugated sheets.

A cheerful shower made of yellow corrugated sheets for a summer house and a private home.

An excellent capacious shower stall and a barrel for heating water.

Capacious shower cabin made of corrugated sheets with a wooden floor.

You can safely enter the next shower, it’s ready, just grab your rubber slippers.

The finished shower product made from corrugated sheets remains to be delivered to its destination.

Shower made of corrugated sheets with ready-made hooks and plastic shelves.

Camping shower. TOP 8 popular models
Summer has come again - it’s time to think about fully equipping a trip out of town, into nature, for such an event you need not only skewers with a barbecue, but it is important not to forget all kinds of insect repellents, and the opportunity to relax in nature like at home - and this means a camp shower. Let's present the top 8 popular models of a portable shower, which is also heated by the sun's rays.
The camp shower shown below looks like a black plastic bag. It is made of black color to attract the warm rays of the sun.

Next model camp shower made of translucent material, with comfortable plastic handle for transfer.

Super shower, with an organized canvas tent.

Convenient summer shower, also for washing hands and food. Easy to use.

Summer shower in the form of a backpack-bag, convenient to carry and use.

With the help of such a portable summer shower, you can give your beloved pet a bath.

11-liter, mega-spacious shower, perfect for outdoor recreation.

Outdoor portable shower, perfect solution for camping.

Do-it-yourself summer shower made of polycarbonate: 10 ideas for your dacha
It’s great to have a shower in your country house, especially in the hot summer. To ensure that your shower is of high quality and not expensive in terms of materials costs, use polycarbonate. It is easy to process, durable and reasonably priced.
Shower in the form of a fungus and with a good door.

Polycarbonate comes in different colors, for example a shower made of red material.

But matte, white color.

Here they decided not to spend money on the door and made it from polycarbonate itself.

A bright and beautiful shower made of pink material.

Such a shower will be difficult for beginners to make, but the shower looks very modern and beautiful.

A simple shower, but your neighbors will see you in it.

Larger in size, you can even ask to smell the back in this one.

This is such a cylindrical and pretty shower.

In this work they darkened the material and it turned out well.

Outdoor shower and toilet made of brick under one roof. 10 photos
Summer is a hot time. During the period of sunshine and hot air, it is very important to refresh yourself and take a breath of fresh air. This task is quite feasible - you need to build a shower, and along with it a brick toilet under one roof. Let us present below 10 photos of such construction, which is easily feasible if available. suburban area.
A simple building that performs an important task. 
Shower and toilet made of brick under one roof, amenities with comfort in nature.

An excellent solution for a summer cottage.

Stone construction of an outdoor bathroom.

The foundation and foundation of the future bathroom in nature has been laid.

Separate bathroom under one brick roof.

Comfortable conditions, construction of a brick bathroom.

Brick, mortar, roof, and the amenities are ready.

The building is old, but a small reconstruction is possible and everything is ready.

Bathroom, shower, everything you need for relaxation, brick construction.

Agree, it’s nice to cool off under running warm water after a hard day. And this means that you can’t do without a summer shower at the dacha.
Manufacturers also took this into account when offering consumers wide choose various designs of summer shower made from different materials. Summer showers made of polycarbonate are beginning to be in particular demand today.
Advantages:
- simplicity and high speed of installation;
- the ability to install yourself;
- low cost of materials;
- ease of construction;
- the ability to make a permanent or portable shower;
- reliability and durability of the structure;
- the ability to provide water heating;
- wide choice of designs and colors.
With all these advantages, making a summer shower with your own hands from start to finish is not at all difficult. This does not require any special knowledge or professional tools. It is enough to prepare the material. A this instruction for installing a polycarbonate summer shower will help you do the job efficiently, reliably and taking into account many nuances.
Tips for choosing
1. shower location:
- the shower should be located near the house. But at the same time, take into account the influence of the water drainage system on the foundation of nearby buildings;
- It is advisable to consider a water supply system. To do this, it needs to be installed close to the water supply;
- It is important to ensure water drainage. To do this, it is better to place the shower at some elevation;
- the shower should fit organically into overall design plot;
- It is advisable to place the shower where the sun will shine longer to ensure the water is heated. If you plan to heat water, this recommendation can be ignored.
2. material for the frame
Perfect for making a frame metallic profile and a tree. However, metal will last you much longer.
- the profile needs to be primed and painted;
- the wood must be treated with antifungal and waterproofing solutions, and then periodically painted.
3. water tank
- it should be flat. This way you will have a larger area to heat;
- it is desirable that it be dark. In this case, the sun's rays will heat the water better;
- tank weight. The tank is installed on the roof of the shower, and its parameters can have a destructive effect on the frame.
- volume of the tank. The larger the water tank, the more thoughtful the drainage system should be;
4.shower size
It is logical to assume that the dimensions of the frame should be determined by the largest of its users. But nonetheless:
- recommended dimensions are at least 1,000 x 1,000 mm. If you are planning to arrange a locker room, the size can be reduced;
- the dimensions must be sufficient for an adult to bend down;
- The height of the shower must be at least 2,000 mm. So that an adult can freely raise his arms.
As a material for arranging the floor for a summer shower, you can choose:
- wooden shield. The most common option. The presence of cracks will ensure water drainage. It's cheap, and it's quick and easy to set up using available materials. It is pleasant to stand on such a floor with bare feet. However, due to the cracks, there may be air blowing into the shower. cold air;

Sometimes a wooden board is replaced with an MDF pallet, in which holes are drilled at a distance of 10-15 cm. But MDF deforms very quickly when exposed to moisture.
- concrete. In this case, it is important to ensure that the water drains. Concrete is more durable, but it still requires additional flooring.
- pallet. You can purchase a shower tray and install it in your outdoor shower. However, the cost leads to higher construction costs. Therefore, this method is the least common.

If a separate locker room is planned, a threshold should be provided. This will prevent water from flowing outside the shower.
6. Exterior finishing material
Such material can be used - lining, plastic, siding, moisture-resistant plywood or even simple film.

But today we will talk about what advantages polycarbonate creates.
- cheapness and availability;
- the ability to choose a color and create a stylish shower;
- ease;
- strength;
- flexibility;
- good thermal insulation. Especially for cellular polycarbonate;
- resistance to temperature changes - temperature range - -40 o C - +100 o C;
- UV protection;
- moisture resistance.
The only disadvantage of polycarbonate as a material for covering a summer shower is its transparency. But by choosing matte or colored cellular polycarbonate, you can solve this problem.
Technical Tips:
1.on water supply.
Water can be supplied to the tank using a pump or from central water supply. To control the water level, you should install a valve that can shut off the water.

2. for water heating.
- natural heating. To do this, you need to place the tank in a sunny place;

- electric heating. Installing a water heater will quickly heat the water. This method is used in cases where the shower - capital construction or the number of shower users is so large that the water heated per day is not enough. Then it is advisable to provide two compartments for water - cold and hot.
3. water drainage
There are three ways to drain water from the shower:

Directly under the bottom of the shower in drainage system. Suitable only in cases where the shower is rarely used and little water is used;
To equip the drainage system, you need to remove the turf to a height of 500-600 mm. Fill the bottom with crushed stone and sand on top.
If a wooden board is used as a pallet, water will pass through the cracks and into the drainage system.
If it’s a concrete pan, then it needs to be built with a slope towards the drainage to drain water in the right direction.
- V drain hole. The hole should be dug at a distance of 3-4 m.p. Otherwise, constant dampness will negatively affect the durability of the shower. The volume of the pit should be at least twice the volume of the water tank.
- into the central sewer.
The second method is more popular for country showers.
4. on arrangement of the foundation.
In order for the pallet and frame to be installed firmly, the foundation should be laid out. After all, when the soil gets wet, it can float, and the entire structure will lose stability over time.
5. by lighting.
During daylight hours there is no need for electricity. Cellular polycarbonate transmits light well. But, if you are planning a major shower made of polycarbonate, electrical wiring should be carried out according to all the rules, because... There is high humidity in the shower.
6. on ventilation.
Installing ventilation gaps will help prevent condensation. They can be made from below and covered with a grill or in the wall closer to the ceiling. To do this, you need to drill a hole in the polycarbonate and cover it with perforated tape. Otherwise, dust and moisture will get into it, and this will reduce the performance characteristics of the material.
How to build a summer shower from polycarbonate - 10 steps to the result.
1 step. We make a drawing. We put everything on it required sizes and mark the location of the tank. An example of a drawing in the photo.

Step 2. Calculation of corners for the frame.
For the frame you can take profile pipe 20x20, but it is better to give preference to a 50x50 pipe. The choice depends on the wind load in the region, the weight of the water tank, and the weight of the finishing material.
For the frame presented in the diagram we will need
- vertical racks with a height of 2,200 - 6 pcs.;
- horizontal supports with a height of 1,500 (750+750) - 6 pcs.;
- horizontal side supports 1 200 - 4 pcs.;
- for oblique supports 2 320 - 4 pcs.;
- for oblique supports 2 500 - 2 pcs.
Step 3. Arrangement of drainage or foundation with drain
Step 4 Installation of racks.
Vertical posts for a stationary frame are buried in the ground with a depth of 400-500 mm. To give the shower greater stability, the racks can be concreted. If the frame wooden rack you need to cover it with an antiseptic and wrap it with roofing felt.
Mounting methods are as follows
Weld by welding;

Secure using couplings;

Secure with bolts

Using corners

Since after installation you will end up with a frame consisting only of rectangles, it needs to be strengthened. To do this, we turn rectangles into triangles. And we attach the oblique supports (they are highlighted in red in the drawing). With these supports, the frame will be able to support the weight of the tank filled with water. The approximate weight of the tank is 150 kg.
You can install not oblique supports, but horizontal ones. However, with oblique construction the structure will be stronger. And the resistance to wind load will be higher.
5 step. Installation roofing material. It depends on the material used. If a roof is not provided, this step is skipped.
Step 6 Tank installation.
The tank must be installed so that the load it creates is distributed evenly across the frame supports. According to the instructions, a sprayer and a tap are installed in it. It is advisable to secure the tank on the roof so that it does not blow away in a strong wind.
Step 7 Wall finishing with polycarbonate. Instructions for installing polycarbonate are provided by the material manufacturer.
Step 8 Floor arrangement. Depending on the chosen floor - wood, concrete or pallet, the arrangement methods will be different. They are listed above.
Step 9 Door installation. The door can be made of polycarbonate or be a film curtain.
Step 10 Decoration. Attaching hooks, locks and shelves also milestone in the arrangement of a summer shower made of polycarbonate.
Conclusion
We hope that the tips given here will help you create a reliable, comfortable, practical and beautiful outdoor polycarbonate shower with your own hands. You can buy cellular polycarbonate on our website at a very reasonable price.
A shower in the country is an essential attribute of comfort and a great opportunity to freshen up after horticultural work. However, not every owner of a house in the middle of nature can boast of a comfortable shower that gives a powerful boost of energy and positive energy. However, if this problem is familiar to you first-hand, there is no need to despair - the matter can be fixed. And it will help with this modern material- polycarbonate and helpful information on this topic.
Polycarbonate shower: features
Before we talk about building a polycarbonate shower with your own hands, you need to figure out what kind of material it is and what are its features?

Polycarbonate - polymer plastic, which has a unique structure. Polycarbonate sheets are made from granules through extrusion. This ensures thermoplasticity and the ability to restore their original properties when solidified (no matter how many times they are melted). But this is not the only advantage of the material. The list of advantages is more than impressive.
- ease. Cellular polycrabonate is 6 times lighter than glass, which allows you to create interesting designs that weigh almost nothing;
- strength. The molecular structure guarantees high impact resistance. The sheets can withstand impressive weight and wind loads;
- sound and heat insulation. Thanks to the air filling the internal voids, sound and thermal insulation characteristics of this synthetic polymer are on high level;
- flexibility. The plasticity of the sheets makes it possible to erect structures of complex geometric shapes;
- wide temperature range. Polycarbonate withstands temperature regime from +120 to -40 degrees.
The list of advantages is completed by ease of installation, low maintenance, and resistance to chemical substances and precipitation, safety.
How to build a polycarbonate shower?
If you want to build a country shower from polycarbonate, then you can realize your dream in two ways. The first is a light summer shower with a small water tank. The second is a more solid structure with a foundation and heating.

The location of the booth is of no small importance. It should be reliably protected from the wind; it’s good if the area is warmed up by the sun’s rays - in the evening of a hot day you can swim in warm, pleasant water. To organize good drainage, choose a location on a hill.
We are developing a project
The first step towards realizing what you want, namely a polycarbonate shower for a summer house, is a project. Incredibly, even a basic schematic drawing can facilitate the construction of a building.

The shower stall should not be cramped. The best option- when even the tallest member of the family can freely bend over and raise their arms.
It is important!
Most often, the size of the washing room is 1 m2, the height is 2.5 meters. Whereas for a locker room a room of 1 x 0.6 m is sufficient.
The constituent elements of the structure are an individual moment. But the most popular option is a booth, drain and stationary water barrel. By the way, when developing a project, consider the water source and drainage location. Ideally, the drain is located near the drainage pit.
Setting up a shower stall
We mark the territory and install a columnar foundation. We drive wooden pillars into the corners of the resulting rectangle. Pre-treat them with a moisture-repellent solution and antiseptic. We assemble the metal frame, fastening the individual parts with long bolts. A dressing is made inside the frame, which will serve as the basis for the floor.

Between load-bearing pillars the slopes are laid, and the logs are placed on them. To ensure unhindered flow of water into the drainage, make the floor with holes - lay the logs at small intervals. The only thing is that taking a shower with such a floor in cool weather will not be entirely pleasant due to the air flow from below.
You can build the floor so that water passes through a special tube into the drainage. Don't forget about rational use water resources - you can water your garden with water after taking a shower.
If you choose a design with a dressing room, then to separate the two spaces you need to build a threshold. This will prevent water from getting into the locker room and getting your clothes wet. Please pay attention Special attention door designs. It should close quite tightly. Most the best option— a door with an overhead seal. The heat will be reliably retained inside the cabin, and the sash will not wedge due to moisture.
Summer shower: we use it not only in summer
If you insulate the cabin, then you can use a polycarbonate summer shower not only in the summer. Expanded polystyrene is used as insulation, which fills the frame compartments. The slabs are covered with a film that protects them from moisture and steam.

If desired, you can decorate the booth with PVC panels, washable wallpaper, linoleum, and oilcloth. The choice depends solely on your preferences and capabilities. The only condition is that the materials must be moisture resistant. A stapler is used for fastening.
It is important!
For construction, it is better to purchase polycarbonate with a thickness of 8-16 mm. The walls are made of matte, and the roof is made of cellular (transparent) polycarbonate.
A water tank is installed on the roof, heated by the sun's rays. Thanks to the sealed cabin, ensuring a constant temperature is not a problem.
Choosing a tank
As already noted, the tank is installed on the roof. Previously, water had to be collected by hand, but today this is not the case. Water is supplied directly from the water supply or pumped. The plumbing valve stops the flow when the tank is filled to capacity.
As for the material and shape, the barrel can be cylindrical, flat, made of either plastic or metal. Plastic flat tanks are especially convenient. They are easy to transport, install and remove. Only a shower stall with such a tank will have to be covered for the winter.

Metal barrels are bulky and heavy and require annual plumbing maintenance. The water in them heats up longer, but also cools down more slowly, which is also important.
How to heat water?
The sun alone is often not enough to effectively warm up the water. To increase the heating rate, a “greenhouse” is installed under the tank. The simple design of polyethylene and slats increases the water temperature by 10 degrees.
An increase in this indicator is also facilitated by a sheet of foil or a mirror installed on the north side. Don't forget that warm water is always on top, so don't be lazy to equip the container with a float. Warm water will be used first, and cool water will rise and warm up.

If your plans include using the shower in winter, then drastic measures are necessary. A large boiler or heating element from washing machine. In the first case, the tank should be divided into 2 zones: for cold and hot water.
It is important!
To heat 50 liters it will take an hour and a half and a water heater with a capacity of at least 2 kW.
Follow safety precautions. Insulate the wiring and use the correct size wire.
Making a drain
A waste pit is, of course, convenient, but not practical. The water should go first into a small depression and then into the compost pit. Next to the drain there is a drainage and septic tank. It is prohibited to place them under the shower stall - water will flow into the septic tank and bad smell. Please note that the volume compost pit should be twice the volume of the water tank.

Don't forget about the waterproof layer. This can be a concrete slope, hydroglass insulation, roofing felt, film.
What are the benefits of a polycarbonate shower?
The work is completed, and you are the happy owner of a comfortable shower stall, consisting of only advantages. A polycarbonate shower is not only durable, but also aesthetically pleasing, hygienic, and not afraid of direct sun rays and temperature changes. In a word - a dream.

Execution options can be varied. Choose the one that matches your ideas about the ideal island of coolness and cheerfulness. Watch the presented video and enjoy country life and maximum comfort anytime, anywhere!
Summer shower made of polycrabonate: video
An outdoor shower is an integral attribute of almost any summer cottage. It makes it possible to “wash off the dirt” after working on garden plot or just to cool off on a hot summer day. As a rule, summer shower designs are characterized by maximum simplicity and simplicity. For the walls of the shower stall, owners often use the material that, as they say, “was at hand.” It can be slate, plywood, thin sheet iron and even regular boards. But today, with the advent of new construction technologies there is no need to show unnecessary “construction ingenuity.” Construction supermarkets offer excellent, durable and, most importantly, inexpensive material for the construction of a summer shower - polycarbonate. So, we are building a summer shower from polycarbonate.
A few words about polycarbonate
Before moving directly to the description of the technology for constructing a summer shower made of polycarbonate, we will briefly consider the main properties and characteristics of this material.
Polycarbonate is a polymer synthetic material, the sheets of which can be either solid or cellular (that is, containing voids).
Example of cellular polycarbonate sheets
Polycarbonate is highly resistant to temperature changes, is quite durable, but is easy to bend and cut, does not need painting and requires minimal maintenance. In addition, polycarbonate sheets are very light, which makes it possible for even one person to work with them without any help. If we add to all of the above the fairly low cost of polycarbonate, it becomes clear that this is one of the best materials for building a summer shower today.
Choosing a place for a summer shower
First of all, you need to decide on the installation location of the future shower. When choosing it, you need to consider several points:
- The shower should be located in a place where the sun shines most of the day, otherwise the water will not warm up to the desired temperature;
- It is better to build a shower on a hill or at least on the edge of a slope, so that the water used for washing flows out evenly and does not accumulate in one place;
- And finally, it is advisable to place the summer shower in a place protected from wind and drafts.
Having decided on the construction site, you can begin to create a project for your summer shower.
Project development
Today, it is not a problem to find a suitable summer shower project on the Internet. But, nevertheless, we will introduce you to the basics of developing a project for a summer shower.
The summer shower consists of a water tank, a shower stall and a tray. All other “bells and whistles”, such as a locker room or a water heating system, are optional and are done solely at the request of the owner.
Schematic representation of the frame of the future shower stall
Project development begins with the creation of even the most simple and schematic representation frame of the future shower stall.
Since we make the shower out of polycarbonate, the best material for the frame will become metal pipes with a diameter of 40-60 mm.
The plan must include horizontal jumpers between the corner posts, as well as supports for the water tank or barrel and pallet.
When the schematic plan is ready, it is necessary to calculate the required amount of materials. To do this, let's put the dimensions on our drawing. They, of course, can be anything, but based on practice, we recommend that you adhere to the following parameters:
- The height of the shower cabin is 2.5 meters;
- Width meter by meter;
- If you are planning to make a locker room, then its width can be 0.8 by 1 meter;
- The height of the corner posts is calculated using the formula “height of the shower stall plus 0.5 meters”;
- The width of the supports for the water tank and tray is calculated based on their design.
Once the dimensions have been plotted, armed with a calculator, you can calculate the required number of pipes to build the frame of the shower stall.
Please note that thicker pipes (60 mm) must be used for load-bearing posts and supports of the pallet and tank, while thinner pipes are suitable for horizontal jumpers.
Thanks to fittings you can forget about welding
In addition to defining required quantity pipes, the drawing makes it possible to calculate the number of fittings required for installing the frame.
These are special connecting elements, with the help of which you can assemble the shower frame without using welding, which will undoubtedly greatly simplify the work.
When the project is ready and that's it necessary materials purchased, you can proceed directly to the construction of a summer shower.
Frame installation
The first step is to cut the pipe into pieces of the required length in accordance with the drawing.
Installation of the frame begins with the installation of corner supporting posts or (in the case of using connecting fittings) their lower sections. To do this, four depressions with a diameter of 30-40 centimeters are made in the ground at the corners of the future structure. After installing supports in them, they must be filled with a mixture of crushed stone and cement-based mortar. Exactly these " concrete bases"and will become the foundation of the future soul.
Only after the cement has completely dried (at least 48 hours) can you begin installing the frame.
If you use connecting fittings, then the frame is mounted from the bottom up, according to the principle of simple children's construction set. If you use welding, then, on the contrary, you need to start from the upper perimeter, then install supports under the tank, then the lower perimeter, supports for the pallet and finally horizontal jumpers.
When the frame is ready, all that remains is to fix it on one of the racks door hinges and hang the door frame on them, after which all that remains is to paint all the frame elements with waterproof paint.
Installation of polycarbonate sheets
The next stage in the construction of a summer shower is the installation of polycarbonate sheets on the frame. Do
it's quite simple.
First of all, you need to cut the polycarbonate into sheets of the required size.
For the shower walls and door, of course, you need to use opaque or matte polycarbonate.
You can cut polycarbonate with almost anything: a jigsaw, a hacksaw
or with a regular knife for cutting linoleum.
To fasten the prepared sheets, you must use special self-tapping screws with plastic thermal washers.
A plastic thermal washer is ideal for attaching prepared sheets
Video about attaching polycarbonate to a metal profile
You can learn more about the technology of fastening polycarbonate with self-tapping screws from the following video:
It is better to attach coat hooks and shelves for shower accessories not to polycarbonate, but to horizontal pipes load-bearing frame.
Installing a water tank
The water tank is installed on the roof of the cabin
The water tank is installed on the roof of the shower cabin. You can use regular plastic or metal barrel, but it’s better to buy a special one plastic tank for a summer shower.
Such tanks are already equipped with all the necessary fittings for attaching a shower head and, in addition, as a rule, they are painted black, which helps to heat the water faster.
The tank is installed on pre-prepared supports and requires virtually no additional fastening. But to be on the safe side, you can throw one or two fixing clamps made of metal or plastic tape over it.
To make the water in the tank heat up faster and maintain its temperature longer, you can build a special cap over it - a greenhouse. To do this, you can use a sheet of transparent polycarbonate, which can simply be bent along pre-installed guides so that it forms a kind of dome over the tank. The edges of the dome are attached to the upper jumpers of the frame using the same self-tapping screws with thermal washers.
After installing the tank, it is enough to attach the shower head to it and connect the hose to fill it with water.
After the tank is installed, all that remains is to attach a shower head with a shut-off valve to it and connect a hose to fill the tank with water.
Pallet installation
The final stage in the construction of a polycarbonate summer shower is the installation of a tray. You can use a ready-made metal or plastic pallet for this purpose, or you can use well-planed boards. Standing barefoot on such a pallet will be both useful and pleasant. Another advantage of a wooden pallet is that it can not be mounted on a frame, but simply placed on the ground.
The finished summer shower looks something like this
If you make a pallet from boards, do not forget to leave small gaps between them, through which used water will escape.
At this point, the construction of a summer polycarbonate shower can be considered complete. And if you have already filled the tank with water, you only have one thing left to do - enjoy a cool shower after a fruitful day at work. Good luck with your repair and enjoy your steam!
Taking a shower in the summer heat at the dacha is an excellent reason to relax and unwind after work. Do-it-yourself shower cabins are quite popular today among owners of suburban areas. A building created according to a simple design will be functional and attractive. A polycarbonate garden shower with a dressing room can be made with a wooden or metal frame.
Features of the material
Polycarbonate is a material that falls into the category of polymers. Sheets are made from extruded granules. The material is produced in sheets. They can be cellular or solid (monolithic). In the first case, the sheet has voids. Polycarbonate has many unique characteristics, which ensures its popularity.
Among the advantages of polycarbonate are:
- High strength. Thanks to a certain manufacturing technology, polycarbonate has acquired high mechanical strength. This property allows sheets of material to withstand strong gusts of wind. Polycarbonate is also able to withstand snow loads.
- Small mass. Due to its lightness, polycarbonate is quite easy to install. It weighs 6 times less than glass.
- Flexibility. The use of sheets of material when arranging a shower allows you to create cabins of various shapes.
- Temperature resistance. Polycarbonate can withstand temperatures from -40 to +120 degrees.
- Sound and heat insulation polycarbonate sheets is at a high level. Such properties are ensured by the presence of honeycombs in the thickness of the material.
- Safety. Even if the sheet is subjected to strong blow, small fragments will not work. This is the main advantage of polycarbonate over glass.

In addition, the material is not exposed to various aggressive environments. When installing a shower, the sheets are quite easy to install, as well as process and operate.
Shower device
Before you build a polycarbonate shower for your summer house with your own hands, you should choose the shape of the cabin. This will make the process of cutting the material easier. The simplest option is to install a polycarbonate shower in which a water container will be placed. This option is chosen when you need to cool down in extreme heat. You can also build a major shower, which will be equipped with heated water.
When choosing a place where the shower will be installed, it is worth considering wind load and the presence of shade. It is also worth providing for water drainage. It is better if the polycarbonate country shower is installed on a hill.

Shower design
Design is a very important stage in the construction of a shower in the country. However, it is often missed. It is important to draw up even the simplest drawing, which will subsequently help to do the work correctly.
Shower Design Features:

Shower cabin equipment
During construction country shower There are several features to consider that will help make it as strong and durable as possible. Also, advice from experienced professionals will ensure quick construction of the structure.

General tips to consider when installing a shower:
- Before building the cabin, you should carefully select a location and mark the area. It is necessary to install poles at the corners of the marked area. Before this, the tree is treated with an antiseptic. You should also impregnate the cabin elements with a water-repellent composition.
- The next step involves assembling the metal shower frame. Cabin parts can be purchased at finished form. They are fastened with long bolts. A ceiling is installed on the lower part of the frame, which will become the basis for the floor covering.
- The joists must be installed at such a distance as to ensure the strength of the shower floor. IN floor covering Gaps should be made between the boards. This is necessary for rapid drainage of water. To prevent cold air from blowing in from below on cool days, it is worth draining into the pipe. To ensure that the water that was used is not wasted, you can water the beds with it.
- If the shower design takes into account the presence of other compartments, at the entrance to washing department it is worth installing a threshold. This measure will prevent water from entering the locker room.
- The door is an important part of the structure. It should be made from materials such that it does not swell. It is also important to install the seal correctly. This solution will prevent heat leakage from the cabin.
These tips will help make your shower comfortable and durable.

All-season shower
A shower stall in a country house has one feature - it can be modified as much as you like. For example, if it is properly insulated, the shower can be used in autumn period. Expanded polystyrene is often used for insulation. It is mounted between two walls. To prevent moisture from getting on the insulation, it should be covered with a special film.
The inside of the shower can be decorated according to your own taste preferences. Usually PVC panels, as well as oilcloth or linoleum are mounted on the walls. It is important to choose not only moisture-resistant, but also wear-resistant material.
You can build a polycarbonate shower with your own hands quickly and without much effort. The walls must be colored and the roof transparent.
Selecting a water container
To use the shower for a certain period of time, it is worth installing a tank of the required volume on the roof of the structure. It should be selected taking into account the expected water consumption and the number of people who will receive water treatments. Typically, metal or plastic tanks are chosen. The water in them is heated by heat from the sun.
The tank is usually cylindrical or flat. The last option is optimal for a country shower. It is quite easy to install and carry. The only drawback of such a container is the need to cover it in winter.

A metal water container is much more difficult to install. It is also quite difficult to transport. This is due to the large weight of the product. Also a metal tank requires regular care. The advantage of such a container is that the water heats up faster and holds the temperature better.
Water heating
There are several ways to heat water in a shower container. Often solar energy enough to prepare warm water for washing several people. However, on cloudy days or in autumn it is worth cold weather. To make the water warmer, you can build a kind of greenhouse in which the tank will be placed. Thanks to this solution, the temperature of the liquid will rise by 10 degrees. To build a greenhouse, it is enough to stretch polyethylene film without slats.

There are other ways:
- A mirror or foil is used to heat the water. If you place them on the north side, they will reflect the sun's rays onto the water tank.
- For a permanent structure, you will need to install a water heater. A heating element can be used as such a device. In this case, the water tank should be divided into 2 compartments. The second one will be filled cold water. To heat 50 liters of water in 2 hours, you need to use a 2 kW heater.
These methods of heating water are quite simple and effective.
Draining
Draining water in the case of a dacha cooperative is carried out by simply connecting the drain to an existing sewer system. The problem arises when water is drawn from a well. In this case, you will have to think over a drainage equipment scheme in accordance with the characteristics of the site.

As you can see, making polycarbonate showers with your own hands is quite simple. You should decide on the sequence of actions and have it in front of your eyes exact drawing future construction. This will create a durable and reliable shower stall in which you can cool off on a hot summer day.
Also, such designs are highly practical and affordable. Every owner can build a shower for a dacha from polycarbonate sheets personal plot. The materials are quite cheap, and even a beginner can master the construction technology.


