Do you know what innovation is, how raised beds came to our country from Canada. The land there has been cultivated in this way for many years. These planting options can be used not only for growing vegetable crops, but also to create original ones. Let's find out how to make beautiful and practical raised garden beds with your own hands. Photo, description technological processes and the diagrams will help you with this.
Do-it-yourself raised beds at the dacha: photos of structures and main characteristics
The rate of gas exchange, soil moisture and the presence of beneficial microorganisms depend on the size and shape of the beds. All these parameters affect the quality of the soil.
Raised beds can be used to grow big harvest berries, vegetables and fruits. At the same time, you can get good results even from a piece of land that is not fertile. The peculiarity of high beds is that they warm up faster than low structures.

There are several types of vertical beds. They differ not only in material, but also in functionality. Some options are made from building materials, and others are simple.
Here are the types of beds that exist:
- trapezoidal structures;

- multi-tiered beds;

- structures with a triangular cross-section.

When creating isolated beds, you can take into account factors such as lighting, soil composition, and its structure. At what height such beds will be placed depends on the volume of the root system, soil characteristics and your own preferences. The minimum height is 15 cm, but to produce better insulation, then you can raise them by 30-40 cm. Warm raised plantings can be higher than 50 cm, since a layer is still laid on the bottom. Narrow beds can be up to half your height.

The length can be very varied. Most often it depends on the length of the garden. If the bed is too long, then its sides need to be further strengthened. When arranging any garden bed, remember your own comfort and convenience. The best width is when you can reach the middle of the structure. Optimal value 90-120 cm.

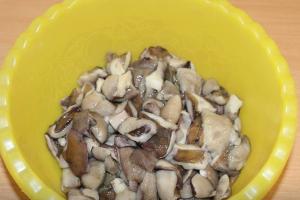
You can grow different crops in raised beds. It is not recommended to use plants with tall stems, as they will be inconvenient to collect fruits from. Root crops, strawberries, peppers, herbs and cucumbers are often planted on bulk structures.

For your information! Raised bed filler is particularly useful. It is made from organic ingredients. In this case, the root system is located in the fertile layer, which promotes the development and growth of plants.
Related article:
Let's find out how to make original beds and what materials they can be built from. Interesting ideas Our review will help you create a variety of designs.
Features of raised beds: pros and cons
The main advantage of raised beds is that you can accommodate a variety of vegetables and plants in a small area. Raised beds are especially popular for strawberries, aromatic herbs and cucumbers. Such designs also have other advantages:
- bulk beds can be filled with specially prepared soil. In this case, the quality of the soil on the site is not of great importance;
- it is possible to regulate the thickness of the soil layer for any plants;
- raised gardens are easier to weed and dig up;
- raised beds can be laid out anywhere, even with difficult terrain;
- Seedlings can be planted on high embankments earlier, since the soil in them warms up faster;
- in raised gardens the soil is looser, which promotes better gas exchange;
- can be used for those that will hang over the edge of fences for high beds;
- depending on the material, you can create not only practical, but also beautiful designs. Some options can become a design masterpiece for your garden;
- high beds with sides are practically not susceptible to attack by weeds, and are also well protected from mold and fungi;
- Installing beds is not a complicated procedure; they can also be easily dismantled. The planting location can be easily changed;
- inside such structures you can create a convenient one;
- the soil on raised beds is protected from freezing as much as possible. During early frosts, you can cover this planting with polyethylene;
- the construction of high plantings is protected from erosion during rainstorms.

Such designs also have certain disadvantages, but there are not many of them. First of all, you will need fertilizing mineral fertilizers. It is also important to monitor the mole cricket invasion.
For your information! Before you start work, treat the wood parts with an antiseptic and special impregnations. This will prevent rotting processes and protect materials from destruction.
Creating vertical beds with your own hands: photo options
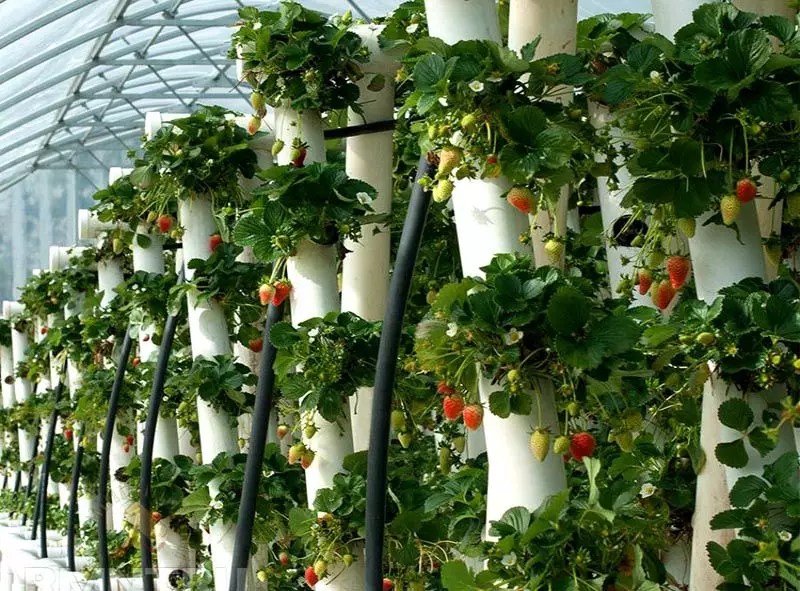
You can also create warm raised beds or vertical structures. They are popular because appearance and saving usable space. Moreover, this perfect solution to protect plantings from various pests. Vertical structures are great for growing flowers, strawberries and herbs. You can not only make such structures from available materials, but even purchase ready-made options. You can see how to make warm structures in the video:

Why you should buy a vertical bed for strawberries: prices
You can see different variants design of vertical beds, but they the most important advantage are miniature in size. Such structures can be built from any materials, even from plastic bottles.
Vertical products do not require special care. They are on optimal height, in order to process them conveniently.
You can see how to make a raised structure for strawberries in the video:
How to make a pyramid bed for strawberries with your own hands: dimensions and other parameters
You can build beds with a pyramidal structure on your own. You will need tools and materials such as a tape measure and a board. To make the base you will need 4 support boards. They can be 2 meters long. In this case, the sections need to be connected under acute angle.

To increase the rigidity of the pyramidal bed, you need to install an additional post as a supporting element. In this case, the boards are mounted on a horizontal surface and attached to each other. A rail is installed in the base. The resulting side is fixed vertically, and then the second and third sides are attached to it. After installation frame system the length of the slats is measured. They are placed at intervals of 25-30 cm. To make the shelf raised, its ends should be cut at an angle of 30 degrees. After assembly, the structure is filled with soil, which is compacted.
Technology for arranging vertical beds for strawberries from plastic pipes
To grow strawberries, you can build a vertical bed from. In this case, you need to prepare plastic pipes, steel cable and a special cutting knife. The volumetric section allows you to place inside required amount soil. The cut should be made along the structure. To fix the bed in a horizontal position, you need to make a hole in each half. Then a fishing line or cable is pulled through them. The parts are then placed one on top of the other. In this case, you can make different levels of beds from PVC pipes with your own hands.

For your information! If you plan to place the structures in a suspended state, then you need to take into account that they can sway. Therefore, it is better to install them in places that are well protected from the wind.
Constructing vertical beds with your own hands using a construction mesh
A compact structure can be built for crops such as strawberries, greens, flowers or potatoes. A good solution would be a vertical bed. To do this, you need to prepare a metal mesh, straw, special soil and necessary tool for processing the material.

To create a bed you need to bend the mesh into a pipe. In this case, the cross-section should be 0.9 meters. The edges are secured with wire. Straw is laid on the sides, and the free space is filled.
To plant potatoes, such beds should be placed at a height of 50 cm from the surface level. Gaps of 10 cm are left between plants. Then the first layer should be shed, then the soil should be laid and the seedlings should be planted.
Features of arranging a vertical bed for strawberries with your own hands: using pots
To grow strawberries, you can also use ordinary ones. Such designs allow you to create an attractive external design. You can use both plastic and clay pots. In this way, you can create a multi-level composition.
Pots need to be selected so that their diameters become smaller towards the top of the structure. In this case, the difference between pairs of pots should differ little.

The largest pot is placed in the chosen location and filled with soil. After this, a smaller pot is placed in it, etc. When the structure is ready, plants are planted in the soil and watered. The largest pot is installed at the base of the structure. A rod of a smaller size than the diameter of the container is placed inside. The pot is filled with soil, and the remaining products are strung on rods one by one. After filling with soil, plants are planted. The pots are mounted on a pole or high stump.
The nuances of creating vertical beds for strawberries with your own hands from tires: photos of products
Exist different ways growing cucumbers in open ground. In this case, you can build vertical beds. This option is also suitable for planting strawberries.
The tire structure is mounted according to the same principle as pot structures. Tires of different sections are suitable for this. But keep in mind that old products are not particularly environmentally friendly material.

Before mounting, tires should be cleaned, dried and, if necessary, painted. The largest tire is placed down, and a part is cut off from the side. The hole is filled with soil and planted with plants. In this way, other elements are also laid out. Tires can be beautifully decorated with patterns or even unusual cuts.
Article
If your harvest disappoints you and your garden plot is not as productive as you would like, or if your plot of land small size, creating raised beds can be the solution to all your problems. Raised beds allow you to garden with greater efficiency, on a smaller area and on firmer soil.
Steps
Quick Methods
- Find an old wooden rowing boat (or similar). A boat that is not suitable for water use will probably be the cheapest.
- Paint the boat any color you prefer and drill some holes in the bottom.
- Place it on permanent place so that the boat is level. It may be necessary to dig a small trench.
- Line the bottom with plastic and place it inside a large number of stones or other filler to level the bottom.
- Fill with soil and plant the plants you wish.
-
Use an old wooden bed frame. You can purchase an antique bed frame to make your garden beds look quirky and unique. The downside, of course, is that the height may be awkward for planting and it will be difficult to reach the center of the bed if a very large bed is used. It is recommended to use a child's bed.
- If you can only find the back and front headboards, they can be attached to the appropriate size bed as described below.
- If the bed frame has sides, you can simply extend them further to create a box inside the bed. Measure the boards and nail them (with inside bed) to the frame. Fill with soil and plants.
-
Use old wine crates. Wine boxes, tangerine boxes or any similar boxes can be turned into a great planting box. Simply drill holes for drainage, if there are none, fill with soil and plant. Place them on the ground, on a flat or sloped surface.
Project plan
-
Determine and design the shape of the raised bed. Luckily, constructing a raised bed doesn't take long! You just need to build a box with an open top and bottom. You can make it any shape you want. Think of it as if you are making a mold to pour soil into it (like pouring cement or plaster into a mold).
Draw a plan for your beds, measure your plot, and add the measurements to the drawing. Now you can determine how much material you will need to build your garden bed.
Decide what materials to use. You can use anything: boards, plastic, synthetic wood, sleepers, brick, stones or a number of other materials. However, the use of wood is usually the simplest and effective method. This article talks about creating a bed from planks or synthetic wood.
Gather everything you will need. Full list what you will need is presented below. All you really need are boards cut to the correct length and at least 60cm high. If you want to make a triangular bed, you will need three boards. If you want to make a square bed, you will need four boards of equal length. For a rectangular bed you need four boards, two of one length and two of another!
Installing raised beds
Install the frame. Use 4 pegs in height equal to twice the height of the proposed bed. Dig holes and place pegs halfway into the ground. Make sure the pegs are level and in the correct places.
Attach long boards. Measure the larger distance between the pegs, including the width of the pegs themselves, and cut the boards to the appropriate length. Use nails or screws of the appropriate length. Drive two nails or screws into the ends of each board. Place the boards on the sides, adjusting the expected height of the bed. Reduce the width of the boards if necessary.
Attach the boards along the short sides. Measure and cut the boards for the short sides of the bed according to the distance between the outer edge of the two boards on the long side. Again, use two nails at the ends of each board, driving them into the pegs.
Create an overhang if necessary. You can create a more attractive bed by adding a lip to the top edge of the sides. First, take boards of the desired width and cut a 45-degree bevel on the ends of each board, picture frame style. Purchase wooden pegs half the width of the overhang and use matching nails to attach them to the outside at the top of the bed. Fit the cut edges of the boards together and nail the lip to internal corners on top of the pegs.
Cut a piece of garden plastic or cover material to fit the area of your raised bed. By placing it on the surface, you will significantly reduce the growth of weeds. Seven or eight layers of dampened newspaper or packing cardboard will also keep weeds at bay (be sure to remove the tape from the cardboard).
Using raised beds
- Add dry organic fertilizers (eg. wood ash, bone meal or blood meal) when building your bed. Follow the instructions on the package.
Once your bed is in place, fill it with soil. Add some compost fertilizer to the base of the bed, followed by a layer of soil on top of the nutrient-rich compost. You can significantly reduce costs by using soil (up to 50%) from other parts of your site. Fill at least 1/3 of your raised bed with compost or manure (sold at garden nurseries or garden centers in 50-pound bags).
-
-
Proceed with landing. Some people like to grow flowers in raised beds. Some people prefer to grow vegetables. The options are endless. If you want to grow vegetables for food, raised beds are an excellent choice for growing lettuce, carrots, onions, radishes, beets and other root vegetables.
-
Protect your raised bed from the elements. To build a miniature greenhouse, install arcs on the bed, bending PVC pipes in the shape of an arch. Install arches every 1.2 - 1.8 meters.
- Buy a piece of cover material, attach it to the arches, and you have a moisture-saving, insect-free greenhouse that you can use to grow vegetables throughout the growing season.
- When the plants in one part become so tall that the cover can no longer be used, you can open that part and lay the cover on the ground. It may seem strange, but light, heat and moisture will be able to penetrate through the coating, but bugs and weed seeds carried by the wind will not. Therefore, this step can help you reduce watering, weeding, and pesticide applications.
- You can also install plastic netting to protect your homegrown crops from birds and deer.
Use the old one wooden boat. Using a wooden boat can be a great way to add a unique touch to your garden, and it will also help if you don't have any building or carpentry skills. To find the right boat, look online for listings such as Craigslist or ask local fishing stores.
- Raised beds should ideally be between 60 cm and 1.2 meters wide. 60 cm if the gardener has access to the bed from only one side, and 1.2 meters if the gardener has access to the bed from both sides. It should not be wider, otherwise the gardener will have to step on the bed (thereby compacting the soil) or this will add stress to the back.
- Consider using boards 5cm thick and 30cm wide, cut to the length of the bed. If you lay them on edge, one on top of the other on each side of the bed, your bed will be approximately 60cm deep.
- Decorate your raised bed or even install some lighting to make it the focal point of your yard.
- Building a raised bed with two people is much easier and faster than building it alone.
- You can either buy soil from a garden store, dig it up locally, or buy a truckload of it from a farming operation. Find out the prices and decide what is best for you. Purchased soil is sterilized and free of weed seeds, but it can be expensive to purchase in large quantities. If you take soil from your yard, it will likely contain weed seeds, but the price will be reasonable.
- You can reduce soil costs to almost nothing by stacking grass clippings and straw (but not hay, as it contains seeds) or fallen leaves. Water each layer thoroughly and tamp it down before adding the next layer. Once the bed is full, you can plant the plants in it, adding soil to each hole you dig. By the time the plant roots begin to spread beyond the holes made, the compost material will begin to decompose. If you plan to plant seeds, add a thin layer of soil or compost on top. Be prepared to add additional compost each season because compost material decreases in volume as it decomposes.
- Be creative when creating your raised bed. You can build a beautiful raised bed from scrap wood, so don't be afraid to experiment. Raised beds are very useful and affordable.
- Narrow raised beds help conserve water.
- Raised beds are easier to care for than plants planted on the ground. If you find it difficult to bend down, you can make the beds higher, up to waist level. Just make sure you build it firmly enough and water accordingly.
- Water raised beds frequently. Because they are located above the ground, your raised beds do not hold water as well as soil on the ground. Place raised beds near a water source to make it easier to water throughout the year.
Warnings
- Raised beds are an attractive place for cats to litter. If there are cats in your area, plant catnip to keep them at bay.
- In some areas, wood-to-ground contact increases the risk of termite infestation for nearby residents. wooden structures, including for houses.
- Old, treated wood may contain arsenic, which is deadly poison, and also a carcinogen. Arsenic is no longer used to treat wood, but old lumber may still contain the poison. Arsenic is released when you saw or burn old wood, and can leach from the wood when it comes into contact with acidic soil or during acid rain. While it is tempting to use this type of wood for your garden beds because it has a longer lifespan, it is better to use regular wood, especially for garden beds, and replace it every three to five years.
- New treated wood no longer contains arsenic.
- Old wood, however, may contain this substance.
What you will need
- Shapes for your raised bed (consider using 10cm x 10cm pegs 60cm high for the corners and 5cm thick x 30.5cm wide boards for the sides)
- Nails or screws
- Hammer or screwdriver
- Compost
- The soil
- Seeds or seedlings
- Shovel
- Rake
- A barrier (plastic liner or similar) to keep weeds out. Moisture insulation can also be used on the inside of the bed. This will significantly extend the life of the wood.
- PVC pipe and greenhouse plastic (optional)
- Composted manure (available from nurseries or farms)
Vegetable gardening in Russia is famous for the fact that people are constantly adopting various low-cost ways to increase productivity. The so-called warm beds have earned high popularity. Their device is created in such a way that early heating of the soil occurs with natural (from rotting organic matter) or artificial (using energy) heat.
To put it simply, a warm bed is a kind of compost pit that has drainage at the bottom and planting soil at the top. There are three options for compost beds according to their placement relative to ground level:
- raised above the surface;
- recessed;
- mixed design (the base is at depth, the top is located above ground level.
In any case, filling the bed will look like a layer cake, in which each layer represents some kind of organic material.

Such beds are formed either in early spring, or late autumn. Going into winter with pre-prepared beds is very rational, because before freezing in the depths of the structure, the process of decomposition of organic matter will already begin, and in the spring it will continue with renewed vigor.
Contents of organic warm beds
Approximate contents of raised beds from bottom to top:
- protection from rodents - mice and moles (use metal or plastic mesh);

- drainage layer (plant branches, large twigs, logs, remains of old stumps and other bulky material);
- insulating fabric (geotextile) or a layer of old newspapers and cardboard on top of it;
IMPORTANT. The insulating layer protects the drainage layer from being flooded with water and also prevents the germination of weeds.
- sawdust, bark, chopped branches;
- unrotted organic matter - old foliage and various plant remains;
- rotted compost;
- garden soil or specially brought fertile soil.
IMPORTANT. The thickness of the top layer must be such that the roots have enough space and do not grow into the layer of unrotted organic matter. Study in advance the specifics of the plants that you plan to plant in this bed.
Depending on the design, some layers can be eliminated. For example:
- if the bed lies on the ground without deepening, then a drainage layer of bulk material is not needed. There is no need for cardboard either - just cover the bottom of the bed with a protective coating against rodents, and then with waterproof technical fabric, so that irrigation water does not quickly go into the soil;

- if the bed is of a mixed type (buried with an elevation), make sure that the ground level is somewhere between a layer of cardboard and unrotted organic matter.
There are no strict rules. the main task for a novice designer of warm beds is to understand the whole operating principle:
- sequence of layers;
- organization of the rotting process;
- protection from rodents;
- thickness of each layer of filler.
Most questions revolve around how thick each layer should be. Experienced gardeners We recommend paying attention to the following key points:
- top fertile soil with compost 15-25 cm (depending on the length of the roots going deep);
- unrotted organic matter (old leaves, etc.) in a layer about 12-15 cm thick;
- layer of old branches, sawdust- about 10-13 cm;
- the lower drainage layer is from 5 to 10 cm.

Varieties
There are different versions of garden beds that provide natural warmth from within. The choice of design depends on how much time and effort you are willing to spend on the result. Remember that any garden design is considered simultaneously as:
- the opportunity to increase yields;
- means of facilitating further gardening work, increasing convenience;
- aesthetic organization of plantations and plantings on the site.
Technologically the simplest option. What are the advantages of a warm bed of this type:
- they are much easier to care for;
- there is no need for hard work digging the earth to depth;
IMPORTANT. Ideal for conditions where the soil is excessively swampy (an optimal environment is created inside the contour of a warm bed by selecting fillers, and the bottom is covered with insulating material).
- easy to create clear geometric shapes (relevant for lovers of sophistication landscape design);

- it is much easier to protect plant roots from mice and moles.
In-ground beds
Most difficult option in terms of labor costs. However, the result is more solid:
- below ground level, organic matter does not freeze as much as in raised beds, so the process of heat release begins much earlier in the spring;
- Once you dig a trench and fill it with organic materials, you don’t have to worry about repeated work for several years (shelf life is about 3-4 years without the need to change the internal contents);
- saving effort and time on the side framing of beds, because you can do without it (if the surface of the bed is level with the level of the surrounding ground).

Mixed type
This option is considered optimal:
- the buried part plays a long-term role (there is no need to dig it up every spring);
- the elevation of the upper fertile part allows you to cultivate the bed with less effort;
IMPORTANT. Working in a sitting position is important for older people. They often suffer from atherosclerosis and other vascular diseases, in which a head-down position is contraindicated.
- the recommended height of the part protruding above the surface is approximately 55-70 cm;

- the rising part will have to be decorated with side walls, that is, the result will be an aesthetically attractive look - the garden or vegetable garden will look more stylish, pleasing to the eye with landscape design.
Materials
Very important aspect- what to make the contour of the bed from. Although there is a wide variety of materials on the market, they have different properties:
- aesthetic appearance;
- financial high/low cost;
- fragility/durability;
- response to temperature;
- safety from an environmental point of view.
IMPORTANT. Never use glass. There is a high risk of combat, and it is simply unrealistic to remove small fragments from the soil.
The final decision is always yours, and let it be balanced. Short review materials claiming to be used:

DIY garden bed
In this article we will look at a mixed type design:
- buried by the base;
- having an above-ground part;
- wooden side frame.
Such instructions will help you better understand the general scheme and details of working with various materials.
Preparing for work

Tools and material:
- carpentry (saw, drill, level, screwdriver, measuring tape, corner);
- gardening (shovel, rake, pitchfork, garden cart for transportation of compost and other filler materials, earth drill);
- edged board 2-2.5 cm thick, 17-20 cm wide;
- 4x4 cm block for stakes;
- metal or plastic mesh against rodents.
Bed dimensions:
- The width is important so that it is convenient to work with the bed when growing plants. It is optimal if the bed is no wider than 1.0-1.3 m. In narrow areas of the site (for example, near a fence), you can make beds 70 cm wide. Even with one-way access, the plantings will be necessary care and the care of the gardener.
- the length is arbitrary - as far as the configuration of your garden plot allows.

- as mentioned above, the ground part of the bed is recommended to be 50-75 cm high;
- however this recommendation is not mandatory. Moreover, taking into account the fact that the thickness of the internal layers varies. Therefore, the bed can also be placed inside a lower contour (20-35 cm).
IMPORTANT. Plan in advance, this will make it easier for you to implement your plans without wasting time on alterations and improvements.
Frame making
Please note that the sides of the bed will have to be made of double boards, that is, place one board vertically above the other so that the height of the walls is sufficient. Thus, you will have the following actions:
- measure out desired length, cut boards (4 pcs. side, 4 pcs. end);

- prepare stakes from a 4x4 cm bar, 75-80 cm long;

IMPORTANT. How many stakes will it take? With a bed length of 2-2.5 meters, 6 pieces are enough. With a bed length of 3.5-4 meters, 8 pieces are enough.
- make two-level sides by joining two boards together (use scraps of boards, loosened into planks with a hatchet);

- keep in mind that the screws should not extend beyond drilled wood(when buying self-tapping screws, remember that the thickness of the board is 2.5 cm, and it needs to be multiplied by two, since the connecting strips will be the same thickness).
This completes the preparation. The frame will need to be installed directly into the trench - fastening at the corners of the structure will also be done there. A measuring angle and level will help you maintain accuracy.
Trench and its filling
Step by step steps:
- mark the bed or beds (marking with pegs and a stretched cord will allow you to dig a trench of an even geometric shape);

- It is advisable to dig a trench so that its depth is about 40-45 cm;

- lay down a rodent net (it is sold in construction stores, ask for reinforcing mesh or chain link);
- create a drainage layer (see details above) - coarse, long-rotted organic matter;
- cover with old newspapers, cardboard;

- install side walls;
- drill holes for support stakes;

- At the corners of the structure, connect the boards and stakes with self-tapping screws;
- use a corner and a level to ensure that the structure “sits” in the ground exactly both horizontally and perpendicular to the joining corners;
- continue to fill the raised part of the bed;
- add dry grass, leaves and other unrotted organic matter;

- further - humus, manure or compost;
- the final layer is high-quality garden soil.
IMPORTANT. In fertile areas, before starting trench work, carefully remove the top layer of soil and set it aside. This is the turf you use for planting.
After all the steps, do not forget to water the bed to create a moist environment. In such conditions, the process of rotting inside will begin. Do not try to moisten each layer with water as you fill the trench. There is no need to rush, let everything go at a moderate speed. There is still time before planting, and the contents of the bed should rot and be loose, and not rot in a viscous slurry.
Video - Do-it-yourself warm beds
Warm beds with artificial heating
The concept is that:
- water pipes made of cross-linked polyethylene are laid on the drainage layer;
- the pipe structure is connected to the electrical cable;
- heating is controlled by the user (turning on and off the heat supply as needed, depending on the ground temperature).
IMPORTANT. Artificial heating is optimal for covered (tent) beds and greenhouses - the heat generated by the pipes is retained inside the system and is not sprayed in the open air.

The order and list of fillers may vary. In any case, the most important layers should remain:
- bottom drainage (it is laid directly on natural soil);
- additional insulation (prevents the “layer cake” from cooling from below, from the ground);
- sand (occupies the location of the heating pipes) - plays the role of fine-grained drainage, helps retain heat, and facilitates the passage of irrigation water downwards).
Only after all these components is the fertile layer of soil placed at the top.

- at dachas it is advisable to use an electric cable (after all country heating, as a rule, temporary and low-power);
- in permanent private houses, you can connect directly to the heating (not forgetting to make a shut-off valve in case the house is heated, but the garden bed does not need to be heated at this time).

What type of heating is allowed? It can be of any type:
- gas;
- electrical;
- steam;
- water;
- stove
Operating procedure
It's actually quite simple:
- prepare layers (large drainage, synthetic insulation, sand);
- lay water pipes. Scheme - closed loop (ensure circulation warm water round);

- add a little more sand on top;

- the final layer is directly fertile soil. Use good quality garden soil, as well as additional black soil. Keep in mind that the soil should nourish the plants well when heated;

- Connect the greenhouse piping to the heating source.
In the absence of experience working with electricity, invite more help knowledgeable person. If electric installation work you understand, the whole process will be elementary for you, and the design will be durable, effective and reliable.
In the field of modern landscape design and improvement of personal plots, raised beds or bulk flower beds are very popular. They are fenced areas of varying heights and sizes, filled with soil. In such beds you can successfully grow vegetables, ornamental trees, flowers and shrubs. In addition, raised beds have an attractive and neat appearance.
Advantages and disadvantages of raised beds
Compared to ordinary beds, tall beds have a number of undeniable advantages:
- you can use any soil, even purchased soil with all the components useful for plants;
- you can make proper drainage yourself;
- if you have purchased soil, you can further avoid the appearance of weeds and plant diseases;
- on a high bed it is more convenient to weed and fertilize plants, as well as harvest;
- a high bed can be insulated. This will allow you to receive good harvest even in cold climate zones;
- a mobile garden bed can be arranged anywhere on the site;
- a high decorative bed with flowers can be arranged near the house as a decoration;
- high coefficient useful action insulated high beds. In a small garden you can grow more vegetables than in the garden;
- in high beds the soil is always loose, which has a positive effect on the life of plants;
- high beds can be fenced with both cheap and expensive materials.
Flaws:
- quick drying. Such beds must be watered frequently with water at room temperature;
- plants in high beds need additional feeding with mineral fertilizers;
- immature compost is biologically active, so seeds may not take root in it. To do this, it is better to plant seedlings in it;
- The mole cricket loves to live in high beds. Therefore, when building a bed, it is necessary to take the necessary measures to protect against pests.

Dimensions of raised beds
Height of beds
If there is soil good quality on your personal plot, to create a bed on the ground, you can limit yourself to a 15-centimeter height. If you plan to construct a bulk bed without contact with the ground, then the height will have to be made up to 30 centimeters. And for planting potatoes - a little higher.
Warm beds should be built 50 centimeters high. It is possible even higher, since you need enough space for compost insulation.
Everyone can determine the height of the bed independently. The main thing is that it is comfortable, and with a large width it is necessary that the height allows you to reach the middle of the bed.

Length and width of beds
When arranging beds, their length does not matter. The main thing is that the size of the greenhouse or other area where the bed will be located allows. The only condition is additional strengthening of the wooden sides of the beds.
The most optimal width of the bed is from 90 cm to 1.2 m. With these parameters, it will be convenient to get to all corners of the bed to care for the plants.
Growing crops such as corn and sunflower in high beds is not recommended by agricultural experts due to the fact that harvesting will be inconvenient.
High beds. The design of beds of this type does not require special skills and craftsmanship; it is enough just to determine the maximum sunlit place for their location.
If you plan to make a bed on the ground, then you need to take additional measures:
- line the bottom of the future bed with a special mesh to protect against rodents;
- To prevent the appearance of weeds, line the bottom of the bed with polyethylene or newspaper.
Materials for raised beds
- Wooden sides. This is the most a budget option, but short-lived. Under constant exposure to moisture, wood is prone to rotting. If you treat wood with a special coating, its environmental properties will disappear.
- Tree branches. In this case, the sides are woven by hand from branches. Quite attractive in appearance, but the option is short-lived.
- Masonry. A high bed made of stone looks beautiful and impressive. But this is an expensive pleasure, especially when you have to make long beds.
- Brick sides require additional construction skills to properly lay the brickwork. Moreover, the option is not cheap.
- Sides for raised beds made of plastic are durable and do not require special care. But you need to choose environmentally friendly plastic if you plan to plant vegetables.
A raised bed can be built entirely from different materials, the main thing is that they are resistant to moisture and pressure. It should be noted that it is better to make beds for planting vegetables from natural materials. And for decorative beds You can use processed materials chemical coatings. It is quite possible to build raised beds with your own hands. Before starting work, design the dimensions of the future bed and its location. The size and shape of the bed can be different, the main condition is convenience when caring for plants. Optimal size a high bed is about 90 centimeters wide. Length is arbitrary.
You can see what raised beds should look like in the photo:


Stages of construction of raised beds
To build raised beds yourself, you must adhere to the following rules:
- High beds according to the Lyadov method are made in the form of a box made of dense blocks of wood. To begin, choose a location for the future garden bed. Preferably in the sun.
- Lay the logs on the ground. If the height of the logs allows, then deepen them into the ground for greater stability.
- Determine the width of the bed from 60 to 140 centimeters. The length can be any.
- At the points where the log boxes are fastened, connect them with screws. Side walls It is better to make it from boards, which are then attached to long logs.
- Bottom wooden box line with newspapers or polyethylene. Pour a small layer of sand on top so that the sand covers the bottom.
- Lay branches and grass (without seeds) on the sand as future insulation for the bed to ensure humus.
- Cover it all with a 10-centimeter layer of fertile soil.
- The bed according to Igor Lyadov’s method is ready. Its sides can be painted.

High bed-greenhouse
These beds are different high yield. They can be constructed both in the greenhouse and separately.
Construction stages:
- With help building level determine the exact height of the wooden sides of the future bed. For structural strength, choose a thick tree and dig it into the ground.
- Knock the boards together. Soak up wooden frame special means, preventing the destruction of the tree.
- Install the metal arch mount above the garden bed. The distance between the arches must be at least 75 cm.
- Line the bottom of the bed with fabric and secure it to the wooden sides with a stapler.
- Install metal arches. Experts recommend using polypropylene arches with a diameter of 20 mm. Insert them into the prepared metal supports.
- For strength, secure the upper support points with an additional arc, which should be located in the center.
- Fill the garden bed. To do this, pour a 10-centimeter layer of soil onto the fabric. On top is holey cardboard, then a layer of grass or hay, as well as some sand with mineral fertilizers.
- Cover the greenhouse. For this from above metal frame stretch and secure the polyethylene.
When the seedlings are already in the ground, it is necessary to water it with water and cover it with a layer of sawdust or black film. The latter is necessary to avoid drying out and cracking of the soil.
Frequent watering of seedlings in high beds is required. You can water plastic bottles under the root of the plant, trying to avoid getting water on the leaves of young seedlings.

- It is better not to use high beds for tomatoes and cabbage. These plants lack moisture in this type of bed.
- Perennial grasses are also not suitable for planting in high beds, as they will freeze.
- To avoid loosening the soil of the bed, cover its surface with sawdust, which will regulate the moisture level and prevent the soil from drying out.
DIY raised beds. Video
The market offers a large number of materials that allow you to create raised beds with your own hands in the country. Various vegetable crops are grown annually using this method, obtaining abundant harvests. For example, the advantages of high pallet fences are convenience and order. Plastic beds also have certain advantages. At the same time, tall structures take up a lot of space, which is considered their disadvantage.
Beautiful tall vegetable gardens
The availability of fertile land in sufficient quantities is suitable for creating greenhouse structures. It is better to arrange a tall garden with your own hands in this way according to the requirements:
- Choosing the right place for the garden bed.
- Determining the size of the plot.
- Making a frame from scrap materials.
- Filling the fence with fertile soil mixture.
- Availability protective coating structures.
- Periodic harvesting.
Option from the board
Beautiful fencing suitable for early sowing different varieties and plant species. They have several advantages:
- any well-lit places are suitable summer cottage, including areas with rocky or;
- heating of the contents of the box occurs intensively in the spring;
convenient watering; - protection from bad weather and ensuring the safety of mulch;
- the presence of a drainage layer eliminates moisture stagnation;
- digging and weeding large areas is no longer required;
- use sand or crushed stone to fill paths between rows.
Wooden box
It is recommended to create raised beds at the dacha with your own hands in order to solve a number of problems associated with the slow development of vegetable crops. Fences are created individual conditions growing seedlings when choosing the most suitable soil mixture. It is important to ensure constant watering of the beds to prevent rapid evaporation of moisture.
Fencing materials
When making the box, logs, bricks, corrugated sheets or stone are used. If you build it from pallets with your own hands, red or cedar wood, this will increase the service life of the structure. The bottom inside it is usually covered with plastic or to protect against rodents.
Setting up raised beds does not require the use of expensive equipment. For example, having made a box with your own hands, it is better to stretch a polyethylene film over it. Arcs made of metal or are pre-installed. The greenhouse must have dimensions corresponding to the dimensions of the bed made of brick, wood, blocks or stone. This will protect the seedlings from frost and extend the harvest period.
When is the best time to do it and what to plant?
Fall or late summer are better times to create your own raised beds. If you start working in the spring, during this period the impact of emerging processes on the development of seedlings is very weak and imperceptible.
It is better to fill fences created in spring a month before planting seedlings.
Such vegetable gardens will decorate the yard
To fill raised beds at the dacha with your own hands, photos of which are presented below, the autumn period is most suitable.
Precisely when the development of internal processes in the earth continues. The layers in the box that have rotted over the summer provide the plant root system with the optimal amount of useful elements.
Plant rotation
Seedlings are usually planted immediately after the construction of structures. After harvesting ripe vegetable crops, they begin to alternate them annually with healthy herbs, for example, parsley, dill. This allows for abundant harvests every year.
Great garden option for strawberries
The internal decomposition process will prevent strawberries from freezing during severe frosts. This is possible if the raised beds for strawberries are covered with snow or special material in winter. When planting plants in a warm bed, it is convenient to grow them in it due to the least evaporation of moisture.
High bed for cucumbers and tomatoes
A bed for cucumbers or tomatoes is built according to a principle reminiscent of the method of arranging a fence for growing. The only difference is the need to install supports with crossbars along the edges to ensure crop support. Each cucumber vine, tied with a wire stretched between it, produces a bountiful harvest.
Most appropriate place at the dacha they are often equipped with several boxes. When doing them on the lawn, they leave room for working with a lawn mower. Be sure to provide a certain distance between the rows for the delivery of fertile soil, mulch or fertilizers in special wheelbarrows.
Preparing boxes
Processing of wood material
The boards are cut taking into account the dimensions of the frame. Substances hazardous to human health should not penetrate the soil, therefore treated wooden elements covered with film. Then the processing is carried out in stages. This requires:
- Cut the timber into 50 cm sections.
- Impregnate with a protective compound.
- Dry the material.
Various location options on the site
The earth is dug up at the same time as the fine grass to increase the permeability of the soil. If there is sufficiently dense soil, you can remove the turf taking into account the markings. The advantage of laying out a box of boards is that it does not require removing too much soil.
DIY frame installation
Construction device
The markings made before creating the fence allow you to build a perfectly level structure. During installation, check the dimensions of all components of the box. The frame is made correctly if the diagonals of opposite corners are the same.
Step-by-step instructions that allow you to create raised beds with your own hands involve completing several basic steps:
- Move the frame to the marked area.
- Place the shields according to the markings.
- Make recesses for supports.
- Check the accuracy of the installation of the shields with a level.
- Remove excess soil or place stakes.
- Having finished making the high beds, fertile soil is poured into each of them.
Compost preparation
Mulching the soil causes more intense evaporation of moisture. Do not leave gaps in compacted soil.
Filling the bed
Before filling, the bottom of the structure is covered, which is nailed along the edges of each wall. will protect plants from rodents. The laid layer of geotextile will prevent weeds from growing in the soil.
Filling scheme
Step-by-step instructions include the following steps:
- Cover the geotextile with dry twigs, bark, large sawdust, shavings, and leaves.
- Lay out layers of compost and bird droppings.
- Cover the organic matter with grass, fallen leaves or bark.
- Apply the required amount of mineral fertilizers.
- Lay fertile soil.
The thickness of the layers created is usually 10 cm, they are not mixed with each other. Each of them is well compacted and leveled. Creating a fertile layer involves the use of:
- tops;
- sawdust;
- peat;
- wood ash;
- green manure;
- rotted manure;
- bird droppings, etc.
The video shows how to make a high garden bed.
If the beds in a greenhouse are created with your own hands from a fertile soil mixture, this significantly increases the yield. To compact them, you need to water them several times with plenty of water.
If the composition of the soil is not fertile, then purchased soil, which is spilled with a large amount of water, is suitable. Then they wait two days, during which the layers can settle. The compacted fertile soil on top must be covered together with the frame with black agrofibre. This will warm it up to the greatest extent and prevent weeds from germinating.