The Art of Creation various products from a vine or wicker was known more than a thousand years ago. Then it was a necessary skill associated with the satisfaction of everyday human needs. Currently, willow basket weaving for beginners and experienced craftsmen is rather an exciting hobby that allows you to get beautiful products, designed not only for collecting and storing mushrooms, berries, fruits and vegetables, but also for decorating rooms.
Modern designers are increasingly resorting to the use of all kinds of baskets, as they allow you to fill the space with a unique rustic "spirit" and comfort, inherent only rural houses. This is especially true in rustic, country and, which are now becoming more and more popular among residents of various private houses.
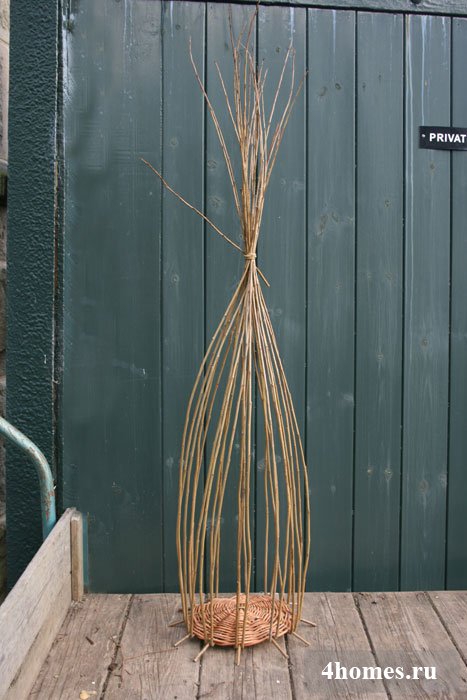
Basket weaving technology
For basket weaving, you can buy ready-made willow twigs or assemble them yourself. Freshly cut rods filled with juice must be dried well, and before starting to weave the product, soak for 30-40 minutes in hot water to make more flexible. The tools you will need for the job are secateurs, sharp pocket knife, scissors and an awl or screwdriver.
The art of basket weaving has its own simple terminology. If you look at the bottom of the basket, you will see thick straight rods that diverge from the center in the form of rays and are called "knitting needles". After they are folded upwards in the process to form the walls of the basket, they become "racks" (or "box").
All sections of thin wicker that bend between the needles and uprights are called "knit" (or "weave/weft").
Usually baskets start to weave from the bottom. Sometimes it is also called the base. Then weave the walls, bend and, if necessary, handles.

Weaving willow baskets for beginners step by step
Consider one of the methods of weaving a basket with a diameter of about 28 cm and a height of about 12 cm.
We will need the following materials:
- 6 thick willow branches (future knitting needles);
- 24 rods of medium thickness (for the side parts of the bottom);
- 50 thin branches (25 for racks and 25 for walls);
- 12 rods of medium thickness (for a special weave designed to connect the base and walls).
In total, there are five stages of basket weaving.
Stage 1: basic
From a thick shoot, cut 6 rods 35-40 cm long with a pruner. They will serve as base knitting needles.

In the center of each of these three rods, use a knife to make a split 4-5 centimeters long. This split is called a "cut".


Put together three rods with splits, and insert the remaining whole rods into the slots so that you get a cross.

Now we begin to weave the very base (bottom).
Select the longest and thinnest rods. Take two rods and insert their thin ends into the slot of the slot, as shown in the photo.

Separate the twigs, pass thick knitting needles between them and braid them like this, skipping from above and below alternately. Thus, you need to make two circles to get weaving from two thin willow twigs


Then continue to make the same weaves, only single ones, tightening the twigs tightly and bending each of the knitting needles outward in turn. It is necessary to try to ensure that the distance between large branches is uniform, as a design should be obtained that resembles spokes from a bicycle wheel.


The following picture clearly shows what exactly the pattern should be obtained in the process of weaving around the knitting needles.

In the description of the method of weaving baskets from willow and vine for beginners, one thing is often missed. important detail, on which the quality of one of the most important elements, the bottom, directly depends. This is the need to tighten the twigs as tightly as possible after each weave of the knitting needle, without moving them up or down!

Using the described method, continue to work, moving in a circle until the twig ends.

To increase the length, do not use two new branches at once. Just stick the twig with the pointed end between the old twigs from the last rows, bend it in the right direction and continue weaving at least a few more moves forward before changing the second twig. Trim the remaining ends carefully. As a rule, replacement should be done when there are still about 10 cm left to the end of the branch.

Base at finished product it should turn out to be slightly concave so that the basket can stand firmly on the veranda or the bottom technique clearly demonstrates that, when the diameter reaches 7-8 cm, you need to wrap your hands tightly around it and “push” the very center outward with your thumbs a little. However, here it is important not to overdo it and not to bend the base too much.

Continue weaving until the bottom reaches a diameter of about 22 cm. It is advisable to guess so that this moment coincides with the end of the next twigs, the ends of which should be fixed by tucking between the branches of the previous row.

Cut the ends of the twigs with secateurs as close as possible to the wicker base itself, but so that they still rest against the knitting needles.

Here is the bottom and it's ready. For beginners, the result may turn out a little different than in the photo, but this is completely normal.

Stage 2: breakdown of the base
On this stage in the weave of the base, new branches are added to each knitting needle, which will then play the role of racks for further creation of the basket.
It is important to consider that each wicker has a natural curve with an inside and outside.

For high-quality weaving of our basket, we need 24 such branches. Cut each of them with scissors or secateurs to get a pointed and long oblique cut, located strictly on the inside or outside of the rod, but not on the side.

Holding the base with the concave side down, press the awl or screwdriver into the weave next to the needle as shown in the photo.

Remove the awl and immediately insert the prepared rod inside down and another rod on the other side of the knitting needle. Using the same method, insert two branches into the will of each knitting needle.

In various descriptions of weaving strong willow baskets for beginners, it is always indicated that the rods must be inserted with the inside down so that the product bends itself beautifully. If instead you insert them with the outer side down, the basket will move apart.
On each upright, make a kink a short distance from the beginning of the weave of the base (about 5 mm) by simply pressing on them with your thumbnail.

Raise all the racks up, secure them with a hoop or tie them, making sure that there is no bending inward and skew to one side.

Cut the base knitting needles of the bottom at the same level with the edge of the weave a little below the bend of the uprights.

Stage 3: connecting the bottom to the walls
One of the most milestones in weaving baskets is the connection of the finished bottom with racks with the side. In order for this transition to turn out to be uniform and look neat, use the softest light twigs of medium thickness in the amount of three pieces.
Position the basket on your lap with the base towards you - this will be the easiest to work with.

Take three twigs of uniform average thickness and trim their length so that it is the same. Insert them with their tips into those weaves on the bottom that are adjacent to uprights. In order for the rods to hold firmly, their tips should go deep into the base by about 5 cm.

Start creating a braided pattern from the leftmost twig. Hook it and throw it over the first, and then over the second rack of the second row. Keep in mind that weaving should not be on the side, but on the edge. This will allow you to get the most aesthetic connection.

Take the next twig, moving from left to right, and braid it around the uprights in the same way.

Continue weaving around the entire base, always choosing the twigs one at a time and making sure that the branch that is in work is on top of the other twigs.

It is important in the process to always tighten the twigs tightly, which will allow the product to get a beautiful shape due to the good fixation of the racks at the very bottom. After the first circular weave, place the basket upright on a table or any other convenient surface. This will make the next process easier.

Leave the small end of the twig sticking out, as shown in the photo. Start adding new branches from left to right, simply moving the old twig a little and inserting a new one into the resulting weaving gap. Make a few weaves before adding the next twig.

As a rule, several circular weaves are enough to create a beautiful transition from the base to the walls. Pull the remaining free ends down through the resulting weave, and then cut off with sharp scissors.

Stage 4: weaving the walls
There are many patterns of rods of varying degrees of complexity, but when weaving a willow basket for beginners, it is better to use the simplest option, the diagram of which is presented below.

With an odd number of racks, it is permissible to use one rod as the basis of weaving, however, we got 24 racks, so the best option is an interweaving of two branches.
Place the blank of the basket on a vertical surface, place some weight in it that will prevent the product from falling, and start weaving. First add one twig, and only after a few throws over the racks in front and behind (about the middle of the diameter of the basket) add the second. Next, the branches need to be alternated, using one after the other in turn.
When the twig is finished, add a new one in the same way as shown in the picture. Always trim the branch before it becomes too narrow, so that there are no too thin parts in the weave.

After making a few circles, remove the hoop that supports the racks. If at the same time they begin to move too much to the sides, return the mount to its place. In total, you need to move up about 9 cm.

After completing the main weave, take three of the same twigs that were used to create the connection between the bottom and the walls. Secure them by simply sliding the ends under the posts.

Make several circles of weaving light rods of medium thickness and tightly fasten the ends in the same way that was described above at the stage of connecting the base and walls.
Willow basket weaving - simple but incredible an exciting activity. Moreover, not only the older generation, but also young people are engaged in this type of needlework. From the willow vine, you can weave a product of absolutely any shape and size, which can be a great gift for friends or relatives. enough to follow step by step diagram willow weaving for beginners.
Modern products woven from willow branches are very popular. They decorate not only summer cottages but also city apartments. In addition, they not only bring practical benefits, but also decorate the room.
 We must immediately add that collecting branches for weaving does not harm the tree. On the contrary, it is able to rejuvenate and heal it. This type of needlework is popular not only in villages, but also in big cities. It is especially pleasant that willow weaving is an absolutely inexpensive hobby, because you can collect the necessary material yourself.
Willows are widespread in Russia. Therefore, finding a tree and collecting material will not be difficult. If you do not want to do it yourself, then the willow vine can be purchased at specialized stores that offer needlework products.
A basket can be woven not only from willow twigs, but also from branches of a walnut tree, vines of grapes and many other shrubs. The main condition: the rods must be flexible and long. On collected material there should be no branching for the braid. All collected willow vine is divided into:
- unrooted, that is, unpeeled branches;
- debarked is a purified vine.
 For needlework, both peeled and whole branches are suitable. From a single vine, large household items are created, such as fences, baskets are very large sizes, various furniture. Vases, boxes, bread boxes and other small items are woven from peeled branches.
The collection of material must be carried out late autumn or in early spring when the tree has no sap flow. In addition, during this period, the willow vine is especially flexible, but in summer the branches are very brittle, so it is very difficult to weave from them.
If the preparation is made in spring period, then the branches must be cleaned immediately. But the autumn vine needs to be boiled before cleaning.
The harvesting process is simple, although you will have to spend some time on it. But the weaving technique itself is very interesting and exciting. Although for beginners, weaving a willow basket will be quite difficult.
Required Tools
To work with willow branches, it is necessary to prepare tools that will greatly simplify the process of weaving. For beginners, this point is especially important. For work you will need:

At the end of the work, you will need stain or varnish, as well as brushes of the required size. They are needed in order to give the woven product a more aesthetic and finished look.
If all the tools are prepared, willow branches are collected, then you can proceed to the basket weaving itself. But at the very beginning, you will have to master some weaving rules and the initial technique.
Weaving technology
The traditional weaving technique starts at the bottom of the basket. After it, the walls, bending and handles of the product are woven. If there is no experience in such an activity, then it is better to start with round-shaped products, since they have more a simple circuit. At the beginning you need to learn how to perform elementary techniques, acting step by step:
- technique of weaving a rounded bottom;
- weaving in the technique of rope;
- layered weaving;
- bend.

During work, it is necessary to constantly compact and compact wickerwork so that the craft or basket does not turn out to be too flimsy and soft in the future. All branches should be located tightly and evenly to each other. Having learned these elementary basics, it will be possible to master more complex techniques for knitting willow baskets. The finished product can be decorated with braids, which are woven from birch bark and straw. Such handmade wickerwork will be a great gift.
At the very beginning, you need to properly prepare the material. To do this, remove the bark from the branches, and then leave it for 5 days (best for outdoors). After that, you can proceed directly to the process of weaving.
The execution technique is as follows:
- the bottom and edges of the basket must be woven using round and solid rods;
- the walls are woven with branches split into several parts.
To split the rods, you will need a hardwood cleaver. At the tip of the twig, it is necessary to make a shallow incision and insert the prepared cleaver into it. Thus, the rod will split into the required number of parts. After that, you need to soak the split willow in cold water for three hours and remove the brown center from it.
Before you start weaving, you need to moisten the willow twigs. To do this, you can use a spray bottle, or simply place the prepared material in a deep container of water. After it is prepared required amount willow, you can get to work. To create a shopping cart, follow these steps:


As you can see, the weaving technique is not as complicated as it might seem at first. It is enough just to properly prepare and prepare the willow material and strictly follow the weaving pattern. Even a beginner can perform these elementary actions. And having already gained experience, you can begin to manufacture more serious products, for example, weave a rocking chair. In addition, such a hobby, with a certain skill, can become a fairly profitable business.
First you will need to prepare the rods. To weave a basket, we need rods 2-10 mm thick of different lengths. The cost can be calculated as follows:
1. For weaving the bottom - about 30-50 rods, with a thickness of butt(the cut point is the thick end of the rod) 2-4 mm, 8 sticks with a diameter of 4-6 mm.
2. For risers (racks) - 16 main, 16 additional (for bending), spare 5-10, total 42 rods, with a butt diameter of 4-6 mm.
3. For the side part - the amount depends on the number of layered weaves. In this model, there are 5 layered weaves, which means that 16 (the number of risers) must be multiplied by 5, we get 80 rods, the thickness is 4-6 mm in the butt.
4. For weaving ropes - 3 ropes of 6 rods (with replacement) -18 rods, 10 rods in reserve, total 28 rods, with a butt thickness of 4-6 mm.
5. For weaving handles - 1 thick rod with a diameter of 8-10 mm in the butt. For braiding, you need 8-10 rods, with a butt diameter of 5-6 mm, a supply of 5 rods.
TOTAL: approximately 230 rods.
You can watch a video course on the preparation of rods on the page:
COLLECTION AND PREPARATION OF WILLOW
The main stages of weaving baskets
1. Weaving the bottom 4x4.
Do-it-yourself willow basket weaving technique
You can weave the bottom 3x3 (for a small basket, or increase the risers in the cross). Maybe 5x5. The more the number of main rods in the cross, the smaller the distance between the risers, which means that the layered weaving looks more dense, and the work is more aesthetic. On large bottoms 5x5 or 6x6 you can weave a large basket. You can watch a video on weaving bottoms on the pages:
WEAVING BOTTOM 3x3
WEAVING BOTTOM 4x4
WEAVING BOTTOM 5x5
2. Next, you need to prepare and insert the risers. For a 4x4 bottom you need 16 rods. Be sure to take a supply, because. the risers break during operation and need to be replaced. You can watch a video course on inserting risers into work on the page:
INSERT RISERS
3. After insertion, the risers must be fixed with ropes, and first in a plane, thereby securing the bottom, and then again at the bend. Sometimes I fix the bottom with 1 rope in 3 rods 2 through 1, and the place of the bend with 2 ropes in 3 rods 2 through 1. You can watch the video course of weaving the rope on the page:
LAYERED WEAVING IN 1 ROD
In this work, I braided layered weaving in 1 rod. In fact, you can braid in 2 and 3 rods, one or 2-3 colors. Colors that can be obtained by conventional water treatment (weld rods): white, light orange and brown. Options for working with different colors of rods and different types layered weaving:
5. After the side part is ready, we fasten it with a rope in three rods 1 through 2, a rope with front side will be under the bend, so I braid this particular rope. You can watch a video course for weaving such a rope on the page:
ROPE IN 3 RODS 1x2
6. We finish the work by weaving the bend. Again, there are options. In this model, I braided the "false braid" bend, you can use different variants braids or simple bends. You can watch video courses for weaving bends on the pages:
BENDING SIMPLE
BEND "FALSE SPIDER"
6. The final stage of working with the basket is weaving the handle. You can watch the video course of weaving handles on the page:
WEAVING HANDLE
7. After finishing work, you need to cut off all the remnants of the rods and clean the basket with a brush. This is done to give the surface of the basket a natural sheen. Decorative baskets can be treated with wood varnish. But I love natural shine, so I do not resort to varnish coatings.
How our baskets are created
Wicker baskets are a product applicable in various areas of our life. They can serve as perfect gift wrapping, framing flower arrangement, as well as a useful household item. Baskets woven from natural natural material, are very beautiful, so they are often used as decorative elements interiors. For whatever purposes, wicker baskets are used, they are steadily popular with buyers.
Basket factory.
 Factory for the production of baskets in bulk sells its products.
Master class on crafts from the vine
We have large production areas where baskets are created literally from scratch. The first stage of manufacturing is obtaining the material, that is, growing the vine. For the manufacture of baskets, willow vine is used - quite soft and easy to weave, but at the same time very durable. The vine is grown in separate areas owned by the factory.
Upon reaching the vine of the required size in length and diameter, it is cut and sent for processing. This process includes sanding, if necessary bleaching for certain models of baskets in white or painting with environmentally friendly paints.
Further, the vine, ready for weaving, is sent to the workshops for the production of baskets. It is here that our products are directly created - a variety of baskets for flowers, gifts and other purposes. We create wicker baskets of a wide variety of models, which are developed by our designers. These are deep baskets for gifts, and small baskets, models of different shapes, sizes and colors. Some models of baskets are made using a combination of vines - light and dark, thin and thick - to create an original weaving pattern and, in fact, the final result.
Finished products are packaged and sent for sale. Baskets are wholesaled from the factory, in any volumes required by the buyer.
Natural materials, high quality.
An important characteristic that all our wicker baskets have is environmental friendliness.
Willow vine is used as a material for creation. Willow vine shoots of various thicknesses allow you to create interesting design solutions for baskets of different models.
Modern technologies for processing vines and weaving baskets for gifts and other applications make it possible to create high quality products. Each basket is characterized by high reliability, strong construction, well-made handles that can hold any load placed in the basket. This makes our wicker baskets versatile, suitable for most different needs.
 With large volumes of production, the factory maintains excellent product quality. At the same time, natural resources remain untouched due to
using their own willow plantations, designed specifically for creating baskets.
Baskets in bulk - a profitable investment
We offer you to buy baskets in bulk from the manufacturer. As noted above, this product is in steady demand: flower and gift baskets never go out of style, and interesting options weaving and functionality of baskets help housewives to equip their home life with their help. In this regard, the purchase of baskets in bulk is an excellent investment for:
Stores selling consumables such as flower baskets, etc.;
. flower shops;
. shops and boutiques of gifts and souvenirs;
. shops of economic and household specialization.
By purchasing baskets in bulk from the factory, you get a huge price advantage by getting these great products at a cost price.
Who needs wicker baskets? →
How to weave a basket

In the recent past, the ability to weave baskets taught in every family. They wove shoes, baskets, bodies for sledges, carts, individual pieces of furniture from wicker. But along with the old way of life, many types of applied art that were common at that time began to decline. Gradually, weaving from a vine almost disappeared from our life. And then it turned out that a basket for picking mushrooms and berries cannot be replaced by any bag or bucket. In a wicker basket, the contents are well ventilated, and potatoes, for example, are easily freed from sand - it spills out through the holes. Wicker boxes and baskets are convenient and practical.
Today, due to the interest in antiquity, as well as the increase in free time and the desire to do things “for home and family” with your own hands, weaving, like other types of applied art, is experiencing a rebirth.
With which basket to start learning to weave
Weaving training, in our opinion, should be started with a simple basket, durable and beautiful design, which is called cat(photo above). Making these baskets is not difficult. They are distinguished by their capacity, strength, stability (which is especially important when picking berries, mushrooms, potatoes), and are easy to carry (on the arm bent at the elbow). Skillfully made cat looks beautiful, filled with the gifts of nature, fits well into the interior modern apartment makes it more comfortable and homey. Onions, garlic, cranberries, potatoes, etc. are stored in baskets in the kitchen and pantries.
Amateur weaving does not require a special tool, a workshop. It is enough to have a knife, a piece of wire and pliers.
What are baskets made of?
Branches and rods are used as material for weaving baskets. First, blanks for rings are selected. These are branches or shoots of willow, buckthorn, bird cherry, oak forest, hazel, etc., without damage, knots and other flaws. One ring will serve as the handle of the basket, and the other will serve as the base. After examining the workpiece, it must be worked out on the knee, slightly bending and securing it with your hands. An unbound ring is a compressed spring, and if one of the ends pops out, it can hit hard.
 If the workpiece bends well and does not form breaks, then a ring can be made from it. To do this, at a distance of 8-20 mm from the end of the branch (depending on the diameter of the thickened part), a smooth cut is made from the outside. The same is carried out at the thin end of the workpiece, but already with inside. This is necessary so that the thickness of the ring around the entire perimeter is approximately the same. After that, the ring blank is overlapped. First, the ends are tied with twine, and then, having made cutouts on both sides, they are carefully pulled together with wire.
Bending a small ring does not require much effort, but when working on the knee blanks for large baskets, significant efforts and safety nets will be required so that the blank does not crack or break. The skill is not developed immediately, and therefore, if you fail, you should not despair.
Having made the outer ring, proceed to the inner. Since it is braided, they do not make such high demands on its appearance as on a pen ring. Having made both rings, put them aside and proceed to the ribs.
Strong material for the ribs of the basket are living lower branches of 10-20-year-old Christmas trees. Having torn off such a branch from small twigs and needles, it is worked out on the knee, cut to desired length and cleared of bark. The same is done in the manufacture of ribs from other species of trees or shrubs. The length of the main ribs should be more than half of the inner ring, and the additional ones should be somewhat shorter. The rib should bend evenly along its entire length. To do this, its thick end is cut off, as are the blanks for the ring.
Basket weaving materials
Willow twigs, walnut shingles, wire, PVC pipes, etc. are used as material for weaving a cat basket. Willow twigs are the most common and easily accessible. Many willows grow along rivers, in meadows and in low places. However, not all rods are suitable for weaving. Annual shoots 60-80 cm long are used, and the thickness is selected depending on the size of the basket. Rods harvested in spring and summer can be immediately put into action, and those cut off in winter are warmed up first.
The workpiece is cleaned of bark, knitted in bunches and folded in a ventilated barn or in the attic. In winter they are steamed. Such a rod bends well and is very convenient for work. With a lack of a rod, as well as for the ease of baskets, the shoots are split in half. Baskets for potatoes are usually woven from unpeeled twigs. Willow goes to rings, ribs, and thinner rods - to weaving.
Sometimes hazel is used to make baskets and boxes. For this, hazel sticks 1.5-2 m long are harvested at the age of 4-6 years. Their diameter at the butt should be from 15 to 30 mm, and the sticks themselves should be straight, without knots and damage. They cut off the hazel shoot with a knife or cut it down with a hatchet at the very base, so that the butt part does not get cracked.
Usually the material is prepared for several baskets at once. For beginners, we recommend cutting off a few extra blanks, since not every one will make a ring the first time or it will be possible to make shingles.
To make a small basket (for 3-4 liters of berries), 2 hazel blanks are used for rings and 4-5 for shingles and ribs. Hazel has no waste, since, having removed the shingles, the core is used for ribs. The shingle is obtained as follows. The hazel is first slightly bent at the knee along the entire length, and then an incision is made with a depth of 1-2 annual layers for ¼ of the length of the stick circumference. From the incision as a result of bending, the shingles peel off. The hazel is taken under the arm and the shingles are carefully peeled along the entire length. As the skill is acquired, this operation is performed more and more confidently. The main thing is to “feel the layer”. In the same way, shingles are torn off from the opposite side and from the sides.
Hazel shingles are removed completely from the entire workpiece. After peeling it with a knife, it is immediately used for weaving, since when it dries, it becomes brittle. Obtaining hazel shingles requires experience. Therefore, it is better to start weaving your first cat from willow twigs. In addition to willow and hazel shingles, the roots of pine, spruce and other trees are also used for weaving. Roots 0 to 10 mm are usually used. They are carefully removed from the ground and, without breaking off, they begin to lift in one direction and then in the other direction. Thus, sometimes it is possible to obtain a root 3-4 m long. It is split in half; peeled and used for weaving. Weave from the roots quickly, the products are light and elegant.
Nowadays, wire is sometimes used for rings and ribs, and for weaving - artificial materials different profile (round, oval, flat) and colors. These materials, unlike natural ones, are recommended to be used during the initial acquaintance with the design and weaving of baskets - for educational purposes. Such a cat is easy to unravel, and the material can be used repeatedly. Baskets woven using plastic materials look elegant, but they have significant disadvantage: it is much more pleasant to collect and take a handful of berries from a cat made of natural materials.
Four steps in basket weaving


- Cross stitching. We insert one ring at a right angle. Then we take the prepared rod (shingles, root) and, holding one end between the rings, we braid the cross, as shown in the photo. We tuck the end inward and tighten. We also braid the second cross.
- Next, insert the first three ribs on each side with sharp ends. We braid them first on one side, and then on the other. We check whether both halves of the cat are symmetrical. To do this, we tie the middle of the rib with a cord. If the contours of the future basket are successful, weaving continues. When the distance between the ribs increases, additional sections are inserted into the gaps between them.
- At the end of the weave, when all the ribs are inserted, it may turn out that the weaving comes to an end at the inner ring, and there is still a gap in the middle.
In this case, it is necessary to align the basket along the entire length by parallel weaving on each side. In this case, the ends of each twig (shingles or root) are laid under the rib and cut off.
- When weaving the last rows, threading the twig between the ribs resembles sewing with a needle: it is pulled with effort so that there is uniform density and symmetrical alternation. Finishing a woven product consists of removing burrs, cutting off the long ends of the rods, cleaning with a file or sandpaper.
Try to weave the simplest cat basket. This is not only useful, but also a very exciting activity.
If you are attracted original design and smart appearance wicker baskets, then you can safely purchase them for home use- you don't have to be disappointed.
Vine weaving
The advantages of wicker baskets, in addition to their external characteristics, are really many:
- Products are made from environmentally friendly natural material- willow vine
- Weave density allows you to adjust the level of breathability inside the product
- Willow rod gives products lightness, strength and durability
- Products of any complexity are made by craftsmen by hand.
- Wicker baskets are sold at low prices due to the availability of material
- Products can be painted and varnished to better match the interior
The purchase of wicker products makes you think about how to maintain their neat appearance for a long time and prevent damage. We will please you with the fact that another significant advantage of wicker products is easy care after them.
As a rule, wicker containers for any purpose, whether vegetable storage boxes, bathroom sink baskets, outdoor furniture baskets or built-in cabinet baskets, do not require special external cleaning. Simply wipe them with a dry or damp lint-free cloth. Vegetable baskets and bread bins, of course, must be periodically emptied, shaking out the accumulated debris and crumbs, and the rest, depending on their current state. If you have used a basket to harvest fruits, berries or mushrooms and it gets dirty, just rinse it with water or soapy water, rinse well and dry.
When stains appear on a wicker basket, dry cleaning and rinsing is no longer enough. You will have to dilute the detergent solution with salt and rub the contaminated areas with it with a sponge or soft brush. Then rinse the product with non-hot water and leave to dry away from heaters and direct sunlight.
Do not use abrasive cleaners when cleaning wickerwork. detergents- this may damage the surface. The same applies to sand or soil particles accumulating in the slots of the baskets, if they are used for garden work. You must first carefully remove the sand and only then wipe the product. If scratches do appear, they will be especially noticeable on the surface of a large basket. To get rid of them, it is enough to lightly coat the damaged areas with polyurethane varnish.
To prolong the life of wicker products, try not to expose them to too dry air and high temperatures- this can cause cracks in willow baskets. But wicker products are resistant to moisture. This, of course, does not mean that baskets should be left out in the rain. It is best to store wicker baskets at normal temperature and humidity levels. Note that a slight deformation of the basket, like a dent, can be eliminated if this place is soaked with water to a flexible state and an attempt is made to restore the product to its previous shape.
By the way, if wicker baskets that have already been in use clearly lack their original gloss and color, it's time to get down to business and return them to their former appearance. There are several ways to remedy the situation. You can, for example, apply a thin layer of drying oil on the surface of wicker baskets that need restoration. Let the drying oil dry, and then cover with a layer of colorless varnish. You will immediately notice how your wickerwork has changed and “rejuvenated”. And in order to change the shade of the baskets, you should use wood stain. Lightly sanded with fine sandpaper the surface of the product must be covered with stain in several layers. For this, a not too hard medium-sized brush is suitable. When the stain is absorbed and dries, you can cover the surface with a transparent colorless varnish.
Did you know that willow wicker products change their color to darker over time? This is explained by the fact that the processes of pigmentation under the influence of tannins and dyes contained in willow branches continue in finished baskets woven from them. New products, especially from a rod subjected to "barking" - removing the bark artificially or naturally, usually have White color. Over the years, the color of wicker baskets takes on shades depending on the variety of vines used: from golden and copper to chocolate.
Needlework lovers often have a problem with a place to store materials. If you love and know how to work with your hands, it is illogical to buy various organizers, pencil cases and boxes, because you can make them yourself. We have already told, and in this master class we suggest trying to make a basket of veneer strips. The basket is square, therefore, having made several pieces, they can be easily arranged on a table or in a closet.
Veneer baskets are perfect for storing materials and tools, as well as other little things that are in abundance in any home. When weaving baskets, sizes can be varied, choosing them to suit your needs. The same technology can be used when working with birch bark and even colored cardboard.

Materials and tools for basket weaving:
- metal ruler
- scissors
- clothespins

How to weave a veneer basket with your own hands
Place the veneer in warm water for about an hour. Hang it up to drain excess water.
When there is no visible moisture left on the surface of the veneer, cut strips of the same length. The length of the spikelets and their number will depend on the size of the basket.

Important: The number of horizontal and vertical stripes must be odd.
We used a 7x7 lane layout. The length of the veneer strips depends on the height of the sides of the basket. Here the principle “better overkill than undershoot” applies.
Take half of the prepared strips and lay them on the table, fixing them with tape or pressing them with a heavy book. Try to imagine the square that is formed if horizontal stripes are laid on top of the vertical stripes. Strips of tape should be placed along the sides of an imaginary square.

Weave in the first horizontal strip of veneer. Weave each strip so that its edges are bent towards you.

Weave the next strip using the classic weave pattern (if the previous horizontal strip is laid on top of the vertical one, the next one should go under it).

Having weaved all the horizontal strips of veneer, in the central part you should get a square.

Check in which direction it is better to bend the veneer. In one direction, it can bend, forming a smooth bend, and when bent in the other direction, the veneer can peel.

Turn the workpiece over so that when the strips are bent up, the veneer does not peel off. Bend all the strips along the edges of the braided square using a metal ruler.

Align the strips along one side of the square and weave in a long strip of veneer. The length should be such that the veneer is enough for all four walls of our basket. Don't forget about classical scheme weaving, and make sure that the long strip is well folded in your direction.

In the same way, weave two more strips of veneer.

Bend all three strips along the line of intersection with the last of the vertical strips into which they are woven.

Weave three long strips along the next side of the square. Special attention devote to weaving in the corners.

Repeat the same operations with the stripes along the third and fourth sides of the square.


Cut off the remaining strips woven into the walls of the veneer basket, leaving a margin of about 5 cm. Weave the remaining parts of the strips into the wall that was woven first.

The veneer basket takes shape. At this stage, you can weave a few more strips into the walls to achieve the desired height.

Important: after weaving the walls, approximately 7 cm of strips should remain, from which the bottom of the basket was woven. The loose ends will later need to be bent and weaved inside the basket.
Bend the vertical strips that passed over the last horizontal strip into the basket, weave them under the third horizontal strip from the top. To simplify the task, the vertical stripes can be pre-cut to the desired length.

Do this for all outer vertical stripes. Thus, half of the strips will remain unwoven. Inside the basket, along the perimeter of the last woven strip, fix another piece of veneer. This strip can be fixed with clothespins.

Bend all the remaining vertical strips over the side fixed with clothespins and weave them under the second horizontal strip of veneer from the top.

Cut the vertical strips to the desired length so that they do not stick out from under the horizontal ones.


The same technology can also be used to make baskets of veneer, for example, 5x5 or 9x9 strips. We think you will immediately find a worthy use for them.


A popular way to decorate the interior is weaving baskets from newspaper tubes: a simple task will allow you to create real works of art.
Basket weaving involves the use of rope technology, with its help you can create beautiful products for home decor. In such baskets it is convenient to store threads for knitting, needlework and other accessories. The finished basket is not particularly durable, so you should not place objects with a lot of weight in it.

Advice
A newspaper basket is well suited for storing decorative fruits in the kitchen: it serves more as an interior item than as a means of carrying things.
To make a basket with your own hands at home, you can use a master class for beginner needlewomen. All you need is to prepare necessary materials and follow the suggestion step by step instructions with photo. The process is so exciting that it will even involve children from the age of 7 years.
For work you will need:


Having prepared everything the right materials, let's get to work.
To begin with, we will cut the magazine into strips 5-7 cm wide, from which we will later twist the tubes.
Let's take a knitting needle and attach the end of the strip to it, gradually winding it around the axis: we get the first tube, which must be fixed with a drop of glue at the end.
Depending on the size of the future product, the number of tubes will be determined. For example, for a basket with a diameter of 14 cm, 40 to 50 paper blanks will be required. By increasing the height of the basket, it is necessary to increase the number of blanks.
The next step is to create the base for the bottom.
We put across 4 by 4 tubes, forming a cross. For strength, it is recommended to coat the cross with PVA glue so that the base is more reliable. The cross is considered one of the most simple ways to make the base, therefore it is often used in weaving master classes for beginners.
Next, we move on to weaving the bottom.
- We take one tube and fold it in half, forming a loop. We put it on the resulting 4 tubes as shown in the photo. After that, we proceed to weaving with a rope method.
- Rope weaving is carried out in this order of work: the tube located in front twists back, and the one that was behind, on the contrary, twists forward. So it is necessary to braid several rows until the sticks run out. When they run out, make an extension - just insert a new blank into the hole of the old one and secure with glue.
- After making 2 rows of 4 tubes, they must be separated and weaving should be continued every 2 newspaper sticks. This will give the base extra strength. The next step will be braiding 1 divided tube, as shown in the photo: as a result, the number of rows will depend on the future bottom diameter.
- We cut off the paper blanks involved in weaving and fold it inward, glue the very bottom at the end points and fix it with clothespins until it dries completely. After that, we begin to lift the walls of the basket in order to proceed with the manufacture of the side parts.


Next, we proceed to weaving the wall.
- Again we make a loop from the workpiece, put it on the wall tube and braid it with a rope method in the same way as we worked with the bottom.
- The number of rows depends on the height: in order for the basket to keep its shape, we put the jar on the bottom and braid it.
- To finish weaving, we also cut off the ends and bend the workpiece inward, flavoring it with glue.

Let's start weaving the handle.
- To do this, leave 3 tubes on opposite sides of the basket and braid them.
- Weaving must be carried out immediately on both sides of the product, gradually narrowing it towards the center of the basket.
- At the top, the ends are connected with adhesive tape and disguised as the base of the handle.
- Finishing the product is considered the final stage: mix a little acrylic white paint, water and glue and walk around the perimeter of the walls with this composition.
- It is also necessary to paint the bottom of the product. To dry the basket, turn it upside down and leave it for a few hours.
The final decoration of the finished product occurs at the request of fantasy. Do not forget to open the workpiece with varnish for reliable connections. Decorate the basket with ribbons, decorative flowers, rhinestones or using the decoupage technique: a masterpiece will delight your eyes and give you a great mood.
Handle weaving
One of the main details of the basket is a high-quality handle, because it is useful to move items from place to place. The handle should be dense and durable, it can be decorated as desired: make a braid with tape, stick artificial stones and rhinestones, as well as simply decorate with colored acrylic. There are several ways to make a pen:
- openwork weaving;
- pigtail;
- rope way.

In this master class, we will consider the manufacture of a reliable and beautiful handle for a basket using the pigtail weaving technique. At first glance, it seems that the technique is complex and defies explanation, but after completing step by step actions after 1 hour you can enjoy the finished wicker handle.
Weaving a strong handle
Detailed master class
To work, you will need 6 long newspaper tubes along the length of the handle, colored blanks for braiding the frame, as well as twisting for weaving the braid itself.
Let's get started step by step:
- We put newspaper bundles in the amount of 6 pieces together and wrap them with colored tube blanks. This is easy to do: just start from the edge of the blanks, gradually wrapping them around the entire perimeter in one tight bundle.
- When the base of the handle is ready, we proceed to attach an additional 4 tubes to decorate the pigtail. To do this, at the very base of the handle, we apply 4 tubes of different or the same color and wind them a little to the workpiece using a bundle.
- We begin to weave a pigtail: first we bend the two side sticks to the sides, and bend the two middle sticks towards ourselves. After that, we carry out weaving according to the figure in the photo below.
- When the tube ends, we insert a new one into it, wetting the connection with glue. We continue weaving until the braid covers the entire base of the handle. The finished handle can be attached to the basket in any way: it is best to do this with rope technique.

How to make a cover?
If the basket is woven open, then it is enough to make handles for it, and it will be ready. When it is planned to manufacture a structure with a lid, the upper part of the product is woven separately. To make a cover yourself, you can use a simple master class for beginners.
Advice
If you want to get a more patterned cover, you should choose those workshops that are based on openwork or checkerboard weaving - then the pattern will be clearly visible on the surface.
For work, prepare 2 circles of cardboard, corresponding in diameter to the finished basket. The circle can be immediately decorated: perform decoupage, decorate with acrylic or cover with a cloth. You will also need PVA glue, a lot of newspaper tubes of one or more colors and varnish.

Let's start the process of creating a simple but beautiful cover:
- Two circles of cardboard must be glued together, having previously placed around the circumference, the rays of newspaper twists.
- Weaving is done in rope technique or by layering. Four main twigs are inserted through one ray twist and the braiding of a circle of cardboard begins.
- All 4 twigs are used at once: first they are brought over a newspaper tube, then they are carried out behind the next tube. The result is a beautiful border along the contour of the cardboard. So the whole circle is woven along the diameter of the basket.
- To make the sides of the lid, the workpiece is applied to the basket and the rays of the twists are bent down by bending the rack behind the rack. Weaving continues in the above technique. The ends are cut off and bent inward, gluing.
The finished cover should dry, then you can decorate it in your own way.
Basket weaving methods
The widespread popularity of making beautiful baskets from newspaper tubes provoked the development of new techniques. If earlier it was possible to weave a basket only by the method indicated above, then modern craftswomen do not sit still.
They come up with new ways of weaving blanks, as well as various schematic patterns. To learn more about each type of weaving, we propose to consider a summary table describing the methods.

| Technique | Description | Where is it applied? |
|---|---|---|
| Spiral twist | The technique is considered one of the simplest, judging by the reviews of the needlewomen, even a schoolboy can cope with it. The essence of the method lies in the gradual increase in the height of the product due to the circular interlacing of the tubes. Each new workpiece is superimposed on the previous one in a spiral. | Used to create tall decorative baskets as well as attractive vases unusual shape. Using this technique, it is easy to make a stylish decor item for the interior. |
| Layered | The technique involves making a basket from several tubes at once. For the convenience of weaving, first several rows are performed with rope technique, additional tubes are inserted into the support holes and the walls begin to be braided in a circle with each tube at the same time. | Used to create baskets various shapes, as well as for the design of patterns on the surface of products. It is worth noting that the racks should be an order of magnitude stronger than the blanks for braiding themselves. |
| Rope | This weaving method was discussed in the master class above, where a step-by-step guide to creating an original, but simple basket for beginners, was disassembled. | The weaving technique is used to create simple products of round and square type. This method is suitable for teaching beginner craftswomen. |
| Weaving in a spiral | Do not confuse the technique with spiral twisting - they are fundamentally different. This method involves weaving at an angle | Spiral weaving is suitable for making small and tall items, such as narrow baskets, glasses, vases. |
| Pigtail | There are 2 types of this method - edging and invoice. The first option is used to weave the rack counterclockwise, while the tubes are brought out, then in. Overhead technique involves the use of several twists at once, braided with an edge. | Baskets made in this way look more elegant. The texture of the pattern resembles a real willow basket. |
| openwork | It is not difficult to recognize such weaving - outwardly it looks like lace. It consists of holes and patterns. Technique is a synthesis of simple and complex techniques. | Original openwork baskets are open or closed. They are well suited for presenting a gift to a birthday person as a packing box. |
The considered methods of weaving will help you better understand how to make a basket with your own hands. For beginners, it is better to use rope technique or spiral twisting, more detailed descriptions These techniques will be presented as the material progresses.
Laundry baskets
The main advantage of working in this technique is its practical side: having learned how to weave baskets from improvised material, you can easily create household items.
One of these useful gadgets is a laundry basket - the work is simple, the difficulties lie only in the size of the product itself. To weave a laundry basket from newspaper rolls yourself, be patient and have the necessary materials.

Prepare the following materials and tools:
- thick cardboard, some needlewomen use corrugated cardboard;
- wallpaper or colored paper for pasting the bottom;
- paper tubes, pre-painted in the desired color and covered with stain;
- colorless varnish;
- PVA glue;
- fabric for the liner on the base.
You will also need clothespins to secure the bottom while it dries and heavy objects such as a weight or stack of books. A box will not be superfluous, according to the size of which the basket will be braided. It will add stability to the bottom and make the basket the correct shape.


The first thing to do is stick the wallpaper on the cardboard and wait for it to dry. After that, take the prepared tubes and distribute them along the bottom, fixing them with glue. It is necessary to put a second sheet of cardboard on the sticks and firmly fasten it with glue and clothespins, waiting for it to dry completely.
When the material dries, you can proceed to the braiding of the walls. To do this, the tubes are bent with each subsequent bundle and pulled up. A box of a suitable size is placed in the center of the bottom so that the weaving takes on the correct shape.
The work uses the technique of layered weaving with several tubes at once .
You can use both single-color convolutions, and use two-color options. The tube is wound up behind the base of the axis, then it is brought out in front of the axis - in this way, weaving is obtained, similar to calico fibers.


When the height is reached, you can proceed to the manufacture of handles. To do this, on opposite sides of the basket, lifting rows are made that imitate a handle. At the end of the work, the tubes are cut off and hidden inside, fixing with glue. The decoration of the basket is made according to your desire: often it is one-color decoration with acrylic paint.
fruit basket
Finding a practical use for things made by hand is always easy. For example, it would be a good idea to make a fruit basket: the product can be used instead of a metal fruit bowl and put light fruits inside. Some of the baskets ready-made able to hold a lot of weight, everything will depend on the technique and density of weaving.

To make your own beautiful basket for fruits, prepare newspaper tubes in the amount of 310 pieces - their length is 27 cm. It is recommended that the tubes be pre-painted with this composition: take 2 tbsp. l. acrylic varnish and mix with the shade color. Process all the tubes and proceed to step by step work.
| Stage | Description |
|---|---|
| bottom formation | The bottom is made in rope technique using a cross for the base. Take 12 tubes, divide them into groups of 3 each and glue the cross. |
| bottom weaving | Weave 6 rows using the indicated technique, braiding 3 tubes at once, after which start braiding 1 convolution. So it is necessary to weave until the bottom of the desired diameter is obtained. |
| Board forming | To make rises for weaving the sides of the structure, it is necessary to insert 3 more tubes into each hole with a stick. |
| Weaving boards | Putting the bottom on a round object, such as a wooden bowl, you can continue to work. Here it is already possible to weave boards using a layered technique: it is performed in 2-4 rods and will be much more reliable than the rope technique. |
| Creation of delicacy | To make the basket elegant, you can create a pattern: in the center of weaving, simply cross the adjacent rods, imitating rhombuses. Press each connection with a clothespin and weave in new rods for further work. |
| Handle shaping | When the main work is ready, we proceed to create a handle: we insert additional rods from the sides of the product and create a handle, according to the master class indicated above. |
| Decor | We finish the design as we wish: we paint it with multi-colored pigments, we make fabric inserts. |
fruit basket
Detailed master class
Such a basket does not need a lid, because it is designed to store fruit. The handle of the product can be effectively decorated with a foamiran rose.
Weaving baskets of various shapes
Baskets of various shapes are used for different needs. For example, a rectangular high basket is useful for storing linen, a square or round one is suitable for storing sewing accessories, and an oval design will be appropriate for decorating a room for the holidays. Detailed master classes for the manufacture of each form are presented below.

square basket
This type of product is perfect as a desktop bread bin. It is enough to place a fabric insert inside and a beautiful bread box for serving to the guests - it's ready. The work will be based on the use of a special device that helps to quickly weave the base of the product.
Square basket weaving
Detailed master class
To make such an auxiliary device, it is enough to take a sheet of cardboard, bend it in half lengthwise and, after 2 cm from the fold, make holes for the tubes with a hole punch. You also need to prepare a large number of paper or newspaper bundles.
- We insert the sticks for the base into the holes of the cardboard so that most of them are closer to work.
- We begin to braid the bottom: we take a long tube and insert it next to the cardboard, then we work using the rope weaving technique. When we reach the desired perimeter of the square, we finish the bottom.
- To form and lift the walls, we insert new torches around the perimeter of the square: we bend the twist in half and thread it into the hole, grabbing the nearest tube. We fix the attachment points with tape and clothespins.
- We begin to braid the walls until we get the height. For ease of work, we put the design on a square box.

When the work is finished, you can attach a handle to it or weave an additional cover. Such a basket will not only serve as a breadbasket, but will become good option packaging box.


