Chipboard furniture today does not lose its relevance. It is very practical and functional, but at the same time sold at quite affordable price. Today we will talk about the features of such furniture, as well as the nuances of its painting.
Chipboard furniture - material features
Chipboard furniture is made sawdust and shavings. They are impregnated with formaldehyde resins, which have a binding effect. Chipboard is most often used for cabinet furniture and built-in wardrobes. To use furniture in the kitchen or bathroom is used special kind Chipboard, which has increased moisture resistance.
Chipboard is notable for its quite low cost, but nevertheless it has excellent building properties. That is why most office furniture is made of chipboard. The advantages of chipboard include water resistance, strength, ease of processing. But there is also a minus - formaldehyde emissions. At a fairly high concentration in the air, they are incredibly dangerous to human health. There are environmental standards according to which chipboard is divided into two classes: E1 and E2. Chipboard class E1 is more environmentally friendly compared to class E2.

Making furniture from chipboard requires initial cutting and sawing of large sheets. Such operations are not customary to carry out independently. It is much more convenient, more profitable and safer to order cutting and cutting chipboard in specialized companies using modern equipment. One of these companies is DSP Komplekt https://www.dspkomplekt.ru/

Nuances and features of painting chipboard
Painting chipboard is a very excellent opportunity to restore the old coating. The most important thing in this business is to carefully plan everything. Need to think future image furniture down to the smallest detail. Think about it: you may need to replace parts or fittings on already updated furniture. Now you can proceed to the next stage - the selection of materials. You will definitely need tools (brushes, rollers, masking tape, screwdrivers, a paint tray, a spatula, a hair dryer), construction chemicals (thinner, acrylic wood putty, old paint remover), paintwork materials (toning impregnation, acrylic paint, varnish) and various auxiliary materials (new accessories, gloves, soft rags).

In order to qualitatively repaint furniture, it is necessary to carefully choose the paint. It is better to avoid cheap PF-115 paints, because they contain large amounts of lead, which can be easily poisoned, but the recovery stage will drag on for a long time. You can choose oil compositions of well-known manufacturers: Yaroslavl paints, Tex, Rise.
Be sure to calculate the amount of paint. To do this, you need to measure the area of \u200b\u200bthe chipboard that you plan to paint, and also multiply it by the estimated number of layers. It should be borne in mind that the average consumption is 1 liter per 5-6 square meters.
Choosing a tint and varnish is quite easy. Do not forget that the strength of the coating depends on the content of polyurethane polymer. It is best to choose alkyd-urethane or furniture varnishes on water based. Such varnishes provide impact resistance and abrasion resistance.

Preparation of furniture from chipboard before painting
The facade preparation process consists of several stages. The first one is demolition. It is necessary to unscrew all the fittings, remove all drawers and other elements. Then removed old layer using sandpaper. You can also gently heat the surface with a building hair dryer and use a spatula or scraper to remove the old coating.
The next step is degreasing and cleaning. It is necessary to clean the surface of the facade from various contaminants and residues of the previous coating. Next comes alignment. With the help of acrylic putty, all cracks and pits are slagged. Final stage is priming. It is necessary to apply 1-2 coats of primer and allow to dry well.
Another important rule- this is to sweep out all the debris from the room where you plan to paint the facade from chipboard. Since dust and residues of removed coatings can stain the already prepared furniture surface.

All the intricacies of the technology of applying paint to chipboard furniture
The very first step is to check the LMB. Check if the enamel has thickened or become dry? Then take a small amount of water or solvent and dilute the enamel according to the instructions, while not forgetting to mix thoroughly.
Use a roller or brush to apply the first coat of enamel and wait 24 hours. Then you can paint the surface again or stick a stencil with a pattern and cover with a second layer. The final drying time of the enamel depends on the manufacturer. As a rule, the enamel dries for at least a day.

If suddenly the original color shows through the applied paint, try to apply the coating again. If you want to achieve a mirror finish, you need to coat the surface with a layer of acrylic or alkyd lacquer. The total drying time is at least 3-4 days, otherwise the strength and quality factor of the coating remains a big question.
Varnishing and tinting impregnation is carried out according to the same scheme. This process requires perfect purity surfaces and rooms, because any speck of dust can become a significant obstacle to achieving an excellent result.

It is not always possible to replace outdated furniture with new ones, and a nondescript, worn chipboard floor with expensive parquet or laminate. One of the ways to restore the old coating is to paint chipboard. In such simple matter also has its own "pitfalls", so you need to know how to properly prepare the surface and apply coatings. Compliance with the technology will allow you to do the job efficiently and beautifully, and the coating is resistant to abrasion, scratches and delamination.
The choice of materials and tools for painting furniture from chipboard
If you decide to repaint old furniture from chipboard with your own hands, start with the main thing - careful planning. Think over the future image to the smallest detail. What exactly do you want to see: a mirror-glossy, but solid surface of bright colors of the rainbow, matte patination with several pastel shades, special techniques (decoupage and others) or simple tinting under bog oak, teak or wenge. Do I need to replace fittings or parts. Check the compatibility of the selected tones by color wheel designer.
The next step is the selection of materials. Depending on the project you will need:
- Tools: wide and narrow flat brushes, short-haired foam and velor rollers, masking tape, screwdrivers, sandpaper coarse and fine-grained, paint tray, universal glue, spatula, hair dryer.
- Construction chemistry: acrylic wood putty, thinner, old paint remover.
- paintwork: adhesive primer for wood and chipboard, acrylic or alkyd furniture paint, tinting pastes, tinting impregnation and varnish.
- Auxiliary materials: soft rags, gloves, new accessories.
The primer not only reduces paint consumption (Lacra GF-021), but also levels the surface, strengthens it (Helios Tessarol, Dufatex-Grund, Dyostar), and some contain antiseptic additives (Belinka Base).
To repaint furniture, it is not enough to go to the store and take the first budget paint that comes across. You need to choose carefully, because the updated facade should serve at least 5-7 years. Therefore, it is better to avoid cheap PF-115 of unknown production with a high lead content - it is easy to get poisoned, but hard to recover. It is better to take oil formulations from trusted manufacturers: Rassvet, Yaroslavl paints, Tex, Dyo, Tikkurila, Dulux. You can buy time-tested furniture enamels and varnishes from Galamiks, Raduga, Novbytchim.
The same applies to acrylic (water-based) and alkyd enamels, but here the choice is already expanding due to aerosols. The latter are very convenient for applying to a laminated coating, as they give a perfectly even coating without streaks.
The water base of acrylic paints is also good because it can be diluted and washed off with water until dry, tinted to any color with the help of pigments.
Another point is the calculation required amount paints. Before buying, you need to measure the area of \u200b\u200bthe chipboard to be painted, multiply by the estimated number of layers. The average consumption is 1 liter per 5-6 square meters. m.

The process of selecting tinting and varnish is simple. They also differ in base. The strength of the coating depends on the content of the polyurethane polymer, so it is better to choose alkyd-urethane or special water-based furniture varnishes - they contain additional additives that provide impact resistance and abrasion resistance (Lacra, Alpina, Pinotex, Dyo, Tikkurila). Tinting mixtures should have good permeability and give a uniform tone without spots and whitish streaks (Belinka, Practic, Helios).
Often for do-it-yourself tinting, drying oil or a simple stain for wooden products is used.
Preparation of furniture surfaces from laminated chipboard and chipboard
The facade preparation process includes the following steps:
- Dismantling- unscrew all fittings, pull out or remove all drawers, extensions and other elements;
- Removing the old layer(laminated or paint): sandpaper (sand first with rough, sweeping, wide movements, then smooth with fine-grained), wash-abbezer according to the instructions (Pufas, Dufa) or gently heat with a building hair dryer and remove with a spatula, scraper;
- Degreasing and cleaning. You can first brush off the dust with a wide flat brush, then with a rag moistened with water or a solvent, clean the surface of the facade from litter and the remnants of the old coating;
- alignment: acrylic putty putty all cracks, pits. It is advisable to apply 1 coat of primer before starting, so that the irregularities are better manifested. Then, for perfect smoothness, go over again with zero sanding paper, wipe with a wet cloth;
- Padding: Apply 1-2 coats of primer and allow to dry.
At the end, be sure to sweep away the debris from the room where the repair is being carried out, wipe all surfaces (tables, chairs, floors, window sills, etc.) so that dust and residues of removed coatings do not accidentally stain the prepared facade.
The technology of applying paint and varnish on furniture
So, you can start painting furniture. First you need to check the expiration date of paintwork materials. If the enamel (lacquer) has thickened or dried up, you need to dilute it with water or a solvent according to the instructions, mix thoroughly.
Apply the first (background) layer of enamel with a roller or brush, leave to dry for 24 hours. Then either repaint the surface, or carefully, tightly stick masking tape in accordance with the design idea or a stencil with a pattern and cover with a second layer. The drying time depends on the manufacturer, but is usually at least a day.
If the hiding power of the selected brand is weak, and the original color shows through the paint, then it is possible and necessary to apply the coating one more time. Mirror gloss is achieved with an additional layer of acrylic or alkyd universal varnish.
The total drying time should be at least 3-4 days. Only in this case, the furniture coating will be solid and durable.
Varnishing and tinting impregnation is carried out according to the same scheme. The difference is that this process requires perfect cleanliness of both the surface and the room, any speck of dust can nullify all efforts.
Painting the floor from chipboard: materials and stages of work
One of the most effective ways to preserve the integrity of the chipboard flooring and give it high strength characteristics - do-it-yourself painting with high-quality floor enamel or parquet varnish. Moreover, it is not necessary to be limited to only one color. With the help of playing with shades, you can visually expand the space, arrange bright accents, zone the room. And such a simple technique as stencils with patterns will allow you to create a designer floor in a few days.
The necessary set of tools and materials includes:

The primer is used the same types as for furniture, but the paint should be designed specifically for the floor. Simple acrylic wears out quickly, loses its gloss and attractive appearance.
To repaint flooring, it is necessary to choose an enamel with improved quality characteristics (impact resistance, resistance to fading, scratches).
Alkyd compounds can only be used if the last layer is varnish. But even in this case, a simple wood varnish or a universal varnish like NC will not work. It should be parquet varnish with polyurethane additives (Practic, Dyo, Belinka, Marshall), which provide increased surface resistance to abrasion and mechanical stress. Oil paint PF-266 (Lakra, Yarko, Rastsvet, Chief Technologist) and polymeric floor enamels (Dufa. Dulux, Tikkurila) have the same properties.
It is necessary to prepare the chipboard floor for painting especially carefully, since any flaw will appear almost instantly, but it can no longer be corrected.
The work includes the following stages:
- Checking the floor for squeaks, defects, scratches, cracks. The creaking is eliminated with additional fasteners, chips and pits are puttied, the gaps between the sheets are sealed.
- Fastener control: all hardware is examined for strength, the protruding ones need to be planted with a hammer, the loose ones should be sealed with glue or sealant.
- Degreasing and polishing chipboard: greasy stains and dirt are removed with a solvent, then the board is polished with fine-grained sandpaper, especially at the joints. Finally, wipe thoroughly with a damp cloth.
- Priming: the impregnating primer is applied in 2 layers, then the floor is checked again for defects.
The quality of restoration work depends not only on the qualifications (or lack thereof) of the master, but also on the quality of the materials used. Only solid, trusted brands guarantee long term coating service and its resistance to any mechanical load.
Paint or varnish is applied in 2-3 layers with a brush, roller or spray gun in accordance with the instructions. Highlighting or applying additional elements made with a separate small brush. Roughness can be removed between coats with sanding paper.
Sheet chipboard is often used for internal finishing works and not only, this material is also used for the manufacture of furniture.
It is economical, practical, easy to use and maintain, and is relatively inexpensive.
Quite often, when carrying out repair or restoration work, a quite reasonable question arises, how to paint chipboard with your own hands?
And even if at first glance it seems to you that it is quite simple, yet this process has its own characteristics and some nuances, which we will talk about.
First, let's decide on a list of what we need for painting work.
- Chipboard surface (the object of restoration work itself);
- putty;
- Primer;
- Solvent or acetone;
- Dye;
- Roller, brush and spatula;
- Tray;
- Clear nail polish;
- masking tape;
- Fine-grained sandpaper;
- Glasses;
- Gloves;
- Bandage or respirator;
- Sander.
 Special attention worth paying attention to the choice of paint. For coloring any chipboard base, you can choose various paints: alkyd, acrylic, epoxy, alcohol, oil, polyurethane. But on the advice of experts, it is better to give preference to coloring acrylic compositions.
They have clear advantages over their direct competitors:
- Acrylic paints are produced on a water basis, while they can be diluted with water if necessary to obtain the desired consistency;
- They do not have a pronounced synthetic smell, so you can work with them even indoors;
- Such compositions dry out in a matter of hours, therefore they are ideal option for such material;
- It is easy and convenient to work with them, with the formation of streaks or extra smears, they can be removed with a damp cloth;
- They allow you to create a high-quality and dense decorative layer that is resistant to abrasion.

The processed base can be painted in one tone, two or multi-colored. To create two or more colors that have clear contours (for example, make horizontal or vertical stripes), you can use masking tape.
A process such as painting chipboard with your own hands can be divided into two stages: preparatory and main.
Preparation stage
At the preparatory stage, we need to prepare the surface for painting. If you are working indoors, it is best to protect walls and furniture with paper or film.
When painting furniture from chipboard, all elements that cannot be processed should be dismantled. If they are not dismantled, they must be carefully wrapped with plastic wrap.
Then, using sandpaper, remove old cladding to the original base. It is necessary to skin the base only along the fibers of the material. If a new surface is to be painted, then just give it a good sanding to improve adhesion to the paint.

After the base has been processed, it is cleaned of dust and dirt with a brush or dry rags.
If during the preparation process you notice that the surface is not even or has obvious defects, such as cracks, chips or holes, then it is necessary to level with putty.
The mixture is prepared in accordance with the instructions, and evenly applied with a spatula. For these purposes, a rubber spatula is suitable. After the putty has dried, the base should be sanded and cleaned of dust.

Before proceeding with the process of painting surfaces made or lined with chipboard, priming is required.
When working with acrylic paint the best option for priming will be the use of an acrylic primer.
To apply the primer, you can use a thin roller or brush. The leveled, sanded and cleaned base is covered with a primer mixture. It is allowed to apply the primer in two layers.
Having completed preparatory stage It is necessary to allow the surface to dry completely, after which you can proceed to the staining process.
Coloring stage
It is best to paint chipboard surfaces in a horizontal position, in this case the paint lays down evenly, without forming unnecessary streaks. If your base is vertical, then you need to apply paint smoothly from top to bottom. For small parts you can use a brush, for large surfaces - a roller.

For best result paint should be applied in 2-3 layers, while each previous layer should dry. Therefore, do not rush and do everything in a hurry. Apply one coat, wait 15-20 minutes, then apply the second, and so on.
Particular attention should be paid to the processing of joints, corners and other elements.
Only after all layers of paint have dried can you proceed to varnishing. It is necessary in order to protect the painting from damage, as well as to give the surface the desired shine and attractiveness.

The varnish is applied in 1-2 layers with a sponge or a thin brush. For these works, both matte and glossy varnish are suitable, it all depends on your tastes.
Do-it-yourself chipboard you already know, but finally, here are a few useful tips when working with this material.
If you want to paint the base in dark color, you must first apply 2-3 layers. To increase the service life of a chipboard product, work surface should be treated with a special mixture of deep penetration.
Sanding is done before painting, after stripping and applying the primer.

When working with chipboard, it is better to use paints and varnishes and other materials from one manufacturer. To obtain an even and smooth painted surface, you can use a short-haired roller, to obtain texture - a roller with a long pile.
During the painting process, always use protective equipment and thoroughly ventilate the room.
Video on how to paint quickly and efficiently:
And do not forget that any process involves obtaining the desired result, the main thing is to choose the right means and methods for its implementation.
How to paint chipboard with your own hands is of interest to many owners of furniture assembled from chipboard. Chipboard - far from best material for use either indoors or outdoors. He is afraid of moisture and is not very durable. Formaldehyde-based compounds used for gluing wood chips turn chipboard into a source of unhealthy fumes.
Nevertheless, wood-shaving material is also in demand in furniture production and in the construction market. The reason for its popularity is its low price and ease of processing. The coating applied to the boards improves their environmental performance, as it prevents the release of formaldehyde vapors from chipboard.
How to paint chipboard furniture
Furniture makers veneer the slabs or paint them to look like expensive wood, but the coating on a pressed base does not last forever. At best, scuffs and scratches appear on it, at worst, the protective and decorative layer swells, peels off or chip off. Furniture loses its presentability, and formaldehyde resins begin to evaporate from bare plates.

Painting furniture from chipboard to acquire an aesthetic look
Painting chipboard will extend the life of the furniture. Coloring can update its design. Of course, the paint will create a protective film on the plate. Anyone who has ever assembled factory-made furniture from chipboard knows that not all of their faces are laminated. Uncoated areas of the slabs (usually their backs) should also be painted over. This rule should not be neglected by amateur furniture manufacturers.
But what about non-laminated boards purchased in hardware store? Their purpose is to be used as a draft base. Chipboard will subsequently be hidden under finishing, but it's better to cover them protective film from paint, varnish or bituminous coating.
Painting furniture is a more time-consuming process. Just paint over your closet or nightstand with enamel of the color you like. How to paint chipboard furniture so that the new coating does not peel off after a short time, what paint is better to use when updating furniture? Is it possible to paint it without taking it apart? What tools are needed for the job? The answers to these questions will be given below.
Preparatory stage
Before painting a chipboard, its surface must be carefully prepared. At this stage you will need:

Preparation of furniture parts from chipboard before painting
- coarse and fine sandpaper;
- primer and putty on wood;
- edge tape;
- flat brush.
Desirable disassembly of furniture from chipboard. After it, each plate should be checked for cracks, scratches, chips. Perhaps the most questions arise, how to paint laminated chipboard if cracks have formed in the coating. The problem is solved simply:
- the syringe is filled with PVA glue;
- squeeze it out under the facing peeled off from the base;
- press the coating against the plate (it is better to use a clamp);
- remove excess glue.
After a day, the clamp can be removed.
Can tiles be painted now? No, because the bond between smooth surface slabs and paint will be minimal. The panels are treated first with large, then with fine sandpaper (you can use a grinder with grinding nozzles). After leveling the surface and roughening it, dust is removed with a brush. The plate is primed.

Putty of furniture parts from chipboard
After that, the remaining potholes are puttied. The composition is better to apply rubber spatula. When the putty dries, you need to remove the bumps with sandpaper. Before painting chipboard, an edge tape is glued to the ends of the boards with an iron (PVC edges are glued after painting).
There are other ways to remove chipboard old coatings - thermal and chemical, but at home it is better to remove varnish from panels with abrasive tools. Such work is more dusty, but less hazardous to health.
Is it possible to paint a chipboard cabinet without dismantling it? Well, you can leave it in place if the cabinet does not need repair and only needs to be updated. appearance. In any case, the surfaces to be painted must be sanded and primed with acrylic to prepare the surfaces for painting.
Furniture painting
Before proceeding with painting the furniture, it is necessary to carry out a wet cleaning in the room and once again remove the remaining dust from the plates. Chipboard can be painted with a brush or roller. The brush is handy for applying paint on small areas and hard-to-reach areas. The roller is best used when painting large surfaces. In any case, you need to work quality tool that does not leave lint and bristles on furniture. By the way, the hairs remaining on the stove can be removed with a sewing needle or pin.
Some people prefer to paint furniture from a spray gun, but working with it requires a certain skill.

How to properly paint the details of the headset from chipboard
The best paint for chipboard is acrylic. It is in good contact with the surface, creating a smooth, durable, elastic film on it that protects the plate from impact. external factors. At the same time, the paint layer prevents the release of harmful fumes from the plate. The coloring pigment of acrylic paint practically does not fade. It can be used to paint surfaces in any room, including children's rooms. Acrylic paints have almost no smell and dry quickly. Before painting them, however, chipboard should be primed only with an acrylic composition.
Is it possible to paint furniture with other paints? Alkyd enamels fade quickly. In addition, they contain chemical components that are unsafe for health during the drying of the paint. Nitroenamels are toxic and create a film that is not resistant to mechanical stress. Oil paints are environmentally friendly, but fade as quickly as alkyd paints. The paint layer may become cracked shortly after application.
Acrylic paint is applied to chipboard in at least 2 layers. The second layer is applied after the first has dried. The paint should dry in the absence of drafts, so windows and doors should be closed in the room where the work was carried out.

Painting furniture from chipboard
It is not necessary to paint the planes with paint of the same color. When creating a multi-color composition on the surface, you can use masking tape. It will clearly delimit the sections of the panel with different shades. After staining, the adhesive tape is removed.
The main component of any interior is, of course, furniture. Everyone probably knows the feeling when you want to change the situation in the house. If interior details such as curtains or desk lamp, are updated in houses from time to time, then the situation with furniture is much more complicated. Updating furniture is not a cheap pleasure, but what if you want pleasant changes that are not always included in your spending plans for the near future? Have you ever heard of how to repaint chipboard furniture? In fact, this is a great way to please yourself and loved ones, to refresh the atmosphere in your home. In addition, which is an important advantage of this idea, you can choose absolutely any shades of colors, for example, to match your favorite detail of your interior.
For quality painting furniture from chipboard you need: disassemble it in parts, carefully prepare the surface and choose the right paint.
Special skills are not required here, the main thing is to have a desire and be patient. Another condition that should be taken into account before you decide to repaint chipboard furniture is to act in accordance with all the stages of work indicated in the instructions. Otherwise, you will not only not get the desired result, but also spoil your furniture, and at the same time your mood.
Surface preparation for painting
The first step in the process of painting chipboard furniture is surface preparation. But first you need to decide what color your New furniture. If you like experiments, you can combine 2 shades you like.
In this example, an old chipboard bedside table will be considered. Your task is to understand the principle of operation, and you can apply it on anything. But it is better, of course, not to take risks and choose something worse for the first experiment.

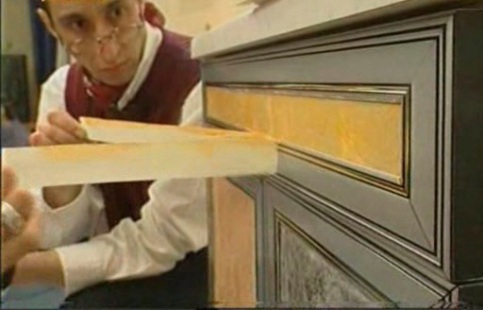
Before chipboard painting needs to be wiped off old paint sandpaper.
So, before you start painting chipboard furniture, it is very important to properly prepare its surface. If possible, disassemble everything that can be disassembled: drawers, doors, remove all handles.
In order to repaint chipboard furniture, you will need the following tools and materials:
- coarse and fine sandpaper;
- flat brushes of different widths;
- two pieces of cotton fabric;
- sponge;
- screwdriver;
- scotch;
- flat brush;
- acrylic primer;
- acrylic paint.
Using a rough sandpaper, remove a layer of old varnish so as to get to the very wooden base. In addition, surfaces must be free of any contaminants and greasy spots. All these subtleties are necessary in order for the paint to lay down in an even layer and as accurately as possible.

You can also clean the surface with an adhesive primer. Just try on the corner first, and then on the entire surface.
Acting in this way, you should carefully sand each element of the cabinet. Widely swinging, the skin must be driven along the fibers.
After treating the surface with a coarse-grained sandpaper, shake off all the removed material. To do this, it is better to use a flat brush, since the rag will not sweep away the dust from the surface, but will clog it into the wood fibers, which is undesirable in order to repaint the furniture with high quality.
For the following steps, you will need fine sandpaper. Your task is to use it to sand the places that you could not reach using a coarse sandpaper.
Having finished with the preparation of surfaces, it is necessary to properly clean up your workplace.
The room must be absolutely clean, otherwise dust and debris can stick to freshly painted chipboard furniture.
After cleaning the room with a damp cotton cloth, you need to carefully wipe each prepared surface of the furniture. Then, using an already dry piece of cloth, wipe all parts dry. Let the surfaces dry completely, leaving them for 20 minutes.
Back to index
Paint selection

Acrylic water-based paint is the most suitable because of its properties: easy application, fast drying and no toxic substances.
In order to repaint chipboard furniture, it is best to use acrylic paint. The fact is that it does not have a pungent odor, since its composition is based on water.
Accordingly, acrylic paint is diluted very simply - without the use of any liquids with sharp, unpleasant odors. It is easy to work with such paint, all its excess is easily washed off with plain water.
Acrylic paint does not take much time to dry, but it is required to work with a freshly painted surface as delicately as possible.
Before you start painting surfaces, it is very important not to skip the stage of applying the primer, also acrylic.
Back to index
Tool for the job
It's up to you, there are no special recommendations here, but it is still much more convenient to paint over everything with a brush. hard-to-reach places. Of course, you should understand: whichever option you choose, the tool must be designed to work with acrylic paints. In addition, it is better not to save on such things, since in the process of work it is very important that the pile does not remain on the painted surface, which is typical of cheap brushes and rollers.
It is convenient to work with brushes of different widths, try to take care of them by rinsing them in clean water in time.
Back to index
Product primer
First of all, read on the package all the tips and tricks for working with acrylic primer. No special difficulties can arise here. By the way, a roller is also quite suitable for applying a primer, the main thing is that the layer is thin. Having coped with this stage of work, leave the furniture boards to dry for the time indicated on the package.


