Installing a wooden floor along joists on a concrete base is a common way to create a warm, well-ventilated structure that can serve as a finishing surface when using tongue-and-groove boards or be an excellent base for finishing facing material. At the stage of manufacturing such a floor, the question arises: what is the best way to attach the joists to concrete floor? This is what we will discuss in today’s material.
Despite the fact that the advantages of creating a flooring with joists rigidly fixed to the base are obvious, there are opponents of this method who claim that in this way the integrity and sound insulation of the room can be damaged due to the formation of acoustic bridges in the places where the fasteners are installed.
If the screed is destroyed during drilling, then this indicates its poor quality and should serve as a signal to dismantle it completely and fill in a new one. A high-quality screed does not change its integrity when holes are drilled in it using a drill.

Regarding sound insulation: a rigid structure transmits sound waves, but if you consider that between the lags insulation material, which dampens the sound, then this statement can be considered controversial. In addition, concrete is much denser than wood, and therefore the sound that is transmitted through the acoustic bridge to the concrete base will not reach the neighbors below.
One of the nuances of wooden flooring over joists is the possibility of creaking, which can be heard even by neighbors below. This occurs when structural elements (beams, joists and fasteners) are displaced relative to each other. By rigidly fixing the joist to the concrete base, these troubles can be avoided.

Important! If the logs are not firmly fixed, and their humidity stated by the seller does not correspond to reality, then soon, due to the process of warping of the wood, the floor structure will begin to deform and shift.
Proponents of abandoning rigid fastening of joists prefer floating floor designs, when the flooring is not fixed to the supporting structures. In this case, it is necessary to approach the choice of lag material very carefully. The stability of the floating structure will be ensured by the special fastening of the beams to each other - in the form of a lattice, into the voids of which insulating material is placed.

- The process of creating high-quality flooring on joists depends on the correctly selected material. Wood is the most preferred coniferous species, since it resists moisture better, contains natural antiseptics, and is therefore resistant to the formation of fungus, and is also a durable type of wood.
- The moisture content of the timber should not be higher than 18%. Before laying, the timber must undergo an acclimatization period of several days and get used to the microclimatic conditions in the room where it will be used. If during these days some joists begin to show signs of warping, they will be rejected and not used in the floor structure.
- Before laying, logs are treated with an antiseptic and fire retardant. It is better to do this before installation, because it is more convenient to process the entire product.
- It is important to pay attention to the choice of direction for laying the joists relative to sun rays– the beams are laid crosswise to ensure their uniform heating. Where the strength of the flooring is important (in rooms with high traffic), the logs are placed across the movement.
- The distance between the lags is selected in accordance with the thickness of the rough flooring. The larger it is, the greater the distance between the logs (40 - 50 cm). The distance from the wall to the beam should be 2 - 3 cm.
Materials and tools
The work of laying floors on joists does not require specialized equipment and tools. You will need to prepare:
- Hammer drill.
- Screwdrivers or screwdriver, hammer.
- Measuring tools - tape measure, level, pencil.
- Fasteners, depending on the method of fastening.
- Wood processing during work is carried out using a plane, hacksaw or circular saw.
You will need to purchase waterproofing material taking into account the overlap on the walls around the perimeter of the room by no less than 15 - 20 cm.

- You should not take to heart the assurances of lumber sellers that the more expensive and higher the grade of wood, the more reliable and durable the logs made from it will be. For flooring, you can get by with spruce, fir or pine.
- You can safely purchase wood of grades B and BC, provided that its humidity does not exceed 18%. External minor defects and shade of the material can be ignored.
- The main condition is the absence of traces of insect pests (bark beetles) and mold on the surface of the wood - even a minimal amount of it should be a signal to refuse to purchase wood from this batch.
- The cross-section of the beam is selected in accordance with the selected thickness of the flooring and the upcoming loads.

Mounting methods
There are several most common ways to attach joists to concrete. Each of them has its own characteristics.
Fastening joists using self-tapping screws
Although this method of fixing lags is the simplest, it is not suitable in every case. The process is simple:
- A hole is drilled in the concrete base for a plastic dowel.
- A hole for a self-tapping screw is also drilled in the wooden element.
- The dowel is placed in the concrete hole, driven in with a hammer, and the joist is fixed by immersing the screw head into the body of the wood a few millimeters.

The step taken when attaching the logs in this way is at least 50 cm.
Table 1. Installation of a wooden floor with fastening joists to self-tapping screws
| Illustration | Description |
|---|---|
 | Obvious defects on concrete surface sealed using mortar or foam. |
 | The concrete base is dusted off and debris from this surface is removed using a vacuum cleaner. |
 | The floor is primed with a solution with antiseptic additives. |
 | The logs are pre-treated with antiseptics and fire retardants. |
 | The logs are laid in increments of 50 cm. |
 | Plastic wedges are placed under the joist and with their help the element is adjusted to the desired height. |
 | The height of the logs is controlled using a construction angle or tape measure and a laser level. |
 | Drill a hole for the self-tapping screw. |
 | Screw in the self-tapping screw. |
 | The wedges must be fixed in the specified position using foam. |
 | |
 | Lay a layer of vapor barrier. |
 | The OSB boards are fixed. |
Fastening joists using anchor bolts
Fixing lags using anchors is a durable and reliable method. Additional rigidity of the structure is provided by attracting the timber to the surface of the base.

An anchor is a more powerful fastener than a dowel; it can withstand high loads. When installing such a floor, you can rest assured that it is securely fixed to the concrete base. According to the technology of work, fastening timber to anchors is similar to fixing it to self-tapping screws. First, holes of the required diameter are drilled in the base and joists. A hole is made in the wood so that the head of the bolt can be hidden.
The number of fasteners is calculated taking into account the fact that an average of 4 anchors are required to fix one beam. The bolt into the locking element, inserted into the hole in the concrete, is driven through the wood. The length of anchor bolts varies from 45 to 200 mm. When choosing it, 6 cm is added to the thickness of the beam for penetration into concrete. The recommended diameter of the anchor bolt is 10 mm.

The popularity of anchor fastening is due to more rigid fixation wooden structure. With the help of this fastener, you can count on restraining the wood before the deformation process if it has not been sufficiently dried.
Table 2. Anchor installation
| Illustration | Description |
|---|---|
 | After the anchors are driven into the concrete base, using a 13mm wrench you will need to tighten each anchor nut to secure it more securely. However, you should not use too much force to avoid stripping the thread. |
 | After this, a lower nut is screwed onto each anchor and a washer is installed on which the log itself will be laid. The nut is installed with the reverse side and screwed in, guided by the markings on the wall. |
 | A puck is placed on top. |
 | A hole is drilled in the joists for the anchor head and under its body, taking into account the spacing of the anchors. |
 | The logs are attached to the anchors. |
 | Screw in the top fixing cap of the anchor. |
 | The nut is tightened in accordance with the level value. |
 | Excess fasteners are cut off using a grinder. |
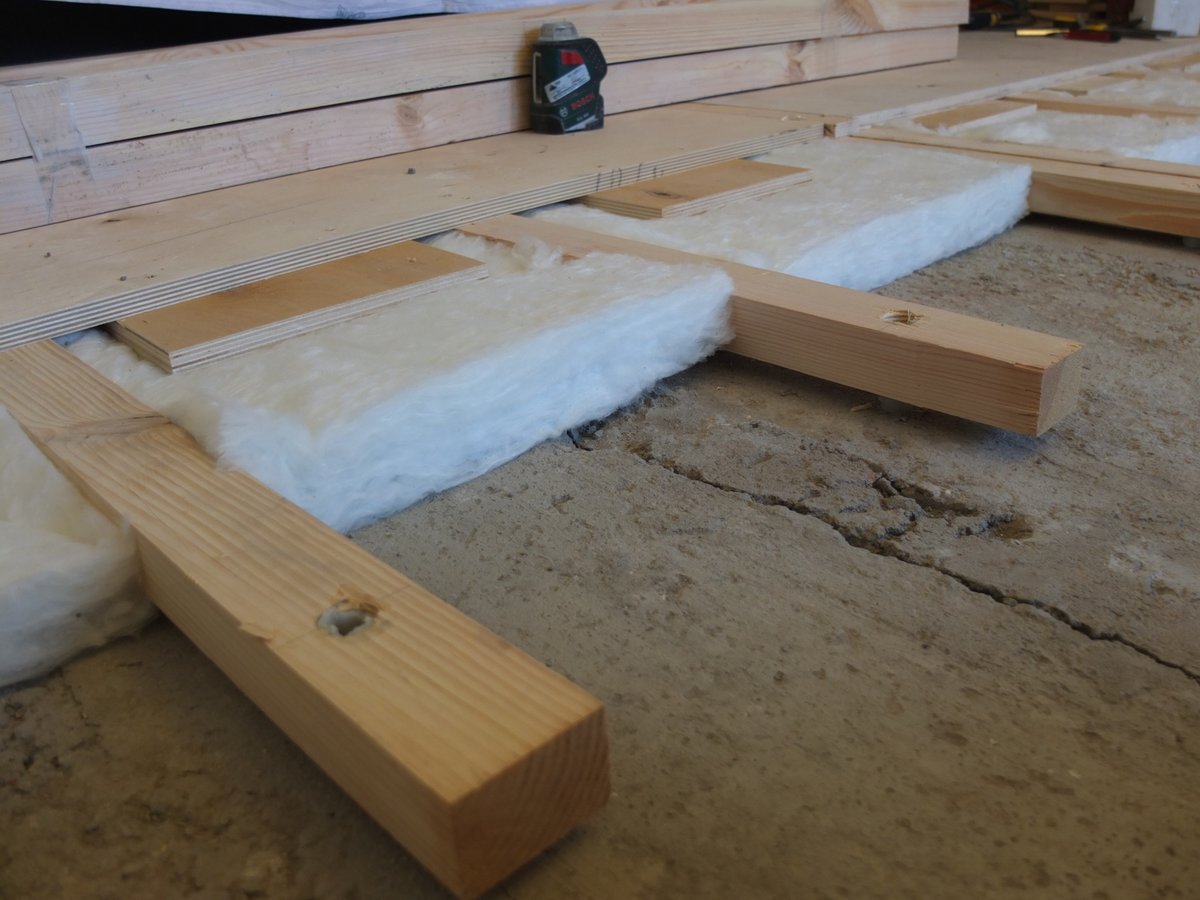
 | Insulation is laid in the space between the joists. |
 | Sheets of plywood are fixed to the joists. |
Attaching joists using corners
If the height of the logs exceeds 10 cm, then metal corners are used for their fastening. The corner shelf is secured to the concrete base using dowel nails, and to the joist - with self-tapping screws. In this case, the corner is used to fix the position of the wooden element, and the load is distributed on the spacers.

Table 3. Installation of logs
| Illustration | Description |
|---|---|
 | Before attaching the corner to the joist, drill a hole for the self-tapping screw. To ensure a strong connection, the self-tapping screw is immersed into the wood at an angle. |
 | A hole is drilled in the concrete floor for the dowel. |
 | The dowel is immersed in the hole and the self-tapping screw is screwed in. |
 | A beam is inserted under the logs, which will allow the logs to be fixed at the required height and provide ventilation to the structure. |
 | The bars are also fixed to the floor using corners. |
 | Wooden flooring is made from tongue and groove boards. |
 | To fix the board at an angle, drill a hole for a self-tapping screw. |
 | The board is fixed using a self-tapping screw inserted into the groove at an angle of 45 degrees. |
Adjustable joists
An adjustable joist system is the simplest way to install a level boardwalk in a room with a concrete base that has a significant difference in height. The anchors in this design are replaced with plastic posts, which are attached to the concrete using dowels. Ease of use plastic racks is that you can adjust their height and the level of the logs using special rotating bolts. Excess posts protruding above the surface of the joists after adjustment are cut off.

Modern manufacturers offer universal racks that make it possible to produce a perfectly flat plank covering in a room with a large difference in height, regardless of the cross-section of the beams. Installation proceeds as follows. The supports are installed on a concrete base.

The logs are laid and, focusing on the level, they set the horizontal plane, adjusting the location of the beams using a special rack mechanism.

Universal racks are equipped with an automatic tilt angle correction system up to 5%.

The boards are fixed using clips and screws.

Video - How to lay a floor using adjustable joists
Wooden logs are required to ensure natural ventilation underground space And better preservation heat in the rooms. Thanks to the use of logs, the floor covering can last much longer. However, among people who do not have much experience in construction, you can often hear the question: is it necessary to attach joists to a concrete floor? Experienced craftsmen know that for a truly durable flooring that does not change its geometry under load, and for its long service life, it is imperative to correctly fix the logs on any supporting structure, including on concrete screed.
Now that it is clear whether it is necessary to attach the joists to the concrete floor, it is worth noting that this task is not difficult, does not require special skills and knowledge, and, therefore, can be done by any home craftsman.
- Materials and tools
- Fasteners
- Tips for choosing lags
- Tools
- Methods for installing joists on a concrete floor
- Fastening the log to a metal corner
- Attaching joists to concrete pillars
- Step-by-step instructions for attaching joists to concrete with your own hands
- Step between joists
Materials and tools
Fasteners

The question of how to secure joists to a concrete floor has different answers: simple or adjustable structures can be used for this. The latter use special screws, by tightening which the logs can be leveled. In addition, the choice of fasteners and fastening methods depends on what kind of joists are used.
Most often, the lags are fastened to the concrete floor with metal anchors or self-tapping screws with polypropylene dowels, the dimensions of which are selected depending on the cross-section of the selected beam for the lags.
The choice between anchor nails or self-tapping screws is determined by the following:
- Self-tapping screws are cheaper, of course, but anchors are more reliable. In practice, fastening with self-tapping screws is almost always sufficient.
- The advantage of anchors is that in addition to fixing the beams, they tightly press the logs to the base. This becomes especially important when the finishing coating is quite heavy and is regularly exposed to mechanical stress - this must be taken into account when choosing the method of how to properly attach the joists to the concrete floor.
At modern technologies the logs under the wooden floor could not be secured at all, however, such a solution would greatly increase the likelihood of the floor covering being skewed or the logs moving from their original location. Therefore, when it comes to fastening lags, it is best to rely on old methods that have been time-tested more than once.
However, fastening may not help if low-quality or unsuitable lumber or incorrect fasteners are chosen for the work.

When choosing logs for a concrete floor, you need to pay attention to the following points:
- type of wood;
- type of lumber;
- length and section;
- price.
For reasons of economic feasibility, you should not take expensive wood, because spruce, fir or pine are correct processing can last no less. Doesn't really matter and appearance material, however, it is necessary to discard specimens eaten by grinders or blackened by mold. Evenness of tone and correct geometry of the lag are of less importance. For this work, grades B and BC with a humidity not exceeding 20% are suitable. As is customary to work with lumber, they should be stored in a dry room for some time so that they equalize the humidity with the surrounding atmosphere.
Before attaching the logs to the concrete floor, all wooden elements must be thoroughly impregnated with an antiseptic.
Tools

Since the task is how to lay logs on a concrete floor, you will have to use the following tools in your work:
- Drill and hammer drill.
- Carpentry tools: a circular saw, hacksaw, plane.
In addition, you will have to spend money on waterproofing, which must be spread over the entire surface of the concrete. When calculating the amount of material, you need to add another 10-15 cm overlap to the floor area.
Methods for installing joists on a concrete floor
Methods for attaching joists to a concrete floor come down to four main options, after familiarizing yourself with which, any master can choose the most suitable one for himself.

This the simplest way fastening the lag, but, unfortunately, it is not suitable in every situation.
- First, you need to drill holes in the timber to match the diameter of the plastic dowel, and use a hammer drill to make a counter hole in the concrete.
- Then the dowels are driven in with a hammer, after which self-tapping screws are screwed into them or dowel-nails are driven deep into the ceiling.
- The head of the screw should sink a few centimeters into the hole.
People often ask, what step of attaching the joists to the concrete floor is better? There is no strict standard here - the step can vary from 40 cm to 80 cm, but on average you can safely focus on half a meter.
The logs will hold securely enough only when there is a small gap between the base and the beam. This should definitely be taken into account by those who want to know how to properly lay joists on a concrete floor.

Anchors, unlike self-tapping screws, not only rigidly fix the logs, but also attract them to the concrete surface. Thanks to this installation, wooden beams will be held more securely, which is why most craftsmen prefer to use anchors. In addition, this powerful fastener will restrain the deformation of the wood to a certain extent, especially if it has not been sufficiently dried beforehand. But snatch from concrete base the anchor is much more difficult than driving it in, so when dismantling it, workers will have to spend a lot of effort.
Be that as it may, when using anchors, the floor covering will not swell, but it may sag. To avoid the latter, it is necessary to install gaskets more often.
- Installation of logs on a concrete floor here begins with drilling through holes in the beam.
- Then, opposite each of them, counter holes are made in the concrete.
- After this, the anchor bolt is inserted into both holes and tightened with a spanner or open-end wrench. It is important not to overtighten the bolt, otherwise it will bend the beam, especially when there is a gap in this place. Then there will be a depression in the finished field.

Before installing the anchor, you need to drill a larger diameter hole in the beam to accommodate the bolt head.
The anchors should be spaced at intervals of 60-100 cm, and their length should be sufficient for them to penetrate approximately 6 cm into the concrete. Most often, anchors with a diameter of 10 mm are used. Typically one joist is held in place by 4-5 anchors.
Video about attaching joists to a concrete floor with anchors:
Fastening the log to a metal corner

It becomes inconvenient to work with logs 10 or more centimeters high. To fasten them, it is better to use steel corners, which will touch the joist with one shelf and the concrete base with the other. In this case, fixation is carried out: to the concrete - with dowel-nails, and to the timber - with self-tapping screws. In this case, the main load should fall on the gaskets, and not on the fastening elements, because the corners should only fix the position of the beam.
In order for the lag to be better bonded to the surface, you need to use self-tapping screws whose threads do not reach the head.
You can also attach wooden elements to a concrete base using a galvanized steel corner. The installation process is as follows:
- Attach the corner to the joist using self-tapping screws, which should go at least 30 mm into the wood.
- Attach the corner to the concrete base using dowels.

Video on how to secure joists to a concrete floor with corners:

There is another option for attaching joists to a concrete floor. For this, a rectangular stand is used, which is attached to the base with four dowels. In the middle of this stand there is a pin that pierces the beam through and through.
By rotating the nut located under the beam, you can accurately set its height, and use the upper nut to fix the element in the required position.
This system is not that difficult to install; it is attached to the floor with dowels, and you will need to make a hole in the joist for a pin. The frequency of installation of stands under it depends on the cross-section of the log; however, in any case, it is not recommended to make an interval of more than 1 meter. This option of attaching the log to a concrete base, although recognized as optimal, however, due to its high cost, has not become very popular.
After fixing the logs, a subfloor made of boards, OSB or similar materials is laid on them. If the work is done efficiently, the appearance of the finished floor can be impeccable.
Attaching joists to concrete pillars
Logs are attached to concrete pillars in the same way. The same fasteners are used here, but intended for poles.
- The pillars need to be waterproofed in advance by coating them with simple bitumen or bitumen mastic. The upper cut of the pillars can be waterproofed by placing pieces of roofing material pre-cut according to its configuration on it.
- Also, in advance, you need to make holes in the bases of the pillars and in the timber into which to drive a dowel or anchor spacer.
- The beam is attached to the post with a self-tapping screw, the length of which is 2-3 times the width of the spacer.
- The timber can also be attached with special metal plates equipped with screws. For this purpose, they are screwed to the base of the pillars with dowel nails, and a hole is drilled into the joist through hole, into which you will then need to insert a screw and screw the joist to the top of the pillars. Thanks to this, the lag will hold tighter.
Step-by-step instructions for attaching joists to concrete with your own hands
Attach to concrete floor wooden joists It's not difficult even on your own. There are several mounting options, and below are the steps of one of the standard methods.
- Lay waterproofing (roofing felt or plain film from PVC). The joints between the pieces must be secured with special tape.

- Next you need to a certain step lay out the joists on the floor. This step will depend on the material from which the finishing deck will be made: when using tongue and groove boards 25x100 mm logs can be laid with a spacing of 70-80 cm, but for other materials the spacing will need to be reduced to 40 cm.
- If the length of the material is not enough to cover the entire room, then the elements can be joined using an iron angle or by making cuts that form a connection into a root tenon.
- Before installing the joists on the concrete floor, you need to take care of the outermost joists that will be located near the walls. They must be laid level, clearly leveling their height by placing wooden planks or pieces of plywood under the beams. It is most convenient to use a laser level. When the outermost logs are fixed, a nylon thread is stretched between them, which will serve as a guide when installing the remaining logs.
- To attach timber to a concrete floor, you need to make holes in both. You need to drive a dowel or steel anchor spacer into the hole in the concrete. Each joist must be fixed with at least four anchors, and the screws must be placed 40-60 cm from each other.

- You need to prepare levelers for the joists in advance - cut chipboard or plywood into even strips. With the help of these elements, the joist structure is fixed in a level position (pieces of plywood are simply placed under the joists if you need to raise them) so that the finishing coating on it does not creak or move.

- If, on the contrary, there are bulges in the concrete base, then you will have to level the lag not by placing plywood, but by selecting part of the material from below using a plane.
- When all the logs are installed in their places, thermal insulation should be laid between them, for example, expanded clay.

- Before covering with the topcoat, you should think about laying the necessary communications. It is also advisable to use a vapor barrier layer.

Step between joists
How to properly lay joists on a concrete floor, if for finishing coating will be used different materials? Below is the relationship between the thickness of the floor boards and the distance between the joists:
- with a board thickness of 20 mm, there should be a distance of 20 cm between the logs;
- for boards 25 mm thick, a step of 50 cm will be required;
- for 25 mm – 60 cm;
- for 40 mm – 70 cm;
- for 45 mm – 80 cm;
- for 50 mm – 100 cm.

If the floor is plywood, then the step between the joists is determined differently:
- with a plywood thickness of 15-18 mm, a lag pitch of 40 cm is required;
- at 22 mm – 60 cm.
Which method do you prefer to attach joists to a concrete floor, and why? Share your opinion or experience in the comments.
In what cases is it necessary to attach wooden beams to the wall? When installing various structures to the wall, it is necessary to take into account the properties of the structure, details and methods of fastening. Often there is a need to fix some interior element, furniture, or fix household and electronic appliances to the wall. To install wooden door, remodel, re-clad the house or simply install a canopy over front door In a private house, you need to install wooden beams. If you want to make an extension like wooden veranda For country house, you will need to attach a wooden beam to the wall.
First you need to figure out what kind of wall it is, wooden or brick, concrete or plasterboard, in order to choose the right method and fastening parts.
Today in any store your choice will be presented wide choose fastening elements. Not every person will be able to do it themselves right choice without getting confused about their purpose.
How to attach a wooden beam to a concrete wall?

Having prepared the beam and drilled holes in it for the fastening element, you can begin preparing the wall on which the structure will be mounted.
- First, let's drill a hole. We will need a twist drill of hard alloys, a drill with a Pobedit tip or with a diamond coating.
- To maintain the service life of the drill, periodically cool it in water to avoid overheating.
- Then prepare a wooden plug, dip it in glue, but not water-based, so that the wood does not swell.
- You can also make your own lead plug. To do this, take a sheet of lead, cut a strip suitable for the hole, and twist it into a tube.
- Then we pierce it with a nail and screw a screw in there.
You can also use a monolith made of alabaster or gypsum solution.
Let's take a copper wire and screw it onto a screw in the form of a spiral, then fill the hole with the prepared solution and coat the wire on the screw with it. Without hesitating for a second, in order to avoid the solution drying out, press the screw into the hole until required depth. Remove the squeezed out excess solution without waiting for it to harden. After 10 minutes, you should remove the screw to prevent it from drying out along with the solution. When the plug becomes a monolith with the wall, you can begin attaching the timber.
Although when it comes to concrete, be it brick or mortar, anchor bolts are the best choice. They will ensure fastening strength.
How to attach a wooden beam to a brick wall?

If you have to work with brick wall, use only a drill. Drill carefully and slowly, evenly without loosening on the sides, to avoid splitting and scattering of the brick. If you hit concrete, it is better to use a drill with a hammer drill function, this will help crush it. There are often cases of getting into hollow brick. How can we be here? It is better to use a dowel that, when twisted, curls into a knot. Carefully screw it into the drilled hole so as not to break its parts.
It is better to screw self-tapping screws into concrete using dowels made of durable plastic. The dowel is laid between the concrete and the self-tapping screw. It can also be pre-lubricated with glue.
An anchor is also perfect for attaching a wooden beam to a brick wall; unlike nails and screws, it can handle any load.
How to attach a wooden beam to a gas block wall?

Before you start attaching a wooden beam to an aerated block, you need to take into account that aerated concrete is an easy-to-work material, as it is quite soft. Therefore, the magnitude of the beam load here is very important role.
If it is a small beam of light weight, then you can use bolts or self-tapping screws. Wedge-shaped bolts will be more appropriate, because they sit firmly in the material. A screw with threads along the entire length is also suitable.
To fasten heavier structures, shelves or cabinets, metal or plastic dowels are needed.
For fastening solid materials, it is better to use nylon dowels in the center of the object. Hollow materials can be caught at the edges.
When making connections to an aerated concrete surface, it is necessary to take into account that parts made of metal may be destroyed when interacting with the block. So consult with specialists, they will definitely tell you proven fastening elements.
How to attach a wooden beam to a wooden wall?

In this case, the perforated fastening method is common, as in roofing works and in the furniture industry. Perforated elements are secured with nails, self-tapping screws or self-tapping screws.
Perforated plates connect parts in one plane, for example, roof installation. There are also corners of different widths to strengthen and connect the structure. For auxiliary elements Light weight mounting tape is suitable.
Most in the usual way fastenings of wooden structures are nails. Liquid nails are often used in everyday life, furniture assembly and construction. Using nails will seem like a very easy way, but we must not forget the technique of hammering a nail. If you use a bolt with a nut at the end, you can easily hammer a nail into any hard-to-reach place. Calculate in advance how long a nail you will need. For a more durable connection of the boards, the nails are driven in at an angle to each other. Wood that is too dry will split faster with a nail. If the timber is too dense, hold the nail in the middle with pliers to prevent it from bending. For large nails, you can pre-drill a hole that will be narrower than itself. Make a small drilling for the cap.
How to attach a wooden beam to a plasterboard wall?

Using drywall you can create various designs enough smooth surfaces. At the same time, it is quite fragile, so securing a wooden beam to its surface will be problematic. The use of ordinary nails and self-tapping screws will not lead to the desired result. Even light objects can be torn out, taking the screw with them, and leaving a hole.
To ensure fastening strength, before starting the installation of drywall sheets, lay wooden beams in places where the need for strengthening is expected in the future. Thus, the load will be on the beam itself, so the fastening can be done with the same self-tapping screw. But during installation, it is often not always foreseen what the load will be in a particular place.
For drywall there are special fastenings. Depending on the load on the beam, the type of fastening is chosen.
When using a nylon or metal anchor, first screw it into the drywall with a screwdriver, then secure it with a self-tapping screw. But this method is the weakest, since there is no fixation with reverse side.
For a stronger fixation, it is better to use a drop-down metal anchor. To do this, insert the folded anchor into the hole. Use a screwdriver to tighten the anchor, it will fold, locking into the sheet of drywall.
In order to secure the beam using a universal plastic dowel, you must perform the following steps:
- drill a hole of suitable diameter;
- insert the dowel into the hole;
- we secure the item we need using a self-tapping screw;
- the dowel is folded into a knot, providing fixation on the reverse side.
The most reliable fastening is time-tested
When attaching the timber to concrete wall Of course, the most reliable fastening will be fixation with an anchor.
Reliable fastening of wooden beams has been known since ancient times, when there was not even a concept “ quick installation" and "perforator", self-tapping screws and dowels had not yet been invented. A hole was made with a bolt in a wall made of bricks, blocks, or in a ceiling made of reinforced concrete. A large wooden rod was driven into the hole, lubricated with cement. A nail was driven into this rod through a wooden beam. Despite the fact that we now have a choice of various fasteners and elements, modern technology and equipment, this method of fastening, although rigid, is still widespread. It is appropriate to use this method for small loads on the beam.
A softer method is the use of U-shaped brackets for drywall profiles. The positive difference here is the short installation time. But the fastening does not have sufficient rigidity. If you hit a wooden beam with force, the bracket will bend and the surface of the structure will be damaged.
py-sm.com
How to attach a beam to a wall?
Fastening the timber to the wall is present in the process of any construction of a country or private house. The installation technology is relatively simple and consists of several stages.

Schemes for attaching timber to the wall.
The beams are fastened at a certain distance between each other. The gap between fasteners is made depending on the cross-section of the beam and, accordingly, the quality of the wall surface.
Thus, if the parameters of the beam are 4x5 cm or 5x6, then it is fixed every 80 cm. Moreover, this element is installed only after you have decided what you will use to cover the wall surface. Saving free space during finishing is also the main factor in choosing the cross-section of timber.
When installing, do not forget to take into account unevenness, roughness and other deformations of the wall. In this case, you should select construction fasteners strictly according to height - this way you will hide all the shortcomings. If the surface of the house where you are doing the sheathing consists of wood, then before fixing the timber you need to thoroughly treat it with an antiseptic or drying oil so that mold does not form and the wood is not exposed to the negative effects of insects.
There are 2 methods of attaching the frame: soft and hard. Each of them has its own operating characteristics.
What do you need to attach the timber to the walls?
You will need the following equipment and materials:
Tools for working with timber.
- beam;
- antiseptic;
- drying oil;
- hammer;
- nails;
- screws;
- axe;
- coven;
- drill;
- wooden chop;
- chisel;
- plane.
Fastening technology: soft method
This method is used using U-shaped staples. The method has both advantages and disadvantages. The main advantage of soft fastening of timber to the wall is the speed of operation, the disadvantage is the unreliability of fastening the frame, the structure can collapse over time.
Among other disadvantages, the fragility of the timber is noted: the frame can be easily damaged by accidentally hitting it. Therefore, it is worth thinking about before you decide to do this work. However, there is still a solution: if the elements are laid to finish the walls from plastic panels, then, as a rule, no deformations are observed. It should be taken into account that the panel covering wooden frame performed perpendicular to the element panels themselves. On the lower part of the wall, timber is laid more often than in the upper area. As a rule, fastening the timber to the wall to a height of up to 1.5 m is located every 0.4 m. Above this mark, the distance becomes larger and can be 0.6-0.7 m.
You can do this work yourself. Installation of the frame does not require any special skills in the field of construction; it is only important to follow the instructions exactly.
Features of hard installation
Scheme of fastening the timber using the soft method using staples.
The method is distinguished by its reliability, strength and durability of the structure.
Experts advise making fastenings to walls using a rigid method, since there will be no further problems with deformation of the frame.
During the work, a bolt is used - a device for making holes. You will need to drill a hole to install the fastener. It doesn’t matter whether the wall is made of concrete or brick - this tool will help you cope with the task.
Insert a wooden chop into the hole formed (hammer it). Next, you need to hammer a nail into the chop using a block or beam.
This method is used more often than the soft fastening method. However, despite the guarantee and quality of work, it has one main drawback - time. The process of covering the walls will take a lot of your time and energy, which is so in short supply. to modern man.
DIY installation: step-by-step instructions
Schemes of rigid fastening of timber.
First of all, you need to make markup, which will be the basis for creating the project. This is done so that you can determine the level of the wall surface.
The next step is strapping. To do this, lay the elements strictly along the contour of the wall being leveled. If you are planning to level one wall, then you need to attach the beam to the walls that are perpendicular. The use of pads is not required during installation.
It is recommended to first make a small hole in the part to be installed. This must be done so that the screws can be inserted. Remember that the diameter of the drilled hole should be slightly larger than the diameter of the screw.
Then you take the product and apply it to the surface of the wall. You do part of this work with a hammer and nail. Your task is to transfer the mark for the hole to the surface.
The next stage of work is to drill the planned holes. As a rule, you must drive wooden chops or regular dowels into them.
Scheme of fastening the timber to each other.
Now you attach and install all additional contour elements. For convenience, you should stretch a thread between them. What is the thread for? Using it you will be able to determine the height of the block, and in all places where the beam is attached to the wall. This way you measure the distance that forms from the surface of the wall to the thread. Then we subtract the height of the element from this distance.
Then you should take pieces of plywood of various thicknesses and build a structure. During the work you will need an ax and a chisel.
Once the block is ready, you can start drilling a hole in it. The diameter of the hole made should be larger diameter screw.
Next, you should make holes in the beam so that you can later attach it to the wall. How to drill a hole depends on the height of the element, as well as the material from which it is made. For example, if the beam has a height of more than 6 cm, and the material is larch, then you need to use a drill with a drill with a diameter of 12 mm. When installing, take into account one important circumstance: the head of the screw must be completely inserted into the beam, do not allow any elevations, try to place the screw in the inner part of the element.
If the timber is of considerable thickness, then you should make holes up to 3 cm deep. Then we proceed to fasten the element to the surface using previously made blocks.
To make sure that the fixed timber is level, use a building level. If it turns out that the beam is attached to the surface a little higher than planned, then unscrew the screw and replace the head. You can also use the second method: unscrew the screw (just not all the way) and place spacers of the required parameters on both sides of the element.
If the beam is located below the planned level, unscrew the screw and change the head. However, if the difference in marks is insignificant (up to 2 mm), you can plan off the unnecessary part using a construction plane.
Fastening timber to a brick wall: installation features
To get started, you should purchase:
- dowels;
- self-tapping screws;
- anchors;
- rivets;
- nails;
- corners.
Choose correct drill you can do it at a hardware store. The drilling process will take a lot of your time, but there is no other way.
Installation is done according to the standard scheme: make holes and attach the beam using special devices. Be careful: if installed incorrectly, the entire structure may collapse.
Fastening the beam to a concrete wall is carried out according to the same instructions, the devices and materials are the same. However, the main tool is a drill, which is capable of making holes in concrete (a drill is useless here). For the rest of the job you will also need to drill, calculate and secure. Thus, if all points of fastening technology are followed, the beam will hold securely.
1poderevu.ru
How to attach timber to a wall made of various materials
During construction or repair work Quite often there is a need to attach a wooden beam to the wall of a house. If you need to create a frame for facing material, install any element of furniture or household appliances, remodel walls or build an extension, in any of these cases you will need to attach a wooden beam to the wall.
 Fastening with nails
 From correct installation wooden blocks largely determine the further performance of the work and the reliability of the structure. First of all, you should select the installation method and the necessary fasteners.
As a rule, for the construction and finishing of walls the following is used:
- ·concrete;
- ·brick;
- ·tree;
- · aerated concrete blocks;
- · drywall.
 Fastening with corners
 Once you have established what material the wooden blocks will need to be installed on, you can decide on the choice of fasteners. Its quantity can be calculated based on the following standards: when the cross-section of the slats is from 2.5 to 4 cm, the distance between the fastening elements should be up to 60 cm; on a beam with a cross-section from 4 to 6 cm, they are placed at a distance of 70-80 cm from each other.
Installation of timber to a concrete base
To secure wooden slats to a concrete base, you will need to perform the following steps. First, prepare the timber by drilling holes in it for fasteners. Next, drill holes in the wall at the same distance. For more accurate markings, you can attach an already drilled beam to the wall surface and make marks along the existing holes.

Concrete drilling is carried out Pobedit drill or a diamond-coated drill. It is better to use a drill with a hammer drill function. When drilling a hole, the drill that gets too hot is dipped into water for a while and cooled.
Next, wooden chops are hammered into the wall, a beam is applied and a nail is driven through it into each chop. In the next photo you can see what the mount for a concrete base looks like. You can also attach wooden slats to concrete using anchors (pictured below).

How to fix beams on brick
If the wall of the house is made of brick, you should use a slightly different installation technology. To do this, drill holes at a distance along the block with a wood drill, then change the drill to a pobedite one. Having attached the lath to the wall, we make markings through the drilled holes, drilling through the brick.
Then we remove the block and drill holes of the required depth and width in the brick wall. It is recommended to keep the drill straight and not loosen it, otherwise you may crumble the brick. You can attach the beam to a brick wall using dowels and self-tapping screws. You can also use anchors for a brick wall.
Features of installing wooden slats to aerated concrete
IN Lately Aerated concrete blocks are often used for the construction of houses and other buildings. They are easy to process, so building construction is much faster. However, the specific softness of aerated concrete is associated with the peculiarities of installing beams on its surface.

First of all, the choice of fastening elements will depend on the magnitude of the future load on the beam. If the structure will not be loaded with a large weight, self-tapping screws or wedge-shaped bolts can be screwed into the aerated concrete blocks. Full length threaded screws can also be used for this purpose.
To ensure that the structure can withstand sufficiently large loads, steel or plastic dowels are used.
When choosing fasteners, you should also take into account the fact that aerated concrete blocks can have a destructive effect on the metal over time. Therefore, before purchasing, it is advisable to consult with the seller and find out all the possible risks.
Installation of slats to the wall of a wooden house
Quite often, when constructing walls, glued or profiled timber is also used. How to attach the beam to the wall timber house? Most common for connection wooden surfaces use perforated fasteners. They can be secured to the surface of the block and the wall using nails, self-tapping screws or self-tapping screws. Perforated fasteners are available various types. To secure elements located in the same plane, plates are used; if fastening needs to be done in different planes, angles are used.
If the structure will not be provided high pressure, you can use mounting tape. Using nails for fastening wooden elements you should stick to a few simple rules. If you have to hammer nails in hard to reach places, a bolt with a nut at the end should be used. It is also necessary to choose the correct length of nails.
To make the structure more stable, the nails are driven at a distance at a certain angle to one another. If the slats are made of high-density wood, hold the middle of the nail with pliers while driving. Pre-drilling the holes will make it easier to drive large nails.

How to properly attach bars to drywall
If the slats need to be attached to a wall finished with plasterboard, installation is performed as follows. Due to the certain fragility of the material, the use of nails and screws is not recommended. As a rule, nylon or metal anchors are chosen to securely fix the bars to drywall. They are screwed into the sheet and secured with a self-tapping screw.
This is the easiest way. Drop-down anchors can provide a more stable fastening. Thanks to their special design, additional support is provided on the reverse side. These anchors are inserted into the holes and tightened with a screwdriver until they are completely folded.
You can also use regular plastic dowels. To do this, drill a hole, insert a dowel, and secure the beam with a self-tapping screw. A rolled dowel can provide support on the back side of the sheet. Find out in detail how you can attach the timber to the wall in the video below. As you can see from the video, there are enough a large number of ways to securely fasten a wooden structure.
brusportal.ru
Fastening the timber to the wall
During repairs and redevelopment, construction of a private house and various household buildings, when installing design elements, furniture, household and other appliances, it is often necessary to attach wooden beams to the walls. And below we will look at how the timber should be fastened to the wall, providing a lot useful information:
 | Fastening elements and methods of fastening timber. |
 | Features of fastening timber to a concrete wall. |
 | Fastening timber to a brick wall. |
 | How to fasten a beam to a wall made of aerated concrete blocks. |
 | How to attach timber to a wooden wall. |
 | Methods for attaching wooden beams to a plasterboard wall. |
 | Fastening the timber to the wall using corners. |
 | The soft way fastening the timber to the wall using special U-shaped brackets. |
Methods for attaching timber to the wall and basic fasteners
The beam is fastened to the wall different ways. In this case, the following parameters must be taken into account:
- wall material and decoration (aerated concrete, concrete, plastered, brick, plasterboard, etc.);


- the weight and scale of the structure that the beam must support.

These parameters determine which tools and fasteners need to be used to secure the beam to the wall. The following can be used as fastening elements:
- screws;
- nails;
- self-tapping screws;
- anchor bolts;
- metal and plastic dowels;
- U-shaped brackets;
- metal corner;
- wooden cotter pin.
Here are several options to ensure that the timber is fastened to the wall correctly.
Secure the timber to the concrete wall
Before attaching a beam to such a wall, it is worth assessing its dimensions, as well as the weight of the structure that it must support. If the beam is small and the structure is quite light, you can use technology using gypsum or alabaster mortar:
- a screw of the required diameter is tightly wrapped along its length with wire (it’s good if it’s copper);

- prepared holes in the wall must be filled with plaster or alabaster mortar;

- quickly, without waiting for the solution to set, it is necessary to screw a screw wrapped in wire into the hole;

- after 10 minutes, when the solution has set but has not completely dried, carefully unscrew the screw;

- After the solution has dried, use this screw to secure the beam.

For a more secure fit powerful designs would be better suited this way:
- In the places of intended fastening it is necessary to drill holes (0.5-1 cm in diameter). To drill concrete walls, you need to use diamond-coated drills, carbide drills or pobedit drills.

Attention! To make quality holes, you need to cool the drill from time to time by immersing it in cold water for a few seconds.
- Pre-prepared wooden plugs of suitable diameter must be impregnated with glue. Do not use glue on water based, otherwise the cork will deform and swell.

- Hammer the plugs into drilled holes using a hammer.

- Wait until the glue is completely dry.

- The timber is attached to the wall using screws (they are screwed into the plugs).

To ensure that the fastening of the timber to the concrete wall is as strong and reliable as possible, it is better to use anchor bolts.
Fastening timber to a brick wall
Attaching timber to a brick wall has some peculiarities. Before attaching the timber, you need to make holes in the wall in the places where the fasteners should be located. Holes in a brick wall must be made with a drill or drill bit with a Pobedit, carbide or diamond-coated tip. In this case, it is not recommended to use a hammer drill, since brick is a rather fragile building material. It is important to consider unevenness brickwork, therefore, before attaching the timber to a brick wall, it is worth taking measurements and making preliminary markings.

It is recommended to fasten structures that are light in weight using plastic or metal dowels. Before attaching the beam to a brick wall with dowels, it is worth assessing the weight of the structure. The heavier the timber, the correspondingly longer the fastenings will be. To ensure the strength of the fasteners, the dowels are coated with construction glue before installation.
The frequency of fastening placement directly depends on the cross-section of the beam: in the case of a cross-section from 2.5 to 4 cm, it is necessary to place fasteners at a distance of 0.6 m from each other, with a cross-section of 4-6 cm, the distance between fasteners is 0.7-0.8 m. To attach a beam to a brick wall in order to hold a weighty structure, it is better to use anchor bolts - this method is considered the most reliable.

Fastening a wooden beam to a wall made of aerated concrete blocks
Aerated concrete blocks are a fairly pliable and soft building material, which simplifies the process of fastening the structure, but at the same time requires special attention to perform load calculations. A load that is small in size and weight can be attached to bolts, self-tapping screws (wedge-shaped ones are better) or threaded screws located along the entire length. The installation technology itself is reminiscent of fixing timber to a brick wall.

If you need to attach something heavier to a wall made of aerated concrete, for example, wall cabinets, you will need more solid fastenings. In this case, metal, plastic or nylon (plastic) dowels will be required.
If attaching a beam to a wall made of aerated concrete blocks involves construction functions (for example, you planned to attach a veranda to the house), then you need to proceed according to the following scheme:
- To the armored belt on aerated concrete wall The studs are attached with a certain frequency.
- A wooden beam is secured to the studs.
- The beam is fixed to the stud using a bolt and nut.
Only in this way will your design be reliable. If you do not use an armored belt and fasten the timber directly to the blocks, the fasteners may be torn off as a result of the high weight of the structure.
Attaching timber to a wooden wall

There are several mounting methods:
- The simplest is to use dowels, nails and self-tapping screws. It is quite suitable for light structures. But hammering nails into wooden wall has some nuances:
- if the timber is too dry, hammering a nail may cause it to crack;
- to ensure a strong fastening, you need to drive in at least two nails that are at an angle to each other.

- Create a reliable “groove-to-groove” fastening. Grooves are cut out in advance on the timber and the supporting structure, which form the lock. When the beam is installed, it is secured with a wooden cotter pin or a nail installed in the prepared holes. This method is used not only when finishing works, but also during construction (for example, during the construction of a roof wooden house).

Walls finished with plasterboard do not require the installation of heavy structures. How to properly secure timber to a plasterboard wall? Possibility of mounting on a plasterboard wall, e.g. wall cabinets, should be provided for at the stage of installation of drywall. In this case, on load-bearing wall in the place where you intend to fasten the structure, you need to secure a wooden beam, and upon completion of the installation of the drywall sheets, the structure is attached to such a beam using self-tapping screws.

A small cross-section and lightweight beam can be fixed to a plasterboard wall using drop-down anchors or dowels. When the screws are tightened with a screwdriver, the fasteners open up and help hold the structure. But in this case, we recommend that you be extremely attentive to the load - a structure that is too heavy can tear out the fastenings, causing it to break. plasterboard sheet.

Fastening the timber to the wall using corners
The method of attaching timber to the wall using corners is ideal for any type of wall. In this case, you need to select corners only from durable metal– fasteners must withstand double load. Before attaching the beam to the wall using corners, you need to make markings. The work is carried out in several stages:
- The corners are attached to the wall using self-tapping screws. In this case, the fastenings are not tightened, so that as a result it is possible to adjust the entire structure.

- A beam is inserted into the corner, which is secured with self-tapping screws. The fasteners are tightened to the maximum.

- The corner is clamped with fasteners, and the design is adjusted taking into account the markings.

This method is excellent for attaching timber to a brick wall, and in many other cases.
A soft method of attaching timber to a wall using U-shaped brackets
There is also another effective method fastening the timber to the wall, which involves the use of metal U-shaped brackets. The main advantage of this method is its simplicity and high speed of implementation - you can do it on your own, without the help of professionals. The technology also has disadvantages: the design is quite fragile and can be easily damaged by hitting a beam.

How to secure a beam to a brick or other wall using staples. They are attached to the wall every 40 cm. At a height of 0.5 m from the floor, the frequency of fasteners changes: they can be placed 60 cm apart.
Wooden beams are a practical building material. Low price, low heat loss, light weight and ease of installation of a house made of timber make this material very popular. However, securing the beam to the foundation is not so easy, because wood cannot be glued to concrete or welded to metal. In this article we will talk about how timber is attached to various foundations, what they pay attention to and what mistakes are made.
Types of foundations for a timber house
Waterproofing
The bottom beam, as well as the wooden grillage, must be properly protected from water and dampness, but it is not always possible to use creosote or other equally effective (and most often unpleasant-smelling) substances. If it is not possible to treat the grillage or lower beam with heavy fractions of oils, then it is necessary to use less effective substances, and at least 2 layers of roofing material must be laid between the foundation or iron/concrete grillage and the beam. This is material that falls out due to temperature changes. After all, in the morning the air temperature rises, but the temperature of the foundation or grillage remains unchanged. If you use a wooden grillage, then waterproofing must be laid both under and above it. This will protect the wall from dampness and prevent mold and rot.
Which mounting method is better?
When choosing a mounting method, consider the following factors:
- timber moisture;
- climatic conditions;
- seismic activity;
- the strength of the most frequent winds.
To attach damp (over 16%) timber to a wooden grillage, you must use only shrinkage compensators. All other fastening methods are ineffective.
After all, the beam is high and especially natural humidity, gives very strong shrinkage, so ordinary anchor bolts will not be able to provide high-quality fixation. To fasten timber with high or natural humidity to a wooden grillage, it is necessary to use an analogue of a shrinkage compensator, only made not from a screw, but from an anchor bolt. The same method can be used when installing timber on threaded rods. Instead of a nut and washer, you need to use a nut, two washers and a spring. The same fastening method should be used in those regions where there are heavy and long rains in spring and autumn.

In regions with high seismic activity, it is necessary to use a bottom beam with a moisture content of no higher than 12%, treat it with the most effective waterproofing and install it on the most rigid fastening (regular and anchor bolts). This will ensure sufficient strength of the entire structure. The same approach must be applied in those regions where wind speeds often exceed 20 meters per second. Neglecting rigid anchorage in seismically active or windy regions will result in the anchorage being exposed to external factors will become loose and the house will begin to rock. Neglecting shrinkage compensators when working with timber of natural and high humidity, as well as in regions with frequent and heavy seasonal rains, will lead to the appearance of gaps between the flashing crown and the foundation or grillage.
Attaching timber to a wall is not a simple matter. Timber has always been popular in the construction of private houses. Nowadays, they are increasingly appearing Construction Materials with new properties, technologies are developing. The combination of timber with new building materials and installation systems sometimes raises questions - how will it be technically correct to attach timber to different surfaces?
Required for fastening fastening material. Today there are many types of fasteners for any connection of elements. Their differences are the scope and specifications, which regulate permissible load on the fastening element and fastening technology.
Corner fasteners made of metal have holes for fastening with screws, nails or dowels. Metals for corners are used that are not subject to oxidation and are quite durable. The safety margin of the corner must be taken to be at least 2, that is, the corner must withstand a weight twice as large as the weight of the element that will rest on it. At the same time, you also need to take into account and calculate which structures will rest on this beam.

Wooden beams are attached to walls for different purposes - to strengthen hanging furniture, bookshelves or decorative elements interior, as well as household appliances. When installing door frames, for cladding outside and inside, for installing a canopy over the front door or a canopy for the veranda, you also need to attach the timber to the walls. The main thing is that you first need to decide on the material of this wall, and approach aerated concrete blocks, plasterboard cladding and a brick wall, of course, will have to be completely different.

The choice of fastening method depends on the wall material and the features of the structure being created. Of course, in the context of aerated concrete, we are not talking about attaching purlins made of timber to walls made of cellular concrete or ceramic blocks; this is impossible without installing an armored belt or structures that reinforce the support, but only about attaching bars, for example, for sheathing under plasterboard.

Also, we are not talking about attaching timber to brick and concrete walls for the construction of floors or floors with logs made of timber, since in these structures the timber and its fastening must bear significant loads. The design of fastening the timber in this case is installation into the wall during the process of laying or concreting, or resting on an armored belt.

The end of the beam is additionally impregnated with a fire-biosacite composition before embedding or laying in the wall and protected with a layer waterproofing material. Antiseptics on oil bases It is not recommended to use them because they impede the evaporation of moisture. ends wooden beams cut at 70 degrees so that the moisture evaporates better. The gap between the niche wall and the beam is required; thermal insulation is placed in it, since the beam rests on the outer wall.

When laying timber beams on an armored belt, they are secured with special anchor plates, coated with an anti-corrosion compound.
Angle fasteners are used to fasten timber to concrete and brick structures. A reliable and durable connection is possible when using high-quality metal corners that can withstand the load.
- Before installing the corner elements, mark the position and contours of the beam on the surface using measuring tools. You can use a regular plumb line and building level, But laser level will allow you to quickly make markings both vertically and horizontally at the same time.
- Then the corner elements are fixed with dowels, self-tapping screws, and nails are used for lighter structures. The screws are not fully tightened so that the position of the element can be slightly adjusted.
- The timber is inserted into the corners and attached to them with self-tapping screws, then the fastenings of the corners to the wall are tightened completely. The corner is clamped with fasteners, if necessary, adjusting its position exactly according to the markings.
Fastening timber to concrete and brick walls
You should drill the brick carefully, strictly at a right angle, without “losing” the drill, so as not to split the brick. Splitting can cause the brick to fall off. if a brick gets into the cavity, you will have to use an anchor-type dowel, which, when screwed into the wall, forms a knot, or a spacer dowel. Tighten the dowel carefully. Mechanical anchors for fastenings wooden beams To brick walls much better than self-tapping screws and nails, both technologically and in terms of fastening strength.

For concrete, you need a drill with a hammer drill function and durable plastic dowels for self-tapping screws; sometimes, before driving a plastic dowel into the wall, it is additionally lubricated with glue.

Attaching timber to a wooden wall
Perforated fasteners of angle type or flat are used. Fasteners vary in size, metal thickness and coating. Nails, self-tapping screws and screws are used. For larger nails, pre-drill holes, especially when working with seasoned wood.

Fastening to aerated concrete and plasterboard walls
Aerated concrete blocks are a soft material; screws with full-length threads are suitable for them, but it is better to use anchors, mechanical or chemical. To properly install an anchor with bending ribs or a wedge-shaped one, pre-drill a hole with a diameter slightly larger than the anchor. One type of anchor is perfect for hollow blocks and blocks made of cellular concrete - foam blocks, gas blocks, etc. The main “parts” of the anchor are a steel sleeve with ribs and a nut at the end. When the screw is screwed into the sleeve, the ribs bend and move apart, forming a “butterfly” that securely holds the anchor inside the material.


Chemical anchors hold even stronger, they are suitable for everyone wall materials from lightweight concrete and for plasterboard, and for any wall materials. The principle of operation is the ability of synthetic resins to penetrate deeply into pores and adhere to the base. The weak link fastening to porous blocks and drywall is not fasteners, but the base material, especially under the action of a vertical load, and chemical anchors help solve precisely these problems. A chemical anchor is inserted using a special gun. The adhesive mass is squeezed into the drilled hole under pressure, and a fastening element is immediately inserted - a threaded pin or rod. Adhesive composition fills the pores of aerated concrete or other porous block, and after hardening forms a strong and reliable fastening. The pullout force of a chemical anchor from a brick is more than 500 kg. The service life of chemical anchors is tens of years, they do not deform due to temperature changes, and are inert to aggressive environments. The latter is very important when working with aerated concrete, which is aggressive to metals. All fasteners for aerated concrete must have an anti-corrosion coating.


For attaching a block to aerated concrete or plasterboard, the anchor method of fastening is the most durable, although costly. It all depends on the density (grade) of aerated concrete and the required load. To fasten the sheathing, it may be sufficient to use mechanical anchors - wedge-shaped or "spiral nails" type. The latter are convenient because they are mounted into a wall made of aerated concrete, driven in with an ordinary hammer. When driven, the spiral nail is screwed into the block without disturbing its porous structure.
The dowel, which in its working position resembles the spokes of a half-opened umbrella, bears the affectionate name Molly and is excellent for attaching wooden blocks to plasterboard partitions in order to secure paintings, light shelves or lamps on them. Molly is a type of expansion anchor bolt that has a sleeve with longitudinal slots, which, when the thread of the inserted screw is tightened all the way, folds and turns into an umbrella. The load-bearing capacity is excellent, but this fastening has disadvantages - it can only be removed by breaking out part of the partition. In addition, it is impossible to work with Molly in tight spaces.

Fastening timber in roof structures
Timber logs are attached lock connection and brackets, but for a roof such a connection is unacceptable, since the roof is used in completely different conditions. All roof elements ( rafter system) are installed according to the design and calculations, and they are secured with special elements and bolt systems, sometimes additionally reinforced with brackets.

Fastening the timber to the suspension
In interiors, decorative elements are sometimes used that require the beam to be fixed to the ceiling on a free suspension or to imitate such a suspension. Sometimes beam suspension is needed for structural reasons. This type of fastening is performed using a special suspension designed for a certain load. A suspension system of this type may have the additional ability to adjust the height of the beam suspension.

The suspensions are attached to the ceiling with dowels, and the second part of the fastening is installed on the beam, then the elements are connected. Practice shows that such fastenings, contrary to expectations, can withstand considerable loads. But it’s still better not to have such a risk factor over your head, and for the design, imitate a suspension, and attach the beam securely to the wall. In this case, the suspension system is installed to strengthen the fastening, and for design purposes, “for beauty.”


