Comfort and coziness in a living space depend on many factors, including the condition of the ceiling. In some cases, it becomes necessary to repair cracks in the ceiling between the plates or small cracks on its surface. You can do this yourself by choosing one of the seven methods proposed in this article.
Causes of cracks in the ceiling
Before proceeding with any repair work in an apartment or house, a thorough inspection of the walls and, in particular, the ceiling for the presence of various cracks, defects and irregularities should be carried out. This need is caused not only by aesthetic needs. Deep cracks in the ceiling or gaps between concrete slabs may have serious consequences.
The main causes of cracks include:
- Building settlement;
- Non-compliance with technologies in the process of construction or repair;
- Low quality building materials;
- Sharp temperature changes.
If cracks in the ceiling began to appear in a newly built house due to its shrinkage, then it is not recommended to immediately carry out work to eliminate them, since the structure will continue to deform. The best option there will be repair work 3-4 years after its commissioning.
Ceiling diagnostics and determination of the nature of damage
Diagnosis of the ceiling begins with a thorough examination of its entire surface. Availability even small cracks in plaster can be a sign of deeper damage, therefore, if all noticeable defects are identified, the nature of the damage to the ceiling should be determined. To do this, it is necessary to partially remove facing material around the detected crack with a spatula or a special brush. Next, you need to carefully examine the surface of the ceiling adjacent to the crack, since the detected damage can occupy a larger area than during the initial visual inspection. In this case, you should completely clean the ceiling covering over the entire area of damage.

Another indicator of the degree of deformation is the depth of the gap. If this indicator does not exceed 1 centimeter, then the crack is considered shallow and can be repaired with some kind of filler. A gap depth greater than 1 centimeter indicates a more serious deformity. In order to repair it on your own, you will need a much larger amount of work and materials.
Method 1: Decorate the cracks
The simplest and fast way getting rid of cracks, and at the same time from irregularities on the ceiling, is to glue the ceiling with special polystyrene boards. This material allows you to hide both small cracks and deeper cracks and differences in the surface of the ceiling. Ceiling tiles they are inexpensive, stick well and give the ceiling a feeling of novelty.
Tiles on the ceiling must be glued in such a way that the joints between them are not in the places of damage. In order for the ceiling to appear even and for the tiles to hold securely and not peel off, cracks and irregularities must be completely hidden under their surface. However, we should not forget that this method only masks the flaws, but does not solve the problem of damage to the concrete ceiling.

Method 2: Seal the cracks with a cloth
Another way to easily repair both small and fairly deep cracks and joints between the plates is to seal them with fabric strips. Despite its apparent simplicity, this is one of the oldest and most proven ways to repair the ceiling. A properly made fabric “patch” lasts for years and prevents the crack from growing further.
Sealing a crack with a cloth is performed in several stages:
- The edges of the crack are cleaned from ceiling covering along its entire length and washed with water.
- A reinforcing fabric strip is made. For this purpose, both a special serpentine ribbon and any natural fabric - linen, cotton or gauze - are suitable. The material is cut in such a way that the strip is 2-3 centimeters wider than the crack.
- The strip is wetted with PVA glue or starch paste, squeezed out, applied to a dry crack and straightened.
- It is recommended to putty the dried and hardened strip, carefully smoothing the surface with a spatula.
After drying, the putty layer is cleaned sandpaper and wipe off dust.

Method 3: Fill cracks with putty
Spot plastering of the ceiling is a traditional method, most often used if it is necessary to repair cracks before whitewashing. Puttying the entire surface allows not only to hide the cracks, but also to level the ceiling, preparing it for any finishing work.
The process of sealing cracks begins with cleaning them with a brush to remove the exfoliated parts of the coating. Next, the surface is washed with water, and after it dries, it is treated with a deep penetration primer. After that, a putty solution is made and applied to the cracks so that they are filled with the solution throughout the entire depth. Then the putty layer is leveled with a spatula either pointwise, around the cracks, or over the entire surface of the ceiling.
After applying the first layer, the surface dries for 24 hours, then it is cleaned with sandpaper. Depending on the nature of the damage to the ceiling, one to several layers of putty may be required, with each subsequent layer being applied only after the previous one has completely dried.

Method 4: gypsum mortar
Gypsum plaster is another proven method for solving the problem of cracks in concrete ceiling. Gypsum mortar is sold in the form of dry mixes and contains mineral components. Sometimes, instead of a gypsum mortar, synthetic compounds are used, which are more expensive.
Their use allows not only to repair the crack, but also to protect the surface of the ceiling from its re-formation.
A gypsum mortar is made by mixing the powder with water in the proportion specified by the manufacturer. Like putty, gypsum plaster applied to the cleaned and primed surface in several layers with complete drying of each layer. For maximum alignment of the ceiling, it is recommended to use a reinforcing mesh.
Method 5: sealant
In some cases, the appearance of cracks and cracks in the ceiling is associated with leakage, therefore, to seal them, a material with good waterproofing properties is needed. Such a material is a sealant, which, after hardening, resembles rubber in its structure. It has good penetrating power and has a service life of more than 10 years.

In order to fill the gap with sealant, you must use a special gun. The sealant hardly expands, so after it hardens, it will not be necessary to remove significant excess material. The sealant is applied over the entire surface of the crack, then the frozen protruding layer is cut off with a knife, after which the gap is sealed with a fabric strip and covered with putty or plaster.
Method 6: placeholder
It is possible to cover up rather large and deep cracks with sealant, but this will require a significant consumption of material. In this case, it is much more efficient to use other types of filler, which can reduce repair costs and use materials of different properties.
The most popular placeholders include:
- Mounting foam.
- Natural fabric strips.
- Special polyurethane foam filler.

Method 7: deep cracks between the plates
The appearance of deep gaps between the plates is a serious problem in panel house. Such cracks are fraught with large heat losses and the risk of further deformation, and therefore require special repairs. First, the gap between the plates is cleared of the ceiling covering and the old leveling layer. The crack is then expanded with percussion instrument with a special nozzle and processed along the edges with a knife or spatula.
Further inner surface cracks are treated with a primer and filled mounting foam. After it dries, the excess foam is cut off, and the seam is smeared with a building mixture using a reinforcing mesh.
Any cracks in concrete are stress concentrators that contribute to the destruction of the structure. External cracks in winter time V literally the words are "torn" by frozen water, so they must be carefully sealed and sealed.
What is the "capital" close up cracks in concrete?
Epoxy resin and repair compositions based on it
A very effective and cost-effective way to seal cracks in horizontal dry surfaces: floor, screed, blind area, concrete pads for various purposes.
Advantages of the method:
- Low cost and fast drying;
- Securely fixes the seams and keeps them from further expansion;
Will be required the following materials and tools:
- Angle grinder equipped diamond disc"on concrete" for crack preparation;
- Dust removal devices;
- Spatula and containers for preparing the composition;
- Primer "for concrete";
- Epoxy resin with hardener;
- Fine cleaned sand.
The embedding technology consists in preliminary “grooving” of the crack, removal of the loose layer of concrete and dedusting. In this case, the size of the defect should increase by more than 5 mm in width. It is also necessary to cut transverse grooves in concrete for a power screed in the format length 100-150 mm, pitch - 400 mm. Operations are performed with an angle grinder and a vacuum cleaner.
The next stage is soil treatment and the laying of repair brackets in the transverse grooves. Further, according to the attached instructions, a repair solution is prepared: epoxy resin, hardener, fine sand. Given that the setting time of epoxy resin is about 10 minutes, filling the joint, transverse grooves and leveling outer surface should be done as quickly as possible.

Popular compositions for repair: Epoxy resin ED-16, ED-20 (hardener is purchased separately) Russia; resin Epoxy 520, Spolchemie, Czech Republic; composition UZIN KR 416, Germany; Repair Technokolla, (Sika), Italy (most popular concrete crack repair compound).
Self-expanding cords and sealants
This is one of the most reliable, but rather expensive methods of concrete repair. Therefore, it is used mainly in the bowls of pools, in the underground parts of foundations and the outer surfaces of the walls of buildings and structures.
Advantages of the method:
- The ability to choose a material option for any defect;
- Full tightness and durability;
- Possibility of installation in conditions of low ambient temperature.
Necessary tools and materials:
- See the first two points of the previous method;
- Self-expanding repair: tape, cord or mat;
- Polyurethane sealant "for concrete", mounting gun;
- Bench chisel, brush, paint brush, foam.
The sealing technology is thorough, therefore, before sealing cracks in concrete using the self-expanding material method, carefully read the recommendations:
- Measurements of the depth and width of the crack are carried out, according to the results of which a variant of the type of self-expanding material is selected;
- The crack is embroidered and dusted with a grinder, a chisel and a vacuum cleaner;
- With a defect depth of up to 60 mm, self-expanding tape with dimensions of 18x23 mm can be used;
- Important! Self-expanding materials are not subject to caulking or other mounting reinforcement;
- After installing the tape, cord or mat into the crack, the free space is filled with polyurethane sealant, and the material that comes out is smoothed out with a spatula.
What is the best way to seal a crack in concrete?
Popular brands polyurethane sealants for concrete repair: ELASTOSIL PU 20, 3M PU 575, Russia and Rubberflex Pro PU-15, France.
Popular brands of aggregates:"PLOW", (tape, cord), Russia; G-Flex GX-7615, Alchimica, Ukraine (tape 18x23 mm); Waterstop 1520, Greece (cord, tape 18x23 mm); FUMAX, China (tape 18x23 mm); Hydrotite CJ-0720-2K, Japan (tape 18x23 mm).
Additives in concrete for self-tightening of possible cracks in concrete
Russian engineers have developed an additive in concrete that promotes the formation of hydrophobic crystals. The additive "works" only in the flooded structure in contact with moisture.
By adding an additive to the concrete used to fill the pool bowl or foundation, the developer insures himself against the appearance of small and medium cracks, which subsequently turn into major problems.
At this point in time, this unique additive in Russia is produced by ONLY one company "PENETRON" ("Penetron Admix").
Other Methods for Effectively Filling Cracks in Concrete Structures
Effective sealing of cracks in highly loaded concrete structures is carried out by injection of low-viscosity synthetic resins into defects.
To do this, diagonal holes are drilled along the defect at an angle towards the crack. Bushings are inserted into the holes obtained, through which a repair compound, resin, is injected with special equipment. This technology ensures high strength and durability.
The task of repairing cracks in concrete at home is solved in the following way. A liquid cement paste is prepared, epoxy resin with a hardener and proprietary repair mixtures are added to it.
This composition can be used to repair cracks less than 4 mm wide. For defects larger than 4 mm, a proprietary composition is used, consisting of 1 part of cement, 3 parts of water, 3 parts of sand and PVA glue.
You can close up a hole in the wall in different ways, it depends on the surface on which the hole appeared and on the size of the hole itself. Let's consider several variants of this problem.
First you need to prepare, regardless of the type of wall. First of all, you need to clean the edges of the remnants of whitewash, plaster and paint. If the wall is wallpapered, cut out the rectangle with a sharp knife.
Hole in a brick wall
How to fix a hole in a brick wall? Putty, polyurethane foam or cement.
Big
- Clean the hole with a vacuum cleaner from dust;
- The inside of the hole should be well wetted with a brush or foam rubber, let the water soak in. This prevents a strong retraction of water from the repair solution;
- If the hole is more than 5 cm, then you need to pick up a piece of stone or brick in size and put it into the hole with cement mortar. The remaining gaps can be repaired with plaster and allowed to dry;
- Apply with a large spatula finishing plaster and try to level this place by capturing a little of the whole wall;
- When the solution dries well, clean the place of the hole with an abrasive mesh;
- Now you can paint or glue the wall.
Small

You can repair a hole in a medium-sized wall using mounting foam:
- The excess is cut off with a knife, after drying, the hole is puttied;
- Holes less than 5 cm (for example, after removing an unnecessary hook or dowel) are sealed with high-quality putty or any kind of gypsum (alabaster, satengypsum, isogypsum);
- It is necessary to choose a screw to fit the size of the hole and use it to expand the hole so that water and putty penetrate it well;
- With a spatula, we apply putty to the damaged area, rub it deep into the hole, and then level the surface;
- We wait until it dries, then carefully clean it with an abrasive mesh;
- We paint over this place to match the wall or glue it.
How to fix a hole in drywall on a wall
Such damage occurs most often due to the fragility of the finishing material. How to close a hole in a drywall wall: drywall and putty.
Big
- Make a rectangular or square marking on the damaged area (using a square);
- A damaged piece is cut out with a knife on it (at an angle of 45 degrees);
- WITH inside sheets of wood at the top and bottom are fastened with self-tapping screws (you can use a whole plank, then a powerful screw is screwed into its center as a handle, which is removed after fixing with self-tapping screws);
- A drywall patch is cut out, the edge is cut at an angle to fit perfectly into the hole in the wall;
- The cut patch is applied to the wall and fastened with self-tapping screws to the bars;
- Processing of seams - they are sealed with sickle tape, puttied and rubbed with an abrasive mesh;
- Puttying, grouting and painting the entire patch.
You can repair a hole in the wall easier. If the drywall is close to the wall, you can skip the support and screw the patch directly onto the wall. Or an even simpler way: the patch is placed with plaster directly on the damaged area, while it is not cut out. The edges are fixed with adhesive tape.
Small
How to close a hole in the wall up to 5 cm from a dowel or nail? 2-3 layers of putty are simply applied to this place.
Concrete wall

How to fix a hole in a concrete wall? Cement mortar, gypsum and putty or mounting foam. The sequence of work is the same as when sealing a hole in a brick wall.
Big
- We clean the recess or hole with a vacuum cleaner;
- With a brush, we moisten the hole inside well;
- We put a piece of stone or brick inside the hole, “sit” them on the cement;
- From above we eliminate the defect with plaster;
- When everything is dry, apply the finishing plaster (with a large spatula) and level the problem area, capturing even sections of the wall;
- We wait for the complete drying of the layer and clean it with an abrasive mesh;
- We make painting or pasting.
Small
- When the depth does not exceed 5 cm, we close the hole with a spatula with gypsum and let it dry;
- If the gypsum cracks during drying, the cracks must be repaired again by reinforcing with construction mesh.
How to fix a crack in a wall

Now that the hole issue is resolved, let's move on to the next one. possible problem- sealing a crack in the wall.
Repairing cracks in brick walls
Produced after the gap will not increase. To do this, you need to wait for the shrinkage of the house or repair the foundation. The control is carried out by gluing paper "beacons" and see that they remain intact.
The direction of the cracks is important: vertical openings can be sealed with mounting foam or putty, and horizontal ones can only be filled with strengthening material so that the wall does not settle further.
- A small crack is sealed with cement mortar, the edges are first knocked down with a hammer (for better adhesion).
- Medium gaps (5-10 mm) are also eliminated, only fine sand is added to the solution.
- Large cracks are considered critical and are eliminated either by dismantling the damaged masonry, or special locks with anchors are placed on the gap sealed with cement.

Strengthening the wall with plank and anchors
In plasterboard walls
If the crack is very narrow, it expands to 3 mm. The old coating is cleaned off, the area is wetted warm water and then the gypsum composition is applied. You can use a special synthetic putty, it has excellent elasticity, which reduces the risk of recurrence of the gap. Putty is used moisture resistant. To prevent cracks from reappearing, a construction mesh is used.
In concrete walls
It is usually performed in the usual concrete mix. Before this, the chipped surface is lubricated with PVA building glue (diluted).

Now appeared new technology: with help special device cracks under great pressure filled with mortar (acrylic gel with epoxy resin), and they crystallize the free space inside the crack.
How to fix a crack in a brick wall? Brick is the most common construction material used to build buildings. But the downside is the cracks in the wall. brick house that appear during operation.
Eliminating such a shortcoming is not difficult. In this case, it is necessary to determine the causes of cracks and choose the right one. technological process which is recommended to learn from this article.
Tip: To detect cracks in brickwork you should visually inspect the entire house. Pay attention to the direction of the expansion of the split.
The direction of the cracks is influenced by the loads on the walls.
For example:
- From the vertical load, the expansion goes down.
- When the foundation subsides, the cracks expand upwards.
- From the wear of the material, numerous cracks open closer to the surface.
Cracks can be:
- constructive. Such causes of cracks in brick walls arise due to:
- error in calculating the depth of the foundation;
- incorrectly selected load on the walls;
- non-compliance with the technology of building a house;
- the brand of masonry mortar does not correspond to the current loads;
- lack of wall reinforcement.
- Temperature. Such defects are formed from:
- freezing of the foundation;
- temperature fluctuations.
- Shrink. Their reasons may be:
- pit near the house;
- The building is erected on bulk soils.
- Deformation. Wrong material selected.
- From wear. All materials have a certain lifespan.
In appearance and depth, cracks are:
- Vertical.
- Horizontal.
- Inclined.
- Direct.
- Curvilinear.
- Closed or not going to the edges of the wall.
- Through.
- Surface.
According to the size of the gap are divided into:
- Wide, more than one centimeter.
- Medium, from 5 to 10 millimeters.
- Small, up to 5 millimeters.
How to check cracks for stabilization of their further expansion
Tip: Repair of cracks in a brick wall should only be started after the process of its further increase is completely suspended.
The elimination of cracks in the brick walls of the house is carried out after the final determination of the causes of their occurrence and the end of the shrinkage process. To understand whether the cracking process has ended, it is necessary to conduct a special rupture test.
This is done with:
- Gypsum beacons.
- Lamellar beacons with a special scale.
You can define stabilization:
- Sticking paper on the crack.
- Applying a cement strip.
After a certain time, the remaining intact paper or strip indicates that the sealing of cracks in the brick wall can be performed. When continuing the deformation process, it is necessary to wait for its completion. At this stage, it does not make sense to carry out any repair work, the crack will reappear.

How to repair cracks in a brick house
Before closing a crack in a brick wall, it is necessary to prepare tools and materials.
They may be:
- A small spatula, for the convenience of mixing the solution.
- Mixture container.
- Construction master.
- Hammer.
- Brush.
- Skarpel, for processing stone.
- Putty knife.
- Mounting foam.
- Cement.
- River sand.
- Rolled metal.
- Fittings.
- Dowel.
- Anchor bolts.
Depending on the type of crack in the wall of a brick house, the option of sealing it is selected. For shallow cracks up to 5 millimeters wide, a strong mortar of cement or gypsum is used.
In this case, sealing the crack with your own hands is performed in the following sequence:
- Held preparatory work. Cracks are cleared of:
- garbage;
- mud;
- dust.
- The cavity is abundantly wetted with water and left to dry.
- The crack is treated with putty or mortar.
- Reinforced tape is laid.
- A layer is applied to the tape cement mortar or putty.
To seal cracks up to one centimeter wide, the instruction suggests:
- Remove cracked masonry sections.
- Clean repair areas from debris and dust.
- Surfaces should be reprimed (see).
- Drill holes for the dowels in increments of 25–50 centimeters.
- From above, fix a metal mesh with a mesh size of 5x5 millimeters with screws.
- Cover the grid with plaster cement mortar, adding a small amount of sand to it.
- Finishing material is applied.
The sealing of wide cracks is carried out in the following sequence:
- Cracked bricks are removed from the outside of the wall.
- The place of the defect is cleaned with a construction scarpel from any dirt and dust.
- New bricks are being laid on the cement mortar.
- Such cracks can be eliminated using a metal anchor, as in the photo, which is a plate with two pins or anchors located on it.

Tip: Cracks more than one centimeter wide are critical defects in the walls of the house that require special methods of elimination.
To eliminate them, you will need:
- Clean the area of damage from contamination.
- Fill the defect with mounting foam.
- Leave until completely dry.
- Cut the foam to a depth of two centimeters.
- Fill the resulting recess with a cement-sand or cement composition.
- Apply finishing material.
If it is not possible to disassemble the cracked brickwork of the building, you can do this:
- The repair site is cleared of debris and dust.
- The cracks are sealed with cement mortar.
- T-shaped strong anchors are driven into the cracks, which are necessary for fixing with dowels on both sides of the gap. They are attached to the surface of the wall of the building.
How to close through cracks
To eliminate such defects, you can strengthen the walls.
In this case:
- Preparatory work is underway: damaged areas are cleaned of old coatings, dirt and dust.
- The crack is wetted with water and given time to dry.
- The gap is filled with cement mortar and gravel of a small fraction.
- If necessary, steel plates are fixed with anchors and dowels.
- Produced Finishing work damaged sections of the walls of the building.
Through cracks can be eliminated with the help of metal brackets.
For this:
- Prepared:
- metal lining - two pieces;
- tightening bolts, they will be passed through the wall.
Tip: To prevent further opening of the crack, steel staples should be hammered into the wall on both sides of it. Bend their ends to the wall and fix with bolts.
- Before fixing, the bolt holes are filled with cement.
- Large defects are eliminated by installing several brackets.
- The crack itself is sealed with cement in the same way as in other cases.
How to eliminate gaps in brick walls and dangerous cracks
For cracks that appeared on the piers of the outer brick walls, a metal clip is used. Depending on the width of the pier, the dimensions of the clip and its design are selected. To eliminate serious cracks that threaten to destroy the house, metal log rods are installed on both sides of the wall. This will allow the building to be covered with a powerful steel bandage.
How to eliminate foundation flaws
Cracks can often be caused by flaws in the foundation.

When strengthening the foundation, further formation of cracks and their spread can be excluded.
For this:
- A trench is dug along the area of the crack, not thicker than the monolithic base, but slightly below the bottom edge.
- The place of the crack is cleaned, freed from poorly retained elements, cement mortar, and slightly enlarged.
- The site is drilled under the reinforcement vertically and horizontally.
- Anchors are woven with reinforcement and welded. In this case, the distance between the reinforcement is from 0.6 to 1 meter, which depends on the size of the crack. The created structure will become a frame connecting the house with a new reinforced base.
- Mounted wooden formwork.
- Concrete is being poured.
- Settled to dry, approximately 28 days.
- A blind area is being made.
Paper beacons check the elimination of the cracking process.
After the restoration of the foundation, the walls are repaired:
- Destructions up to 5 millimeters are sealed with a cement mortar, the edges are beaten, cleaned, wetted so that they adhere well to the mortar.
- Cracks larger than one centimeter are sealed with cement and sand in a ratio of 1:3.
With large gaps in brick walls, emergency measures will be required:
- Brickwork is dismantled from above, damaged parts are removed. New bricks are laid with a lock, reinforced with metal rods, profile corners or metal strips.
- When the masonry breaks, metal strips are taken, their ends are bent into the masonry and squeezed out with bolts, anchors and screws.
Tip: If it is impossible to use such methods, crushed stone with cement should be poured into the gap. At a distance of about 25 centimeters on both sides it is necessary to drive in T-shaped anchors. The elements are connected with metal strips.
- Deep cracks that cannot be completely filled with cement are filled with mortar injection. To do this, holes are made with a diameter of more than 25 millimeters in increments of 20 centimeters along the perimeter of the gap. A tube with a solution is inserted into the holes. Through it, a sealant is injected into the gap with a pump or a vacuum syringe, carefully filling the voids.
With very large cracks in the brick walls, if the masonry is cracked through, repair work is carried out from the outside and from the inside.
Wherein:
- The site is cleaned, its edges are processed.
- The crack is deeply moistened, filled with gravel, cement.
- If necessary, steel plates are installed, which are fastened with dowels, anchors.
- After drying, the wall is sealed with plaster or other cladding.
How to strengthen brick walls

Tip: If there are no results after the repair work of the walls, it is necessary to make a partial re-laying.
For a guaranteed fortress of a cracked brick wall, it is desirable to strengthen it from the inside of the building.
This implies:
- Crack patching.
- Imposing a lock on it, or a metal profile.
- The lock is attached to the wall with anchors, and the gap is blocked by it across, which will prevent its increase in the future.
- Repairs can be made with metal brackets, their ends must go into the wall to a depth of at least 1/2 of the thickness of this wall, in which holes for the brackets should be drilled in advance.
- In a day, such a repaired wall can be put into operation. But in any case, it cannot be heavily loaded - the wall will acquire full strength only in a month.
If cracks appeared due to improperly poured foundation, best solution the base will be reinforced with an auxiliary concrete belt.
For this:
- A trench is dug around the entire perimeter of the house with a depth greater than the depth of the foundation.
- An auxiliary belt will fit in it.
- In order to prevent the formation of further cracks in the masonry, the base is poured using the appropriate technology.
What can be cracks in brick walls, their cause, methods of elimination can be found in the video in this article. Cracks in masonry are very common. The price of solving this problem is different, and it is worth getting rid of it immediately in order to avoid violating the integrity of the structure of a residential building.
The appearance of cracks is one of the most pressing problems of plank floors. Squeaky floorboards, heat leaks, dust and insect infiltration are all backfire such defects, and if measures are not taken in a timely manner, the floor will have to be completely changed. Meanwhile, there are several effective ways close the gaps in the floor between the boards and significantly extend the life of the coating. All of them are quite simple, they do not require special skills, and therefore everyone can do it. So, why do gaps form in the floor and how can they be eliminated?
To pick up best way sealing gaps, you first need to accurately determine and eliminate the cause of their appearance. If this is not done, the result of the repair work will be short-lived and after a while everything will have to be repeated again.
The following factors contribute to the occurrence of cracks:
- natural shrinkage- any wood is subject to shrinkage, only with different intensity. Boards processed in vacuum chambers, almost do not change their geometry during the service life, but ordinary lumber can dry out by 5-10%, or even more, depending on the initial humidity and wood species;
- low indoor humidity- if the air in the house is too dry, the boards will intensively give off moisture and decrease in size. For wooden floors optimal humidity air should be kept within 40-65% at a temperature of 18 to 25 ° C;
- incorrect installation- violation of laying technology leads to loosening of the boards, their subsidence and deformation, resulting in gaps between the floorboards. The most common mistakes are non-compliance with the plane when installing the log and weak fixation of the flooring;
- rodents living under the floor- Mice and rats are able to gnaw through the thickest boards to get into the room. The more active the pests, the more cracks and holes they will make, and it is most difficult to eliminate such damage;
- laying raw lumber- drying of the boards during the operation of the floor almost always leads to significant deformations of the flooring and the appearance of gaps between the floorboards. That is why, when choosing, you need to give preference to well-dried, even boards with relative humidity 8-12%.


Depending on the number and size of gaps, as well as general condition wooden elements, repairs can have varying degrees of complexity - from repairing individual damage to a complete replacement of the flooring.
Troubleshooting Methods
The choice of termination method should be approached thoroughly, taking into account the cause of the damage, the location of the cracks, as well as the labor costs and time it takes to repair. Equally important is the financial aspect, because the larger the work, the more funds you will need.
| termination method | Description |
|---|---|
| It is used to eliminate small cracks and cracks in the floor. Adhesive tape is needed not simple, but reinforced, 50 mm wide. The floor is cleaned of dirt, degreased and dried, after which the gaps are sealed with adhesive tape, the edges of which are fixed to the floor with a stapler. The method is very simple and budget, takes a minimum of time. Minus: the floor with tape stripes does not look aesthetically pleasing, so carpet, carpet or other rolled covering must be laid on top |
| It is used to eliminate gaps between the floor and walls resulting from the drying of wood. It is carried out after dismantling the skirting boards and cleaning the gaps from debris and dust. If the slots are too wide, pieces of foam are placed in them before foam is blown. After the foam has dried, its excess is cut off at the level of the floorboards, the cuts are puttied so that dust does not accumulate in the pores of the material, and the skirting boards are installed back. The method is convenient, does not require much physical effort, and takes a little time. Cons: high foam costs, fragility |
| This option is suitable for small gaps between the floorboards. Only special wood putty is used. The composition is applied with a spatula, carefully filling all the recesses and gaps, after drying, the surface is polished. The method is fast, does not require special skill, and is quite affordable at a cost. The downside is fragility - putty tends to crack and crumble, especially with heavy loads on the floor |
| Homemade repair compounds are often used to seal wide gaps and cracks in the floor. Traditionally, a mixture of carpentry glue and sawdust is used, which is applied with a spatula to problem areas, tamped into recesses, and polished after drying. To seal cracks gnawed by mice, cement and broken glass are added to the adhesive solution. To speed up the curing process, epoxy is used instead of wood glue. This method of termination is very affordable and durable, moreover, it is easy to perform. |
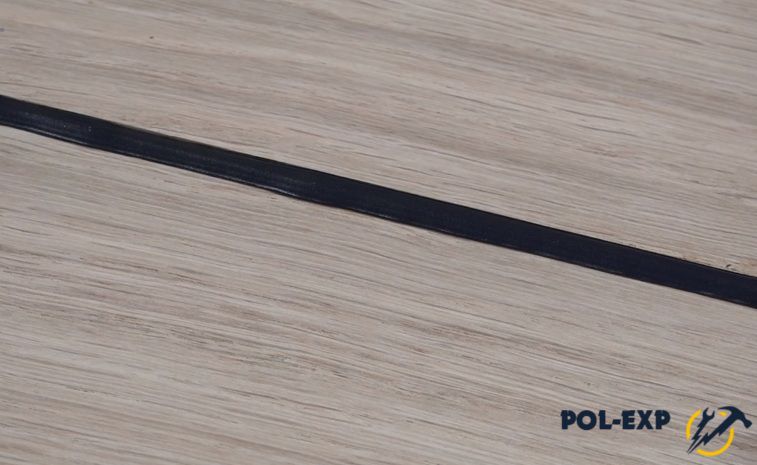
| With wood sealant, both narrow and wide gaps between floorboards can be easily sealed. The nozzle in the form of a syringe allows you to effortlessly evenly distribute the composition and fill all the recesses. Due to its elasticity, the sealant will not come off the boards during temperature deformations and will reliably serve for more than one year. To mask the repaired areas, putty is applied over the sealant to match the color of the coating. The method is convenient, simple and durable, material costs are low |
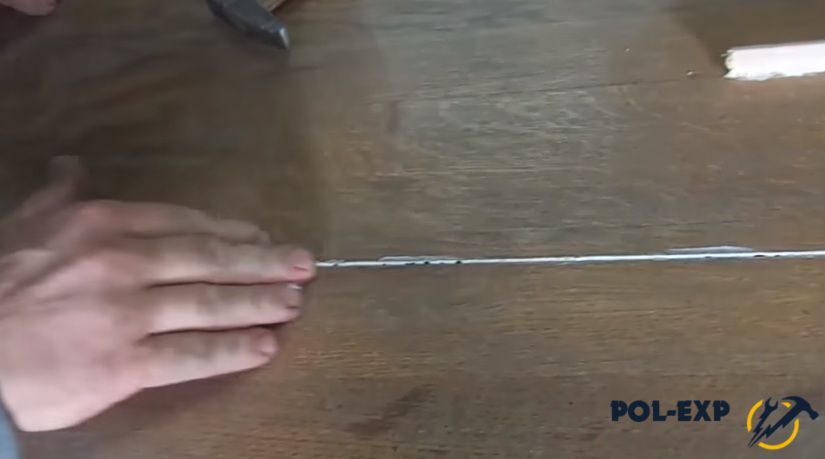
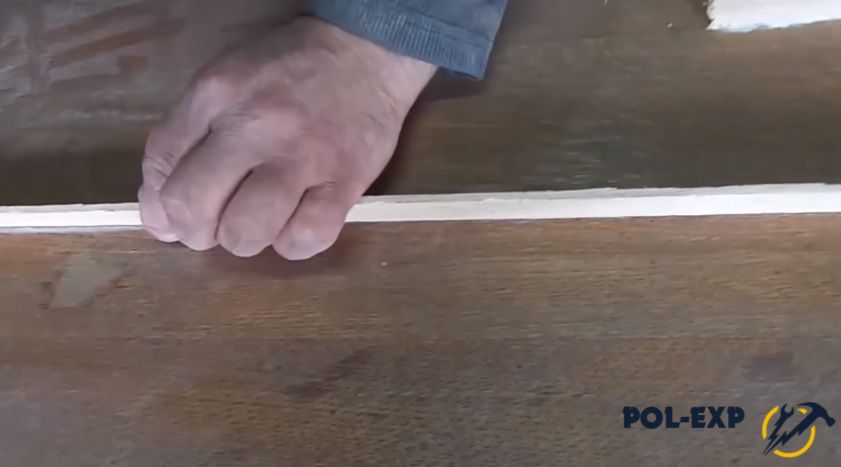
| This method allows not only to eliminate cracks, but also to effectively get rid of squeaks in the floors. IN construction stores a special synthetic cord of various thicknesses is sold, which is selected according to the width of the gap. Instead of a cord, you can use a regular hemp rope. To seal the defect, the cord is liberally lubricated with carpentry glue, laid on the floor and tightly hammered into the slot with a corner of the spatula so that 2-3 mm remains from the cord to the floor surface. This recess is filled with a mixture of sawdust and glue, leveled, and polished after drying. Similarly, you can use sanitary tow. The method is reliable, inexpensive, although a little laborious |
| Used to fill wide gaps in the floor. Wooden slats they are hewn in the form of wedges according to the size of the gaps, thickly coated with glue and hammered into the gap with rubber or wooden mallet. After the glue dries, the part of the wedge protruding above the floor is removed with a planer, the working surface is polished and painted. One of the most practical ways is inexpensive and durable. Cons: trimming and fitting take extra time, some effort and skills in working with carpentry tools are required in the process |
| It is used in case of significant drying of the floorboards and the appearance of wide cracks in the floor. To do this, the boards are carefully dismantled and then laid again, compacted with wooden wedges, clamps, a jack or a special lever. As a result of tightening, additional 2-3 floorboards will be needed, depending on the degree of floor shrinkage. The method is characterized by high reliability, durability and low cost. The disadvantages include the duration of the process and its complexity. |
| It is used in cases where there are many gaps and appearance The floor leaves much to be desired. Plywood is laid on the floor so that there are gaps of 1-2 mm between the sheets, and the joints in each row are displaced by at least a third of the sheet. The sheets are fixed with self-tapping screws, sinking the hats into the tree, then the recesses are putty, the flooring is polished and laid top coat. This method allows not only to close all damage, but also to insulate the floor, as well as level the base under decorative coating. Cons: high material costs, labor intensive work |


All the described methods have been repeatedly tested in practice and are widely used by home craftsmen. And now let's take a closer look at the most popular options for sealing gaps: what tools to use, how to properly prepare the surface and workflow technology.
Gap sealing technology
Most often, gaps are eliminated with the help of sealants or putties, which are presented in a large assortment in hardware stores. Like more a budget option many prefer embedding with wooden wedges.
Sealing cracks with sealant
The effectiveness of this method directly depends on the type of sealant. In living quarters for wooden surfaces silicone or acrylic based formulations are used. The former have greater elasticity, and therefore better withstand the deformation of the coating when changing humidity and temperature conditions. But they publish bad smell during application and are unsuitable for subsequent staining, so that in order to mask the treated seams, it is necessary to initially buy a composition that matches the color. Acrylic sealants can be puttyed and painted, have no smell, are applied easily and quickly. Their disadvantage is the tendency to shrink and lower elasticity.
Advice. Acrylic sealant is best suited for heated rooms with little fluctuation in humidity levels. For unheated rooms, or irregularly heated, it is worth choosing a silicone-based composition.

In terms of quality, Ceresit, Tytan, Moment and Bostik sealants are considered the best.

In addition to the sealant, you will need a narrow and wide spatula, a clean, dry rag and a protective impregnation, such as parquet oil, for work.

The floor is well cleaned of dirt, Special attention giving cracks. If necessary, the surface is degreased or washed with water, after which you should wait for the wood to dry completely.
Carefully cut off the tip of the nozzle along the width of the gap between the boards, insert the tip into the gap and squeeze out the sealant in an even continuous strip.

After filling the cracks in a certain area of the floor, they take a narrow spatula and level the composition by running the tool along the cracks. The trowel blade should be held at a slight angle to the surface to remove the sealant flush with the boards and not leave any projections or indentations at the seams.
Step 4 After leveling, wipe off excess mixture with a clean, dry cloth.
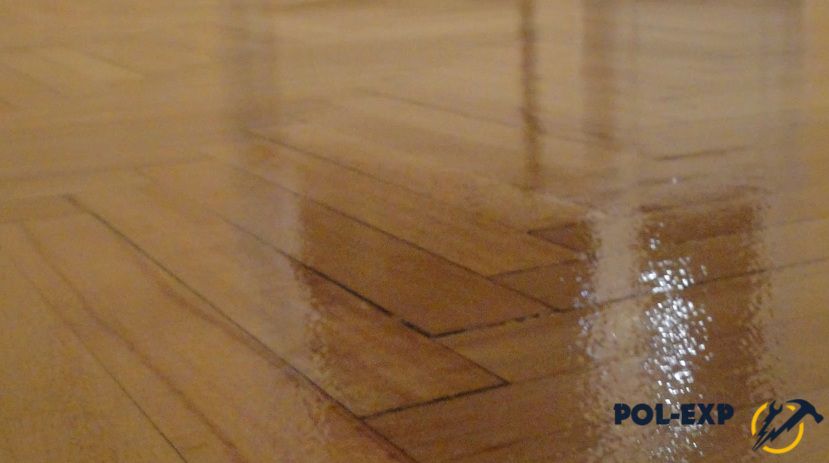
A small amount of parquet oil is poured onto the floor and spread with a wide spatula over working surface. The movements of the spatula should be arcuate, across the boards, so that the protective composition fills the smallest depressions with high quality.


Now it remains only to wait for the surface to dry. If everything is done correctly, the cracks in the floor will not bother you for a long time.
Elimination of cracks with putty
What you need for work:
- putty on wood;
- wide spatula;
- Sander.
| Step, No. | Procedure |
|---|---|
| The floor is vacuumed or wiped with a well-wrung cloth to remove dirt. |
| Stir the putty and pour a small amount onto the floor. |
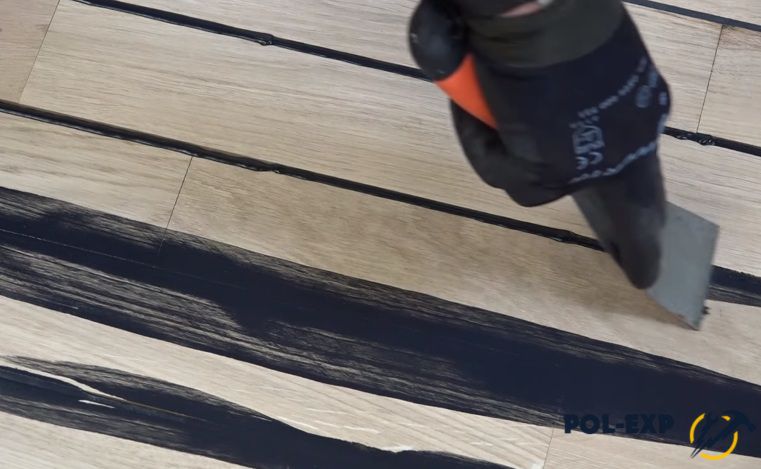
| With a spatula, gently spread the mixture over the floor, starting from the corner. The spatula blade is pressed firmly against the surface and drawn along the junction of the wall and floor across the floorboards. The floor is treated with wide stripes, moving from the far corner to the doors. The putty layer should be as thin as possible so that the texture of the wood shines through. The main thing here is to fill the gaps, so the putty is carefully rubbed into the gaps and recesses, and the excess is removed with a spatula. |
| After the process is completed and the putty has dried, the floor must be treated grinder. If the room is small, grinding can be done manually. |
| Now it remains to vacuum the floor and cover the boards protective composition. If there are few cracks, it is not necessary to putty the entire surface. In this case, the composition is applied small rubber spatula exclusively on the crack, carefully filling all the recesses. |


Sealing a gap with a wooden lath
In the process of work you will need:
- thin wooden rail;
- a large awl or screwdriver;
- PVA glue;
- hacksaw with fine teeth;
- hammer;
- putty on wood;
- sandpaper.
The gap between the boards and the floor surface is cleaned of dirt and dust.

The tip of a screwdriver or an awl is inserted into the slot and is forcefully drawn several times along the entire length of the board so that the rail fits more tightly into the gap.
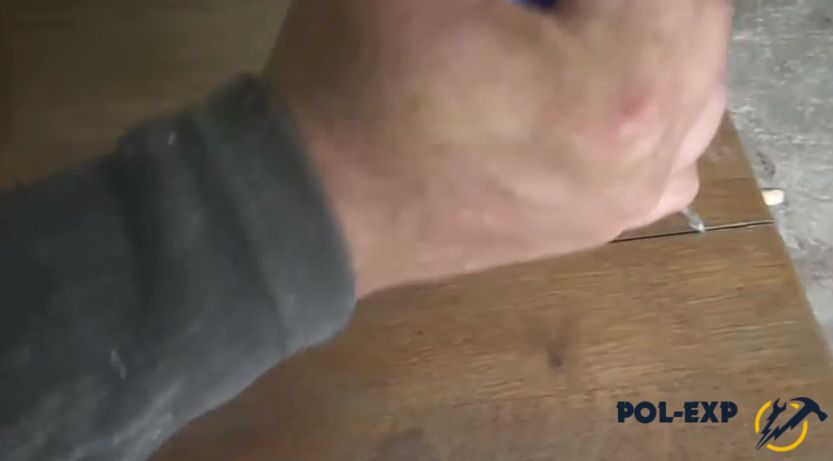

Step 4 They take a rail, insert it with an edge into the slot and knock it out with a hammer. For convenience, the lower edge of the rail can be hemmed in the form of a wedge - so it will go deeper between the boards and fill the gap more densely.

Advice. If wooden mallet no, you can knock out the rail with an ordinary hammer, turning it on its side. You can also use wooden block as a lining - so on the rail there will be no dents from the hammer.
When the glue dries, the protruding part of the rail is cut off with a hacksaw flush with the surface, then cleaned with a planer.


The treated area is covered with putty to eliminate the smallest defects, then polished with fine-grained sandpaper.

After that, it remains to clean the dust and treat the boards with any protective compound - oil, varnish, stain or floor paint.
Video - How to close the gaps in the floor between the boards


