Finally, this important decision is made - you decide to make drywall walls with your own hands. But where to start and how to avoid critical mistakes? About,
what materials and tools will be needed, and how to properly carry out the work at each stage of the repair, let's talk in more detail.
To sheathe walls with drywall, you will need the following tools:
- tape measure and ruler;
- sharp knife or saw for drywall work;
- perforator or drill;
- metal scissors;
- screwdriver;
- level and plumb or laser builder.
To make a frame from a profile, you will use:
The most commonly used fasteners for the installation of gypsum board structures
- profile: carrier (width 60, height 27 millimeters) and guide (width 28, height 27 millimeters);
- direct suspensions for the profile (read about fasteners when working with plasterboard);
- dowels;
- "bugs" 4 mm, they are also self-tapping screws for metal;
- self-tapping screws 25 mm for drywall sheets.
The approximate cost of materials for finishing walls with drywall in a room of 20 m2 (5 by 4, height 2.5 m):
- 15 sheets (width 1.25, length 2.5 meters) for 215 rubles - 3225 rubles (Knauf);
- bearing profiles 3 meters long, 68 rubles each - 80 meters (40 centimeters first indent, distance between the following profiles 60 cm) - 5440 rubles;
- profile guides 3 meters long at 52 rubles each - 90 meters (distance of 60 centimeters) - 4680 rubles.
Preparing walls for subsequent installation
- Immediately before starting work, the walls are cleaned of old wallpaper and lagging plaster. Dirt and dust (if any) is erased. On not smooth walls Oh
beacons are installed. - Then markup is made to place the guides. The most commonly used ruler and tape measure, as well as the building level and plumb. But more convenient and
modern will be the use of a laser builder.
This handy tool will help to make walls from drywall with your own hands:
- projections of planes simultaneously on four walls of the room;
- projection of a horizontal line and its intersection with vertical lines;
- projections of points to the ceiling up and to the floor down (plumb).
All angles are measured with a laser level, and the lines are marked with a chalk cord. All construction lines must be level with respect to the floor!
Installation and installation of a frame from a profile for plasterboard walls

The framework consists of guides (horizontal) and bearing (vertical) profiles. Plasterboard sheets are attached to the latter with self-tapping screws.
The times when drywall was attached directly to walls and ceilings are gradually becoming a thing of the past. Frames made of
metal profiles or wooden slats and bars.
Metal is more commonly used, since it does not absorb moisture, is not damaged by fungus and has a longer service life.
The frame consists of guides (horizontal) and load-bearing (vertical) profiles (you can read more about mounting the frame). Plasterboard sheets are attached to the latter with self-tapping screws.
- Scissors for metal cut out parts of the frame.
- In place of the doorway and windows, the required dimensions (openings) are left.
- A horizontal line is marked along the bottom plinth.
- Near the ceiling, exactly the same line is drawn (built relative to the line below using a plumb line or a laser builder). By these marked by the floor and
near the ceiling, guide profiles are attached to the lines, to which the vertical racks of the frame (bearing profiles) will be mounted. - The gap between the fasteners to the wall is an average of 60 centimeters. The whole structure is attached to the walls with dowels (size for concrete 4 mm). For each
profile requires three dowels. If it is long, then more than three dowels are used.
Then vertical racks (bearing profiles) are attached with metal screws.

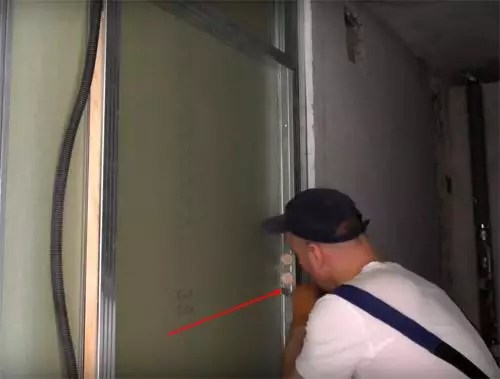
This is what a plasterboard wall looks like.
The distance between the profiles is as follows:
- 20-40 centimeters from the wall to the first profile;
- 60 centimeters between subsequent profiles.
Bearing vertical frame profiles always have C-shape cuts and additional stiffening ribs. Guides are horizontal U-shaped and they are designed for a smaller load.
Three profiles should be installed on one sheet of drywall (two at the edges, one in the center).
Drywall technology

Scheme of connection of the wall and guide profile when mounting the frame for drywall
Drywall with a thickness of at least 12.5 millimeters is used on the wall.
- Cutting drywall sheets is quite simple. They should be placed on a flat surface and drawn along the marking line with a sharp knife. Then leaf
bent over the notch and cut through reverse side. Sections are processed with a rasp for perfect smoothness. - Sheets cut to size are attached to the frame on the wall using self-tapping screws. It is better to place sheets in a checkerboard pattern.
- A screwdriver is used to tighten, it will help to cope with the work faster.
- The distance between the screws is 25 centimeters (indentation from the edge is 3 centimeters). Hats should not be sunk too deep into the thickness of the sheet - this can
lead to breakage. - All joints are sealed with a sickle and covered with putty.
On a note.
To level the walls with plasterboard, you need at least two, and preferably three people. This material has increased fragility and it is not possible for one person to lay it on the frame correctly.
If you decide to install walls using a wooden frame

- For rooms with low humidity, use wooden frame made of bars (size 60 by 40 mm).
- First, horizontal rails are attached.
- Then, with the help of self-tapping screws, vertical bars are mounted to them (previously cut out in the guide rails according to the marking of the recess for
vertical posts). - To align the walls, the verticality of the frame must be checked by a level! The pitch of the fasteners is 15 centimeters.
- Wood is treated with special compounds that protect against mold and dampness.
Wall cladding with plasterboard

For smooth and dry walls, adhesive fastening can be performed.
- Ten-centimeter strips of drywall are attached to the walls (parallel to the ceiling and floor). used
glue "Perlfix" (Knauf). - Then vertical strips (60 centimeters wide) are glued to them.
- Each sheet is smeared with glue as follows: glue drops are located at a distance of 25 centimeters along the perimeter, and 35 centimeters in the center.
- Then the sheet is applied to the supporting frame and slightly pressed.
Video: how to glue drywall on walls
How to insulate walls with drywall?
- To keep the heat in the room under the drywall, foam sheets are mounted. They are installed with
using dowels with "umbrellas" (5-6 per sheet) or glue. - The gaps between the foam are blown out mounting foam. Top overlap fastened with rails
polyethylene film. This is a budget option. - More expensive is the additional foam sheathing with any flexible fiberglass insulation.
(for example, Ursa 5 cm thick, sold in
rolls 1.2 meters wide and 6 to 14 meters long).
Insulation will help not only protect the apartment from heat loss, but also enhance sound insulation and thereby add comfort to housing.
Problems of wall insulation in this way
However, many builders are against internal insulation plasterboard walls. The colder it is outside, the more the wall will freeze.
Condensation will appear near the heater and this will lead to its getting wet. Over time, mold will appear under the foam, which will not have the best effect on
residents' health. In addition, exterior walls without access to room heat begin to collapse at an accelerated pace.
Ultimately, each owner decides on his own whether to make a choice in favor of internal insulation or to put up with the inevitable loss of heat in
cold season.

To keep the heat in the room under the drywall, foam sheets are mounted. They are installed using dowels with "umbrellas" (5-6 per sheet) or glue.
There are a number of ways to improve the quality of internal insulation:
- the insulation should be as close as possible to the wall;
- also it should not have high vapor permeability;
- high quality film is used for insulation, all joints are carefully sealed with glue;
- walls are pre-treated with a composition against the appearance of fungi and mold.
Important points when working with drywall
- First, all whole sheets are attached. And only after that the inserts are cut and screwed.
- The distance between the screws in the center of the sheet can be extended up to 30 centimeters.
- Self-tapping screws should be slightly buried in the sheet (no deeper than 1 mm).
- On the circumference of the doorway, it is inserted into the frame wooden beam OK. This will secure the door frame.
- Sheets are attached only if they are sure of a uniform fit to the profile. Skews are fraught with sheet breaks.
- The sheets have a slight narrowing at the edges - this is a margin for applying putty. Sheets are placed narrowing outward, that is, facing the room.
- The first sheet is superimposed so that its edge covers half the width of the vertical profile.
For all the seeming complexity, wall cladding with drywall sheets is quite simple to perform. The main thing is not to be afraid to make repairs with your own hands and not to make a mistake during preliminary calculations.
A popular proverb says - "Who does not take risks, he does not drink champagne." It applies to some extent to repair work. Confidence in your own abilities!
Video: installation of a frame for drywall and walls
From the author: Welcome, dear reader of our repair and construction portal. Since you have landed on this particular page of the site, then most likely you are thinking about redevelopment of the apartment or maybe you want to divide the room into several parts.
Or maybe you have a need to build an arch or build a wall of plasterboard ( drywall sheets). It is also possible that you need to form separate premises in a new building, into which you were recently lucky enough to move. One way or another, you are looking for the answer to the question of how to make a drywall wall. Well. Here you will receive it.
Why drywall?
Before we figure out how to do it yourself, I propose to consider one important question. Very briefly. Why GKL? Why is he so good? I have heard the opinion that this material is not the best to build a wall. Basically, this position is held by people, so to speak, of the “old school”, who perceive drywall sheets as a purely finishing material.
But this is not entirely true. Yes, GKL is also used for decoration, but it will also fit very well as a material for building walls. Moreover, in many cases this is the only correct solution. So, why should you choose GKL? Now we will briefly name the main characteristics this material so that you can cast aside all doubts:
- strength/durability. Walls built from GKL are no worse than those made from brickwork. You won't be swinging a sledgehammer around your house or throwing weights at the wall afterward, will you?
- limitless scope for creativity. Absolutely everything can be created from this material: you can design openings of various sizes, ledges and niches, recreate other structurally expressed elements;
- health safety. The material is environmentally friendly and does not cause allergic reactions of the body;
- versatility/practicality. Plasterboard walls can be erected anywhere - in any part of an apartment or house, even in rooms with high humidity. To do this, there is a special moisture-resistant drywall, which you can buy at a regular hardware store;
- availability. GKL does not apply to expensive building materials and has become an integral part of almost any repair;
- ease installation work. Yes, you have to try, but if you know the sequence of actions and have the necessary tools, then even a person who has no experience in repair will cope with the work.
I think we have given quite weighty arguments in favor of drywall sheets. In a word, GKL is an excellent material for zoning the space of a residential (and any other) room.

What you need to work
In this section of our article, we will find out what else, besides the GCR, we need to do the job. First of all, we need to build a frame from profiles, which will serve as the "skeleton" of our wall or wall.
As a rule, two types of profiles are used to build a wall:
- D - small profile. It is needed in order to form a plane on which it will be subsequently;
- W - large profile. With it, a frame is built.
In addition, for each of the main types presented, there are:
- C - support profile;
- U - guide profile. In fact, this is a variation of the U-shaped profile.
As a result, we get the following combinations:
- CD - 60x27mm - this is the main element of the "skeleton";
- UD - 28×27mm - guide for CD;
- CW - 50×50/50×75/50×100mm - rack profile, the purpose of which is to form a frame;
- UW - 50x40/75x40/100x40mm - guide for CW;
- UA - 50x50/50x75/50x100mm - in fact, the same CW, only additionally reinforced and more durable.
To build a wall up to 10 cm - you should use only CW and UW. If the wall should be more “serious”, if it is planned to lay communications in it, then you should resort to using CD and UD. On each side of the wall, two guides should be mounted, running parallel at the distance from each other that you previously outlined.
To fix the profile in the frame, we need a special suspension with a universal connector. In the people, such a connector is called a "crab". But sometimes you can do without it.
Self-tapping screws should be used to fasten the frame elements. We will also need self-tapping screws for metal (3.5 × 35 mm, equipped with a countersunk head) to attach the GKL to installed frame. We will also need dowels (of course, with self-tapping screws) to fix our frame to an existing wall.

Now about the drywall sheets themselves. Sheets should be selected with a thickness of 12.5 mm, and please note that there must be a wide chamfer on the sides. We remind you once again that if you are planning installation in rooms with special conditions operation (in the bathroom, in the kitchen), then be sure (!) Choose moisture-resistant drywall. You can easily distinguish it from the usual one: its top coating has green color, while ordinary plasterboard is covered with gray cardboard.

So - let's conditionally draw a line under everything that we said above in this section. We will need:
- actually, GKL;
- profiles CD / UA and UD or only CW and UW, if the thickness of the wall being erected does not exceed 10 cm;
- profile AU, which, however, can be replaced with a wooden beam;
- fastenings (dowels / self-tapping screws);
- tape for sealing;
- metal corner;
- mineral wool to fill the empty space.
Here we have listed the materials necessary for the work. Now here is a list of tools:
- building level;
- roulette;
- rope;
- plumb;
- fishing line;
- rule;
- screwdriver / reverse drill;
- scissors for cutting metal;
- perforator;
- planer for GKL (you will need it when you need to make a chamfer);
- durable knife with replaceable blades for cutting cardboard.

We have decided on building materials and tools. Now something should be said about what the floor and main wall should be like before starting the installation work.
In short, the floor with the wall should be, perhaps, without finishing. So, they should be ready. That is, the floor must be leveled with screed, OSB or in another way, only without flooring. The walls should already be plastered, but without wallpaper.
Now that we have the necessary knowledge, tools and building materials, we proceed to consider the installation process.
Frame assembly process
To begin with, let's look at one common example: mounting the "skeleton" of a wall from UW and CW profiles. The first thing to do is mark the wall on the floor. When marking, you should focus not on one wall, but on two, running in parallel. In this case, the indicators should be averaged. Thus, you will have a chance to avoid a critical curvature.
If you plan to screw the drywall to all the walls, that is, to perform alignment with the help of plasterboard, then you should first achieve right angles after completing the sheathing of the main walls, and then proceed with the construction of the wall.
When you outline the first line, according to which our wall will be located, it should be noted that it is the guide profile that will be equal to it, and not the wall as such. Therefore, the thickness of the drywall sheet, and all the finishes that will subsequently be applied to it, should be added to the mark.
Only after you have drawn a line on the floor can it be transferred to the walls / ceiling. It will help a lot in this matter. laser level. If you do not have this device in your “arsenal”, you can rent it at a hardware store, where there is a tool rental service. Well, or borrow from a friend-comrade.

Now we turn to the installation of profiles. Keep in mind that those profiles that are attached to the main working surface(floor/wall/ceiling) must (!) be mounted with sealing tape. Otherwise, things won't work here.
First you need to fix the rails on the ceiling and floor (UW). They should be mounted with dowels and self-tapping screws: firstly, every 0.5 m, and secondly, along the edges, where the support posts (CW) will be fixed. But racks are mounted not only along the edges of the UW rails. They should also be erected in those places where, for example, there will be a window, a passage or some other opening corresponding to a daring design intent.
It will be more convenient for you to install the profiles first at the bottom, then thread them into the upper guide and mount them. Only mount it exclusively vertically, otherwise the wall will be crooked, and this is not included in our plans. front side the profile must face the inside of the opening. The racks are attached to the rails with the help of "fleas" - self-tapping screws, which we mentioned in the list of necessary tools.
In addition to these strangely named self-tapping screws, we also mentioned the AU profile, an alternative to which can be wooden beams. So, it's time for AU. By using this profile(or bars) we reinforce our opening around the perimeter.
Now we need to mount the CW support profiles. The first must be mounted at a distance of 550 mm from the main wall. The rest - with a step of 600 mm. In this case, it is imperative to check the verticality. To mark the upper border of the passage or the upper and lower borders of the window opening, we use the already familiar UW profiles. In this case, a piece of the profile must be at least 30 cm longer than the width of the opening.
The profiles have side bends. So, on the front side of these bends, you need to put marks 15 cm from each edge. And between these marks, the distance should be equal to the width of our opening.
The side parts of the profiles must be cut strictly at 45°. You should start from the edge - to the mark - and to the very foundation. After the incisions are made, the edges of this profile must be bent to get a kind of U-shape.
We put the resulting U-shaped profile on the side posts of our opening. Then, accordingly, we adjust its position in height. After the profile is put in its position, it will have to be fixed with self-tapping screws. On the horizontal part of our profile, we have formed the so-called "ears", which also need to be fixed. This is how we create the perimeter of the door/window opening.
If you succeeded, then congratulations! This completes the installation of the frame. Now it's time to move on to the installation of direct sheathing, that is, to the installation of drywall sheets.
Installation of plasterboard on the installed frame
The size of drywall sheets that can be found in hardware stores is standard:
- 1.2×2 m;
- 1.2×2.5 m;
- 1.2×3 m.
IN residential buildings ceilings, as a rule, are somewhat higher than 2 or 2.5 m. According to the building standard, the ceiling height in apartments is at least 2.75 m. Accordingly, one whole sheet may not be enough for us. Therefore, you may have to add an additional strip. It could be a cut or even a few cuts. These will definitely appear in the process of work.
Initially, we should mount the sheet, which will be located close to the edge (that is, to the main wall). A chamfer must be separated from it, so a strip with a width of ± 4 cm must be cut along the entire length.
For cutting GCR, a regular knife with interchangeable blades is suitable, like the one shown in the photo below:

At the same time, it is impossible to cut the GKL to the canopy! It must be placed on a flat and hard surface, after which - mark with a pencil or marker the lines along which the incision will be made. With a knife we cut upper layer, and then you should move the drywall sheet to the edge of our support strictly along the notch line, and then easily and gently break off the excess.
Now we need to make a chamfer on the cut edge of the sheet. Now you may be wondering: “why make a bevel if we just cut it off?” - the fact is that a special oblique chamfer is to be made in order to provide a technological (delatation) gap. What kind of gap is this and what is its purpose - we will not consider in detail now. We will limit ourselves only to the fact that we note the following: this gap will help remove excess load from the drywall sheet after installation and application of all finishing materials(primers / putties / wallpapers / paints).
This is where we need a planer for GKL. By the way, such a chamfer should be made not only along the length of the sheet adjacent to the wall, but also on that strip of a piece of plasterboard, due to which the height will be reached (we remember that the height of one sheet may not be enough if the ceiling in the room is higher ). However, this strip for adding height can be mounted both at the top and at the bottom - as it will be more convenient for you.
To fix the GKL to the frame, we use self-tapping screws (3.5 × 35 mm). Initially, the sheet should be fixed from the edges, and then along the middle line. Self-tapping screws should be placed in increments of ± 15 cm. But (!) Not more than 25 cm. The caps of the fasteners should not be deeply “drowned” in the drywall sheet, but they should not stick out either.
By the way, GKL should be fixed at a height of about 10 mm from the floor surface. This distance is called the delatation gap. We have already mentioned this. So, remember: drywall should not fit snugly against the wall or the floor. And yes, there should also be a small distance between the sheets. Subsequently, it will be puttied, but more on that later.
After you install the first sheet, you should measure the distance from the edge of this sheet to the ceiling (well, or the floor, because the sheet can be started both from the floor and from the ceiling). According to the measurements, cut out the missing fragment, make a chamfer on it with a planer - and install it in place. We will mount those sheets that are not adjacent to the wall already without a chamfer, so that the planer can be put aside for the time being.
That is, in places where the sheets are adjacent to the walls / floor / ceiling and between these adjacent sheets, this impromptu chamfer must be present, and as for the rest of the sheets, there should only be a technological (delatation) gap between them, but already without a chamfer . We will embroider these joints when we start puttying / primer. But now it is better not to occupy your bright head with this.
Drywall sheets must be installed exclusively in a checkerboard pattern. In other words: if you mounted the first sheet from the floor, and then got the missing fragment to the ceiling, then the next one - on the contrary - mount it from the ceiling and get the missing piece of plasterboard to the floor. In this way, sheathe the frame on one side. Now let's talk about how to lay the wire in order to install a socket / switch or carry out other important communications.
Laying communications
Communications should be laid after the sheathing of the wall frame on one side is completed. In fact, there is nothing super complicated here. But if you have not dealt with electricity before, it is better to resort to the services of an electrician.
But preparing a frame for laying wires is definitely in your power. To do this, it is necessary to drill holes in the rack profiles with a diameter of approximately 3.5 cm. To avoid damage to the wires, you should bend the edges of this hole to one side. And don't forget to use corrugated pipe. This is your own safety.

Soundproofing installation
Commonly used as a soundproofing material mineral wool(mineral wool). Without soundproofing, the wall will be hollow inside, so any sound from the next room will reach the next one without encountering any barriers. When mounting the wall, you should also use a filler.

For these purposes, rolled wool is suitable for us. The one that is sold in bales can also, of course, be suitable, but it will not be very convenient to work with it. If the width of the roll is 1.2 m, then it must be cut in half lengthwise. With a width of 0.6 m, it is not necessary to cut along.
The material should be tightly laid between the rack profiles. At the same time, gaps are absolutely useless to us. It is not necessary to fix it with glue or something else. If the action takes place where there is a risk of moisture getting inside the wall (which is highly undesirable), then horizontal wooden lintels can be mounted. In addition, - in case of risk of moisture ingress - the interior of the partition / wall must be ventilated.
Completion of installation work / how to finish plasterboard walls
We sheathe the other side of the wall in the same way as the first, and then we should make the ends. The joints of the sheets during finishing must be glued using a sickle. Then, with the help of the starting putty, these recesses are completely leveled and compared with a common plane. Finishing putty helps to nullify those places where the screws were screwed. The corners of the door / window opening or other structurally expressed elements (say, the corners of niches or decorative ledges) should be additionally reinforced with a metal corner.
Do walls need to be primed before wallpapering? Purely technically - drywall is perfectly even, so it can be safely pasted over with wallpaper. But, nevertheless, there is one curious moment: when it becomes necessary to remove this wallpaper in order to glue new ones (in about 10-15 years), it will be impossible to tear off this wallpaper from the drywall without damaging the drywall wall itself. Regardless of what wallpaper glue you used. They just stick on tight. To avoid this, the surface of the wall should still be primed. The primer will not interfere with gluing the wallpaper to the wall, but it will be much easier to tear it off the next repair - this way you save the wall. By the way, before painting the walls (say, water-based paint), - the surface primer will also not be superfluous.
Priming / puttying plasterboard walls is a fairly extensive topic worthy of a detailed disclosure in a separate article. But in order for the material presented to be as exhaustive and useful as possible for you, here we will briefly describe what GKL putty / primer is. Let's consider this process step by step:
- It is necessary to prepare the wall for applying a primer. This means that with the help of the same knife with replaceable blades at an angle of about 45 °, it is necessary to cut through the joints. At the same time, do not be afraid to remove the excess - this way you will not spoil the wall, but only contribute to correct application finishing materials.
- Let's move on to priming. Perhaps the wall will have to be primed several times. First, joints should be processed, as well as places where self-tapping screws are screwed in and places where the gypsum board adjoins the main walls / floor / ceiling. At the same time, we have the right not to process its “native” seams with a primer. This is not at all necessary.
- If there are places where the GKL is damaged for some reason, that is, for example, scratched, this place, of course, must be carefully primed.
To visually familiarize yourself with the process of priming GKL, watch the video below:
As mentioned in the video, it is not necessary to prime all drywall. And it is true. But about putty - the question remains open. But don't worry. Now we will explain it properly. So, we need:
- wide and narrow spatulas;
- knife with replaceable blades;
- drill mixer;
- bucket. It is better if the bucket is not plastic, but metal. This is purely for reliability, because plastic can not withstand the blows of a ruthless mixer, and then the putty mixture will be on the floor, and not on the wall, where it belongs.
- we glue the serpentine tape on all the “native” seams and around the perimeter (excluding the floor). At the same time, it is not necessary to glue the tape on those seams that we cut with a knife;
- prepare the putty mixture, according to the instructions on the package;
- using a wide spatula, we begin to apply the mixture to the seams and places where the screws are screwed. We need a narrow spatula to collect the mixture from the container. At the same time, do not press hard on the sickle tape, otherwise you may damage it;
- we leave our wall for about a day. At a temperature of 18–20 ° C, the first layer will just dry during this time;
- We proceed to apply the second layer according to the same principle. If you set to work not with the onset of the next day, but, say, after a week, then it is better to prime the surface again, since during this time dust has got 100% on the wall, which will 100% prevent good adhesion (adhesion of the applied mixture with working surface);
- if you intend to glue the wallpaper on the wall, then, nevertheless, it is worth priming and puttying the entire surface. Above, we mentioned that the wallpaper will stick too well to the non-putty plasterboard. So good that during the next repair it will be simply impossible to remove them without damaging the drywall sheets.
How to putty drywall - see the video below:
We will not talk about how to paint walls and how to glue wallpaper in this article - it already turned out to be quite voluminous and, I hope, meaningful. In addition, the site contains a separate article about water-based paint. And do not be confused by the fact that it is about ceilings. In fact, painting a ceiling made of plasterboard does not fundamentally differ from painting walls made of the same material. Except, of course, that painting works are carried out in different planes. In the proposed article, not only the painting process is considered in detail, but also arguments are given in favor of "water emulsion" and given practical advice by the choice of tools (in particular, the main painting tool - a roller).
Thank you very much for your attention, dear reader. I hope that the above information has really been useful to you, and you will want to visit our cozy repair and construction portal again. Until we meet again, good luck in all your endeavors!
P.S. Here is a video that discusses the process of erecting a drywall partition:
wall for some families becomes the only way out. Children grow up, and only a few can buy new housing. How to make separate rooms for children from? Do not lay out the same wall from the middle of the apartment. The solution will be with your own hands, step-by-step instruction the manufacture of which will be discussed in today's article. Let's try to understand how difficult it is to do such work on your own: from selection to finishing. We will figure out how to lay electrical wiring in the partitions and provide sound insulation so that the room becomes complete.
We have already talked about dividing the room into two parts. However, a partition will be necessary in other cases. This may be a similarity made according to the same principle, or perhaps decorative plasterboard for decorating a women's boudoir. Consider the advantages and disadvantages of GKL partitions.
Positive and negative qualities of plasterboard walls
Installation of drywall partitions is so simple that this work can be done House master without such experience. You just need to know some of the nuances that we will try to highlight today. Of the advantages of working with such material, in addition to ease of installation, one can note the low cost of time and money. GKL is not expensive, except for well-known brands. Allows you to realize many of the most bold ideas, it can be bent if needed. For example, a drywall doorway when installing interior partitions can be made in the form of an arch or traditional.

The disadvantage of the material can be considered its susceptibility to mechanical damage. It breaks easily on impact. Also, the soundproofing qualities leave much to be desired. Additional work will need to be done to ensure this. One should not hope that subsequently massive objects will be possible. To ensure such an installation, it is necessary to lay stiffeners in the right places that reinforce the structure.
Important information! When installing partitions, you should not hope that the room is dry. At any moment, the neighbors from above can flood, which will lead to quite backfire And extra costs. It is better to purchase a more expensive moisture resistant material. This will not completely eliminate its swelling, but it will significantly reduce the damage.

What material is required to make a plasterboard partition with your own hands
The GKL partition consists of a frame that gives the main strength and plasterboard sheathing. The frame is made of a metal profile, wooden bars or a combination of both materials. Dowel-nails are also used for attaching guides to, and and, with which jumpers and plasterboards are attached to them.
Drywall sheets can be divided into types:
- Standard – grey colour, blue marking. The most common material. It is subdivided into (slightly thinner and stiffer) and wall;
- moisture resistant– green color, blue marking. You should not think that he is not at all afraid of moisture, yet gypsum is hygroscopic, but more resistant to moisture;
- Refractory – pink color, red marking. and high temperatures.

Related article:
GVL, GKLV and other types, their characteristics, sizes and applications - we will talk about all this in detail in this publication. And also consider how GVL and GKL differ and for what work it is better to use each of the options.
Optimal thickness of drywall partitions
GKL thickness for interior partition depends on the purpose of the wall. If this is a decorative false wall, the minimum sheet thickness will be 12.5 mm. If a full-fledged partition is planned, in which installation or various souvenirs are possible, then some calculations will be required:
- If the load is 40 ÷ 50 kg / m², you need a sheet with a thickness of at least 15 mm;
- Over 70 kg / m² involves the use of double sheets, and reinforcement of the frame structure.
Sheathing the frame, you should not make joints of plasterboard sheets of opposite walls at the same level. This will lead to weakening of the structure and the appearance of cracks at the seams. But the choice of GKL is not the most important thing in similar installation. Before you make a drywall partition in a room, you should understand which metal profile to choose for one purpose or another.

The main types of partitions: features and markings
| Image | Construction type | Options | Some characteristics |
 | C111 | The weight of 1 m³ is 28 kg, the recommended height is up to 8 m | A single frame made of galvanized steel profile, which is sheathed on both sides with sheets of waterproof plasterboard in one layer. Inside is filled in the form of mineral wool. It is used as partitions in rooms with low requirements for sound insulation and fire resistance. The thickness of the partition depends on the dimensions of the profile and the plasterboard. |
 | C112 | Weight 1 m³ - 53 kg, height 4÷9 m | Single metal frame with two-layer plasterboard sheathing on both sides. Filler - mineral wool. The design provides high soundproofing characteristics and fire resistance (up to 1.25 hours). It is used for redevelopment or in capital construction. |
 | C113 | Height up to 9.5 m. Weight 1m³ - 78 kg | A single frame is sheathed on both sides with sheets of waterproof drywall in three layers. By increasing the number of layers of GKL, sound insulation increases. |
 | C115.1 | Height - 6.5 m, weight 1 m³ - 57 kg | Double frame, sheathed with GKL in two layers. Along with strength, it has excellent fire resistance. |
| C115.2 | Weight 1 m³ - 69 kg. Height up to 9 m | In addition to the two-layer sheathing, the double frame is separated by an additional sheet of drywall (spaced frame). This increases strength and also thermal insulation properties. Mineral wool slabs are laid inside. | |
 | C116 | Height 4.5 - 6.5 m, weight 1 m³ - 61 kg. Minimum partition wall thickness 220 mm | A double metal frame sheathed with two layers of drywall is convenient for. Fire resistance - 1.25 hours. Sound insulation up to 50 dB. |
 | C118 | Weight 1 m³ - 86 kg. Height up to 9 m | Partition of the class "Protection of the premises from penetration." Made according to the C113 type with a single metal frame, sheathed with a three-layer plasterboard coating. A feature of the product are sheets of galvanized steel, 0.5 mm thick, inserted between the plasterboard, which significantly increases the strength and fire resistance of the structure. The most optimal for creating a drywall partition with a door in a warehouse. |
 | C121 | Weight 1 m³ - 32 kg. Height up to 3.1 m | The frame is made of wood with a moisture content of 12% and sheathed on both sides with one layer of plasterboard. |
 | C122 | Weight 1 m³ - about 57 kg. Height up to 3.1 m | Two-layer "upholstery" of the wooden frame GKL. The insulating material of the partition is mineral fiber boards. Advantages - high strength and good sound insulation. |

Related article:
What materials can be used for manufacturing, how to choose the shape of the partition and expert advice on its installation - read all this and much more in this material.
Types of profile for partitions from GKL
To assemble a frame for a plasterboard interior partition, you will need three types of profiles - rack-mount, guides (main) and jumpers.
Guides - U-shaped profile with standard sizes in width - 5; 6.5; 7.5 and 10 cm. Height - 4 or 4.5 cm. The main (guide) profiles are attached to the ceiling and walls, giving stability to the structure. Marking - PN or UW.
Rack elements are marked as PS or CW. The dimensions are identical in height and width, because they must be inserted one into the other. But the length of the rack profiles is more diverse. If the guides are produced in 3 m, then the rack can also be 3.5 or 4 m. The reason for this was that the racks cannot be increased - this harms the strength of the frame structure.
Jumpers are made independently from any type of profile and serve to increase the strength of the frame. Usually, trimmings left over from rack or main elements are used. The method of bending (internal or external) depends on the wishes of the master, but the internal one is more durable.

Soundproofing methods for walls made of plasterboard
The most common method of soundproofing (as well as) walls made of gypsum plasterboard is laying between the skins of mineral wool or polystyrene. The denser and thicker this layer is, the better the wall or sound.
Do-it-yourself drywall partitions: step-by-step instructions for the main steps
Installation of a wall from GKL is carried out in several stages. But first you need to figure out which one may be needed for work.

Partition wall mounting tool
In addition to the main tool (perforator, drill and) you will need a knife on the GKL. Can be used to cut parts right size. This is done in the following way. Having marked the sheet, we apply a metal profile and draw a knife several times along the strip, cutting the surface as deep as possible. We break the rest. It is not difficult, even a schoolboy will cope with the work. The cut is leveled with a planer along the GKL or with the same knife so that the joint is as even as possible.
Need to know! There is no need to adjust the plates perfectly, because all the flaws will be covered with putty when finishing. But before you make a wall of drywall, you should practice on an unnecessary cut.

Calculation of consumables for the installation of a wall of plasterboard
Calculate required amount GKL is easy. It depends on the layers of the wall, and we will not dwell on it. And here is to calculate the carrier profile more difficult. Calculations are made according to the formula Q = (P/0.6 + 4) × K if the wall is less than 3 m high, and Q = ((P/0.6 + 4) × H/3) + P × K if the wall height is more than 3 m, where:
- Q - the number of carrier profile;
- K – coefficient for waste;
- P - the perimeter of the room;
- 0,6 - the value of the step of the racks in meters;
- 4 - the number of racks indicated in pieces, which must be installed in the corners of the room.
However, there are still load-bearing elements frame. The calculations are made as follows. We divide the perimeter of the future wall by 3 (the height of one profile), and then multiply by the overrun coefficient. For different areas, it is different, and is 1.075 for an area over 20 m 2, 1.175 for an area from 10 to 20 m 2 and 1.275 if the area is less than 10 m 2.

Frame installation: getting started
First, we will analyze the stages of work, how to make a drywall partition, superficially, and then we will try to understand the whole technology in photo examples in detailed step-by-step instructions. First of all, using a laser level, we mark the locations of the main profiles - they are the basis of the future wall. In addition to fixing the dowel-nails to the walls and ceiling, we fix the profiles to each other with a special breakdown or self-tapping screws.
Having completed this work, we move on to the racks. If planned, then install in the rack profiles around it wooden bars- They will give strength to the structure.
Good to know! If the wall is small, then you can do without horizontal bars. If the dimensions are large, then jumpers will have to be installed.

Before you make a partition in the room, cutouts are made in the main profiles for wiring, into which it is dragged. After the main frame is assembled, one side of the partition is closed. At the same time, drywall is attached over the entire area, not excluding the future doorway. Much easier to cut later.
Having closed one side of the wall, on which sockets and switches will be installed, and cutting through the doorway, we install glasses under the electrical fittings, pull cables into them and fill the free space with mineral wool, which will provide noise and heat insulation. It remains to close the wall on the back of the plasterboard and cut through the doorway again.
Now let's look at how a drywall wall is mounted with our own hands in step-by-step instructions with photo examples.
Do-it-yourself step-by-step instructions for installing a partition from GCR with your own hands
| Illustration | Action to take |
 | First, we measure the length of the main profiles and cut to the desired length. To do this, you can use scissors for metal or a grinder. When working with a grinder, do not forget about safety glasses. |
 | Holes are cut in the lower profile for pulling cables (in our case, they pass under the floor) ... |
 | The main profile is laid according to pre-made markings and attached to the floor. The cables are pulled through the prepared holes. |
 | The same actions are performed with the upper profile and with guides along the walls. |
 | This is how the main profile is attached in case there is a doorway directly at the wall. |
 | We install a wooden block in the profile along the door jamb, which is attached to self-tapping screws. It will give strength to the structure and door hinges. |
 | Between themselves, the profiles are fastened with self-tapping screws or by means of special device- breakdown. |
 | Be sure to check the position of each rack and rail with the mounting level. This will give confidence that the wall will turn out to be even, without tilting. |
 | We begin to sew up the GKL frame, along with the doorway. So much more convenient than attaching sheets in pieces |
 | We coat all the seams of the first layer with putty and align. This will provide better heat and sound insulation. |
 | Let's start cutting the door. Here it will not work to break the sheet, and therefore you will have to cut it completely, to the full thickness. In our case, this is 12.5 mm. |
 | We proceed to fixing the second layer of drywall. This time the sheets are moved 60 cm, overlapping the first seam. |
 | Having closed one side in 2 layers, we mark the location of the sockets and drill them with a wood crown ... |
 | ... after which we mount the glasses and bring the cables into them. |
 | On the reverse side, we proceed to laying the insulation - mineral wool. It fills all the free space. |
 | The final result of the insulation looks like this. It remains to close the second side of the wall. |
 | Having completed this work and again cutting through the doorway, we get such a picture. But we still have not mounted another blank wall. |
 | Similarly, we assemble a frame from a metal profile ... |
 | ... and sew it up with drywall. All joints should be as even and neat as possible. |
 | Lastly, we will close the ends of the metal profile, after which we can proceed to the finishing of the mounted wall. |
How to bend the plasterboard for mounting the arched passage
This work is quite easy to do. We cut the strip to size and laying it on the floor, using a knife and a ruler, we make transverse cuts through each centimeter along the entire length. After the actions taken, the strip will easily bend and position as needed. It becomes clear that the question of how to make a drywall partition with your own hands is not so complicated.
Make a redevelopment in the apartment, divide the space in a private house or just embody the original design decision- a plasterboard wall is universal option. And thanks to the ease of installation, even a beginner can handle its installation!
What you need to know about profiles and drywall?
The desired dimensions of the rooms will be somewhat different from those planned, because part of the area will be “eaten” new wall. To understand what to expect in the end, you need to know the width of the profiles and the thickness of the drywall sheets (GKL).
Characteristics of profiles and their purpose
Before you buy materials and start marking rooms, you need to understand the purpose and differences between the profiles. So, according to their purpose, they are guides (PN) and rack-mount (PS).
As the name implies, the guide profile is attached to the floor and ceiling and vertical racks are already inserted into it.
- D - rack and guide profiles 60x27 mm and 27x28 mm, respectively, designed to fix drywall on one side only;
- W - profiles for the formation of a full-fledged wall, sewn on both sides;
- C - rack profiles with a rib height of 50 mm;
- U - guides with a rib height of 40 mm;
- 50, 75, 100 - the width of the profile, which must match the racks and rails.

For example, marking CW 100 means that this is a rack wall profile with dimensions of 50x100 mm. It requires a guide profile UW 100 (40x100 mm). When choosing a profile, you need to focus on the desired thickness of the insulation / sound insulation. So, for profiles with a width of 75 mm, a standard insulation laid in one layer (for example, mineral wool) is suitable.
The length of the profiles also depends on their purpose. The guides are produced in the same length - 3 m, but the racks can be 3, 3.5 and 4 m. The thing is that it is highly recommended not to “build up” the guides in height - this will weaken the entire structure and can lead to cracks. Therefore, before buying racks, you need to measure the height of the ceilings.
Drywall sheets - thickness, dimensions and characteristics
Wall drywall is available with a thickness of 12.5 mm - this is its minimum allowable value. The load on the wall in this case cannot exceed 40 kg per square meter. Such a sheet is quite enough for finishing for painting or even laying tiles with your own hands. If you plan to install heavy equipment, shelves or other interior elements, you should choose sheets:
- 15 mm thick - for loads from 40 to 50 kg;
- 18 mm thick - for loads up to 70 kg;
- double sheets - for large loads from 70 kg.
The dimensions of the sheets are standard - the width is 120 cm, and the height can be from 2 m to 3 m in increments of 0.5 m. Also, do not forget that only moisture-resistant GKL is suitable for the wall in the bathroom. Also, fire-resistant sheets are becoming more and more popular - they do not flare up, but slowly smolder and quickly go out in the absence of a source of fire.
Based on these data, it is possible to determine the dimensions of the future room - at least 8.75 cm must be retreated from the initial markup (7.5 cm for the profile + 1.25 cm for drywall). If it is necessary to lay in the walls water pipes or corrugated cables large diameter, the walls are built from two rows of CD and UD profiles, and the width of the wall will depend on the selected distance between them.
Plasterboard wall installation

Often, there are no perfectly even walls, especially in houses of old buildings, therefore, when dividing a room, you need to bind not to one, but to two opposite walls. This will minimize the visual unevenness of the future space.
If all surfaces are sheathed with drywall, before doing new wall, first, with the help of profiles and GKL, the existing ones are aligned as much as possible. This will allow you to achieve even right angles, which will greatly simplify the finishing work in the future.
Profile mounting
Installing profiles is quite simple, but requires a lot of precision. To align the racks, it is advisable to purchase a laser level to speed up the process, but you can limit yourself to the usual plumb line. Installation is carried out in stages:
- The profiles adjacent to the walls, floor and ceiling are pre-pasted with sealing tape. It performs a shock-absorbing and soundproofing function.
- PNs are attached to the floor and ceiling along a pre-marked line in increments of up to 1 m. wooden surface- self-tapping screws 50 cm long, and to concrete - dowels 75 cm long. In the second case, it is necessary to pre-drill holes with a perforator.
- Both load-bearing and rack-mount profiles can be fixed to the walls. It is important to remember that it must be continuous, therefore, with a ceiling height of more than 3 m, only longer substations will have to be used.
- If a doorway is provided, a gap is left in the floor profile in this place for the width of the opening. It is important to determine the width of the door in advance - if standard canvas 80 cm, then the doorway must be made 88 cm (to install the door frame).
- PS begin to install from the doorway - they will determine its width. First, the profile is fixed on the floor, after which it is leveled and fixed on the ceiling.
- The step of installing the racks is any convenient. Often they are placed to fasten sheets along the edges and in the center - therefore, you need to know in advance the dimensions of the plasterboard. The joints of the sheets should fall in the middle of the PS, this must be taken into account when installing profiles.
- The more often the step of the racks, the higher the strength of the wall, but also the higher the final cost. Also, to make it more rigid, a wooden beam or a supporting profile is inserted into the profiles that limit the doorway. For the same purpose, transverse struts made of PS are used, reinforced with the same beam. They are installed in places of horizontal joints of the GKL.
- A jumper is also installed above the doorway. The height depends on the size of the door. For a standard two-meter canvas, the height should be 205 cm.
- The jumper is made of PS, which is cut 20-30 cm longer. On each side, retreating from the edge of 10-15 cm, respectively, cuts of 45⁰ are made on the side walls so that the bevel is directed outward. The cut sides are folded down, giving the profile a U-shape. (9) The vertical sides are put on the posts and fastened with metal screws. The corners sticking out after cutting on the horizontal part are also screwed to the racks - this ensures maximum fastening reliability.


Important nuances of drywall installation
Sheets are attached to profiles special self-tapping screws with a press washer - they do not pierce the cardboard, but they are well recessed into the sheet. To improve the quality of seaming, all cut edges are chamfered from the upper side (for factory edges, this is not necessary, it is already there).
Gypsum board in our time is extremely popular among professionals and amateurs, and is increasingly used in the installation of partitions and wall cladding in apartments and houses. Due to its lightness, the material can be freely used in high-rise buildings or on the second floor or attic of a private house - this design will not exert a significant load on the floor. Ease of installation makes it possible for novice builders to independently install a partition or wall sheathing.
A do-it-yourself drywall partition can be installed after studying the sequence and rules of the process, familiarizing yourself with the nuances of working with this material.
It should be noted that drywall is used for mounting both blank walls and partitions with windows. various shapes. His ability to take desired forms, under the right conditions for this, make it possible to make or arrange windows in partitions of a round or other curvilinear shape.

The ability of drywall sheets to undergo planned plastic deformation makes it possible to mount partitions with volumetric edges and with a device original shelves that are able to withstand rows of books or the installation of household appliances in them.
 Partition with additional functions - shelves for books and household appliances
 If earlier bulky standard furniture had to be dragged into the apartment, today, using drywall, you can create exclusive wall options that immediately perform two functions - a room space divider and a piece of furniture. It turns out a double saving of money and space, which is especially important for not too spacious apartments.
Materials for installing plasterboard partitions
What do you need to have to create such a partition, except for the main material - drywall?
 All necessary materials- very easy to use and affordable
 From additional materials you need very little, and what is very important - all the necessary components for mounting such a wall have a very affordable price.
Another advantage of all materials for creating a plasterboard partition is that they will not pollute the premises of a house or apartment in the way that, for example, concrete mortars can do.
So, considering everything possible options, then for the installation of the partition you will need:
- Propertyno, GVL themselves. Ordinary drywall, having a thickness of 12 mm - the most optimal option for partitions in rooms with normal humidity. When installing walls that will separate the bathroom, kitchen, bathroom, you will need a moisture-resistant drywall that has a soft green color - this is how the manufacturer distinguishes it functional features. There are other types of drywall, from which you can choose the right one, depending on the location of the partition and on its shape.
| Drywall brand | Thickness in mm | Size in mm |
|---|---|---|
| GKL (normal) | 12.5 | 2500×1200 |
| GKLV (moisture resistant) | 12.5 | 2500×1200 |
| GKLO (fire resistant) | 12.5 | 2500×1200 |
| GKLO (fire resistant) | 12.5 | 2600×1200 |
| GKL (with a straight edge) | 12.5 | 2500×1200 |
| GKL (flexible) | 6 | 2400×1200 |
- Metal profile and wooden bars for the frame, having a width of 75 mm, if between two canvases will be installed soundproofing material, and 50 mm if the space between the drywall sheets remains hollow or will fit thin insulation. In general, we can say that the profile width sets the wall thickness parameter.
- Self-tapping screws for metal structures and for wooden parts.
- Fiberglass mesh-serpyanka for reinforcing joints.
- Gypsum-based putty, starting and finishing - for sealing joints and eliminating surface defects.
Can be determined from this table, but experienced builders it is recommended to take it more by 15% than will be calculated.
| № | Material name | Unit | The consumption rate of materials per 1 sq. m |
|---|---|---|---|
| 1. | Drywall | sq.m. | 1 |
| 2. | Profile CD 60 | running meters | 2 |
| 3. | Profile UD 27 | running meters | 2 |
| 4. | U-shaped universal bracket for mounting the material on the ceiling | PC. | 1.32 |
| 5. | Sealing tape | linear m | 0.85 |
| 6. | Dowel 6/40 mm | PC. | 2.2 |
| 7. | Self-tapping screw 3.5 × 9.5 (flea) | PC. | 2.7 |
| 8. | Self-tapping screw 3.5 × 25 (for drywall) | PC. | 12 |
| 9. | Longitudinal connection for profile CD | PC. | 0.2 |
| 10. | Fiberglass mesh-serpyanka | linear m | 1.1 |
| 11. | Putty for joints (starting) | kg | 0.3 |
| 12. | Deep penetration primer | liters | 0.1 |
| 13. | Putty for the surface of drywall sheets (finishing) | kg | 1.2 |
Tools needed for the job
When installing a plasterboard partition, you can not do without some tools, the list of which includes:

- Screwdriver - required, as you have to tighten a large number of self-tapping screws, and a conventional screwdriver do this work will be extremely difficult.
- A long, preferably metal ruler, for marking and cutting drywall sheets along it.
- A construction square will be needed for marking and for checking the correct installation of parts during installation.
- Building level - to determine the horizontal and vertical planes and racks of the frame.
- Plumb - is necessary to determine the ideal vertical, by combining the points marked on the ceiling and on the floor.
- Pencil - for marking.
- Metal shears - used to prepare blanks of the desired length, for cutting notches on a metal profile.
- Electric jigsaw - for cutting off the necessary fragments of the bar and cutting drywall sheets, especially along curved markings.
- Spatula of medium width - for sealing joints with putty.
- Grater with fine and medium grain sandpaper- for leveling putty on the seams and on the surface of GVL sheets.
- Primer - for processing the finished partition before painting.
- Knife or hacksaw with small tooth for drywall, construction knife with replaceable blades.
- Planer with a beveled blade for chamfering.
- It would be nice to have a riveter for fastening a metal profile - this will greatly facilitate and speed up the work.
- Electric drill with a set of drills.
- A spiked roller will be needed if it is planned to give drywall curvilinear spatial forms.
- Folding ruler and tape measure.
- Hammer for driving dowels, screwdrivers for mounting the frame.
All these tools and fixtures are quite available for purchase in hardware stores.
Prices for drywall and sheet materials
Drywall and sheet materials
Frame installation
Any construction works begin with measurements of the installation site, calculations and marking, and the installation of a partition is no exception.

markup
- It is most convenient to start marking on the floor. With the help of a building corner, a long ruler ( building level, rules) and a pencil, a perfectly even line is outlined and drawn.
A metal profile guide will subsequently be attached along this line.
- The location of the doorway is immediately marked on this line - the guide will not be attached to this segment. The doorway is positioned in such a way that a certain piece of furniture can be placed on one or two sides - this must also be foreseen in advance.
- Now you need to project a line from the floor to the ceiling - this process is carried out using a plumb line, and in this case an assistant will be needed.
 Transferring a point to the ceiling using a plumb line - top view ...
 Having climbed the stairs, the assistant lowers the plumb line down, and presses its other end against the ceiling in the approximate area where the line passes.
 ... and at the same time - from below
 The master marks a point on the floor with a cross, which needs to be projected onto the ceiling, the assistant slowly moves the suspension cord along the sense until the plumb-line cone ideally matches the point marked on the floor. When the target is reached, a mark is made on the point found on the ceiling. Thus, three points are found on the ceiling.
- In addition, vertical lines are drawn on the walls at right angles from the edges of the line on the floor to the ceiling - they will determine the beginning and end of the horizontal projection line.
- Having determined the points on the ceiling, a straight horizontal line is drawn along them - a guide will be fixed along it.
These two lines are very important, since the verticality of the future wall will depend on them. Therefore, their markup must be carried out with special care.
Frame installation
- The next step is the installation of guide profiles.
First, the profile is fixed along the line on the floor using dowels. As already mentioned, space is left for the doorway.

The holes for the dowels are drilled through the laid guides. Then they are removed, plastic plugs-dowels are hammered into the holes.
 Hole done...
  ... and a dowel is driven into it
 - The next step is to install the guides on the walls along the previously marked vertical lines. During the installation process, the position is constantly checked by level in order to prevent even the slightest play to the side.

 The rest is exactly the same, but with constant control of verticality.
 The bottom of the vertical profile is inserted into a horizontal rail mounted on the floor.
If the walls are concrete, then the fixing process takes place in the same way as on the floor. If the walls are wooden, then dowels are not required for them. Self-tapping screws are screwed through the guides directly into the walls.

- Further, the guide is fixed to the ceiling in the same way as on the floors. Self-tapping screws are screwed in at a distance of 250 ÷ 300 mm from each other. The connections between the vertical and horizontal profile on the ceiling are made in the same way as on the floor - using self-tapping screws or using a riveter.
 Step between dowels - 250-300 mm
 - The next step is to determine and mark on the ceiling profile the location of the doorway, based on the bottom markings. This is done in the same way as before - with the help of a plumb line.

Height measurements are taken for the manufacture of guides that will be installed on the sides of the doorway. On standard profiles it is noted desired length, the required blanks are cut.
Now they need to be installed so that they designate a doorway.

- The guides around the doorway are reinforced with wooden bars that are inserted directly into them and screwed with self-tapping screws. Or, for the stability of the structure, another reinforcing profile is installed next to the first profile.

- After installing and strengthening the vertical profiles, the height of the doorway is measured on them. According to these marks, a horizontal crossbar is screwed from the desired section of the profile, and then a wooden beam is also inserted into it, to which vertical racks are screwed. Long self-tapping screws are screwed into the end of the crossbar, installed horizontally.

- Next, the space between the doorway and the walls is measured, and then the number of vertical posts is calculated, which must be fixed at a distance of about 300 ÷ 600 mm from each other.
Then the required number of blanks of the required length is cut. Racks are installed with their ends inside the guides on the floor and ceiling, with obligatory leveling. Fasten the profiles at the joints with self-tapping screws with large hats or rivets.
- For greater rigidity, especially with high ceilings, between uprights horizontal bars are also installed.
electrical wiring
After the frame is fully assembled, inside it is arranged electrical wiring if provided.
Wiring can be carried out after fixing the drywall on one side of the frame, or before that.

IN metal profiles holes are drilled through which wires are pulled, enclosed in insulating corrugated or smooth tubes. The ends of the wires are left outside.
Electric cable prices
Electrical cable
Cutting and fixing drywall
- After wiring, drywall is fixed on one side of the frame. It is screwed with black self-tapping screws specially designed for this purpose. At the same time, the heads of the self-tapping screws should go deep into the GKL by 0.5 ÷ 1 mm.

- If necessary, this process is carried out as follows:
- measurements are taken of the place that needs to be closed on the frame;
- then, the cut can be made with a knife for cutting paper or drywall, as well as a conventional hand saw;
 Cutting drywall is easy
 - if the cut is made with a knife, then the blade is driven along the established ruler, so that the top layer of cardboard and gypsum is cut through, but the bottom layer of cardboard remains intact;
- then, the sheet is bent along the intended line, and cut to the end at the place of the fold with a knife.
 Ideally, there should be a chamfer at the joints
 - The edge of the cut will not have a chamfer, and this is undesirable when sealing seams. The chamfer is made using a planer with a beveled knife.

- If it is planned to install sockets or switches in the partition, after wiring in drywall, holes are cut out with the help of special crowns of the required diameter, through which wires are brought out to connect the sockets after the partition is fully installed. However, on the finished half of the partition, you can install boxes for switches right away - it will be even more convenient.
 Installation of boxes - socket boxes
 - Upon completion of the installation of the material on one side of the frame, on its open side, it is laid between the guides. Usually mineral wool or isover is used for this process, and expanded polystyrene can also be used. Leaving the cavity empty is not recommended. It's not even about keeping warm - sometimes such a function is not needed. It is more important that the hollow wall does not become a sound resonator - the thermal insulation material here, rather, will play a role.

- Further, the second side of the frame is sewn up with drywall, in the same way as the first. If the sockets and the switch will be installed on this side of the wall, then their position is calculated in advance, the holes are cut out before the material is fixed to the frame. The wires for them are brought to the place where the hole will be located, and after installing the drywall they are brought out.
Door frame installation
- When the partition is ready, a box is installed in the doorway to hang the door.

- Wooden jamb with already installed hinges set in level and fixed with powerful self-tapping screws in three or four places to the opening posts. Since wooden bars were previously installed in them, the jamb will be securely fixed.
- The heads of the self-tapping screws must be deepened into the thickness wooden racks boxes, for this, holes are pre-drilled in it “under zatay».
- Next, a door is hung on the installed box. Usually door leaf for such a design, it is selected as light as possible in weight so that it does not pull the partition to one side or the other. If the doorway is properly mounted and reinforced, then there should be no problems with the installation and operation of the door.
- If it turned out that the doorway turned out to be larger than necessary, then wooden spacers are installed between the racks of the partition and the jamb. It is desirable that it be thick plywood, as it will not crack when door frame will be screwed to the racks. The remaining gaps between the jamb and the uprights in this case are filled with mounting foam. The foam must be allowed to expand and dry, after which it is cut off with a sharp construction knife.
The gap under the threshold is sealed with sealant.
Sealing joints on the surface of the partition
After installation is complete completed, you can proceed to sealing the joints of drywall sheets.
To do this, you need a grid-serpyanka. It is advisable to purchase a roll with glue already applied so that the mesh easily sticks to the cardboard surface.
- The mesh is glued to all, without exception, joints.

- Further, with the help of a spatula and starting putty, the joints are sealed, if possible, the seams to the ideal and removing all excess sealing material.

- When embedding joints between those sheets on which self-chamfering was carried out, before gluing the sickle, processing is done with a primer. It should dry well, and only after that you can stick the sickle and apply putty.
- Gaps around the doorway, sealed with mounting foam, it is also better to first impregnate with a primer, and then close up, like all other joints.
- In addition, it is imperative to seal the holes left from the caps of the screws with putty, otherwise they may appear through the decorative rust coating. After sealing the screws, the structure is left to dry completely.

- After the putty dries in certain parts of the partition, it should be completely covered. This coating will give the surface better adhesion, and the finishing putty will lie flat on the wall.
- Further, the dried surface is completely covered with a thin layer of finishing putty - this can be done with a wide spatula. The surface is leveled to the maximum so that there are no deep grooves from moving with a spatula.
- Further, after waiting for the putty layer to dry, it must be processed with a grater with the installed NotNot and fine-grained sandpaper. Then, if necessary, another layer of putty is applied, which is also dried and processed with fine sandpaper.

- Before application decorative coating the aligned walls are once again impregnated with a primer. Only after it dries, you can proceed to or paint the surface of the walls.
Video: installing a light drywall partition in the attic
If it's time to redevelop the attic or big room on the ground floor, there is no doubt in choosing this particular method for the construction of a partition. If you act in stages, following all the recommendations, then even the most inexperienced novice builder will be able to cope with this process on their own. Well, with the exception of some stages, when it is simply impossible to do without an assistant.


