DIY door decor is a great way to add variety and a touch of creativity to the interior or exterior of your home. This is especially true on the eve of the holidays. In addition, small defects may appear on the door over time, which again can be eliminated by decorating. How to decorate your door so that it looks stylish and beautiful - read in this article.
A good trick for adding bohemian style charm to a room is to decorate simple budget interior doors with rows of half-beads or rivets from a craft store
A common idea is to paint and decorate doors with baguettes, repeating the theme of wall decoration. In this case, you can decorate the door with one or more framed paintings. The photo shows an unusual decor of a doorway by gluing golden braid in several rows
 Decor for a doorway You should not ignore not only the door itself, but also the space around the doorway. Good New Year's decor can be done by attaching colored ribbons around it. And at the top of the doorway place such a festive element as a bow. On February 14, you can make an impromptu curtain from hearts, stringing them on long threads. And on March 8, the top of the doorway can be wrapped with a wreath of artificial flowers.
 Decorating a door if it is damaged However, the need to decorate a door is not always associated with such pleasant chores as decorating for the New Year. Sometimes such decor is caused by necessity. After all, doors are short-lived and can lose their original quality over time. appearance.
 Painting an old plain budget interior door in mint color will refresh the entire room and make it even brighter. How to do this - in the photo below
 Update a simple door and give it bohemian chic with a polyurethane chandelier rosette and paint mint color. Step-by-step photo instructions Scratches, chips, cracks - they are all enemies of the excellent appearance of the door. What to do in this case? Of course, the door can be replaced or repaired, but there is another option. Decorating the defect and hiding it from view will come to your aid. The following may be considered interesting options decorating the door with your own hands: cover the door with wallpaper; use mirrors; use the vintage style technique.

Door decor using wallpaper and mirrors Let's consider these options in more detail. So, to cover a door with wallpaper, you can use it as classic options, and wallpaper made of fabric. The last option is perhaps more preferable from an aesthetic point of view.
 Covering cabinet doors with fabric wallpaper
Before pasting, the door should be prepared in advance by removing all irregularities so that the material lays evenly. You will also need to remove the paint layer and sand the surface. Apply a coat of primer. And only then start decorating the door with wallpaper. Instead, you can use regular fabric, which needs to be prepared first. It is not necessary to decorate the entire object in this way. It is enough to simply disguise the defect. For example, using cat stencils, you can glue a design onto a crack. Any shape can be used as a stencil. A door like the one in the photo will undoubtedly become a bright spot in your apartment.

If this option does not suit you, then you can use mirrors as decoration. So, you can use acrylic panels with amalgam. And in this case Special attention attention should be paid to preparing the door. You can also use shaped acrylic mirrors in the form of animals, flowers and other shapes. This decoration will look good on sliding doors. You can decorate the doorway in a similar style. In addition, you can decorate the cabinet doors in the same way.

Decorating a door in vintage style This style is extremely popular at the moment and, decorating your front door or a cabinet door in this way, you will not only disguise imperfections, but will also follow the latest fashion trends in decor. To decorate your front door in vintage style you will need the following elements: coarse sandpaper; brushes, rollers; assembly adhesive; black baguette; PVA glue; sheets from music notebooks or old unwanted newspapers; transparent varnish.
 The door must first be removed from its hinges and carefully processed: puttied and sanded. Next, we proceed directly to the decor.
Let's color the object white. When the paint has dried, we will achieve an aging effect by sanding it with coarse sandpaper.
We decorate the panels and the central part of the door. To do this, newspapers and notebooks need to be randomly torn apart. Using a pencil, randomly draw squares and rectangles on the doors. Lubricate them with glue. And we chaotically glue the paper onto them, straightening it out with our hands. Apply varnish on top in two layers.
Apply baguette glue along the perimeter of the resulting wallpaper. Additionally, you can use any retro-style element to decorate the door.
To decorate a door in this style, you can use ready-made stencils. Your version of an artificially old door is ready! (see photo) This decor can be done both on the sliding doors of the closet and for the doorway.

https://youtu.be/OQH94GGQNWI Source: http://happymodern.ru/dekor-dveri-svoimi-rukami/ http://dvernoigid.ru/dekupazh-dveri-svoimi-rukami
  Chic and severity - this is how you can characterize the selection individual elements on the door leaf in a bright color. For example, a snow-white door with black moldings looks beautiful. If this combination of colors seems banal to you, feel free to experiment with contrasting shades. A door painted in these colors looks great: sky blue with delicate yellow, green with white or red with blue. Not a problem, if there are no clearly defined moldings on the door, you can make them yourself - nail thin wooden strips to the door. But first it is advisable to paint them in the desired color, and then secure them with small nails. Then you will have to go over the surface with a brush again to refresh the inserts. Another unusual solution- on a completely flat door leaf, you can highlight bright areas and build frames from wooden planks painted white. A bright pink door with white inserts looks gorgeous.
The interior door occupies an important place in the interior of the room. It not only serves as a barrier to noise, delimits space and allows privacy, but is also a noticeable piece of decor.
Several reasons may motivate you to decorate an interior door:
- Firstly, despite the huge selection of ready-made (and very attractive) doors, it is sometimes very difficult to find a suitable model. Sometimes all the doors seem the same - “I’ve already seen this one at the neighbors’, “and this one looks like the door to our office.” You don’t want to repeat yourself and buy something that is unoriginal and has become banal, because your interior is unique, so the door should match.
- Secondly, even an old door with scratches, peeling paint and irremovable stains is often why you don’t want to replace it! After all, any replacement of a door is also a replacement of the frame itself, which is associated with dust, plaster, sealing the resulting cracks, the need to change the wallpaper (at least around new door) - in general, with local and sometimes major repairs.

That is why sometimes it is much easier for the owner to update already installed door“on the spot,” that is, without changing the entire box, right here in the room. Of course, in some cases you will still have to remove the door from its hinges, but this is much easier and faster than undertaking a full-fledged repair. Whatever the reasons that prompted you to start decorating an interior door, we’ll say right away that often this requires practically nothing except materials left over from the previous renovation.
And one should not think that real craftsmen and needlewomen will be able to cope with such a task - some of the ideas proposed in this article can be implemented even by a person who has never held a hammer or brush in their hands. And the result of your work, in any case, will be original, unusual and will become a source of pride - “here it is, our door, I made it myself (well, at least I decorated it).”

So, we offer you 14 ideas for decorating an interior door that you might want to bring to life when decorating your interior.
The first idea. We paint, we just paint
The easiest way to get your door in order without any frills or extra work. To do this, you will first need to remove the door from its hinges, then go over it with a spatula, removing old paint, level the surface with sandpaper, seal cracks and scratches with putty, remove grease stains, cover the glass with masking tape so as not to stain it, and you can pick up a roller or brush! It is better to choose acrylic paint - it dries faster, and paint the door in a horizontal position - this way the paint will not drip and will lie more evenly. However, if it is convenient for you to do all of the above on a vertically standing door, you don’t have to remove it from its hinges. Just remember to place something on the floor while painting so as not to stain the linoleum or laminate.
 White, simply painted door. Updating it or repainting it in a different color will not be a problem. a lot of work, although moldings and carvings require special, careful handling during sanding and removing layers of old paint
Idea two. We paint in several colors
The option is more complicated, although it also involves coloring. In this case, we don’t just paint the door one color, but create a simple or complex geometric pattern of stripes, squares, diamonds, and so on. The door must first be prepared, as in the first case - that is, cleaned of old paint and leveled the surface. However, in this case, we will need much more masking tape - it is with its help that you will delimit the zones between stripes or rectangles. In addition, in order not to buy several cans of paint of different colors, you can buy white paint (one liter per door is enough), as well as several dyes with which you can experiment with shades.
 Gold and white, blue and soft pink, bright stripes on a neutral background, diamonds and winding lines - a variety of patterns and patterns can appear on your door leaf. color combinations
 When choosing a geometric pattern, remember that a wide strip along the entire door leaf is more suitable for country style, and for classics it is better to choose other options, for example, paint the upper part of the door in a lighter shade and separate the parts with a horizontal stripe
Idea three. Highlighting moldings
Also painting the door, which in general is not too different from the first option. However, in this case we will focus on the moldings, painting them in a contrasting color. White and black are great combination, but already hackneyed, so think about what colors will look best next to each other. Designers have long recognized white and green, blue and yellow, red and dark blue as excellent options. Such a door will look great both in a bohemian boudoir and in a strict classic living room.
 A white door with highlighted black moldings is a true classic. By the way, if your door does not have such decorations, it is easy to make them yourself - special thin wooden strips are sold that are simply nailed onto the door leaf
 An unexpectedly bright, pink door that looks especially aristocratic and attractive thanks to the frames highlighted in white
Idea four. We paint according to the finished stencil
A very convenient and simple way to turn your door into a work of art, even if you do not have the talent of an artist. Ready-made stencils can be purchased in construction and specialized stores, or ordered on one of the websites, and the choice of designs and patterns is very large. Then we simply apply the stencil to the already prepared door and apply paint. Easy, fast and the result is very beautiful!
 Applying a drawing using a ready-made stencil is as easy as shelling pears, and the choice will allow you to choose an original inscription, an exotic pattern, or an unusual picture
 Such a deliberately simple design can be easily created without stencils. It was the uneven lines and simplicity that became its main highlight.
Idea five. Artistic painting
Unlike all the door decoration options already listed, this option is not for everyone. To create a real masterpiece on an ordinary door, you will need the talent of an artist and certain skills in working with brushes, since a roller is no longer enough here. Imagine that your door is a blank white canvas, on which, thanks to your skill, a beautiful landscape, a cheerful painting or an exquisite pattern will appear. Fine hand painting always looks expensive and stylish, and you can achieve this effect by spending only on the purchase of paints.
 Many European companies offer ready-made interior doors with artistic painting. They are, of course, not cheap, so you can try to create something similar with your own hands. Are you afraid that it won't work out? You can always just paint over a bad drawing!
Idea six. Children's creativity
Does your little one love to draw? Give him this opportunity - let him decorate the door to the children's room himself. Yes, such a naive, bright pattern would be out of place in a formal living room, but as a decoration for a child’s room - great option. Just agree with the young artist that the second half of the door is already your field for realizing your fantasies!
 Usually children's paints are washed off very easily, so your novice artist will be able to paint the door again at least every day. But you will have to first prepare the canvas by putting the door in order
Idea seven. Unusual texture using paint
If you think that simply applying paint is boring, and you are afraid to take on hand painting, you can try to achieve an unusual texture, for example, the effect wooden surface or an antique door using a very simple devices. So, using a sponge you can get a spotty surface, steel wool will help achieve the effect antique door, hard brush - create an expressive surface of denim. Special ready-made paints are also sold that perfectly imitate jeans, wood, canvas, velvet or slate.
 On such a door, painted to resemble a chalkboard, it is convenient to leave messages for household members
Idea eight. Photo wallpaper
If all the previous ideas concerned only working with paints and brushes, then this method is suitable for those who do not want to mess with paint. Photo wallpaper will instantly transform the appearance of your interior door, turning it into bright element design. Of course, it is best to purchase photo wallpaper designed specifically for doors - in this case, your drawing will definitely look complete. Ready-made photo wallpapers usually have standard size 86x220 centimeters, therefore suitable only for standard doors, and without moldings and glass inserts. However, now many online stores offer custom-made photo wallpaper for doors, so you can choose the option that is ideal for your door, with any pattern. You can cut doors and regular wall wallpaper to size, but in this case the picture may look unfinished.
 How do you like this unusual option— a door turned into a telephone booth with the help of photo wallpaper?
Before sticking photo wallpaper, the door must be cleaned of stains, and the surface must be leveled, sanded and degreased with a solvent. You can use regular wallpaper glue, but PVA is much more reliable. The disadvantages of this option for decorating a door include the fact that a bright image will immediately catch your eye, so it can quickly get boring. In addition, photo wallpaper on the door will lose its original attractiveness due to frequent touches. However, no one will stop you from changing the photo wallpaper on your door to something more original in a couple of months.
 Photo wallpapers with picturesque landscapes are especially popular
 Photo wallpaper on the door will help, due to the increased panoramic perspective, to make small room visually more. And it’s very easy to stick them on; you don’t even need to remove the door from its hinges.
Idea nine. Regular wallpaper
Previously, this decorative option was particularly popular, but now many designers consider it bad manners. It doesn't bother me regular wallpaper, “migrated” to the door, remains a popular way of decorating the interior. Paste paper and vinyl wallpapers on the door is especially popular in Sweden, the USA and Canada. By the way, there is no need to hide the entire door behind the wallpaper - on the contrary, wallpaper divided into clear “compartments” thanks to moldings looks especially interesting. The remaining surfaces of the door can simply be painted, choosing a shade that matches the color of the wallpaper. As an option, you can buy cork wallpaper and coat it with varnish on top for reliability. Their unusual texture will make the door more original.
Preparing the door is exactly the same as when using photo wallpaper. The main advantage is low cost, since you can use wallpaper left over from a previous renovation, and ease of decoration. The main disadvantage is rapid wear and tear - the wallpaper can peel off and tear at the joints.
 Wallpaper glued not to the entire door, but to parts highlighted by moldings, looks more impressive
 A door covered with the same wallpaper as the walls will literally blend into the interior. WITH reverse side the door, of course, is covered with different wallpaper so as not to stand out against the background of the wall of another room
Idea tenth. Fabric instead of wallpaper
This option will look especially cute and homey. A door decorated with fabric looks original; the choice of fabrics today is surprisingly wide, but this method also has its drawbacks.
 If you choose a single piece of fabric to decorate a door, you should take care of the original design
First, when choosing a fabric, you should make sure that the glue will not leave stains on it. Secondly, the edges of the fabric should be pre-treated, otherwise the protruding threads will not look very aesthetically pleasing. Thirdly, doors decorated with fabric will not suit every interior design style. Those who are fond of patchwork, that is, creating canvases from different pieces of fabric, can turn their door into a real applique of bright scraps. By the way, if there is space on the door for a glass insert, you can hang a small curtain here, securing it with fishing line and small nails.
 A very cute door, decorated using patchwork technology. The trouble is that classic style Such bright shreds have nothing to do with the interior; this is an option, rather, for “rustic” and colorful country
Idea eleven. Posters, cards, paper
Option for creative people and great idea for a teenager's room. The door can be decorated with a poster and an image of your favorite artist or group, sheets from an old geographical atlas, or sheet music. Pasting such paper sheets and posters is as easy as regular wallpaper.
 An old geographical map would be appropriate even on the interior door of an ordinary living room, but it is better to “place” posters in a teenager’s room
Idea twelfth. All kinds of stickers
This simple and not too expensive way of decorating a door is becoming more and more popular today. Vinyl stickers can be purchased in online stores, cost of size model standard door starts from 2.5 thousand rubles, they are glued very easily, and will last longer than ordinary photo wallpapers.
 Stickers with such funny and at the same time useful inscriptions will not only decorate the doors, but also cheer up the guests
If you do not want to hide the entire door behind stickers, it is quite possible to purchase small images - a butterfly, bright flower and so on. They cost less, and will completely transform the appearance of the door. “Informative” stickers are also popular, for example, on the door of an office, bathroom or toilet, which will tell guests what is hidden behind this door.
 The elegant lady on this sticker will immediately inform guests of the house that the bathroom is hidden behind this door
 Often, stickers can look like ordinary photo wallpaper, and sometimes they can look like hand-painting on a white door or a child’s drawing
Idea thirteen. Decoupage
The technology of meticulously cutting out the images you like from paper and then making appliqués from these pieces allows you to transform not only a box or photo album cover, but also an ordinary door. Everything a beginning master of the ancient art of decoupage will need: paper drawings, napkins with a pattern you like, postcards and the like - everything from which you can cut out a design, a brush, PVA glue, scissors, glitter, acrylic lacquer, outline and acrylic paint.
 In the decoupage process, you can use literally anything - from scraps of old newspapers to greeting cards
IN brief description The process looks like this: we apply a layer of white acrylic paint to the surface of the door, wait until it dries, then another layer - and again wait until it dries completely. Then we apply a layer of paint of the selected shade, and then use PVA glue to attach the cut out paper drawings. At the same time, we try to glue the piece as smoothly as possible, without folds, and to expel all air bubbles. Using glitter and contour we can add dots, stripes and other small details. Then we cover the finished picture with a layer of varnish. That's all. The rest is your imagination and beautifully selected drawings.
 The decoupage technique allows you to create amazingly beautiful paintings, and the varnish coating will extend the life of the decor
Idea fourteen. Mosaic
A door decorated with bright mosaics will be an excellent option for a bathroom; you can decorate a metal entrance door in this way. Moreover, it is not at all necessary to use pieces of ceramics for these purposes - in this case, the door may turn out to be too heavy. Mosaics can be created from pieces of wood or veneer, or you can purchase a ready-made one made from glass.
 In this case, a bright glass mosaic occupies most doors, making it very unusual and cheerful
The mosaic is attached special glue(Moment or liquid nails are suitable) onto a prepared and cleaned surface. It is worth thinking through all the details of the pattern in advance by drawing a diagram of the arrangement of the pieces with a pencil. By the way, you can decorate not only the door itself, but also the frame with mosaics, highlighting the slopes using the selected pattern.
 Creating a mosaic pattern is a huge scope for creativity. And if any part does fall, you can always attach it back
An old door can become a real art object; all you need is a little imagination and effort. To get started, you can use one of the most simple ideas, and then, having gained a taste for it, try yourself in the art of decoupage or painting. In any case, your door will definitely be one of a kind!
To equip the doorways of bathrooms, products made of solid wood, chipboard or plastic are used. Operating these products in conditions of high humidity has a detrimental effect on the appearance of the fabric. It is not easy to dismantle the old structure and install a new one, given the current cost quality door. Therefore, many people have a question about how to finish inner door in the bathroom.
Preparing the door leaf for restoration
Before proceeding with the restoration of the product, it is recommended that you familiarize yourself with the stages of this work.
There are many ways to resurface door leaf, but regardless of the choice, first of all you will need to prepare a list of tools:
- Construction hair dryer;
- Plane;
- Putty knife;
- Sanding machine;
- Sandpaper.
The first stage of work consists of processing and cleaning the canvas from the old coating.
Important! Removal of the old coating will be required regardless of what type of finishing is planned in the future.
Restoration work begins with removing the door from its hinges.
Removing the fabric from the hinges
The removed sash is laid on a previously prepared surface. The place for restoration of the product is chosen so that it is well lit and ventilated.
All elements are removed from the door so that a bare sheet remains. If there are glass inserts, they must also be carefully removed. After cleaning the canvas from excess elements, they begin to remove the old coating.
You can remove old paint using a variety of methods:
- If the canvas has a thin layer of paint, it is advisable to use a special remover, which is a chemical agent that contains acid. This method is considered the most gentle. Apply the remover using a brush to the door covering and wait a certain time specified in the instructions for use. Soon the old coating will swell, after which it is removed with a spatula.
 Chemical solution applied to old paint with a brush or roller
 Important! When using chemical agent To clean the surface of the canvas, protect your hands and eyes from contact with the product.
- When many layers of paint have already been applied to the canvas, you will have to put in a lot of effort. In such cases, a special hair dryer is used. Under the influence of hot air, the coating will swell, after which it is also removed with a spatula. This method is quite effective, but sometimes due to careless work you can damage the surface of the door.
 Removing old paint with a spatula using a hair dryer
 - If you don’t have a hair dryer, you can use another method. Place a damp, stiff cotton cloth on the door leaf and press down with a heated iron. After two minutes, remove the rag and iron, and clean off the paint with a spatula. This procedure is quite labor-intensive, and with its help it is difficult to remove paint from uneven areas on the canvas. At the same time, the fabric and the surface of the iron quickly become dirty, which will also have to be cleaned.
Updating the door leaf
The particles of the old coating remaining after cleaning are removed using sandpaper. First you need to go over the door leaf with coarse sandpaper, gradually moving to the “zero” sandpaper.
Important! Grinding work is carried out along the fibers to avoid the formation of transverse lines.
 Sanding grinder
 After sanding, the blade is inspected for various defects. Small cracks can be repaired using putty. Large depressions are more difficult to eliminate. In most cases, to eliminate large defects in the canvas, you will have to cut out the damaged fragment and prepare an overlay from wood. It is adjusted in size and attached to the canvas using glue. To eliminate minor gaps resulting from gluing, putty is also used.
WITH lacquered door all manipulations for removing the old top layer are identical. Only one point differs - the choice of putty must be approached with special responsibility. Since the varnish is transparent, any imperfections will be visible underneath. The color of the canvas can be changed using varnish or stain.
Important! Internal laminated or veneered structures cannot be painted. Completely different methods are used for their restoration.
Designs of this kind can be updated using a special wax pencil.
 Wax pencil, photo
 The pencil is first heated, after which all scratches and cracks are treated. The main thing is to choose the right pencil tone to match the color of the door. If the material is chosen correctly, then all processed errors will become almost invisible.
Decor selection
The second stage is to directly select the type of decoration that will be used further.
Coloring
The easiest method of updating an old door is painting. But, taking into account the features of the bathroom, you need to choose the right paint. It must be resistant to excessive humidity, temperature changes and not be afraid of frequent cleaning.
 Painting MDF doors, photo
 What paint is suitable for a bathroom door?
The range of paints is small; these are alkyd or acrylic compositions.
Advantages of alkyd paint:
- Ideal for painting MDF and chipboard;
- Available;
- Protects well from dampness;
- Not afraid of frequent washing;
- Has a wide color palette.
Disadvantages of alkyd paint:
- Professionals do not recommend using paint on structures made of natural wood.
Important! Wood has the ability to “breathe”, and alkyd compounds are vapor-tight.
This kind of coating delaminates quite quickly, resulting in cracks appearing on the surface.
- The smell of paint does not disappear for a long time.
Advantages of acrylic paint:
- Superior alkyd paints by service life;
- Not afraid of temperature changes and humidity;
- Easy to clean;
- No strong smell. There are compositions that are completely odorless.
Flaws:
- Despite the speed of paint drying, it remains susceptible to the slightest damage for a month.
Which paint should you prefer: glossy or matte?
There have been debates among professionals regarding the choice of paint type for a long time. According to their own decorative properties paints are divided into the following types:
- Matte;
- Glossy;
- Satin;
- Semi-gloss;
- Semi-matte.
The matte surface is the most unstable. This type of paint is completely unsuitable for covering door panels located in bathrooms due to high humidity. Glossy paint is also not very suitable for the bathroom, since it has excessive shine.
 Painting the door leaf, photo
 Important! If the shine of the canvas does not bother you, then it is quite possible to use this type of paint for the bathroom. Because from a practical point of view, gloss becomes the best option. Smooth surface does not absorb dirt and is less prone to stains.
Semi-gloss and satin paints are an average and universal option.
After determining the type of paint, you can proceed to directly painting the door leaf. The key rule is to choose the right color, since the painted door should be combined with the bathroom finishing elements. Apply paint in any convenient way in 2-3 layers.
Another option for door restoration is a combination of several colors. First, the canvas is covered with one color. After drying, it is sanded and a second shade is applied. You can create the desired texture using graters. After the canvas has dried, it is coated with varnish. A door finished in this way will take on a new life.
How to restore chipboard doors
This kind of material is not resistant to high humidity, so it is recommended to approach the restoration procedure responsibly. For this type of material, you should not use a hair dryer or sandpaper for sanding, as this can lead to surface deformation.
To remove the top layer of paint, you will have to resort to the “old-fashioned” method (iron and cloth) or use a remover. Use a spatula to very carefully remove the paint layer to avoid damaging the canvas.
Grinding is carried out only with a “zero”. After gentle manipulations, you can apply paint.
Important! The best option updating the chipboard structure - veneering.
Choosing the right paint is an important, but final step in restoring a structure. Equally important is careful painting, which is quite difficult to do without certain skills.
In contact with
Comments
Unfortunately, there are no comments or reviews yet, but you can leave your...
New articles
New comments
S.A.Grade
SvetlanaGrade
SergeyGrade
SergeyGrade
AlexeiDo you want to update the decor of your favorite room, but don’t want to start renovation work again? They are not necessary. It’s worth being smart, putting in a little diligence, and the transformation of your home won’t take long.
Let's start with simple decoration. Pay attention to your interior door - a key element in any interior. Decoupage glass on the door will help give it an updated and sophisticated look.
Decoupage as a decoration tool
The essence of the decoupage technique is to cover the surface with cut or torn paper fragments and cover them with varnish. In this way, anyone can decorate their home with unique things and interior elements, decorated with hand painting, because this is exactly what glass decoupage looks like on any object, especially on a door.

This design looks attractive on a transparent surface. Glass transforms the image, breathes life into it and adds volume. Besides this interesting technology, you can update the decor using fabric and wallpaper. They will improve the style of an old door, embodying your fantasies or decor ideas from leading designers.
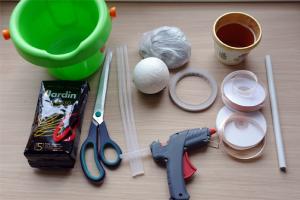
What you need to decoupage glass
The key material in the decoupage technique is the image. Handicraft stores sell ready-made decoupage cards, with which you can easily and quickly make beautiful decor on glass

Shake out your bins, which are sure to contain some cool images from old magazines that are suitable for glass decor. It is recommended to scan the image and print it on rice paper. It will help to advantageously play up any areas of the image, creating a three-dimensional pattern on the glass.
But if you want to create individual project with a unique design, draw it yourself on special rice paper. A glass panel decorated with your photos will give the room a special decor. You also need to print it on special paper.

But there is also a way to prepare a drawing you like from any paper material. To decorate a photo, wallpaper or other paper image is varnished, and a thin layer of plaster is applied to the back side, after which the peeling parts of the once intact paper product need to be removed with extreme care. The resulting picture is used to decorate glass.
Often, novice decorators use ordinary three-layer napkins with a pattern they like. They combine ease of use, low cost, a huge selection of design options and color range, the original appearance of the resulting product. What else do you need for decoration?

When choosing a napkin for surface decoration, you must first straighten the folds, otherwise they will remain on finished product. It's easy to do. To do this, spray the napkin with hairspray and iron it thoroughly. The napkin is ready for decoration.
Important! Lucky on water based may warp the napkin, so read the composition carefully before starting work.

In addition to this, you will also need:
- glue;
- putty;
- scissors;
- brushes for applying varnish and paint.
Step-by-step instructions for decoupage
Before starting work, thoroughly prepare the surface intended for decoupage.
Step 1: Wash it with soapy water or special means for glass.
Step 2. You will need regular alcohol. Apply it to the canvas and wipe with a dry cloth to degrease the surface.
Stage 3. Dry the prepared canvas thoroughly.
Applying an image to a canvas using decoupage
Stage 1. Carefully cut out the elements of the design. If it consists of many small parts It is not necessary to cut out the entire image. You can divide it into components.

Stage 2. Glue is applied both to the glass sheet and to the prepared drawing. It is important to spread it in a thin layer so that it is not noticeable when it dries.
Stage 3. The prepared image is applied to the glued surface. By using paper towel Pressing movements remove air bubbles.
Stage 4. After this, a layer of varnish or glue is applied to the finished drawing. Wooden stick excess is removed. Your decoupage is ready.
How to elegantly age an image
If you want to give the image an antique effect that will emphasize the design individuality of the interior in Victorian, country, or shabby chic style, then it is not so difficult to do. We offer ways to get the desired result.
The effect of antique decoupage from scrap materials
Prepare a decoction of onion peels, freshly brewed coffee beans or strong tea. Just hold the image for a while in one of the proposed compositions.
The effect of antique decoupage from artistic materials
Pour turpentine into a suitable container and add literally a couple of drops of oil-based paint in the color of burnt sienna. Keep the image there for a while. In this way you can achieve the effect of ancient parchment.
The effect of antique decoupage from building materials
Add a little bitumen to white spirit until a pale color is obtained. Apply the resulting composition to the pasted image. To get a cracking effect, go over the image with a metal brush.
Door decoration
If the design of glass on the door seems not enough for you, treat the canvas itself. For this, different methods and materials are used. Let's look at the most creative examples of decor, which are often used by seasoned designers when creating a new look for an old door.
The easiest way to decorate a door is to paint it. Using paint in standard “door” colors will simply refresh it, but using rich shades and their combinations will radically change both the decor of the door and the design of the entire room.
Decorating with fabric
As with decoupage, the surface is first prepared according to the previously described principle. While the door is drying, prepare the fabric. To determine the degree of shrinkage, measure the size of a piece of fabric, wet it and dry it. After this, measurements are taken. If the difference in parameters is large, then all the material will have to be subjected to such processing.

The fabric is fixed to the door leaf using glue, it is preferable to use casein glue. In addition, you may need a hard spatula and, if desired, decorative fittings.
Step 1. Prepare decorative fabric according to the size of the door.
Attention! You can use not a single piece of fabric, but a combination of scraps of fabric of various geometric shapes, which will form the overall pattern.
Step 2. Apply glue to the surface in an even layer and attach the fabric. Using a spatula, smooth the fabric, removing air bubbles and smoothing out wrinkles.
Stage 3. Add suitable decorative accessories to the fabric surface.
Decorating with liquid wallpaper

Liquid wallpaper is a universal material that will create unusual patterns and even three-dimensional designs on the surface.
What you will need for decoration:
- dry wallpaper mixture;
- hopper gun;
- roller;
- selected pigments for tinting;
- transparent varnish;
- alkyd primer;
- oil putty white under liquid wallpaper;
- spatulas of various sizes.
Before applying wallpaper, the surface is prepared in a well-known way. It is recommended to remove old layer paint, if available.
Stage 1. The door is coated with a primer in one layer, and then puttied.
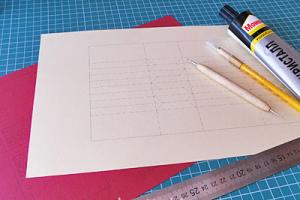
Stage 2. If you want to create using liquid wallpaper some kind of drawing, then draw its outline with a simple pencil on a surface. To avoid confusion, make notes indicating the use of a specific color.
Step 3. Add to wallpaper mixture warm water and mix it with your hands. After 15 minutes, stir again, adding the desired color. The more colors, the richer the shade.
Attention! When creating a multi-colored picture on the door, it is recommended to prepare the wallpaper mixture in portions, by color. The mixture is infused for approximately 12 hours. After this period, you can begin decorating.
Step 4. Take a little wallpaper mixture on a spatula and spread it evenly over the surface of the door. Make sure that the layer of wallpaper applied is the same thickness. If you want to add relief to this decor, go over the applied decorative layers with a textured roller.
This decor dries in 1 to 3 days. After complete drying, the decorated surface is varnished. If you don’t like something, repeat the decorating process, washing off the applied layer with warm water.
As you can see, making colored decoupage or door decor yourself is not so difficult. To study the decorating processes in detail, check out the video.
In contact with
Comments
Unfortunately, there are no comments or reviews yet, but you can leave your...
New articles
New comments
S.A.Grade
SvetlanaGrade
SergeyGrade
SergeyGrade
AlexeiYou can update your interior quickly and inexpensively using non-standard design. There are many design solutions, within which the door decor fits organically into the design and gives the room a logical completeness.
Decorating doors with your own hands is not only an easy way to transform your living space, but also an excellent method for eliminating minor design defects that appear during long-term use. In this article we will look at the basic principles of this kind finishing works and give examples of the most interesting and affordable options.
Wallpapering doors
Currently available in stores wide choose materials that are great for decorating interior doors. However, wallpaper has been taking the leading position for quite a long time. Classic wallpaper looks great both on walls and on other interior items (including as door decor).

To use this method, you don’t have to spend a lot of time and money on finishing work, and a wide variety of wallpaper models allows you to choose the style and shade that suits you.

Note that to decorate doors it is not necessary to use wallpaper to match the walls; you can choose any pattern or color you like (this can also be modern photo wallpaper).

Classic wallpaper
If you are going to decorate interior doors with your own hands, then it would not be amiss to note the need correct selection materials. In the case of wallpaper, you should give preference to more expensive products, since cheap options most often cannot be smoothed out and quickly lose their appearance. It is worth paying attention to the quality of the adhesive mixture.
 Choose only high-quality wallpapers
 As for the process of decorating walls with wallpaper, everything is simple:
1. First, the surface must be thoroughly cleaned of traces of dirt and grease using a degreaser or solvent.
2. If there are chips or other defects, use a special wood putty.
3. It is necessary to dilute the glue to the desired consistency, according to the instructions on the package, and apply the solution to the door leaf.
4. Cut a strip of wallpaper to the required length and try it on the door, then cover it with glue.
5. The process of applying wallpaper begins - when gluing the canvas, make sure that there are no bubbles left on the surface.
6. To smooth out defects, use a roller or wide plastic spatula.
7. Excess parts of wallpaper are removed with a regular stationery knife.

In the video: covering a door with wallpaper and decorative moldings.
Textile
Do-it-yourself door decor involves independent choice materials and unusual design methods. One such technique is the use of fabric. The selected material can become either an integral decoration of the door leaf or a partial decor.
You can decorate the door leaf as follows:
1. Measure the width and length of the part of the canvas that you want to decorate.
2. Make a fabric pattern according to the dimensions obtained and cut it out.
3. Apply double-sided tape around the perimeter of the door.
4. All that remains is to glue the cut fabric onto the door, after making a fold along the edges.

Most often, for this kind of finishing work, whole pieces of fabric are used, but decoration made using the “patchwork” technique looks great in the interior - several fragments of different colors and textures are taken.

A universal option for decorating old doors is liquid wallpaper. With their help, you can recreate entire pictures of incredible patterns on the surface. To work you need to prepare following materials and accessories: alkyd primer or white putty on oil based, dry wallpaper mixture, set of spatulas different sizes, roller, color and clear varnish.
Related article: Which interior doors are best installed in wooden house: selection tips and installation steps
 If colored liquid wallpaper is purchased, then there is no need for color
 Compared to classic wallpaper, the process of applying this material has a number of distinctive features:
- At the stage preparatory work The door leaf is covered with a layer of primer or white putty. It is important to wait until the coating is completely dry.
- According to the instructions from the manufacturer, you need to prepare a mixture of liquid wallpaper, adding the required amount of water and coloring to give color.
- Using a small spatula, apply the wallpaper mixture evenly in a thin layer. If desired, you can prepare wallpaper different shades and create a multi-colored composition.
- When received decorative coating Once it dries, it should be fixed with clear varnish.

Important! The main disadvantage of liquid wallpaper is the impossibility of using it in rooms with high humidity. This material is easily exposed to moisture and may peel off.

One more in an unusual way The design of the door is the use of glass and various mirror elements. This approach allows you to visually expand the space of the apartment, as well as make it more illuminated.

Door decor is quite simple:
1. To begin, remove the canvas and place it in convenient location. It is advisable to treat the surface with a degreaser.

2. Make marks for the future location of the mirror, according to its dimensions.

3. Apply glue (or better yet, a good sealant) around the perimeter and in the middle of the marked area.

4. Place the mirror and press it firmly against the surface of the door.

5. For additional decoration, the mirror can be decorated with a frame, and it is still glued with the same sealant.

6. Until the sealant is completely dry, it is better to additionally secure the frame with tape.

Now acrylic panels with amalgam are also especially popular among Russian citizens - they are characterized by increased reflectivity. The disadvantage of using mirror panel refers to the high cost of production. However, high quality and unsurpassed aesthetic characteristics cannot leave buyers indifferent.

Buckwheat door decor
Design doorway You can also use regular buckwheat husks. This method of framing is very controversial, but has a number of advantages: it is a non-standard approach, the versatility of the material, as well as the low cost of the material, ease of application and the ability to create a wide variety of patterns. The downside is the fragility of the coating.
Work order:
- It is advisable to remove it from the door old finishing, be it paint, varnish or any other coating.
- The surface is degreased and covered with a layer of dark brown paint. If there are glass inserts, it is better to protect them around the perimeter with masking tape.
- When the paint has dried, PVA glue is applied on top, after which everything is sprinkled with buckwheat husks or the grain itself.
- All that remains is to fix the resulting decor with acrylic transparent varnish.

To give the composition completeness, craftsmen recommend transforming the picture frame or other interior detail located next to the door in the same way.

Vintage style decor
IN Lately vintage style has become especially popular. It is used to decorate living rooms, bedrooms and other living spaces. The special atmosphere of such interiors creates a cozy and homely mood. As the masters note, the vintage style can “bring old doors back to life” and fill the space of the apartment with a unique charm.

For finishing work you will need: coarse sandpaper, PVA glue or a special mounting mixture, baguette, paint light color(preferably pastel), rollers and brushes, fixing varnish, additional decor at your discretion.
Decoration progress:
- The main stage of decoration involves painting the door in a neutral color. Next you need to wait until the paint dries.
- Using sandpaper, the canvas is lightly sanded. Traces of natural wood will appear through the layer of previously applied paint, giving the surface an aged look.
- Upon completion of rough processing, decoration of the central part of the door begins. To do this, the selected baguette is coated with glue on the reverse side and pressed tightly against the canvas.
- Additionally, you can decorate the composition using old music books, posters, geographical maps and any other vintage images - they are simply glued to the surface. You can also install antique fittings (for example, a handle).
- To make the resulting decor shine fully, the baguette is painted, and two layers of transparent acrylic varnish are applied on top of the pasted pictures.
Decorating old doors
New interior and entrance doors cost quite a lot, which is why if there are small defects on the surface of the door leaf the best solution there will be restoration and subsequent decoration of this subject interior This approach applies to old furniture, which over time lost its original appearance.
The procedure for decorating wooden doors is as follows:
1. The door must be removed from its hinges and the old fittings replaced with new ones. It is advisable that locks, latches and door handles were made in the same style.

2. After you have removed the door leaf, you need to remove the old paint. To do this you will need a hair dryer and spatulas of different sizes.

3. It is very important to properly repair all microcracks and scratches on the surface of the door. This can be done using putty and special putties.

4. When the surface of the door is completely dry, you can begin sanding. At the same stage, it is necessary to apply a layer of drying oil to the canvas, which will prevent the coating from deforming under the influence of negative environmental factors.

5. Exists a large number of ways to decorate the door leaf - you can use paint or apply a layer of varnish, create an interesting composition using stencils or imitate moldings.

In the video: how to restore a door or give an old door a fresh look.
Decoupage technique
To decorate the door leaf, you can also use the decoupage technique. This method is easy to do with your own hands, which allows you to recreate exactly the design that reflects the interests of the residents of the house. The decoupage technique perfectly complements the vintage style, decorating it and giving it a modern look.
Decoration is carried out using napkins, which are fixed to the surface using decoupage glue or PVA.

Before gluing the composition of napkins, the door must be treated with putty (to level the surface), first covered with dark paint, treated with wax, and then painted white acrylic paint and lightly sand. This will create the same antique effect.
Updating a door using self-adhesive film
Self-adhesive film is also used to decorate old doors made of natural wood, glass, metal and even plastic. A distinctive feature of this material is its high elasticity, which makes it possible to frame the door with the most different ways(around the painted surface). That is why self-adhesive film Great for decorating furniture, door panels, windows, and window sills.

If you do not have additional material resources, but are striving for a radical transformation of the interior or entrance door, then great solution will be the purchase of this material.

Using paints
You can update the interior with standard door painting. The advantages of this method include: accessibility, long term operation, elimination of defects and stains, variety color options and ease of maintenance of the coating. However, such decor today will surprise few people. It makes sense to decorate a doorway with paints in a children's room, especially if you involve a child in this process.

When buying paint, give preference to acrylic products. These materials lie flat on the surface, leaving no stains or smudges.

Stained glass painting
For registration glass doors All kinds of stained glass windows are ideal. As a result, you will get an original and spectacular interior, visual expansion of space and thematic zoning of the house. And all this with the help of one or two small stained glass windows. You can create stained glass on glass with your own hands; for this, art stores sell sets of stained glass paints.

In addition to paints, you will need a contour - the so-called metal border between fragments of different colors.

Decor using old maps or posters
To decorate the interior door of a teenager's room, you will need a stack of old posters, fragments from newspapers or magazines, as well as geographical maps. For a child, such a decoration will be a pleasant surprise, especially if the door to the room is decorated in the style of his favorite musical group. You can paste the scraps in the same way as with classic wallpaper.