The modern market offers a huge number of different materials for ceiling finishing. Some people prefer stretch ceilings, others construct suspended plasterboard structures. However, today we will talk about lining - how to choose a material suitable for the ceiling, how to construct the sheathing and how to carry out installation. Covering the ceiling with clapboard is a very labor-intensive task, so you must approach the issue with all responsibility.
Features of choosing lining for the ceiling
Once upon a time, lining was understood exclusively wooden version of this material, but on the modern market you can already find several variations. When choosing a particular type of material, personal wishes, financial capabilities, goals and features of the room itself should be taken into account.
Modern lining is made from:
- wood;
- polyvinyl chloride (PVC);
- pressed hardboard (MDF).
Let's take a closer look at each of the varieties.

Wooden lining
Obviously, it will ideally emphasize the “natural” design of the room. This lining is absolutely safe and can be used in any room, and the cost of the material depends on the specific type of wood used in the manufacture. As a rule, alder, cedar, aspen, fir, oak, larch, etc. are used for these purposes.
Pine boards are characterized by excellent antiseptic characteristics, which is explained by the resins they exude, which give the material similar properties. These resins protect the wood surface from mold and mildew. Another advantage is that pine by nature has few knots, and this, in turn, was reflected in the quality of workmanship.
Note! Hardwood is an option that is more suitable for indoor use, while lining from coniferous species universal. However, any lining is susceptible to high humidity, so you must take care of appropriate impregnation and regular ventilation.
Wooden lining is also classified according to the quality of the board into four groups. Let's look at them.
Prices for lining

Table. Classification of lining according to board quality.
| Class | Description |
|---|---|
| The material is in perfect execution, free of any dents, cracks or chips. It is produced by using the splicing method, but it also costs accordingly. Such lining is unsuitable for damp rooms, because in conditions of high humidity it can become covered with cracks. |
| Small knots may be detected on such material, but there are no other defects. The most popular category of lining, which is available to most consumers. |
| There are some defects, but they are minor. The material is undesirable for use in living rooms, but for balconies and summer houses this is the best option. |
| Low-grade lining, characterized by numerous defects. |


Video - Features of choosing lining
MDF lining
It looks similar to its wooden counterpart, but is produced using a completely different technology (we are talking about pressing wood chips). The main disadvantage of such lining is the fear of moisture: upon contact with it, the material swells and loses its original properties and appearance.
This finishing option is more suitable for walls, although it is often used to imitate columns in a house. The advantages include good noise and thermal insulation characteristics.

Note! MDF lining of various colors and textures is available on sale, but the important thing is that they can be easily combined. Finally, the installation procedure is also not complicated.
PVC lining
A good finishing material that is ideal for the ceiling. Easy to install, but at the same time quite fragile (you need to remember this if you plan to cover the walls with boards). Therefore, PVC lining cannot be used where there is a high probability of its deformation or damage.
Such a lining can be:
- seamless;
- with a seam.
In the first case, the material forms a complete and smooth surface, and the seams between the panels are almost invisible. If you use lining with a highlighted seam, it will look like Euro lining on the ceiling. Another advantage of PVC panels is that they are impervious to moisture, but can fade under the influence of ultraviolet radiation.
Prices for PVC lining
PVC lining
Note! It turns out that the ceiling can be sheathed as wooden clapboard, and plastic (polyvinyl chloride) panels.


We calculate the amount of material
To calculate the required number of linings, you need to know what the dimensions of this cladding material are. In accordance with GOST, the standard width of one board should be up to 15 cm, length - 600 cm, and thickness - from 1.2 cm to 2.5 cm.
GOST 8242-88. Profile parts made of wood and wood materials for construction. File for download.
Panels with a thickness of less than 1.6 cm are used for interior decoration, and lining with a thickness of 1.8 cm or more is used for external works. If you know the dimensions of the boards, you will be able to determine their square footage. Let’s say the width of the lining is 9.5 cm and the length is 600 cm. In this case, the total area of one panel will be 0.57 m².
To calculate the required amount of material, divide the area of the ceiling by the area of one board. For example, the ceiling area is 9 m². In this case, the calculations will look like this:
9 m²: 0.52 m² = 17.3
This means you will need at least 18 panels. But remember that during installation the width of each board will be slightly less than the total - this is explained by the nuances of the tongue-and-groove fastening of the material.
Prices for ceiling panels
ceiling panels
Checking purchased panels
So, you have chosen the type and color of the lining, and calculated its quantity. We purchased it and delivered it home. What to do next? Now you need to lay out the panels on some flat surface and look at them carefully. The fact is that sellers often put several low-quality copies inside the package. But it’s better to check this point directly in the store.

Next, you need to pay attention to drying the lining (this only applies to wood panels). Products made from MDF and PVC do not require this procedure. Drying is necessary to ensure that the boards do not become deformed. The procedure should last at least 14 days, but longer is possible. This rule should never be neglected.
Stage No. 1. We prepare everything you need
The work must begin with preparation necessary equipment; To cover the ceiling with clapboard you will need:
- drill or hammer drill (for a concrete ceiling, the diameter of the drill should be at least 6-7 mm);
- building level;
- screwdriver;
- roulette;
- hacksaw or jigsaw (to cut panels; tools are suitable for all types of lining).

In addition to the lining itself, the features of the calculation and selection of which were discussed above, other materials will also be required. So, to install the panels you will need a frame (sheathing), which can be of two types.
- Wooden sheathing. The best option for the home, because it costs less than a metal profile, and it is much easier to attach panels to it.
- Metal sheathing. In most cases it is used for drywall.
If you plan to cover the ceiling in the bathroom, then it is better to give preference to a metal frame, since in conditions of high humidity the metal does not deform, which cannot be said about wood.
So, if the frame is wooden, then prepare:
- beam 4x4 cm (according to the ceiling area);
- self-tapping screws;
- brackets;
- wedges (plastic or wood) for mounting the frame.
If the sheathing is metal, you will need:
- metallic profile;
- self-tapping screws;
- fasteners;
- anchors;
- suspension.
After preparing everything you need and drying (if required) the lining, you can start working.

Stage No. 2. Preparing the ceiling
Step 1. Remove old plaster, clean the ceiling surface from dirt and dust.
Ceiling profile prices
ceiling profile

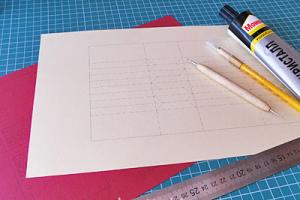
Step 2. Draw the markings for constructing the frame. Preliminarily determine in which direction the lining will be attached (it is advisable to give preference to the one in which there will be no end joints between the boards).
Note! Due to their fragility, wooden elements must be treated with an antiseptic before installation. But this still will not guarantee 100% protection.

Step 3. If we are talking about a private house, then you also have to lay thermal insulation material. Install the profile posts in increments of 50-60 cm, and lay insulation between them. As for apartments, there is no need to do this.
Step 4. First, determine the level at which the sheathing is mounted. Then mark the direction of the bars. The panel must be attached strictly perpendicular to the direction of the beam. It can be mounted vertically, horizontally and diagonally.
Now secure the brackets at the same distance from each other. Attach a wooden beam to the brackets. To level the level of the sheathing, use wooden wedges.
The sheathing is installed very evenly; the lining will be placed on it. Otherwise, the coating will turn out wavy and ugly.

Step 5. Install fasteners with a maximum pitch of 50 cm. For eurolining, this figure should be half as much.
Proper preparation is a very important stage of cladding, on which the durability of the entire structure depends.
Stage No. 3. We install the lining on the sheathing
The installation procedure is not complicated; it does not require special skills or knowledge. It is recommended to carry out the work with an assistant - in this case, boards of any length will be fastened quickly and efficiently.
Step 1. Take the first panel and secure it tightly with the tenon to the wall. It is important that the boards are attached perpendicular to the sheathing.
Step 2. Adjust the position of the first panel using a level, then secure it.

Note! The lining can be attached both to clamps and to small nails. The last mounting option can be used only for those rooms where the aesthetic component is not particularly important.

Fastening with clamps will cost much more, since you will have to spend money on purchasing them.
Step 3. Take the second panel, insert it tightly into the grooves of the first and fix it in place where the frame runs.
Step 4. Attach all other panels in the same way. The last board may need to be cut, so try to keep it against the least visible wall. For wooden and MDF panels, it is better to use a jigsaw, and for plastic panels, a hand saw. Openings for communications and lighting fixtures measure directly during installation - this will help avoid mistakes.
Note! If you use nails for fastening, their heads must be cut using a special tool. In the future, the attachment points must be covered with wax.
Step 5. To decorate the finished ceiling covering, secure wooden plinths around the perimeter - they will perfectly hide the cracks of the cut material. You can also paint the ceiling to make it look even more beautiful. Although it is advisable to coat the wooden lining with varnish, and the baseboards with dark stain and varnish.

Prices for suspended ceilings
suspended ceiling

Video - Do-it-yourself ceiling cladding with clapboard
How much does the lining cost?
The cost of the boards depends on many parameters, including the type and type of wood, the length of the panels, the equipment used to make them, etc. Based on price, lining can be divided into three large groups.
- Expensive. High quality material made from soft hardwoods. As a rule, such panels are processed according to European standards. The cost usually starts from 310 rubles per sq. m. m.
- Average. Hardwood, which will cost 215-300 rubles per sq. m. m.
- Cheap. We are talking about boards made of coniferous wood. These cost between 100-215 rubles per sq. m. m.
If you plan to hire a specialist for sheathing, you can calculate the approximate cost of his services. Finishing one square will cost somewhere between 150-350 rubles (the specific amount depends on the complexity of the work and the qualifications of the craftsman).
Features of caring for lining
If you use wooden lining for the ceiling, be sure to take additional measures. So, to extend the life of wood, treat it with special solutions that prevent rotting, the development of mold and mildew. These include impregnations and primer mixtures. When choosing a product, look at the color - it should be the same as the color of the final result.

Note! The lining can also be impregnated with oil or coated with varnish or paint, as mentioned above. You can choose what exactly to treat the ceiling with.
To maintain the original appearance of the coating, wipe off dust as often as possible. If the contamination has started, and a soft damp cloth can no longer cope, then use special means for processing, which are commercially available in a wide range.
What and how to cover the ceiling so that it is not only beautiful, but also practical, and, if possible, environmentally friendly, interests many. From the variety of finishes, experts highlight clapboard cladding, a material that is one of the most common methods of finishing the ceiling.
Peculiarities
Interesting origin of the name building material. Previously, transport cars were lined wooden slats, which then began to be used in interior decoration. This is how the generalized name for the wooden material came about.
Its main feature is naturalness. A room in which the ceiling is decorated with wooden paneling breathes. A natural microclimate is formed in it due to the property of wood that absorbs moisture when there is an excess of it and releases when there is a shortage.

Distinctive Features are:
- naturalness and naturalness;
- durability and reliability in use;
- heat and sound insulation;
- security;
- resistance to decay processes;
- ease of care;
- ease of installation;
- originality of appearance;
- complete safety for health;
- a great opportunity to hide communications.


Wooden lining is the ancestor of such products as metal and plastic lining. A feature of all types is its shape and installation. A classic of the genre - wooden lining is suitable for finishing different surfaces, including the ceiling. The existing disadvantage - poor moisture and heat resistance - is easily eliminated today. The necessary impregnations will easily cope with this problem.
The plastic version of the ceiling lining is primarily budget-friendly. Produced using seamless technology, it is attractive and elegant. However, it has a number of serious disadvantages. The main one is its fragility. Over time, it loses its snowy whiteness, fades and turns yellow. Subject to mechanical stress and temperature reactions.


Lining, made from thin sheet steel and aluminum, is more often used in finishing the facade of a house, but it can be used in utility and courtyard buildings. Aluminum product is almost forever, which cannot be said about the analogue. Inexpensive material– short-lived. Minor damage to the protective layer leads to an irreversible process - damage to thin metal.

Due to its many types, lining is suitable for finishing ceilings in rooms with different requirements operation and aesthetic needs.
How to choose material?
There are many manufacturers of this material, but the quality of the products sometimes leaves the best. To avoid making a mistake in your purchase, you should carefully inspect it during purchase. You should pay attention to every little detail.
Packaging – you should be wary if the lining is sold packed in film. This fact indicates the low quality of the product, since the seller is not allowed to tear the film and pull out the panel for inspection. Also panels covered with film are exposed to humidity resulting from lack of ventilation. This packaging negatively affects the quality of even first-class materials.

If possible, carefully check the plate itself. Slight bending jeopardizes the result of the work performed. It's better to refuse such a product. Firstly, there will be difficulties during installation. Secondly, even after installing it, there is no guarantee that it will last long.
If visual inspection is clear, inspect the surface. Transverse waves may appear on the board. The most thorough inspection is necessary for connecting structures (grooves and ridges). Under no circumstances should they contain chips or cracks.

For inspection, it is advisable to have a clip that can detect waves. If any are found, the clamper will not be able to be installed as needed. Make sure that assembly is easy when trying to connect individual panels.
Be sure to use a device, if available in the store, to measure the moisture content of the lining. Take the time to examine your purchase - this will guarantee the final result.


When choosing a finishing material, you need to have an idea of its specifications. Wooden lining is divided into four quality categories. They have significant differences. It is impossible to choose quality materials without paying attention to them.
- Class "A" products completely suitable for ceiling cladding. Errors are possible here, such as resin stains (no more than two), non-through cracks (one or two), one knot is allowed.
- Class "B"- relatively good material. Its use in residential premises is undesirable due to its aesthetic characteristics. This is an increased number of blind cracks, knots and resin stains.
- Class "C" products is of low quality. It is used for cladding only outbuildings. In this group, the criteria are completely different - falling knots, through cracks, resin pockets. However, this material is not a complete defect.
- “Extra” class products characterized by the complete absence of any defects. This is an ideal option for finishing ceilings.

This classification is a guiding star when choosing wooden lining. The type of wood affects the performance characteristics of the manufactured product.
Design
A white ceiling looks unusual and original in combination with various materials. Lining on the ceiling in modern design popular and in demand, as the trend towards economical materials contributes to the creation of a unique style. And lining is just such a product, characterized by a natural texture, adequate cost and ease of installation.
To create it, various tree species are used:
- The uniqueness of pine products in soft brown shades attracts customers at an affordable price.
- Lining made from spruce is an interesting budget material. The final stage is painting the surface, since the structure of the wood is not very pronounced.
- The main advantages of larch products are durability, rich shade and expressiveness of the wood texture. This breed tolerates humidity well.
- Linden, plastic in origin, has attractive golden hues.


Coniferous types of lining are durable, practical, and resistant to moisture. Undesirable in rooms with constant high temperature. Since the released tarry substances can lead to fire. Deciduous species are processed and tinted.
White color, which is the basis of any style, combines perfectly with other colors and can visually expand the space. Preference is given to oil and acrylic paints. By treating the surface with a solution that protects against moisture and insects, you can extend its shelf life.
Eurolining creates an elegant picture with the help of various combinations of diagonal stripes.

The created individual elements on the ceiling - around a chandelier, for example. An interesting note in the interior will be the ceiling made of plastic lining, varying in texture and pattern. Using panels of contrasting colors, it is possible to zone the room.


Design finds using this material will allow the owner to give a unique and individual character to his home.
- narrow and long panels expand the space;
- designs made from lines blend harmoniously into any style;
- a lattice structure with cross-positioned slats creates the image of a ceiling made of beams;
- the lining with plastic plates of different widths looks great;


- by laying MDF panels in different directions, they achieve an excellent imitation of natural wood;
- luxury in decoration is achieved by using White color, diluted with gold or silver tone;
- fashionable interiors prefer slatted style;
- The combination of wooden and painted ceilings looks impressive.


There is an opinion about the suitability of such ceilings only on balconies or in country houses. It is wrong.
In the living room it is appropriate to use this material in the design of the ceiling. Lacquered planks can transform the surface. It is possible to construct an image of beam floors as in alpine chalets or hunting lodges. This effect can be achieved by contrasting colors of finishing elements.
Remember: to get a cohesive look, you need to decorate the entire interior in the same style.. Painted lining will create a cozy atmosphere for relaxation in the popular Provence style, so necessary in the bedroom. It will acquire a barely noticeable element of antiquity and unsurpassed charm in the combination of forged furniture and varnished covering parts.

A more careful selection of such a product will avoid negative influence for people suffering from allergic reactions to the released ether compounds. Ideal room there will be a kitchen with a clapboard ceiling.
Design in the above style would also be an excellent option. Here it is possible to use beige, white, and blue tones for coloring the panels. The interior design will be beautiful in the intended way. A room with stylish appliances and steel surfaces of household items will look advantageous.

A natural ceiling would be appropriate in a kitchen decorated with natural stone or its imitation. The use of panels painted in a color that matches other objects is suitable for decorating a corridor. Don't overlook additional details and general form interior

The nursery and office are designed in a similar way. In a nursery, a careful and scrupulous approach to such coverage is also needed. The only room in the house where it is not recommended to install a lining ceiling may be the bathroom. Excessive moisture may cause the coating to deteriorate.

Calculation
Calculating the required amount of this material for finishing the ceiling is not difficult, but painstaking. And the calculation must be carried out carefully so that the final result does not bring disappointment in the form of additional costs (time, money, nerves). It is advisable to purchase the product with some reserve. You need to start with a clearly developed plan regarding the direction of fastening the elements. Record all this on the drawing.

With the help of these records it is easier to calculate the product consumed. The ceiling area is calculated simply: the width is multiplied by the length (as an example - ab - 3x4 = 12). For an accurate calculation, you need to know the dimensions of the selected cladding material. This data must be indicated on the packaging of the material and comply with GOSTs. By dividing the area of the ceiling by the area of one board, you will know how many panels you will need.

Programs will come to the rescue online calculators. All you need is knowledge of the basic parameters of the panel - width, length, height and thickness. Based on practice, it has been noted that the results of two similar measurements do not have significant differences. The accuracy of measurements will save the budget allocated for repairs and protect against unnecessary trimmings. However, do not forget about the rule of rounding up the fractional value and adding to it 15% of the strategic material reserve.
You can immediately calculate the cost of the material. When purchasing, you need to know the parameters of the lining and required quantity. And don’t forget about the factors that influence the cost: the price depends on the size of the lining, with accurate measurement of which it will be possible to purchase the necessary cash. Now it’s time to safely begin installation work.
Installation
To carry out any work, you need to carefully prepare. You don’t need any special skills, if you have the desire. But you need to assemble a tool, without which nothing will definitely work. You will need several types building level . Without a tape measure you will have to work, as they say, by eye, which is absolutely unacceptable. You need a hammer, a hacksaw, a jigsaw and a screwdriver.


If the sheathing is made of a metal profile, it is better to use scissors. When installing the casing, use a drill with an impact mechanism or a hammer drill concrete ceiling. The minimum diameter of the drill is at least 6-7 mm. In terms of time, the cladding will take a little time if the correct calculations and clear markings are made. There are two types of caracas for mounting panels - wooden and metal. The first option is considered more optimal. It is cheaper and easier to work with.
Wooden sheathing will require:
- timber 4x4 cm corresponding to the ceiling area;
- brackets;
- wooden or plastic wedges;
- self-tapping screws


For metal frame needed:
- metallic profile;
- suspension;
- fasteners;
- self-tapping screws;
- anchors.

If necessary, the lining should be dried before installation. Clean the ceiling itself from dirt, dust and old plaster. Find key marking points using a level. The first will be the lowest point of the ceiling, which is transferred to all walls and connected along the perimeter by one line. These are guidelines for the sheathing bars.
A small nuance: in places where the guides do not adhere to the ceiling, use wedges.
Anton Tsugunov
Reading time: 4 minutes
Ceiling decoration with clapboard is increasingly used in the process of improvement of apartments. The lining ceiling is assembled according to the design principle without the use of glue or mortars, and after fastening the material does not need to be puttied or painted. This means that as a result of little effort, a completely finished surface is obtained. High quality material, the right tools and clear instructions are all you need to create a beautiful and durable ceiling.
What is lining?
To figure out for yourself how to cover a ceiling with clapboard, you need to decide what this facing material and for what purposes it is used. for cladding ceilings and walls, it has the form of thin planks with a special type of connection, in which a protrusion (tenon) of the next is inserted into the recess (groove) of one element.
This finish is making the right choice The material will be appropriate not only in the kitchen and loggia, but also in living rooms. In apartments, lining is often mounted on the ceiling. Due to the variety of types, lining ceilings are suitable for rooms with different conditions operation and aesthetic requirements. For its production the following are used:
- Solid wood species.
- MDF boards.
- Plastic.
The scope of application depends on the material. For example, in rooms with high humidity the most logical would be to use plastic, since this material is absolutely not afraid of moisture and is highly resistant to dirt and fungus. MDF or treated wood will look great in any apartment and will highlight a kitchen or hallway.
Anyone can make a beautiful ceiling made of lining with their own hands home handyman. He will breathe into the room new life and will add personality to it.
Although covering the ceiling with clapboard does not require much effort, to do it you will need some specific tools:
- Hammer and screwdriver or screwdriver.
- Wood saw or jigsaw.
- Stapler, square and hammer.
- Construction and water level or level.
- Tape measure and marker.
- Metal scissors (in case of installation on a profile frame).
Frame
At this stage, you should decide on the sheathing. It can be done:
- from ;
- wooden beam.
The choice of frame material depends on the functional purpose of the room: a metal profile is most suitable for conditions of high humidity, in other cases you can choose the material at your discretion. When using ceiling lining made from wood and its derivatives, the most justified installation wooden frame, which is cheaper than metal and is excellent for fastening sheathing.
Solid wood lining installed on the ceiling creates additional load on the frame, which should be strengthened if necessary.
Cladding board
Advantages of durable wooden connection“tenon and groove”, practically devoid of gaps, have proven themselves well in finishing. The boards connected in this way have an attractive texture and, when assembled, form a durable wooden shield. A lining ceiling can be made using material with different types profiles. These include:
- Eurolining is a decorative board, rounded at one end and having a recessed groove at the other. This type of profile complies with the European standard.
- American - has a special expanding shape, thanks to which, when fastened, it creates an imitation of the overlap of boards, which is widespread in the United States. This type of lining on the ceiling will look very interesting.
- Standard lining - used on the ceiling more often than other types. When sheathing, there are practically no recesses between the planks, which are typical for eurolining.
- The block house is an imitation of a log, since the profile has a rounded front part. Finishing the ceiling in an apartment with this type of clapboard will make the surface look like a log house.
Installation of a metal frame
When using metal profiles, the sequence of work will be as follows:
- The lowest point is marked, from which the lining of the ceiling with clapboard begins. To do this, at least 6 cm is laid down, where the first mark is placed. Then it must be transferred to other sides using a level or level.
- A metal frame made of a guide profile (UD) is installed along the laid line and secured with dowels.
- It is necessary to install a supporting profile (CD) into the guides, which is fastened at a distance of 10–15 cm from the starting point of the structure.
- The supporting profile is attached to the ceiling with U-shaped brackets every 50 cm. If there is a need to increase the rigidity of the frame, then crab joints are installed.
Installation of a wooden frame
When choosing wooden blocks as the basis for the frame, assembly will proceed as follows:
- The beams are fixed to the ceiling in a direction perpendicular to the future installation of the boards, the horizontality of the structure is strictly controlled.
The distance between the beams must be maintained within 40–60 cm for plastic and 60–100 cm for MDF and wood.
- At the beginning of the work, it is necessary to determine the area on which the lining mounted on the ceiling will be located, and secure two beams on opposite sides of the room, then carefully align the resulting plane using a level.
- The following beams should be attached to the ceiling in increments of 50 cm, if necessary, placing wooden dies under them for exact horizontal alignment.
Depending on the type of ceiling, the beam is fastened using a driven dowel, anchor or screw. If wooden lining is used on the ceiling, the fastening should be as reliable as possible.
- After installation and alignment, a thread is pulled between the beams, following which the remaining components of the sheathing are installed.
Reinforcement of such a structure is necessary only in case of increased load on the frame, usually these are places where lamps, decorative elements or multi-level transitions are installed.
Cladding ceilings with clapboard
Products made of wood or MDF have much more weight than plastic, as a result of which clapboard ceiling lining has special installation rules.
- The lining intended for the ceiling is pre-cut into pieces of length corresponding to the distance required for installation minus 5 mm. The presence of such a gap will avoid the consequences of possible thermal expansion.
- The first strip of facing board is fixed on each guide at a distance of 3 mm from the wall.
To fix the strip on the beam, you can use clamps (fixing brackets), wood screws, construction staples, fixed with a stapler, nails.
- The next strips are installed at a slight angle, so that the tenon coincides with the lock of the already installed facing board, pushing each new strip as tightly as possible into the groove of the previous one.
During the process of installing the lining on the ceiling, it is necessary to ensure that there are no gaps between the elements, since their presence can lead to a violation of the integrity of the structure and deformation of the entire panel, which will be clearly noticeable when installing the last strip.
To simplify the installation process it is used rubber hammer, which will allow for a better fit of all structural elements. The last strip is most conveniently installed using wedges.
In most cases, the cladding board installed at the end will have to be cut along its entire length to fit the dimensions of the ceiling. In this case, it is necessary to make cuts on both sides of the MDF panel with a knife, after which it can be carefully broken. In the case of solid wood boards, you will have to use a hacksaw.

Incredibly, it’s easy to hem the ceiling with clapboard yourself! Just a few efforts, a little time spent, a little knowledge and you're done. Indeed, installing finishing materials is not difficult. It is enough to have a good assistant next to you, because it will not be possible to install it well alone.
In rooms, as a rule, ceilings are not sheathed. But the kitchen, bathroom, veranda are exactly those rooms where it will be most appropriate.
Having determined the room, let's talk about the materials and tools that we will need.
Tools and materials
 To cover a clapboard ceiling with your own hands, you need a frame.
To cover ceiling coverings with your own hands, you don’t need to buy expensive tools, because any craftsman will probably have such a tool. We will need:
- screwdriver;
- roulette;
- a hacksaw with small teeth or a jigsaw;
- level;
- hammer drill or drill;
- hammer.
By the way, the tool can be taken to construction stores for rent.
The lathing can be either metal or wood.
 Wooden sheathing it is most preferable for the home, since panels are easier to attach to it, and it is cheaper in comparison with metal profiles.
Metal sheathing more often used for drywall.
When lining the ceiling with clapboard in the bathroom, it would also be preferable to install a metal frame. This is due to the fact that metal deformation does not occur in a damp room.
To install a frame made of wooden blocks you need:
- wooden beam 40*40 mm;
- brackets, which are fastenings;
- wedges, wooden or plastic, used to install the frame;
- screws for fastening.
To install a metal frame we will need:
- steel metal profile;
- connecting elements;
- profile hanger;
- anchors and screws for metal.
Choosing material

Now we select the panels themselves. They are divided into several types:
- metal,
- plastic,
- wooden,
The principle of fastening is the same. Before you buy, you need to decide which room we will cover.
For wet rooms, a bathroom, for example, plastic is more suitable. But for the kitchen and veranda the best option It will be wooden, taking into account its environmental friendliness and naturalness.
There are many materials for cladding, and they all differ from each other.
 Wooden have four categories, differing in the presence dark spots and knots on its surface.
The fewer stains and knots, the more expensive the material.
As for the choice of the species from which the panel boards are made, it is better to choose pine, linden or cedar.
 Plastic good for damp rooms, but contact with direct sun rays causes "fading".
They bend easily and hide uneven ceiling coverings well, but cracks may appear on them from constant stress.
But the cracks cannot be restored.
MDF panels should only be used in dry rooms. Moisture can cause material deterioration, deformation and collapse.
After purchasing, you should not immediately hit the ceiling with them. The panels must rest so that their temperature is equal to the temperature of the room where they will be installed.
Preparing for sheathing.

Diagonal trim
Before strengthening the frame, you need to prepare ceiling covering. Cracks and holes need to be patched. Collapsed plaster is also removed.
It is imperative to treat the surface with a special solution against fungus that may form under the casing.
If necessary, we insulate it with penofol or isolon - this is a heat-insulating material based on foil.
Having processed the ceiling covering, we move on to the frame.
We install the lathing.
 Installation from wooden beams:
First, we determine the level at which the sheathing is mounted.
Then we mark the direction of the bars. The panel must be attached strictly perpendicular to the direction of the beam. It can be mounted vertically, horizontally and diagonally.
Now brackets are attached at the same distance from each other. A wooden beam is attached to the brackets. To level the level of the sheathing, wooden wedges are used.
The sheathing is installed very evenly; the lining will be placed on it. Otherwise, the coating will turn out wavy and ugly.
The wooden frame must be treated with an antifungal agent. This will extend the “life” of the ceiling covering.
 Installation from metal profile:
On the walls, along their perimeter, fasten the metal profile. We fix the hangers.
The main profiles of the frame sheathing are attached to the suspension itself and the starting profile.
Before fixing the sheathing, be sure to adjust the level.
After installing the sheathing, we proceed to filing the ceiling covering.
Video - how to sheathe a ceiling with your own hands:
Sheathing with nails and clamps

Now let's talk about how to attach the lining to the ceiling. This is done as follows:
- the boards are nailed to the sheathing strictly perpendicularly, pointing the panels towards the wall with a tenon;
- install using a level, attaching it with self-tapping screws;
- the second panel is inserted so that its tongue coincides with the groove of the first and is fastened in the same way as the first, applying a level.
- hem to the end;
- V plastic panels holes are made with a drill before the casing, thereby avoiding damage to the surface during installation.
The finished coating is decorated with wooden skirting boards around the perimeter, which well hide the cracks of the cut lining.
To make the lining ceiling look beautiful, you can paint it. It’s better to coat it with varnish, and cover the trim, for example, the contour of baseboards, with a stain of a darker color in relation to the main one, and then with varnish.
Now you can admire the finished product beautiful ceiling made with your own hands.
Video - installation of plastic panels:
Cost in rubles

A real professional's work.
The cost of panels depends on the type of wood, its species, the quality of drying of the material, the equipment on which the panels are made, and their length.
The panels are divided into three price parameters: high, medium and low.
High– high quality material, made from hardwood soft tree species. They are processed according to European standards. Their price is never less than 310 rubles. per square meter.
Average– deciduous hard rocks trees, their price ranges from 215 to 310 rubles. per square meter.
Low– coniferous species. Their price ranges from 100 to 215 rubles. per square meter.
When calculating the cost of cladding work, we calculate the area of the surface to be covered. Installation of cladding is estimated to range from 150 to 350 rubles. per square meter. It depends on the complexity of the work and the craftsman performing this work.
Knowing how to cover a ceiling with clapboard, using the information above, you can do it yourself. And if you need to hire a master, then you can independently calculate the cost of his work. Good luck!
Lining is considered one of the most the best materials For interior decoration housing, since it is made from natural raw materials and not only serves as a decoration for the premises, but also acts an excellent remedy for noise and heat insulation. Installation of the lining is simple, and a huge selection of textures and colors allows it to be used to decorate any design. Special attention ceilings made of lining deserve - they give the room a stylish look and fill it with atmosphere home comfort and warmth.


Peculiarities
The lining is a board that has a special groove on one side and a protrusion on the other. Thanks to this design, when assembled, the parts form a solid coating, which is reliable in operation and does not deform under the influence of temperature. Typically, lining is made from various types of wood, but panels made of plastic and metal can also be found.
The ceiling in an apartment is usually sheathed with boards made of coniferous wood - they are characterized by a beautiful texture and patterns, withstand mechanical loads and give the room a pleasant aroma.


The lining ceiling can be installed as a single-tier or decorated complex designs, consisting of several levels. The difference between the models of suspension systems lies only in the assembly of the frame. Finishing the ceiling with clapboard has many advantages, which include:
- Beautiful decor. This type of design is always in fashion and can be used for any style.
- Ease of installation work. Suspended structures do not require additional processing - it is enough to cover them with stain or varnish.
- Masking of surface defects. Facing panels can not only brighten up unevenness, but also allow you to hide communication systems and wiring that are necessary when installing lamps.
- Excellent thermal conductivity and sound insulation.
- Possibility of combination with others decorative materials . Thanks to the original combination of wood with metal and glass, you can achieve a stunning design effect.
- Environmental friendliness. Wood is a natural raw material and therefore completely safe for human health. In addition, board structures are able to maintain a certain microclimate in the rooms.

Despite the presence of positive properties, lining ceilings also have their disadvantages, namely:
- Reducing the height of the room. Regardless of whether it is a simple or multi-tiered system, when installing it, it will not be possible to maintain the height of the room. Therefore, such ceilings are recommended to be placed in spacious rooms.
- Absence fire safety . Unlike finishing the ceiling with plasterboard wooden structures can quickly ignite, so it is advisable to coat them with special mixtures that will not only extend the life of the coating, but also protect it from a possible fire.
- Low level of moisture resistance. In rooms with high humidity, it is best not to install lining ceilings, since under the influence of condensation and evaporation, the panels may change in size and undergo deformation. For such premises, it is advisable to choose plastic lining. If the design provides wooden plank, then it will have to be coated with a protective varnish.
- Instability to mold and mildew. This only applies to wooden lining.


Types of lining
Today, linings made of natural wood, plastic and fiberboard are produced for cladding ceilings. At the same time, solid wood material is extremely popular in modern design, as it is made from various types of wood. As a rule, boards made of pine and linden are chosen for finishing ceilings in residential premises - pine panels are well suited for the interior of private houses and cottages, and linden options can be used for cladding surfaces in apartments.
In addition, wooden lining differs in size, class of wood, pattern and fastening system. Wide board has the appearance of eurolining, and it looks beautiful on ceilings with beams.


Plastic panels come in two types: seamless and with a separated seam. Moreover, after installation, the latter outwardly resemble a wooden covering and are characterized by high aesthetics and affordable price, so they can be used if the house is budget renovation or you need to decorate ceilings in rooms with high humidity. Unlike natural material plastic lining is practical and presented in wide choice colors and textures. It is produced not only with imitation wood, but also decorative stone.
Seamless plastic panels have a special tongue-and-groove system in their design, so after their installation the seams are almost invisible. The width of this material is quite large, so it is used for finishing spacious rooms.


Fiberboard lining has also proven itself well. It is made from wood fiber by pressing. Such boards have standard sizes and shapes, but their designs are limitless. The outer layer of the panels is decorated with original drawings and patterns and covered with paint of various colors.
It is not advisable to use the material for decorating ceilings in damp rooms. Therefore, if you need to install suspended ceiling in the bathroom or kitchen, then aluminum or metal lining is recommended for this.


Design
There are many models of lining on the modern market, thanks to which you can make any design idea. A white timber ceiling is considered a wonderful decoration for a room, as it will not only visually expand the boundaries of the space, but also make the room bright and fill it with a special atmosphere of comfort. If desired suspended structure You can add colored areas or make inserts from dark boards.
Glossy lining also looks chic in rooms - unlike matte panels, it is practical to use, does not get dirty, and after cleaning there are no streaks left on its surface.


IN classic style wooden boards are chosen for cladding ceilings - their natural pattern and color add beauty to the interior and go well with other decorative items. An interesting option Mirror lining is also considered in the design. Its seamless wide panels are well suited for finishing ceilings in bedrooms, bathrooms and living rooms.
In order to create an unusual room design when installing lining ceilings, it is recommended to combine materials of different textures and shades. You can also additionally apply patterns on the panels that would follow the lines of furniture and flooring.


At the same time, do not forget that wood paneling requires the correct selection color range– there should be complete harmony in the interior, the ceiling should not be a separate part of the design. Therefore, it is worth paying great attention to its shape, number of levels and complexity of design. For example, massive dark-colored structures will reduce the space and make it gloomy, while light panel inserts, on the contrary, will expand the boundaries.
To further highlight the beauty of wood, suspended ceilings should have good system lighting in the form of stylish chandeliers.


Scope of application
IN Lately used for interior decoration various materials, but the greatest demand among them is lining. The surfaces sheathed with it are highly durable, versatile and environmentally friendly. Ceilings made of lining can be installed in both brick and wooden house, such designs also look interesting in apartments. Panels with imitation logs or timber can easily decorate any interior; they are especially often used for cladding the attic.


Wood goes well with stonework. The stone itself is a cold material, but if you add it with clapboard, the room will be transformed and become cozy.
For example, in a bedroom or living room one of the walls can be tiled decorative stone and install a clapboard ceiling. In the end it will work out chic design. Such panels will fit perfectly into the interior of hallways, kitchens and children's rooms. In addition, ceilings on balconies and loggias are often covered with clapboard.


How to sheathe it yourself?
Installation process suspended ceiling made of lining is simple, so its installation can be done independently, without the help of craftsmen. Finishing is carried out in two stages: first, the supporting frame is prepared, then the cladding is done with boards.


The frame is attached as follows:
- The direction of fastening the lining is determined. If it is longitudinal, then the frame sheathing is fixed transversely; if it is transverse, vice versa. In addition, before installation, you need to set the level of the future ceiling and draw markings along which the filing will take place. The frame must be mounted 5-10 cm lower from the main ceiling. To do this correctly, it is recommended to use a laser or hydraulic level.
- After all the markings, you need to secure an aluminum guide profile around the perimeter of the room. You can join the parts using self-tapping screws and dowels. In this case, the profile must correspond to the dimensions of the structure, so it is cut and positioned along the length and width of the frame. To increase the strength of the frame, it is additionally reinforced with suspensions, observing a step of 60 cm.


- The next step in installing the ceiling is laying the lining. First, you need to nail the slats to the frame, adjusting them to the size of the walls, then you can put decorative boards. At the end of the work, all joint gaps will be covered with strips, and the joints with the walls will be covered with plinths. During installation plastic lining, on the contrary, the baseboards are fixed first, and only then the panels are laid.
- The staples should be driven into the inner wall of the groove. Wooden lining is fastened with small nails, MDF panels - with nails with a large head, and plastic boards fixed to the frame using self-tapping screws and a stapler.


To learn how to attach the lining to the ceiling, see the following video.
The lining ceiling looks beautiful and original in modern interior, but so that it not only pleases with its aesthetics, but also serves reliably long term, you need to know how to attach it correctly. If installation work are carried out independently, then the following recommendations from specialists can help novice masters with this:
- Since wood is considered a “capricious” material, before use it should be kept for several days in the room where the ceiling is planned to be installed. Thanks to this, the lining will “get used” to new conditions of temperature and humidity and acquire the required form and can be easily styled. The boards must be stacked.
- If, when purchasing the material in the package, you find several crooked planks, then there is no need to be upset - they can be used in covering those places where pieces of material are needed.
- The lining should be secured with nails with a small head. At the same time, to cover the ceilings in bathrooms and verandas, the nails need to be covered with a protective mixture, otherwise under the influence of humidity they will rust, and stains will appear on the white lining that will be difficult to wipe off.
Burrs and chips around the screws can be prevented if you pre-drill holes for the screws before attaching them to the board.


- In rooms where there is unstable humidity, it is recommended to purchase yellow self-tapping screws.
- When attaching the edges of the board, it is necessary to use a center punch - it will protect the surface of the lining from mechanical damage.
- Along the perimeter installed ceiling you need to lay out skirting boards, as they will help hide the joints between the structure and the walls.
- It is advisable to sheathe the ceiling with boards from the corners to the center.
- The last panel of the structure is adjusted in width and placed in the least visible place.
- If, while attaching the lining, the self-tapping screw on its edge splits the wood, and a small crack has formed, then the self-tapping screw can be slightly unscrewed back and a small nail can be driven in nearby at an angle - this way the two halves of the board will be pulled together, and the defect will be invisible.


Beautiful examples in the interior
It is impossible to imagine a modern home interior without clapboard decoration. This is especially true for hanging structures, which have the appearance of a slatted covering and fit perfectly into the design of apartments and country houses. These look beautiful wood planking in living rooms - a ceiling decorated in this way fills the room with comfort and homely warmth.
In order for the design to be harmoniously combined with other types of finishing and decorative items, the outer part of the panels must be detonated with varnish - the result will be a stunning effect, and the natural patterns of the wood will be favorably emphasized in the general plan.

If the size of the living room allows, then you can also create a ceiling that looks like a beam ceiling. As a rule, this design idea is used when decorating rooms in the Alpine style.
In this case, it is not necessary to choose for covering natural colors, contrasting shades will also look interesting in the interior. It all depends on what colors predominate in the room.

An excellent solution would be to install such a ceiling in the bedroom. Planks white or beige colour will create a good atmosphere in the room, which will be as conducive to relaxation as possible. Typically, lining structures are chosen for the Provence style. To achieve an interesting design effect, you can lay out panels of several colors. In this case, the lining ceiling in the bedroom can become a continuation of the wall cladding.