Often, when building a roof, people have to do quite a bit Difficult choice– which option to prefer.
The fact is that modern technologies provide the opportunity for such a choice, allowing you to install any type of roof in a fairly short time. In Russia, gable roofs have always been more popular.
When thinking about which design is more suitable, the homeowner is guided by many factors: its functionality, reliability and durability, and the ability to prevent precipitation from entering the building.
 Perhaps this was facilitated by the peculiarities of the climatic conditions of our fatherland.
According to the project, a gable roof can be made in two ways: with hanging rafters, or with sloping ones. This or that method is selected based on the size of the structure itself or.
It is extremely important that the calculation of a gable roof (device rafter system) was produced correctly. The best way to handle this is to hire a professional.
The point is that in case possible error in the calculations of the required rafter section, it is quite possible that the connection of individual nodes is disrupted, or even the destruction of the rafter system itself. One way or another, the further operation of the building will be in question.
Fastening the support beam (aka Mauerlat)
It can be done using various methods:
- The most reliable of them (also the most common) is as follows. When the walls are installed, onto which the support beam is then planned to be attached, a concrete belt (continuous) is created along the perimeter of the building. It can be replaced with a beam.
Between the purlins and racks, to enhance the stability of the rafters, struts are made. Necessary parameters for struts and rafter legs are calculated by . The usual width of simple rafter boards is approximately five centimeters, but their height is up to 20.
To form an overhang that will become reliable protection external wall from precipitation, puffs or rafters are placed at least half a meter beyond the plane of this very wall. It is necessary to lay a good layer under the Mauerlat, otherwise the service life of the structure will be greatly reduced. You can use the good old or other similar material.
 Several layers are laid between the rafters, always with offset seams. Materials with low thermal conductivity, for example, regular insulation, are used as insulation. In addition to thermal insulation, it is necessary to equip... To do this with inside The insulation is fixed with a well-stretched polyethylene film.
A special vapor-proof film is used. This is a diffuse membrane with a special perforated structure. It is capable of releasing incoming interior space into steam, but prevents moisture from entering it from the outside.
Lathing: assembly order
 After this, you can begin the direct installation of the gable roof according to the drawing. The final (before roofing work) stage of completing the structure
Of all types of roofs, gable roofs are the most popular among developers. This is a very good design universal use. Such roofs can be installed on large multi-storey buildings, including with attics, and on various outbuildings.
In addition, rafter systems are in the middle category in terms of complexity; only flat ones are simpler. Due to the existence of a huge number of options for various stops, ties, overlays, etc., individual options can be selected for each gable roof option.

But you should always remember that a gable roof of a house with your own hands can only be built by those who have experience in roofing works. It is categorically not recommended to undergo training on this architectural element - mistakes are too expensive in the end. It is better to divide the work into several stages, each of them performed in strict sequence.
The more systematically the work is carried out, the lower the risk of errors. It is much more profitable to think through an action plan than to hastily make rash decisions during the course of work. This not only increases construction time, but also significantly reduces its quality.
| Stage name | Content |
|---|---|
| It is necessary to decide on the elements of a gable roof, calculate the parameters of the rafters, their location, additional elements etc. During the development of the project, it is taken into account climate zone residence, wind and snow loads and terrain. The initial data is taken from SNiP tables and adapted to existing conditions. It is very difficult to make such calculations on your own; you need to have special technical education. And there is no need to do calculations, it will take a lot of time, and the result will be approximate. The fact is that data on the height of snow cover and wind strength in SNiP have not changed for about fifty years. During this time, climatic conditions have undergone significant changes; actual indicators differ significantly from those available in the tables. It is much easier to look at the constructed roofs on neighboring houses and copy the parameters of the load-bearing elements. It is faster, cheaper and more reliable - the strength of such structures has been proven by time. | |
| In all cases, it is necessary to purchase materials in reserve. The amount of reserve depends on the experience of the builders, the complexity of the roof and the quality of the materials. There is no need to save on the rafter system; for its manufacture you should use lumber of at least first class. Why? The developer cannot always see some of the prophets of the boards by eye, but the first class provides a guarantee of quality in any case. | |
| You can start only after choosing a design and completely preparing all materials. A rafter system is a structure that has no secondary elements. Each stop, brace or other unit performs its function; incorrect connections or violations of manufacturing technology will certainly cause very unpleasant situations during the operation of the building. Currently there is a large selection of fasteners and construction technologies, making it possible to facilitate the physical labor of roofers and assemble rafter systems relatively quickly and reliably. Most experienced builders they prepare all the elements on the ground according to templates; on the roof they are only assembled into a single structure. | |
| They are used only in cases where the attic space is planned to be used as residential space. The parameters of the roofing cake, the range and cost of materials largely depend on the type of insulation. When choosing insulation, be sure to take into account temperature conditions in this area. If the thickness is calculated incorrectly, then the insulation will do more harm than good. Mineral wool gets damp quickly wooden elements rafter system will be operated in conditions high humidity. As a result, the roof will prematurely lose its initial stability indicators, and current or major repairs will be required. In some situations, the cost of major renovations may exceed the cost of new construction. | |
| The drainage system is installed on all residential buildings, it not only directs rainwater to the selected area, but also prevents waterlogging of the soil under the foundations. Overmoistening is very dangerous - foundations sag unevenly, façade walls Ah, cracks appear. As for snow retainers, this issue should be approached carefully. The fact is that on slopes with a large angle of inclination, snow does not accumulate; snow retainers are not needed on them. These elements are not required on roofs with a slight slope (within 20°); snow does not fall from such roofs, but gradually melts. |
Let's consider step by step instructions building a gable roof of a house with your own hands.
Rafter system
Work should begin only after all organizational issues have been resolved: a specific design has been selected, linear dimensions of elements and loaded units have been selected, and fixation methods have been selected. Taking into account the initial data, materials should be purchased.
Important. If there are unedged boards among the lumber, then they must be sanded. This must be done as quickly as possible; in warm and humid weather, pests may appear under the bark within a few weeks.

The rafter system consists of several important elements.
Making a Mauerlat
Mauerlat is an element of the rafter system on which the rafter legs rest. It not only absorbs the forces from the rafter system, but also distributes them evenly along the perimeter of the facade walls. It is made of boards 50×200mm, timber 50×150mm or 50×200mm. There are options for making a mauerlat from thin paired boards. The decision is made by the foreman on site, depending on the quantity and size of available lumber, the maximum load on the roof and the physical parameters of the walls. To silicate or concrete blocks The Mauerlat is fixed with studs after about one meter.

Important. During fastening, care should be taken to ensure that the studs do not fall into the masonry joint.
Between wooden beam and the wall must use waterproofing. For these purposes, it is best to use ordinary roofing felt, but you can isolate plastic film in several layers, waterproof mastics or modern non-woven roll materials on modified bitumen. There is no point in buying them specifically for the Mauerlat; you can use the pieces left over after other work.

Making rafter legs
If the house is tall, then before starting the manufacture of the rafter system, it is recommended to assemble the scaffolding. They will make it easier construction works on the rafter system and roofing. Professionals know that the time spent on the manufacture or installation of ready-made factory scaffolding always pays off in the future. They make it much easier to perform all high-altitude work. Another undoubted advantage of scaffolding is that labor safety increases, and this is very important.

Step 1. Assemble a temporary ridge run. With its help, rafter legs will be installed much easier and faster. The ridge assists during sizing and regulates the spatial position of elements. The temporary purlin is assembled using corners and screws, which will facilitate the dismantling process after the assembly of the rafter system structure is completed. The element is made from various sections; the method of temporary fixation does not matter. You should pay attention to only one factor - the position of the horizontal beam. It should be such that the rafter legs are located exactly in the middle of the building, and the tops of the ridge assembly of the rafter legs are on the same line.


Step 2. Make one pair of rafters. Take a very careful approach to solving this problem. Check the position of the legs along the entire length of the structure, take accurate measurements. In the future, this pair will serve as a template for making all the others.
Prepare on the ground workplace for making rafter legs for the whole house. The distance of the table from the ground is approximately 1 m; it is convenient to work at this height. The length and width should be such that the blanks for the rafter legs can easily fit.
Step 3. Make required amount elements and deliver them to the roof. Place them in approximately their places at once, this will make it easier to work. In all cases, one universal rule must be followed: there must be order on the roof, nothing should interfere with work or walking. This includes safety precautions, the build quality of the rafter system, and the overall operating time.

Step 4. Nail the rafter legs. This is done in two stages. At the first stage, the lower parts of the rafters are fixed to the mauerlats; they can be nailed with ordinary nails (simple, cheap and reliable) or metal corners with self-tapping screws. The nails are knocked out one at a time on each side of the rafter leg. The roof is subject to significant vertical loads, while lateral loads are minimal. Horizontal forces are held by the crossbar, corner stops, and hardware. Due to these elements, sufficient stability is ensured; there is no need to be afraid that the rafter system will fall on attic floor.

At the second stage, a cut is made in the upper part of the rafter legs and they are connected with wooden plates or metal plates. To speed up the work, sawing is done with a gasoline saw, but you need to work skillfully. The cuts will have to be made at height in an awkward position, without practical experience It will not be possible to make straight cuts.

The master first makes markings for sawing the rafters, and according to the markings he cuts with a chainsaw
During assembly, a nail is first driven into the end of the connection, then the overlay is applied and fixed.


Practical advice. On the outer rafters, mount a tie from a 50x150 mm board; be sure to lay a waterproofing barrier between the gable and the board. Tightening is needed to increase the stability of the system.
After all rafter legs are installed, remove the temporary purlin.


Step 5. Install the bolts. To do this, nail the elements on the two outer legs level, stretch a rope between them and secure all the remaining ones along it. You can use thin boards with a thickness of about 25–30 mm for the crossbars, but then it is advisable to make two elements for each rafter. One bolt on each side.


Step 6. Proceed with the installation of tie rods and vertical stops (headstocks). The process is much faster if you pull ropes at the bottom and top. Using them, you can immediately control the correct position of the elements; there is no need to waste time checking each of them separately. The ties are fixed to the rafter legs on both sides, and a vertical stop is placed between them. The upper end is inserted between the double crossbars, the elements are nailed.


Extension of boards in length


There is another method of fixing vertical supports. A piece of board is inserted between the tie rods and the crossbars, and a support (headstock) is attached to it. You can choose any one, but the first one requires less installation time.
Step 7 Create a cornice overhang. If the length of the rafter legs is not sufficient, then fillies will have to be fixed to them. They are made to size from boards and nailed down. Using a blue rope, measure the cutting lines and align the fillies to length. All this work is done from scaffolding - simply, easily and safely. Nail a 50x200 mm board to the ends.


Step 8 If you need to make it big gable overhang, then you will have to install rafter legs behind the pediment. They are fixed to the rest of the rafters using boards and metal corners.

Then fasten the rafter legs close to the pediment (do not forget about waterproofing), place inserts between them required length and attach them to the rafters.


Photo: wind boards nailed to additional rafters
At this point, the main work on the manufacture of the rafter system is completed, and you can begin roofing work.
Roofing
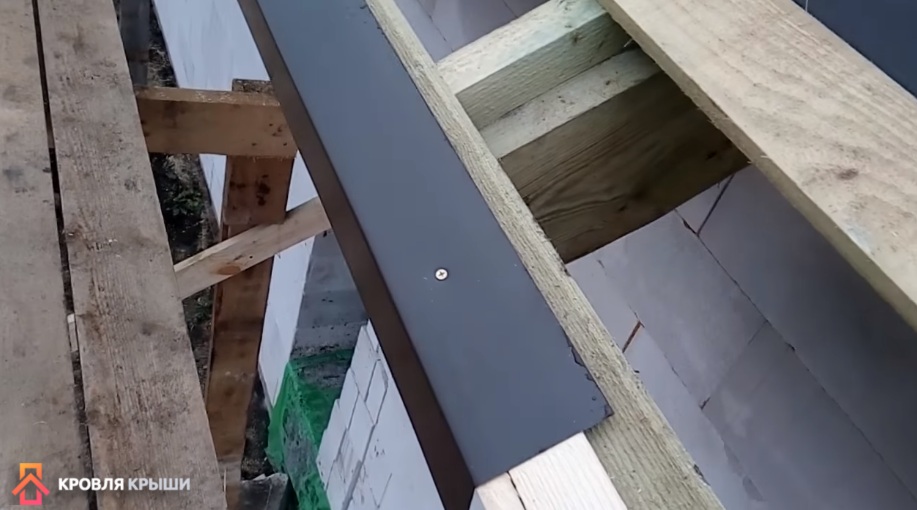
Step 1. Install waterproofing. It is fixed with a stapler on the rafter legs. You can use the so-called Finnish method - do not bring it to the end of the eaves overhang by about 30 cm.

What is special about the Finnish method of fixing waterproofing? The fact is that the material does not reach the end of the cornice and does not interfere natural ventilation under-roof space. The membrane is not attached to the drip, but hangs down into the eaves. The Finns calculated that the amount of moisture condensation dripping from the waterproofing is small. It will evaporate without any problems, icicles from the eaves will not sag in winter, and the boards will not get wet.
Why is it like this for them and not for us? It’s simple, the Finns insulate the roof and attic floors so well that losses warm air almost absent. Hence the very small amount of condensation on the roof.
What are the advantages of their method?
- High efficiency of natural ventilation of the under-roof space ensures quick removal moisture. Due to this, the service life of the wooden elements of the rafter system increases.
- The cost of materials is reduced. In addition to the fact that the footage of waterproofing is reduced, cheaper types can be used. There are no droppers at all, and this is also a noticeable reduction in cost.
- Save time. The fewer elements that need to be installed, the less time is lost to create the roof. This saves not only time, but also the wages of builders.
It is worth thinking about the feasibility and economic benefit strict adherence to recommended building codes and regulations.
Step 2. Nail the counter-lattice slats; the height of the slats must be at least 50mm, otherwise the ventilation is insufficient to remove moisture and condensation.

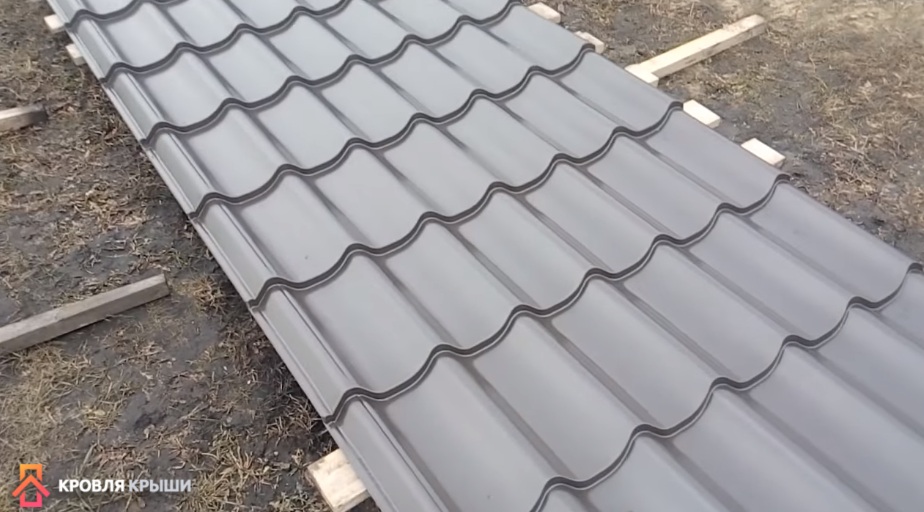
Step 3. Secure the first and second sheathing boards. Special attention pay attention to her position and stride. The point is that an error on the first board will cause big problems during the installation of metal tiles, the relief of the coating will not coincide with the location of the sheathing boards, the screws are screwed in out of place.

The second board is installed correctly if there is exactly 35 cm from the bottom of the first to the top edge of the second. This size does not depend on their width and is universal for all types of metal tiles.

Step 4. Install the sheathing. To speed up installation, prepare a template to check the dimensions of the sheathing pitch. The length of the device is approximately 40 cm, and the working part is 35 cm long. Templates can have different design, the main thing is to control this universal size.


Important. If the hooks drainage system are long, then the first board should have a width of at least 30 cm. If it is not so wide, nail several slats nearby.
On the ridge, a gap of at least five centimeters wide should be left between the slats; it serves as a vent for natural ventilation.

Step 5. Step back 5-10 cm from the outer rafter, beat straight lines on the sheathing slats and cut off the excess ends with a saw.

Practical advice. Experienced roofers accurately calculate the amount of indentation taking into account the size of the roofing sheets. The fact is that metal tiles and profiled sheets have standard sizes overlap depending on wave parameters. You need to find out the width of the sheets being mounted and, taking this data into account, adjust the dimensions of the slope. Otherwise, situations may arise when, because of a few centimeters, you will have to buy additional sheets and cut off most of them for waste.
To increase the stability of the rafter system, install wind connections on the inside. These are ordinary slats or boards nailed diagonally to the slope and several rafter legs. It is better to arrive immediately after installing the rafter legs in place before installing the waterproofing and sheathing.

Step 6. Nail the end and corner boards. To make them deform less, it is better not to use one wide one, but two narrow ones of about 20 cm each and arrange them in the form of a step. The top board should protrude above the plane of the sheathing by about 4 cm. This parameter depends on the wave height of the metal tiles or other roofing.

At this point, the work on the construction of the sheathing is completed, check all the dimensions and proceed with the installation of the roof.
Nail the wind and cornice strips with an overlap of approximately 10 cm. The wind strips can be nailed even after installing the first sheet, it does not matter.

Installation of wind boards

Step 1. Install the bottom sheet of the first row, secure it with only two screws for now. Place the second sheet of the first row and bait.

Step 2. Place the first sheet of the second row and align everything with the eaves overhang. It is better to work with a taut rope. The bottom row of metal tiles along the eaves overhang must be fixed through the wave. Next, in a checkerboard pattern at a distance of approximately 40–50 cm (through the wave). The horizontal overlap must be screwed into each wave.

Self-tapping screws must be screwed into the deflection of the wave, where the sheet is adjacent to the sheathing


Step 3. It is better to start installing the ridge immediately when installing the second row; the distance between the sheets in this place is also about five centimeters. The skate itself can be fixed through the wave. If any self-tapping screw does not hold firmly, then it cannot be unscrewed. An additional one should be fixed nearby, and let the first one cover the hole made in the metal tile. The skate is fastened with long self-tapping screws on the crest of the wave.


The roof installation is complete, install the drainage system.


Video - How to make a gable roof
The design of private houses is inextricably linked with the choice of roof type. There is a simple explanation for this - the roofing budget often accounts for a third of the total cost of the estimate. You can achieve cost reduction in several ways: choose a different type of structure, change the roofing material or rafter system. Projects are always popular one-story houses using a gable structure.
Roof characteristics
Externally, the design of a gable roof looks quite simple. Two equal slopes rest on carriers side surfaces the same height. The space under the roof has a triangular shape. The walls located between the slopes are called pediments.
An integral element of houses with a gable roof is the roofing pie. The set of component materials directly depends on the design option for the attic space. The classic set is shown in the photo:

When designing a one-story private building with gable roof pay attention to the slope of the roof. The choice of parameter is largely determined by the climate of the region where the house is planned to be built:
- The optimal indicator in places with rare precipitation is up to 45 o.
- Significant snow cover forces the slope of the gable roof to be increased to 60 degrees.
- In addition to precipitation, the roof is regularly exposed to wind loads, and an increase in the angle of inclination of the roof leads to an increase in the windage of the structure.
Private house projects are practiced individual approach in each specific case. Therefore, when choosing a material as a roofing covering, the angle of inclination of the gable roof is also taken into account. Slate and tiles are acceptable if the indicator exceeds 22 o.
Note! An increase in the slope of the slopes proportionally increases the cost of covering materials and, accordingly, the overall construction cost increases.
When choosing a structure with an economical angle of inclination of 35-40 o for a one-story private building, you get practical option gable roof, where debris and precipitation do not accumulate. But it is not possible to create space in the attic for convenient use in the future. Numerous advantages gable construction explain the popularity of its choice in the construction of one-story buildings.

Advantages of arranging a gable roof
The dynamics of construction of small private houses is regularly growing. This trend is associated with the natural desire to retire from the hustle and bustle of the metropolis in your own suburban area. A one-story house with a gable roof has many advantages:
Important! If you regularly use the attic area, you should install windows and provide for installation in advance thermal insulation material.
A gable roof is usually chosen for a one-story building with a classic rectangular shape. A photo example is given below:

Main design elements
The structure of a gable roof necessarily includes several technological units, among which the main ones are the ceiling, rafter system and roofing pie. Let's look at the features of each element in detail.
Overlap
Installation of a gable roof ceiling is carried out in several ways, using various building materials. When constructing a one-story private building, they often resort to installing load-bearing beams due to their affordable cost. Depending on the weight of the roof, metal or wooden beams ceilings The key point At this stage of arranging a gable roof, a reasoned calculation of the cross-section of the load-bearing elements is considered, which is determined based on the dimensions of the future one-story house and the planned load.
Correct calculation of the cross-section and determination of the gap between the load-bearing beams will provide the gable roof with strength and long-term operation without any repairs. overhaul. You can calculate the required indicators for a private one-story building yourself or entrust the project to a specialized company. In some cases, the ceiling for a gable roof is made from reinforced concrete slabs, which do not require additional supporting structures. But their installation requires the use of special construction equipment.
After determining the type of material, its cross-section and frequency of installation, the issue of the need to insulate the gable roof floor is considered.

Rafter system
The supporting function of the gable roof is performed by a rafter system made in the shape of an isosceles triangle located on the load-bearing walls. Rafters are of hanging and layered type, the availability of the rest depends on this support pillars and partition systems.
Let us list the main elements that can be used when one-story construction private houses with a gable roof:
- The purpose of the Mauerlat is to uniformly distribute the load from the rafter legs onto the load-bearing walls. It is made from timber with a cross-section of 100 or 150 mm. Installation is carried out along load-bearing walls, fixing with anchors or threaded rods.
- The rafter leg is an element of the system from which the triangle of the gable roof is formed. It must withstand wind loads, exposure to any precipitation and the direct weight of roofing materials. The installation pitch varies from 0.6 to 1.2 m, depending on many characteristics of the roof of a one-story private building.
Note! The main rule when choosing the gap between the rafters is that the greater weight of the roof causes a reduction in the distance.
- Like the Mauerlat, the bench is formed from timber with a similar cross-section. The gable roof element is installed along the inside of the load-bearing wall.
- Tightening required for rafter system hanging type. Its task is to fix the edges of the rafter legs, preventing them from moving apart.
- The purpose of installation on the roof of a one-story private house vertical racks– redistribution of the load from the ridge to the load-bearing wall inside the building.
- transmission link between load-bearing elements and the rafter legs are the struts. To obtain a truss, you need to connect the struts and the tie.

- The boards, fixed perpendicular to the rafters, form the sheathing. In addition to transferring the load from the roofing to the legs of the rafters, they additionally securely fix them. When constructing a gable roof of a private one-story building, boards or edged bars are used as the sheathing material. If the roof is planned to be made of soft material, the sheathing must be continuous. Typically, sheets of moisture-resistant plywood are used for this purpose.
- At the top, the two slopes of the roof of a private house are connected by a ridge located horizontally. Installation is carried out by connecting the legs of the rafters at the top.
- The roof overhang protrudes from the walls by approximately 40 cm and is designed to protect the side surfaces from getting wet as a result of precipitation.
- Fillers - an additional element of a gable roof helps to secure the overhang provided the rafter legs are short. For this purpose, boards are used whose cross-section is smaller than the size of the timber used to install the legs.
The main elements of the rafter system, which can be used for arranging a gable roof during the construction of a private one-story building, are shown in the photo:
Insulation and roofing materials
Private construction does not limit the choice of roofing for a one-story house. When arranging a gable roof, they focus on the angle of inclination, otherwise everything depends on the preferences of the developer and his financial situation. The purchase of thermal insulation material is carried out taking into account the thickness of the insulation, which should ensure heat retention during the cold period. The thickness of the material and its weight are directly related, so the cross-section of the rafters is determined based on these indicators. Produce accurate calculations It is better to provide all the parameters of a gable roof to a specialized company.

Examples of projects
Widespread development of private construction is observed in suburban areas summer cottages. Temporary living does not require large living spaces, so they often turn to one-story house designs. The gable roof in this case will be the best option. We present several interesting options cozy buildings. We will move in the direction from more spacious premises to compact private one-story houses.

Brief description of the first project:
- The living area is 112 m2.
- The slope angle of the gable roof is 29° with a total height of a one-story house of 6.45 m.
- Ceramic or aerated concrete blocks are used as construction materials.
- The ceiling is made of wooden beams.
- Options for covering a gable roof: cement-sand, ceramic or metal tiles.

- Separating the day and night zones will limit the intrusion of others into your personal space.
- Kitchen layout closed type protects household needs from the recreation area.
- If you want to make the kitchen space more open, the pantry can be dismantled.
- There are no windows on the side walls, which makes it possible to build cottage in a narrow area.
- The spacious bathroom will accommodate the entire set of plumbing fixtures, leaving space for a washing machine.

The description of the second project in terms of materials is similar to the previous one. The area of the house is 92 m2.

The absence of load-bearing walls provides a chance to easily change the internal layout of a one-story private house. A fireplace in the center of the living room will create a unique aura home comfort during the cold season. Open terrace will welcome guests hospitably and will not block the penetration of sunlight.


And finally, two more projects of one-story comfortable houses with a gable roof with an area of 77 m2 and 70 m2, respectively.

A gable roof is a roofing structure that is most often used in private housing construction. It is not only simple to construct, it is reliable and inexpensive if you correctly calculate the number of elements.. The article discusses what elements this type of roofing consists of, and how it can be assembled with your own hands. You will learn about the basics of calculations, rules and assembly stages, which will allow you to talk “on the same wavelength” with the contractors of the construction company.
What elements does a double slope roof consist of?
From the name itself it becomes clear that such roofs have only two slopes, which can be the same or different in area. The former are called symmetrical, the latter asymmetrical
Not all gable roofs are made of the same elements. But among them there are basic ones that are present in all designs.
Mauerlat– beam 100x100 mm (minimum cross-section), on which the rafter system rests. The main purpose is to evenly distribute the load acting from the roof structure on the walls of the building. The Mauerlat is attached specifically to the walls (there are several options).
Rafters, otherwise they are called rafter legs. These are boards (rarely timber) with a minimum thickness of 50 mm, located with a slope towards the walls. They form the slopes. At the lower end they are attached to the mauerlat, at the upper end to the ridge beam or to each other.
Ridge beam It is not always used, but only when the roof is covered with layered rafters. More on this below. Its purpose is to support the rafter legs.

Rafters attached to the mauerlat
Additional wooden elements that are not used on all gable structures.
Supports for the ridge beam. They are installed only if one is present in the roofing structure.
Rafter supports. Used if the width of the building is more than 12 m. The longer the rafters, the lower their load-bearing capacity.
Run, aka timber, laid on racks across the rafter legs. The rafters rest on it, and not on the supports.
Sill– a beam located parallel to the girder, only in the lower part. Rafter racks are mounted on it.
Puffs. These are bars that pull paired racks together (between each other).
Types of rafter systems
There are two of them: hanging and layered. The first type, in which the upper ends of the rafters rest against each other, and are fastened together. To increase the strength of the connection and the reliability of the structure, a tightening is often installed between them.
The second type is legs resting on a skate. They can also be tightened if the goal is to increase the load-bearing capacity of the entire system.
Attention! The tightening functions for the hanging variety can be performed by the floor beam on which the legs rest.

Hanging and layered rafters
On our website you can find contacts of construction companies that offer the service. You can communicate directly with representatives by visiting the “Low-Rise Country” exhibition of houses.
Rules for assembling a gable roof
A gable roof is assembled in different ways. Dependency - type of rafter system. Let's look at each one separately.
Assembling hanging rafters
There is a strict sequence of operations:
Produce installation of Mauerlat on walls. It is attached to them using pins, which are installed in the poured reinforcing belt. The upper end of the stud is the threaded part onto which a nut with a wide washer is screwed. It is with them that the Mauerlat is pressed against the wall.
Produce installation of ridge beams. To do this, support posts made of timber or boards are installed along the roof structure right in the middle (if a symmetrical roof is being constructed). They are attached to the beam or to the floor beams with special metal corners using self-tapping screws. Additionally, supports and jibs are installed to maintain the verticality of the racks.
For the latest ridge beams are laid, which is fixed to the racks with the same metal profiles(corners, plates, etc.). The main task of the workman is to align the ridge girder in a horizontal plane.
Rafters are installed in pairs, forming triangles of the roofing system.

Hanging rafters
If there is a need, then under the rafter legs they are installed additional racks. They are either attached directly to each other, or laid on top of the posts with a run across the legs.
On top of the rafter system lathing is installed from wooden blocks or boards.
On top of the sheathing roofing material is stuffed.
Assembly of layered
Layered rafter system gable roof frame house, and not only frame, it is assembled not on the roof, but on the ground. The thing is that it is difficult to fit the elements together when they do not have support at one end. To do this, it will be necessary to build an additional supporting structure temporary type. This is a waste of time, effort and money that no one needs.
Therefore, paired rafters, which when assembled are called trusses, are assembled in the plane of the ground. Since the structure of the truss is a triangle, which is also isosceles in a symmetrical roof, it will not be possible to assemble it a lot of work. The main task of the work manufacturer is to comply with the dimensional parameters of the truss elements. Because it will be more difficult to adjust roof trusses if there are sufficiently large dimensional errors between them.
Raise the rafter assembly onto the roof crane or other device.

Installation of layered rafters
At first install two extreme trusses along the gables of the house, align them with each other in height and secure them to the floor beams with supports and jibs (temporary).
Stretch a thread between the top points of two trusses, along which the remaining rafter triangles are mounted.
The rest is the same as in the case of hanging rafter legs: the sheathing and roofing material are stuffed.
Video description
The process of erecting a gable roof in the video:
Calculation of rafter legs
An important preparatory measure on which the load-bearing capacity of the system as a whole depends. It is impossible to carry out the calculation yourself if you do not understand it. Therefore, ordinary people use online calculators or tables. The calculation manipulations are based on the cross-section of the bars (in mm) or boards, depending on the length of the legs and the installation pitch.
The dependence is this: the longer the legs and the greater the distance between them, the larger the cross-section of the beams should be. Eg:
installation pitch 2.15 m, rafter length is 3 m, for this purpose a beam with a section of 100x150 mm is used;
step 1.4, length 3, section 75x125 mm;
step 2.15, length 5 m, section 100x250;
step 0.9, length 5.5, section 50x200 mm.
For each position there is a specific parameter for the bars used. The tables are freely available.

Distribution diagram of rafter legs
Slope slope
Determining the slope of a gable roof structure is not easy. Take into account the type of roofing. The dependency is:
if asbestos-cement slate is used, then the angle should be not less than 22°, decrease this parameter will lead to leaks at the junction of adjacent sheets;
metal tiles – angle 14°;
corrugated sheet - 12°;
bitumen shingles- corner should not exceed 15°, otherwise there is a possibility of the coating sliding off the sheathing;
roll material(roofing felt, roofing felt and others) – slope within 3-25°.
But there is one nuance here. The steeper the roof, the less load acts on its slopes, because rainwater and the snow quickly disappears from the surfaces. But at the same time the windage of the structure increases. That is, wind loads increase. At the same time, high roofs mean an increase in the cost of building materials, which increases the cost of construction.

Roof slope angle
Sloped roofs
Gable roofs with different slopes are quite common today. This is not to say that they are better than symmetrical ones, but the originality of the design made them popular. Let us add that such roofs are more complex than traditional ones with identical slopes.
These roofs are divided into three types:
Asymmetrical. Their ridge girder is located in the middle of the house. The slopes are located to each other at the same angle of inclination. But one of them is always longer than the other.
Asymmetrical. The length of the slopes can be the same or different, but the angle of inclination of both is different.
Asymmetrical with offset. The same as the previous option, only the ridge girder is shifted relative to the middle of the house to one side.

Asymmetrical gable roof with offset ridge girder
Rules for the construction of asymmetrical gable roofs
A gable roof with different slopes is a complex structure. The whole difficulty lies in the fact that the displacement of the ridge beam relative to the middle of the building creates completely different loads. They are no longer distributed along the ridge. Their main pressure (central) falls on the long, flatter slope. That is why at the design and calculation stage it is necessary to accurately determine the location of installation of additional racks. They are installed under the rafters of a long, gentle slope.
In this case, the entire rafter system is not installed by eye. Even the smallest deviation from the project can lead to irreparable consequences. Making changes to the design will be difficult, and sometimes simply impossible.

Asymmetrical roof truss
And one moment. For an asymmetrical roof (gable) the construction of a very strong Mauerlat is required, with the help of which uneven loads will have to be redistributed. Particular attention should be paid to attaching the Mauerlat to the walls of the house.
As for the construction of a roof with different slopes, the technology itself is no different from the traditional one. The main thing is to strictly adhere to the requirements outlined above. Typically, such structures are assembled from layered rafter legs with the installation of a ridge beam. That's why the main task the work foreman - accurately align the ridge horizontally on the site strictly according to the design. The dimensions of the rafters must be precisely maintained, mainly regarding the length.
Multi-level roofs
Another type of roof with two slopes. To understand what we are talking about, look at the photo below.

Multi-level gable roofs
According to its configuration, the roof is gable and covers the entire house. But individually, each slope represents single-slope structure. Usually a load-bearing wall is erected between them, on which both slopes rest.
But at the same time, the larger slope rests on the upper end of the wall, where the ridge beam or Mauerlat beam is installed, and the smaller one on its vertical plane, where the load-bearing beam is usually fixed. The construction of such roofs is carried out using the technology of a single-pitch structure.
Gable roofs with broken slopes
These structures are mainly used in houses where the construction of an attic is planned. Organizing a room under traditional slopes is problematic. The reason is the presence of “dead” zones at the junction of the rafter system and the wall of the house. To remove these zones, it is necessary to make part of the slope steeper in terms of inclination relative to the vertical.
The cross-section of the roof will not be triangular, but pentagonal. It is not easy to assemble, there are too many elements located at different angles. But she has serious advantages before everyone else:
holds up well snow loads;
excellent resistance wind pressure.
The only downside is that it costs a lot building materials. But the gain is clear - additional living room for a small outlay.

Broken mansard roof
Construction mansard roof- this is the installation of racks on which the beds are laid and the lower ends of the rafter system rest. At the top, the ends of the rafters are connected at the ridge. The steep lower rafter legs rest against the mauerlat from below, and on the beds from above. The result is a fairly stable and durable structure.
Video description
In this video about the construction of a mansard roof:
Generalization on the topic
The variety of roofs with two slopes makes it possible to choose the option that fits into the architecture of the house being built. The effectiveness of the structure is just the visible part. The design is based on an accurate calculation of the elements and the loads on them. But, as practice shows, most roofs in the private housing construction category are gable.
The gable roof structure is a clear example how the classics remain relevant over decades and centuries. This simplest design today it looks new, it has been supplemented modern elements, has acquired a more impressive appearance thanks to new roofing materials. But, in essence, the principle and installation of a two-slope roof remained the same as it was a hundred years ago.
The article will discuss the varieties of two pitched roofs, photos presented modern houses with gable roofs, as well as the advantages and features of these types of roofing.
What is good about a roof made of two slopes?
The roofs of private houses with one or two floors are very often made with gable roofs. And the point here is not only the low cost and simplicity of the design, but also its design and technical features.
The biggest advantage of a roof consisting of two inclined slopes, connected along the ridge line and resting on the Mauerlat, is the compensation of multidirectional forces. The rafter system of pitched roofs is designed in such a way that the pressure from the weight of the roof itself, insulation, sheathing and roofing material evenly distributed on load-bearing walls (central and side).

Design pitched roofs is carried out in such a way that the rafter legs are not connected with each other and with other structural units of the roof - they are not fixed to the ridge and the Mauerlat, the strength of the structure is achieved through mutual compensation of pressures from the two slopes and balancing the forces with spacer elements (braces, crossbars, slopes , beds).
Attention! If a small one is being built country house, a gable roof can be assembled into a single structure - its low weight allows it. The convenience lies in the fact that you can assemble the rafter system on the ground, and then, together or in parts, lift it to the top of the house.
You need to understand that the rafters of gable roofs are not fixed until the sheathing is filled and insulation, waterproofing and roofing material are laid - they are held in place independently, thanks to precise calculations of resistance.
The advantages of gable roofs over other structures are obvious:
- absence of problematic nodes and complex connecting points;
- lightweight toe-in snow masses and precipitation;
- the ability to regulate wind pressure by turning the ramp in the desired direction;
- simplicity of design, thanks to which a small country house, garage or outbuilding can easily be covered with your own hands;
- a spectacular look that can be complemented by bay windows, dormer windows, an attic or canopy;
- several interesting architectural solutions, based on a structure of two inclined slopes (houses with sloping roofs, hip and half-hip roofs, attic structures);
- durability of the design combined with its simplicity and accessibility;
- versatility: look equally organic simple houses made of timber, equipped with a gable roof, and two-story mansions in a classic or modern style;
- the system of layered and hanging rafters, which became the basis of a gable roof, allows you to regulate the load on the roof depending on weather conditions and temperature fluctuations.
Attention! It is also worth noting that gentle slopes are not prone to the accumulation of debris; they do not need to be cleaned, unlike complex ones. broken roofs with valleys and elevation changes.
There are no downsides to a gable roof, otherwise it would have long ago been supplanted by modern complex designs.
Types of gable roofs
At first glance, it may seem that the roof design of two inclined planes is too ordinary and simple. But this is far from true - today there are several standard options interesting design such structures, and also, there are a lot of original solutions developed by professional architects for a specific house.

There are several simple roof designs made from two slopes.
Traditional gable roof
It is a triangle with two identical sides, which are the slopes. The slopes are inclined at the same angle, have equal length and the same area. Most often, such roofs are placed over country houses, garden buildings, garages and bathhouses. The design is the simplest; you can build it yourself, without outside help or professionals.

It must be remembered that the greater the angle of inclination of the slope, the more building materials the owner will need. On the other hand, a high triangular roof will provide better protection from rain and snow, but in regions with strong winds it is better not to make a slope of more than 15-20 degrees.
Gable roof with terrace
This perfect solution For country houses and small cottages. It is possible to build such a roof over already existing house, and over housing that is just being designed.

The implementation of such an idea is practically no different from the construction of a conventional roof of two slopes - you need to install a fence from the gable of the house and extend the floor boards of the second floor onto the terrace, and cover part of the slope with clapboard or other covering material to the depth of the slope.
Asymmetrical roof of two slopes
This design combines slopes of different sizes and angles of inclination. The reason for installing this type of roof lies not only in the aesthetic component. The main “highlight” of the design is that the slopes different sizes, tilted under different angles, resist wind loads differently. It is known that a slope inclined at an angle of 20 degrees takes half the load than a 40-45 degree roof, and, accordingly, the wind presses on it twice as much as on a roof with a slope of 11 degrees or less.

It becomes clear that it is necessary to use asymmetrical roofs in areas with constant and strong wind, the direction of which is known in advance. An example would be a house located between a forest and a field: on the side of the open space (field), a gentle slope is installed, and on the side of natural protection from the wind (forest), the house is covered with a steep roof, the slope of which has a slope of more than 40 degrees.
Multi-level gable roofs
You can also find a more interesting design of asymmetrical roofing - when the slopes are not only different, they are also located at different heights. This option also has a practical justification - a multi-level design allows you to relieve the pressure of the roof on the floors and load-bearing walls, sharing the load.

As a rule, such structures have one slope, which is significantly larger in area than the second. It is this part that is supported on the protruding load-bearing wall, transferring the skate to its top. The fulcrum for the second, smaller slope is a beam reinforced at the level of the ceiling of the first part of the house.

We can say that a multi-level gable roof is, in fact, two pitched roofs, connected into a single structure. It is justified to build such a roof over large houses, where the length of the solid rafter legs would be too long, which would significantly increase the cost of construction.
Different levels of the roof make it possible to install overhangs, canopies, extend the roof onto extensions (garages, terraces, summer kitchens).
Gable roofs with mezzanines, bay windows and dormer windows
This design certainly won’t seem boring, because additional elements only enhance its aesthetics and beauty. Bay windows - turrets protruding from the roof with own roof, reminiscent of the architecture of past centuries, look great on houses in a classical or Gothic style. Inside the bay windows you can place a dining room or a guest room, so this add-on also has a practical purpose.

For those who dream of a living room in the attic, excellent option there will be a roof with a mezzanine and dormer windows. Houses with such equipment look very picturesque; it is especially pleasant to be under the very roof of a house surrounded by a forest or mountainous landscape.
With broken slopes
This design also applies to gable roofs; it looks like a pentagon. The effect is that the upper part of the roof is performed at one angle, and the lower part at a completely different angle.

This option is considered the most acceptable for arranging a residential attic under the roof. Resistance snow load good, the broken design also withstands the wind normally. Of course, the consumption of building materials increases, which needs to be taken into account.
Results
Advice! Using wood for the rafter system, you can significantly reduce the weight of the entire structure. While modern metal rafters and beams make the roof heavier several times, which requires a stronger foundation and strengthening of load-bearing walls.

Houses with a gable roof are a classic, and as we know, they never go out of style. In addition, such designs have whole line advantages over complex options, roofs made of two slopes turn out to be more durable and practical.
And with the right approach, the house will look very impressive - you just need to choose an extraordinary gable roof project and competently implement it.